Block Model
Introduction
A block model represents a rock/soil mass using a 3D gird of cubes (“block”). Each block is assigned a material type along with its geotechnical properties (e.g., friction angle, cohesion). The block database itself is stored as a point cloud of regularly spaced points in 3D space, with each point containing information such as coordinates, material type, and properties.
This approach is widely used in mining industry to capture the spatial variability in complex soil/rock mass conditions. Block models generated in programs like Leapfrog, Deswik, Vulcan, Datamine, and others are support across Rocscience products including Slide3, RS3, Slide2, and RS2.
Block Model in RS2
In RS2, Block Model is only available through importing a Slide2 project which is using a block model. The block model parameters that can be read in RS2 Block Model are the same as in Slide2, as listed below.
- Mohr Coulomb
- Peak Cohesion
- Peak Friction Angle
- Generalized Hoek-Brown
- UCS of intact tock (intact)
- GSI
- mi
- D (Disturbance)
- Generalized Anisotropic
- Dip
- Dip Direction
Steps
To use Block Model in RS2, the steps are followed:
Import a Slide2 File
- In RS2, select File > Import > Import Slide
 .
. - In the Open File dialog, select a Slide2 file (.sli, .slim or .slmd) that contains block model data, and click Open.
- For a multi-scenario Slide2 file, a Multiple Document Selection dialog will appear, allowing to choose which scenarios to import.
- The Slide Import Options dialog will appear. Use the checkboxes to select following options (enabled by default), then click OK to complete the import:
- Turn on Strength Reduction Analysis
- Automatically Generate Mesh and Boundary Conditions
- Run Geometry Cleanup
- The Slide2 file is now imported into RS2.
Block Model Material Properties
- In RS2, select Properties > Define Material Properties. The materials from Slide2 will be listed.
- Select a material from the list.
- Go to the Strength tab. Three strength models can have block-level data: Mohr Coulomb, Generalized Hoek Brown, and Generalized Anisotropic. Each is described in detail below.
- For parameters with block-level data, a checkbox will be available in the Block Data column.
- Select the Block Data checkbox to use block data for that parameter. When selected, the Data field will be disabled, and the Min, Max, and Mean values of the block data across all materials will be displayed, as seen in Fig 1 below.
Failure Criterion = Mohr Coulomb
- The block-level data parameters are Peak Friction Angle and Peak Cohesion (Friction Angle and Cohesion from Slide2), see Fig 1 below.
- Under the Residual Strength section (if Material Type = Plastic), two extra options appear only when block data is used for the corresponding peak values:
- Use Peak Value For Residual Friction Angle
- Sets Residual Friction Angle equal to the Peak Friction Angle block data.
- Use Peak Value For Residual Cohesion
- Sets Residual Cohesion equal to the Peak Cohesion block data
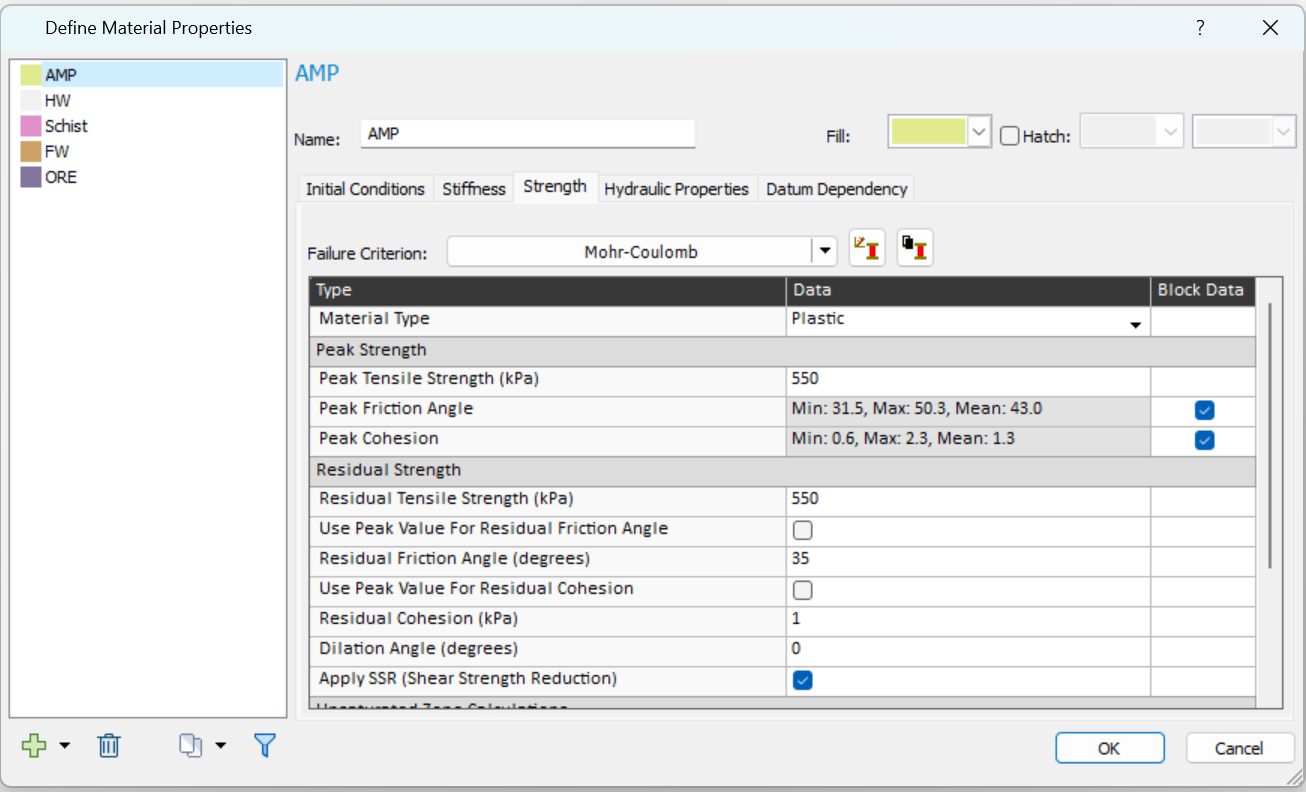
Fig 1. Block model in RS2 – Mohr Coulomb - Use Peak Value For Residual Friction Angle
Failure Criterion = Generalized Hoek Brown
- The block-level data parameters are UCS, GSI, mi, and D, see Fig 2 below.
- Under the Residual Strength section (if Material Type = Plastic), the following parameters can directly use block data from Slide2, independent of their peak values:
- GSI Residual
- mi Residual
- D Residual
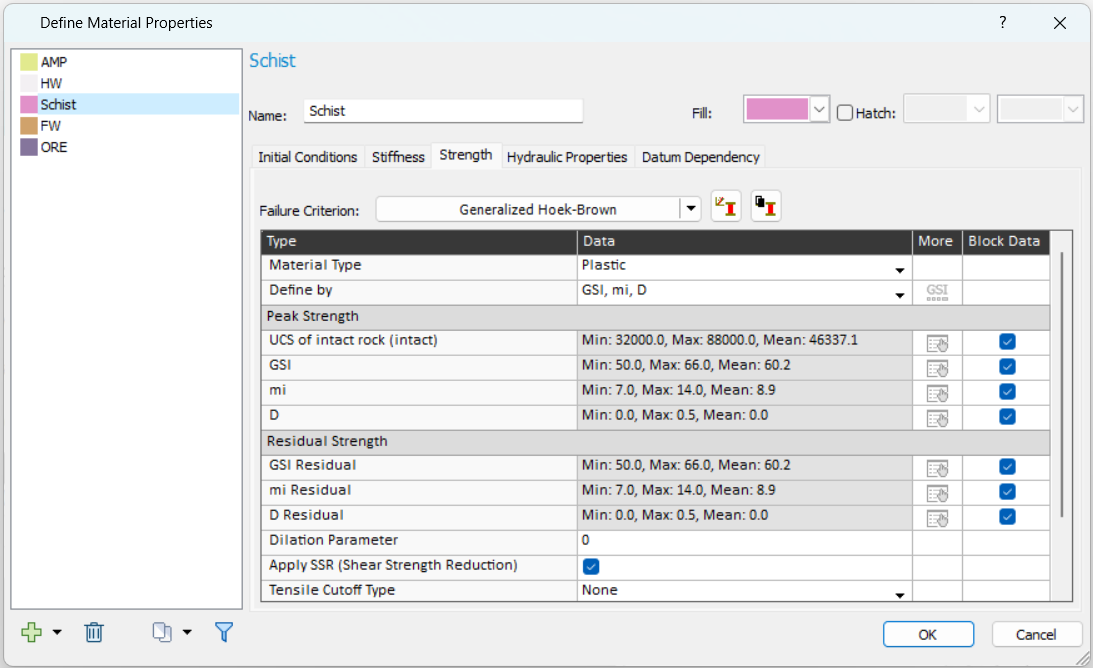
Fig 2. Block model in RS2 – Generalized Hoek-Brown.
Failure Criterion = Generalized Anisotropic
- The block-level data parameters are Dip and Dip Direction.
- If you have Generalized Anisotropic functions imported from Slide3 originally, the dialog will look like Figure 3 below.
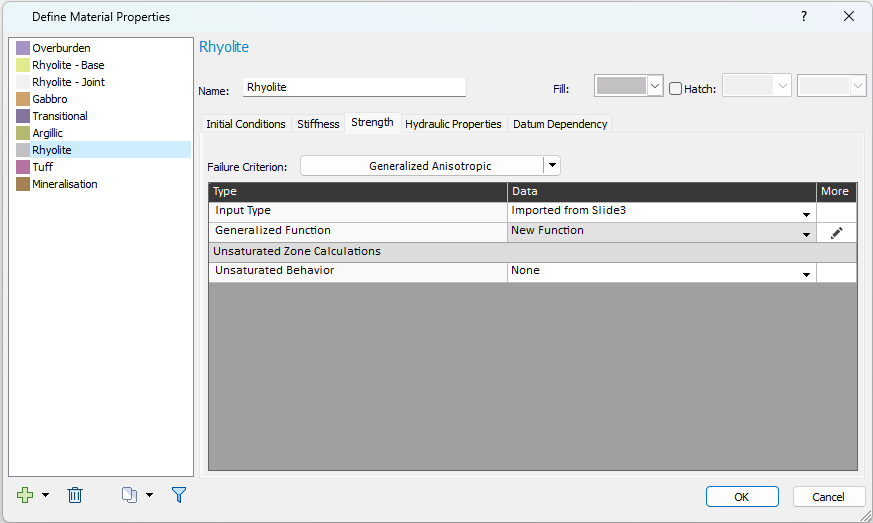
Fig 3. Block model in RS2 – Generalized Anisotropic (imported from Slide3) - Click on the Pencil
 icon under More column. A Define Generalized Anisotropic Strength Function dialog will appear.
 - In the dialog, you can choose the Base Material and 3D Anisotropy Handling method.
- When Consider 3D Anisotropy is selected as the 3D Anisotropy Handling method, the Anisotropy Definition will be Dip/Dip Direction, as Figure 4 below.
- Click on the Select button under the Block Data column.
- The Block-Level Properties dialog will appear, and you can choose Dip and/or Dip Direction parameter to be read from the block file. Click OK to apply.
- Click OK to apply the strength function.
For more information about the Generalized Anisotropic model, see the topic.
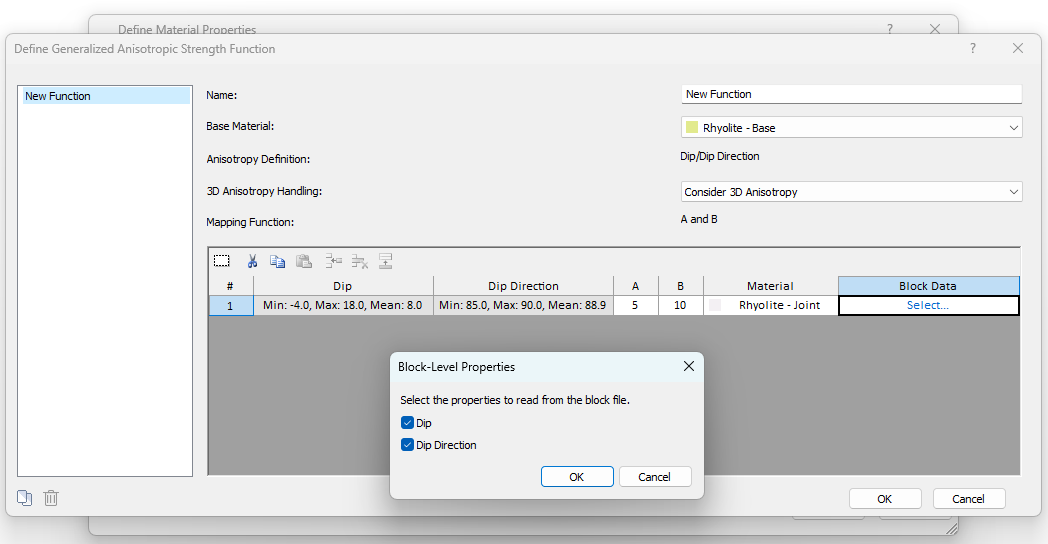
Fig 4. Block model in RS2 – Generalized Anisotropic strength function (imported from Slide3). - Back to the Define Material Properties dialog, proceed to define properties for other materials on the list. Click OK to apply and exit the dialog.
- Now the block model parameters are defined. In the RS2 modeler, same as non-block model materials, the block model materials will be displayed under the Visibility Tree, with theirs properties shown under the Properties Pane underneath when being selected (see Figure 5 below).
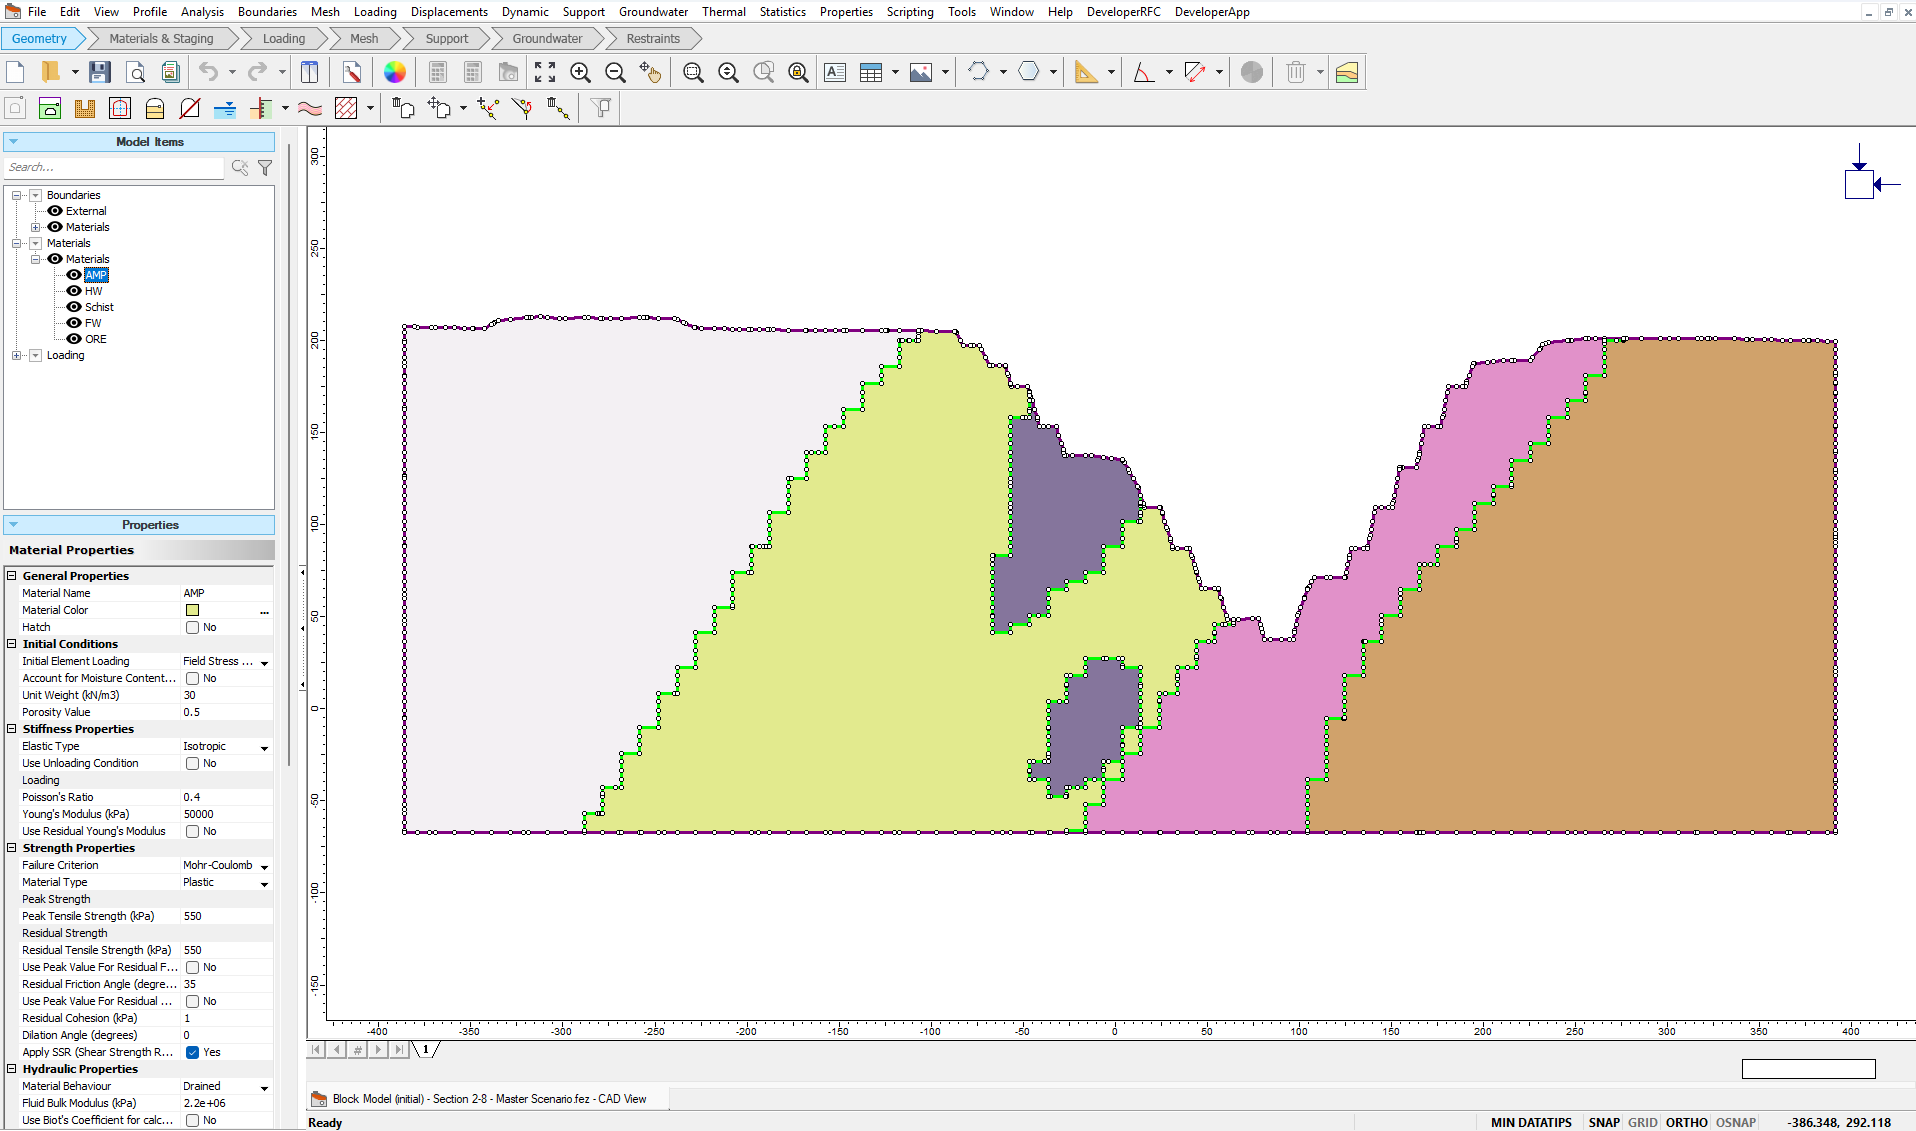
Fig 5. Block model in RS2 viewport.
Block Database and Limitations
Up to RS2 11.027, block models are supported only when imported through a Slide2 project with an active block model (steps are described above). Direct import of block database file into RS2 is not supported yet.
The block database file can be imported directly into RS3 or Slide3 to build a block model. From a Slide3 block model project, you can then export 2D sections to Slide2, creating Slide2 block model projects. These can be imported into RS2, resulting in RS2 block model projects.
- Workflow: Block Database file > RS3 / Slide3 > Slide2 > RS2
Block model functionality can now be integrated across four Rocscience slope stability products: Slide3, RS3, Slide2, and RS2, allowing you to perform LEM or FEM analyses in both 3D and 2D for block model projects interactively. For more advanced block model integration among the products, please stay tuned with Rocscience.
For more information about block models in Slide3, RS3, and Slide2, see below:
- Topic - Slide3 Block Model
- Tutorial - Slide3 Block Model
- Topic - RS3 Block Model
- Tutorial - RS3 Block Model
- Topic – Slide2 Block Model
Limitations for Block Model Materials
- Stiffness and Residual Strength
- Block model data for stiffness parameters (Poisson's Ratio and Young's Modulus) and for residual strength parameters cannot be read in RS2, even though they can be read in RS3.
- Block model data for stiffness parameters (Poisson's Ratio and Young's Modulus) and for residual strength parameters cannot be read in RS2, even though they can be read in RS3.
- Strength factor
- The strength factor contour cannot be plotted when the block model is used for the analysis.
- Stage factors and Datum Dependency
- In Material Properties dialog, the Stage Factors and Datum Dependency cannot be applied for block model materials.
- Generalized anisotropic (no same parameter)
- When the strength parameters of the base and joint for a generalized anisotropic strength property of a block material are defined per-block, the same parameter cannot be separately defined for both base and joint strength because only one column can be selected for a given parameter.