Reinforcement Database
If you are using the Reinforced Concrete liner type, a database of common reinforcement types is available to assist with the input of reinforcement properties. The default database contains over 1000 entries for:
- I-Beam
- Lattice Girder
- Hollow Section
- Rebar
- Wire Mesh
- Channel
- Double Channel
To access the reinforcement database:
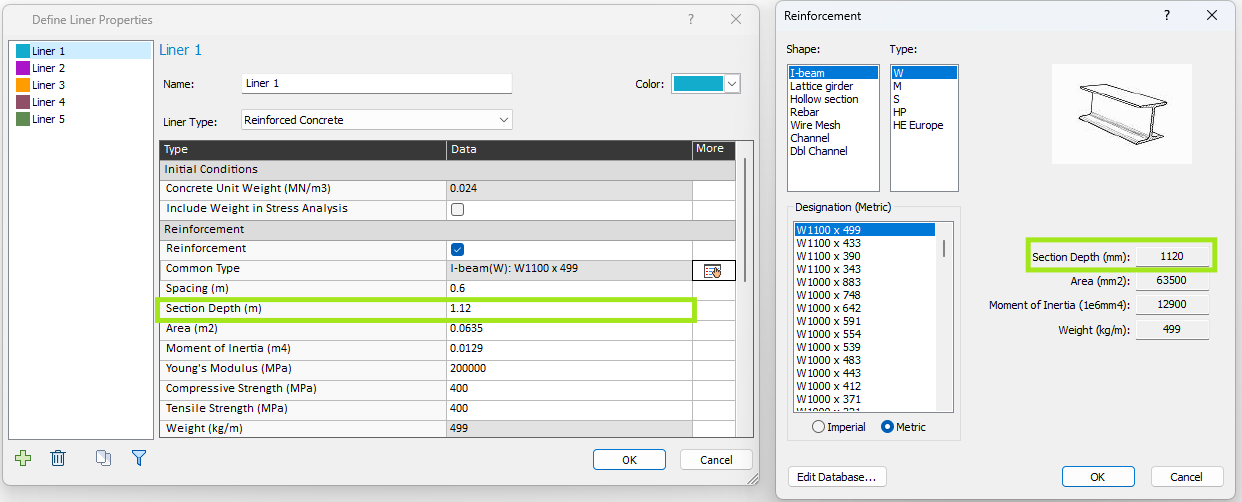
- In the Define Liner Properties dialog, select Liner Type = Reinforced Concrete.
- Select the Common Types button beside the Reinforcement option.
- You will see the Reinforcement dialog, which allows you to choose a reinforcement type. Use the selection boxes to choose the reinforcement attributes:
- Shape
- Type (depends on Shape
- Designation
- Metric or Imperial
- As you make your selections, the following properties will be automatically displayed in the dialog:
- Section Depth / Rebar Depth
- Area
- Moment of Inertia
- Weight
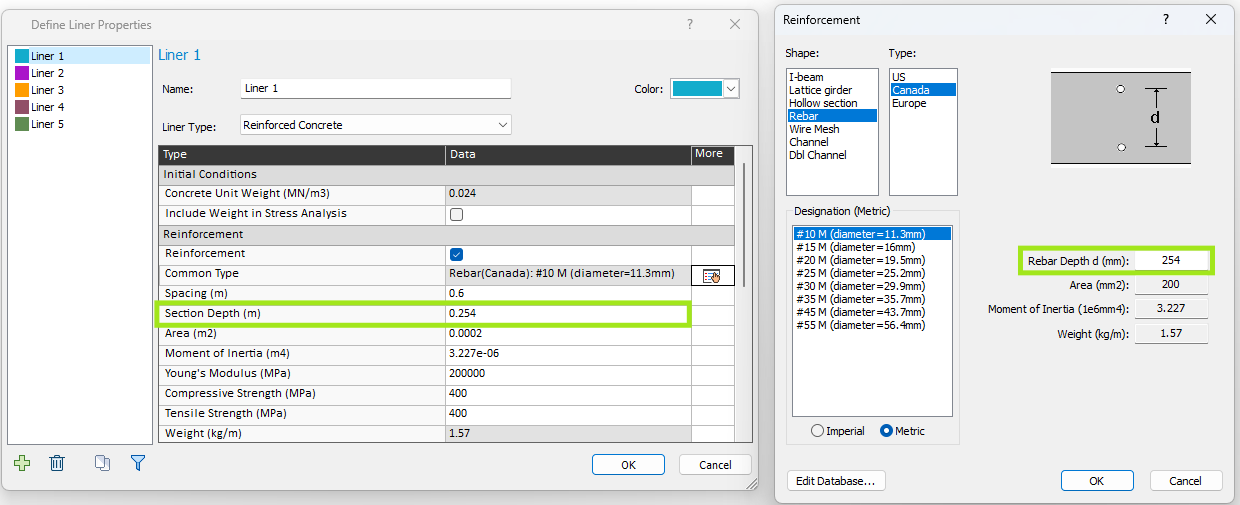
- For Rebar, the Rebar Depth (center-to-center distance of rebar pairs) must be entered by the user. The Moment of Inertia will automatically be re-calculated when a new value of Rebar Depth is entered.
- When you have finished choosing/entering the reinforcement attributes, select [OK] and the reinforcement properties will be automatically loaded into the Define Liner Properties dialog.
The reinforcement database can be customized / edited as described below.
Reinforcement Dimensions
Section Depth
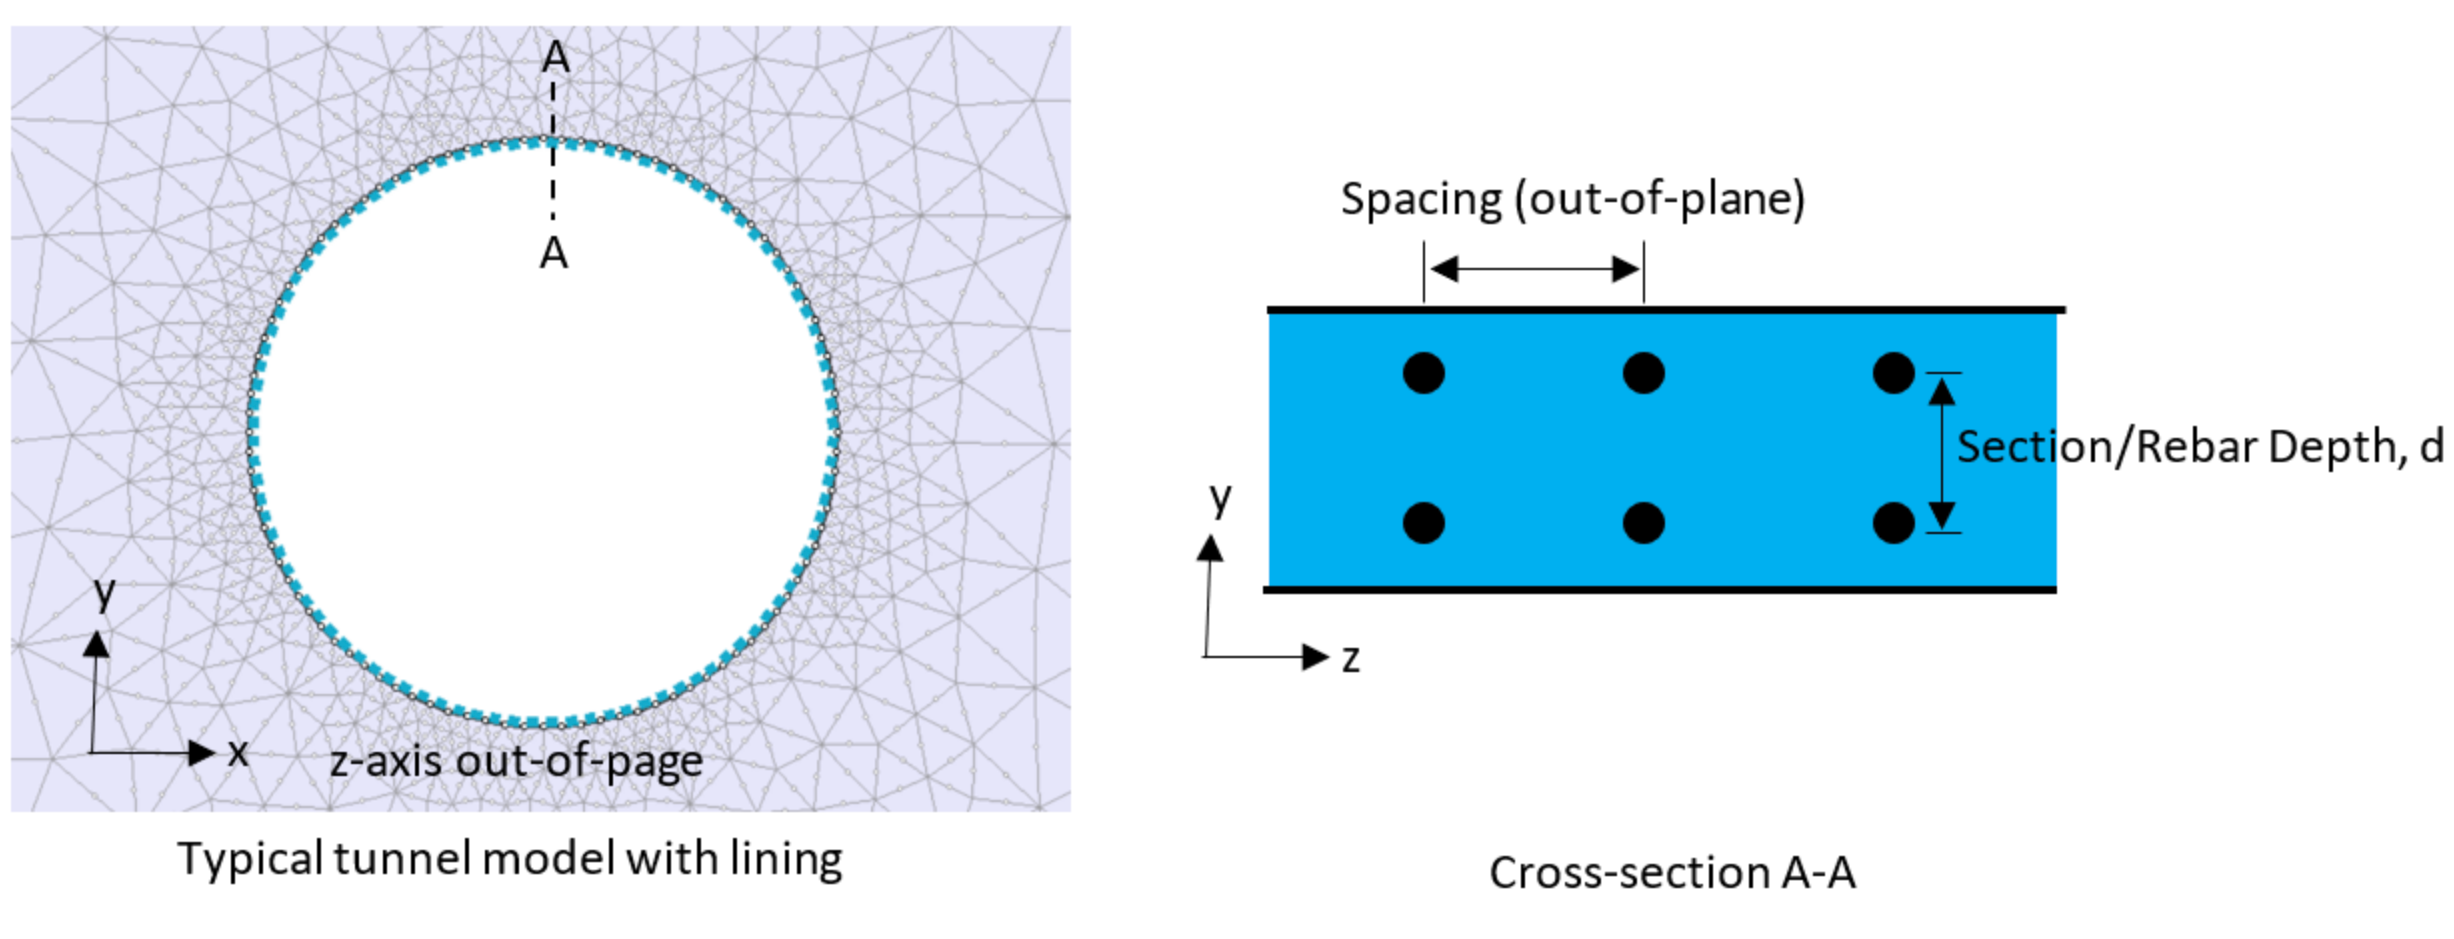
The term Section Depth was chosen as the general dimension term to represent all in-plane depth of shapes. For rebar shapes, Rebar Depth is equivalent to Section Depth.
The selected value in the Reinforcement Database dialog will be automatically updated in the Define Liner Properties dialog (Figure 1a and 1b).
Spacing
The term Spacing is the out-of-plane distance between reinforcement sets (Figure 2).
Schematic Diagram
The schematic diagram below displays a typical tunnel model with a rebar-reinforced concrete lining. The rebars run along the liner circumference. Note that the concrete thickness corresponds to the thickness of cross-section A-A.
Edit Reinforcement Database
The reinforcement database information is stored in an Excel spreadsheet file. The default reinforcement database which is installed with RS2 is an Excel file named Reinforcement.xls, located in your RS2 installation folder. You can easily customize the database (add or remove entries) as follows:
- Select the Edit Database button in the Reinforcement dialog (step 3 above).
- You will see the User Reinforcement Database dialog. This dialog allows you to create/edit a customized database file, choose a database or reset the original database. The following options are available:
- Create New - this will create a COPY of the default database file, so that you do not overwrite the original database. After saving the new database file (you can choose any filename), you can then select the Edit option (see below) to customize the file as you wish. When you create a new database file, it automatically becomes the current reinforcement database used by RS2.
- Open Existing - if you have more than one reinforcement database file, the Open Existing option allows you to choose which file you would like to use as the current reinforcement database.
- Reset - this will reset the current reinforcement database to the default database (Reinforcement.xls) installed with the program. NOTE: if you have edited the default database, the Reset option will NOT restore the original data in the file, it simply makes the Reinforcement.xls file the current database. If you have mistakenly edited or deleted this file and you want to restore the original data, you will have to re-install the RS2 program.
- Edit - this will automatically load the current reinforcement database into Excel so you can edit the file. See below for details about the reinforcement database file format. NOTE: the Edit option is disabled for the default database.
- When you are finished with the User Reinforcement Database dialog, select [OK] and the information in the currently selected database will be displayed in the Reinforcement dialog.
Database File Format
To open and edit a reinforcement database file, use the Edit option described above, or simply open the file directly in Excel.
If you view the first row of the spreadsheet (column titles) you will see that the file format is very simple. Each row of the spreadsheet contains an entry for a single reinforcement type, in both imperial and metric units. The following information is required in each row (note the units):
Customization of the reinforcement database is simple and flexible. You can add or delete rows of the file, and create new shape, type or designation categories (i.e. you are not restricted to the existing labels). Here are some tips to keep in mind if you are customizing the reinforcement database:
- Do not edit the default database file (Reinforcement.xls). You should always create a COPY of the original database, and then edit the copy.
- You can delete rows of the file, for example if you only want the most commonly used reinforcement types available. If you delete rows, you should not leave blank rows in-between data, because the blanks will be interpreted as labels (e.g. Shape) and will appear in the Reinforcement dialog as blank labels.
- You can add rows to the file if you wish to add reinforcement types to the database. You can add rows anywhere in the file (i.e. you do not have to group data in any particular order). The data will simply be read from the file in the order it is listed in the spreadsheet. The data is NOT sorted alphabetically.
- For Rebar reinforcement, Depth and Moment of Inertia are NOT entered in the database, and a placeholder of -1 is entered instead. This is because the Rebar Depth is a user-defined value entered in the Reinforcement dialog, and the Moment of Inertia is calculated from the Depth and Area.
- You can enter any labels you wish for Shape, Type and Designation (i.e. you are not restricted to the existing labels). This allows you to add any type of reinforcement you wish to the database.
- You can create more than one custom database file, if you want to store different data in different files. However, note that only ONE database can be accessed at one time, so only a single user-defined file will be necessary in most cases.
- RS2 does NOT check the validity of the information in the database, so it is up to the user to ensure that correct information is entered.