Increase Element Density
The Increase Mesh Element Density option allows you to select any area of the mesh within a rectangular or polygonal window, to increase the density of the mesh within the window.
NOTE: the discretization of the model boundaries is NOT affected by the Increase Element Density option. Only the mesh density within the boundaries is affected. If you need to modify the density of nodes on the boundaries, you can use the Custom Discretize or Increase Discretization Density options.
To use this option:
- Select Increase Mesh Element Density (window or polygon) from the Increase Density sub-menu of the Mesh menu.
- Click and drag a selection window around the region in which you would like to increase the mesh density or enter points defining a polygon.
- When you release the mouse button, the density of the mesh within the selected region will be automatically increased, according to the following rules:
- A new node is automatically inserted at the center of each finite element, within the selected region
- A new mesh is then generated, which uses ALL OF THE ORIGINAL nodes which existed, as well as the new nodes inserted at the element centers within the selected region.
- You can repeat steps 1-3 as necessary to refine the mesh as required. If you make a mistake, you can use the Undo option to restore the previous mesh.
Example
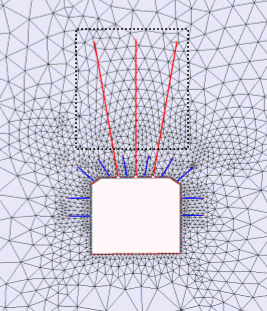
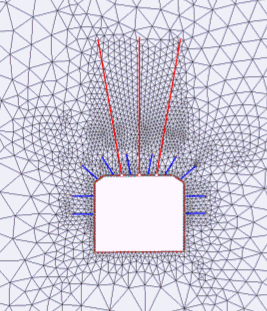
In the following example, the Increase Mesh Element Density (window) option has been used to increase the element density around cable bolts. This was done to improve the accuracy of the bolt results, since the bolts are discretized according to their intersections with the mesh elements.
Mesh density increased around cable bolts


NOTE: if you remove or re-generate the mesh, the results of using the Increase Mesh Element Density option will be lost. You will have to re-apply the mesh refinement if you reset the mesh.