Ponded Water
Ponded Water (e.g. water which is impounded against a dam or a slope) is represented as a blue hatch pattern above the ground surface, as shown in the figure below.
The blue hatch pattern represents Ponded Water which is defined by Total Head boundary conditions if your model includes finite element groundwater seepage analysis.
Ponded water is displayed as a blue hatch pattern
The display of Ponded Water can be turned on/off in the Display Options dialog, or by selecting the Ponded Water ![]() toolbar shortcut.
toolbar shortcut.
Ponded Water Load
It is important to note that the blue hatch pattern only represents the Ponded Water defined by the Total Head boundary conditions used for the finite element seepage analysis. This does NOT define the weight of the Ponded Water (for the stress analysis).
The WEIGHT of the Ponded Water, which is required for the stress analysis, is defined independently using the Add Ponded Water Load option (in the RS2 Model program). The weight of the Ponded Water is modeled as an equivalent distributed load, and is displayed as blue arrows. These blue arrows can be turned on/off in the Display Options dialog with the Distributed Loads check box under the Stress tab.
Auto Ponded Water Load
If the ponded water load is auto calculated (with the Use Calculated Water Pressure option), the load will be displayed with blue arrows. The display of auto ponded water can be set as follows:
- Select Display Options
 from the View menu or from the toolbar.
 In the Display Options dialog, select the Stress tab. Under the Boundary Conditions section, the Auto Ponded Load Value can be chosen to display by:
- Location – the auto ponded water load will be displayed in bule arrows, with the label of “auto-calculated”.
- Value – the auto ponded water load will be displayed in bule arrows, labeled with the magnitude.
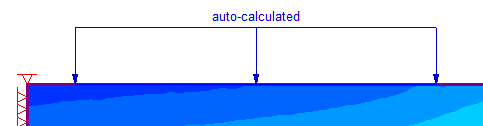
by location 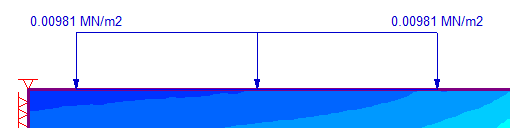
by value - Select Apply to apply the setting. Select Done to confirm and exit the dialog.
Right-click Shortcut
You can also right click on the Auto Ponded Water Load to choose to display load by Location or by Value.