Add External
The External Boundary as defined in RS2 encompasses all other model boundaries and defines the extents of the finite element mesh. NOTE:
- An External boundary must be defined for every model; otherwise the finite element mesh cannot be generated.
- Only one External boundary can be defined for a given model.
To add the External boundary to your model:
- Select the Geometry
 workflow tab.
 - Select Add External
 from the toolbar or the Boundaries menu.
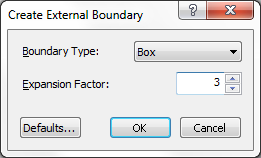
 - If at least one Excavation boundary has been defined, you will see the Create External Boundary dialog, shown below. This dialog allows you to choose from 3 different automatically generated External boundary types (based on the extent of the current Excavation boundaries), or a user-defined, manually entered External boundary.
NOTE: if Excavation boundaries have not been defined, and you select the Add External option, you will NOT see the Create External Boundary dialog. Instead you will be able to immediately begin entering the vertices of the user-defined External boundary, as described below.
Automatically Generated External Boundary
The three automatically generated External boundary types are Box, Circle and Hull. If you select one of these options as the Boundary Type, the External boundary will be generated as soon as you select [OK] in the Create External Boundary dialog. The Box, Circle and Hull options are illustrated below, for an Expansion Factor of 1.
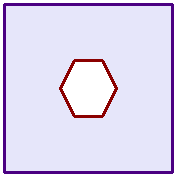
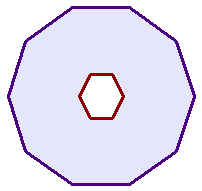
BOX CIRCLE HULL
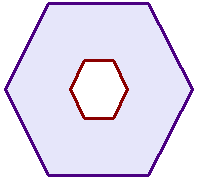
Box
The Box external boundary will in general be a rectangle. It will be a square if the horizontal and vertical extents of your excavation(s) are equal.
Circle
The Circle external boundary option generates an approximately circular external boundary with 40 vertices.
Hull
The Hull option produces an External boundary which is a magnified version of the excavation(s). It will work for multiple excavations, although it is more appropriate for a single, convex excavation.
Expansion Factor
The Expansion Factor in the Create External Boundary dialog determines how far the automatically generated External boundary will be projected relative to your excavation dimensions. The default Expansion Factor is 3, but can be changed to any number between 0.2 and 1000. If more than one excavation is present, the Expansion Factor takes into account the combined extent of all excavations.
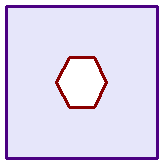
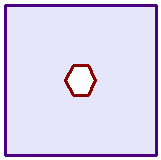
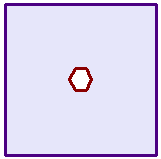
Effect of Expansion Factor (Boundary Type = BOX)
EXP.FACT=1 EXP.FACT=2 EXP.FACT=3
User-Defined External Boundary
To enter an arbitrary, user-defined External boundary:
- Select User Defined as the Boundary Type in the Create External Boundary dialog.
- select [OK] in the dialog, and you can begin entering a user-defined external boundary. A user-defined external boundary is entered in exactly the same way as an Excavation boundary – see the Add Excavation topic for details.
The External boundary must always be closed – as with excavations, you can close the boundary after entering all vertices, by selecting Close Boundary from the right-click menu, or typing c and Enter in the prompt line.
You must enter a user-defined External boundary if:
- You enter the External boundary before the Excavation boundaries.
- Your model does not include Excavation boundaries (e.g. only stage or material boundaries, a "joints only" analysis, or an Axisymmetric problem).
This is because the automatic generation options for the External boundary (Box, Circle and Hull, see above) are only applicable if Excavation boundaries exist.