Batch Print
To use the Batch Print option:
- Select the Batch Print
 icon from the toolbar, or from the File menu. You will be prompted to the Batch Print window, and an Edit Generated Views dialog displayed.
 - In the Edit Generated Views dialog, as seen below, the Data Type and Stage Range can be selected. See the Edit Generated Views section below for detail explanations. By default, only the current Data Type and Stage is selected.
- Click OK to apply and exit the dialog.
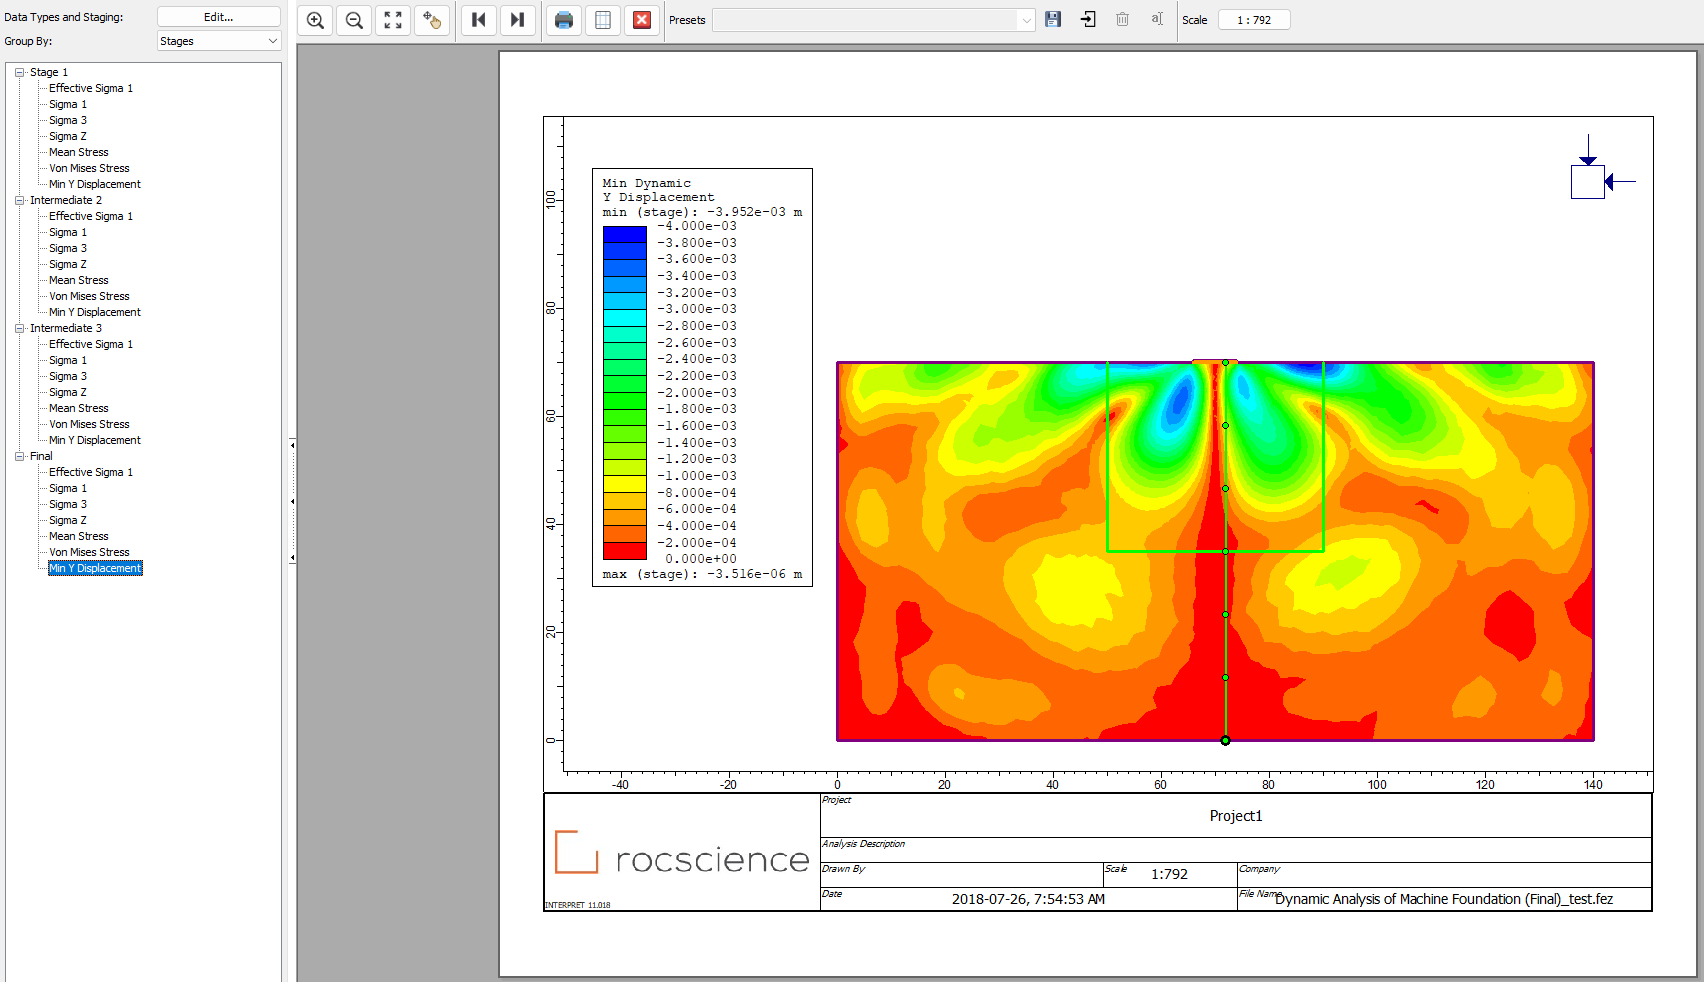
- You will be back to the Batch Print window, and the page layout will be in CAD view style. The batch print pages are listed with respect to selected data types and staging on the left of the window (see image below). Select the item from the list to view the page. The buttons

 from the toolbar at the top allows you to scroll through pages as well.
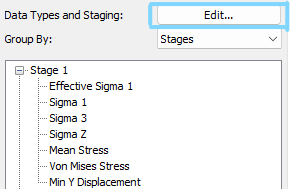
- To edit the data types and staging again, click the Edit button
 from the top right corner. The Edit Generated View dialog will open. Use the dropdown menu beside Group By, to group the pages based on Staging or Datatypes.
 - To scale and re-locate the view, use the mouse, or the various tools from the toolbar: zoom in
 , zoom out
  , zoom all
  , pan view
  , presets
  , scale bar
  (see Presets and Print to Scale pages for more details).
 - Use the Page Setup
 option to modify print layout. Select the Print
  option to print the batch. Click the exit
  button to close the Batch Print window.
Edit Generated Views
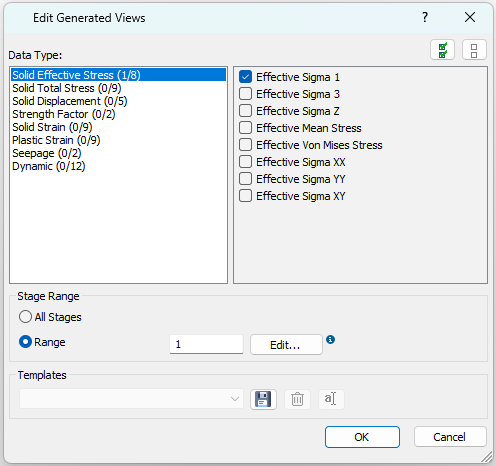
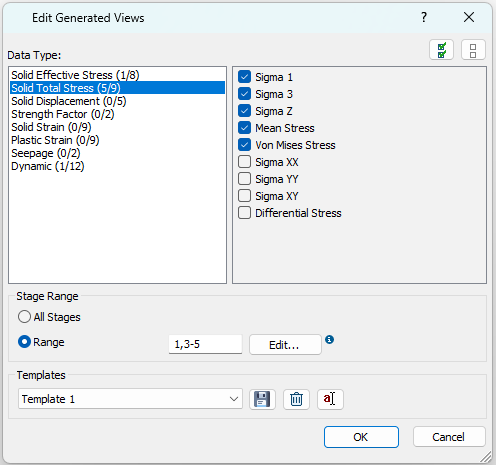
The Edit Generated Views dialog allows users to choose included datatypes and staging for the batch.
The dialog will be automatically displayed when the Batch Print window is first open. Alternatively, click the Edit button beside Data Types and Staging at the top left corner of the Batch Print window to open the dialog.
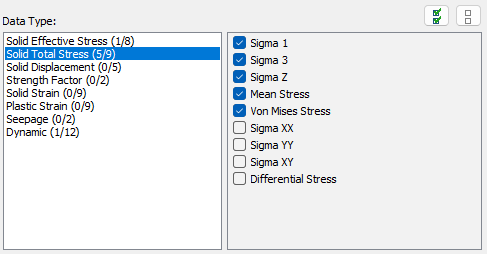
Data Type
In the Data Type section, the categories are listed on the left side, and their corresponded options are listed on the right side. Select one or multiple data types by checking the checkbox. The number of selected items will be displayed beside the category name.
 or unselect all
  .
.
Stage Range
With the All Stages option, the selected data results for EACH stage will be included in the batch. With the Range option, you can customize the desire stage range by entering a single stage number (e.g. 1), a range of consecutive stages (e.g. 3-5), or separate stages separated by a comma (e.g. 1, 3-5).
Alternatively, you can also select the Edit button  . The Advanced Stage dialog will display (as seen in the image below), where the stage number and names are shown. Use the checkboxes to select one or more stages to print. The select all
 ![]() and unselect all
and unselect all ![]() icons are available.
icons are available.
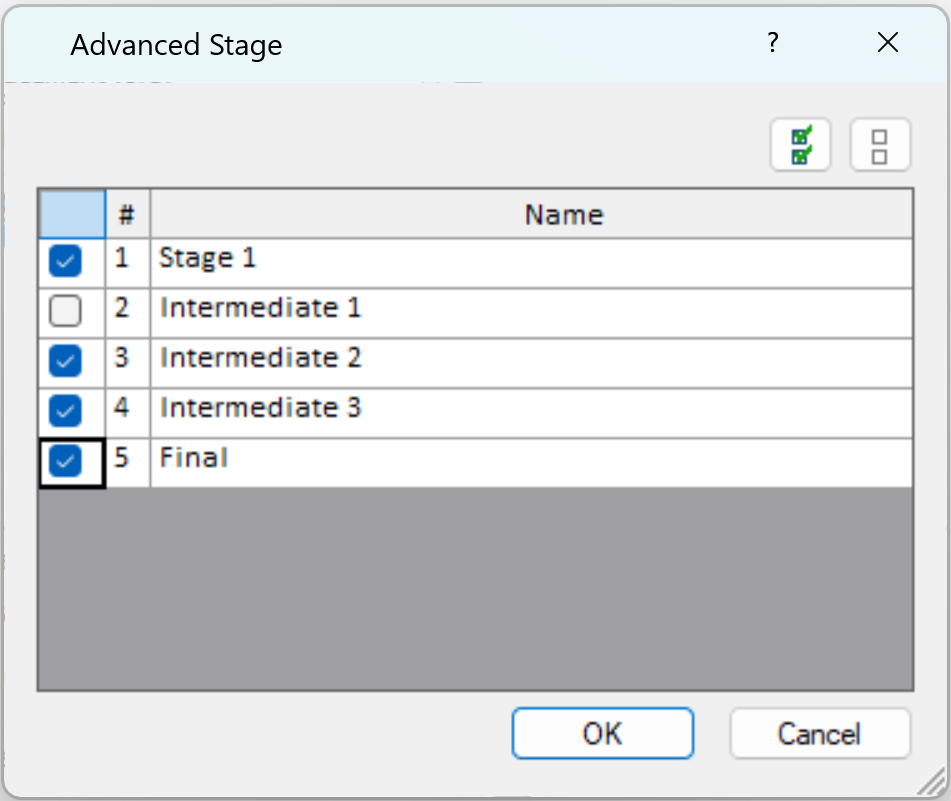
When finished selection, click OK to save and close the dialog.
Templates
You can create and save, or re-use a set of data type and staging selections as a Template.
Create and Save a Template
To save settings as a template:
- Select the data types and stage range in the Edit Generated Views dialog.
- Select the save
 button under the Templates section in the Edit Generated Views dialog.
 - Type a name for the template in the dialog below.
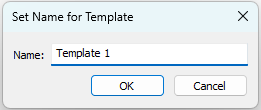
- Click OK to finish and exit the dialog. Click Cancel otherwise.
- Now the current settings have been saved as Template 1.
Use a Template
Under the Templates section, select a pre-saved template from the dropdown menu. The selected data type and staging will be automatically changed to the template settings.
Rename a Template
To rename a template, select a template from the dropdown menu. Select the Rename button ![]() , enter a new name in the prompted Rename selected template dialog, and click OK to save.
, enter a new name in the prompted Rename selected template dialog, and click OK to save.
Delete a Template
To delete an existed template, select the template from the dropdown menu. Select the delete button ![]() to delete the template from the list.
to delete the template from the list.
Page Setup
Select the Page Setup option from the toolbar of the Batch Print window. You can setup the printing layout. By default, the pages will be printed in CAD view style, with a footer below (see the image below). You can customize the design, including page orientation, header, footer, and etc. in the Page Setup dialog. See the Page Setup page for more information.