Add Bolts
The Add Bolt option allows you to add individual bolts to a model. You may add bolts at any location or orientation on the model by entering the two endpoints of each bolt.
To add bolts:
- Select Add Bolt
 from the toolbar or the Support menu.
 - You will see the Add Bolt dialog. In the dialog, enter the following information and select OK.
- Bolt Property
- Staging if your model is staged, you can specify the installation (and removal) stage of the bolt(s).
Install at stage - by default the installation stage will be set to the stage that you are currently viewing (i.e. the currently selected stage tab). You can enter a different stage if necessary.
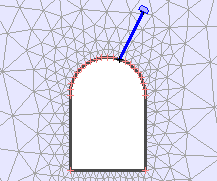
Remove at stage - (optional) you can also specify a removal stage, by selecting the Remove at stage check box and entering the stage at which the bolt(s) are to be removed (uninstalled). - You will be prompted to enter the two vertices defining the bolt location. You can use the mouse to graphically enter the two points, or you can enter x,y coordinates in the prompt line. A bolt is added to the model as soon as the second point is entered.
- You can enter as many bolts as you wish, by repeating Step 3.
- When you are finished adding bolts, press Enter or right-click and select Done Adding Bolts.
Note: the Bolt Property type and Staging information can be changed or modified at any time after bolts have been added, with the Assign option.
IMPORTANT NOTE: if you are adding bolts with faceplates, the faceplate is always added to the first bolt vertex which you enter. See below for details.
Adding Bolts with Faceplates
The following bolt models in RS2 allow you to attach face plates to one end of the bolt:
If you are using the Add Bolt option to add individual bolts to a model, and the Bolt Property type includes faceplates, it is important to note the following:
- The FIRST vertex which you enter (Step 3 above), must be the end with the faceplate (usually on an excavation boundary). A bolt faceplate is indicated by a small rectangular marker at one end of the bolt. See figures below.
- If the bolt faceplate appears on the wrong end of the bolt, then you will have to exit the Add Bolt option, and select Undo (or delete the incorrect bolts). Then re-enter the bolt, but reverse the order of the two points defining the bolt.
Bolt faceplate applied correctly (on excavation boundary)

Bolt faceplate applied incorrectly (inside rock)
This rule only applies if you are using the Add Bolt option to add individual bolts. If you are using the Add Bolt Pattern option to add a pattern of bolts, then the faceplate is automatically applied to the boundary on which the bolt pattern is defined; the user does not have to be concerned with the location of the face plate with the Add Bolt Pattern option.