Import Piles from CSV File
The Import Piles from CSV File feature offers an option to generate piles by importing a CSV file. This includes delimited text files such as *.txt and *.csv.
To use this feature, an external geometry must exist, otherwise it will remain disabled, grayed out.
To import piles from a CSV file:
-
Select: Support > Piles & Forepoles > Import Piles from CSV File

-
The Import Piles from CSV dialog appears
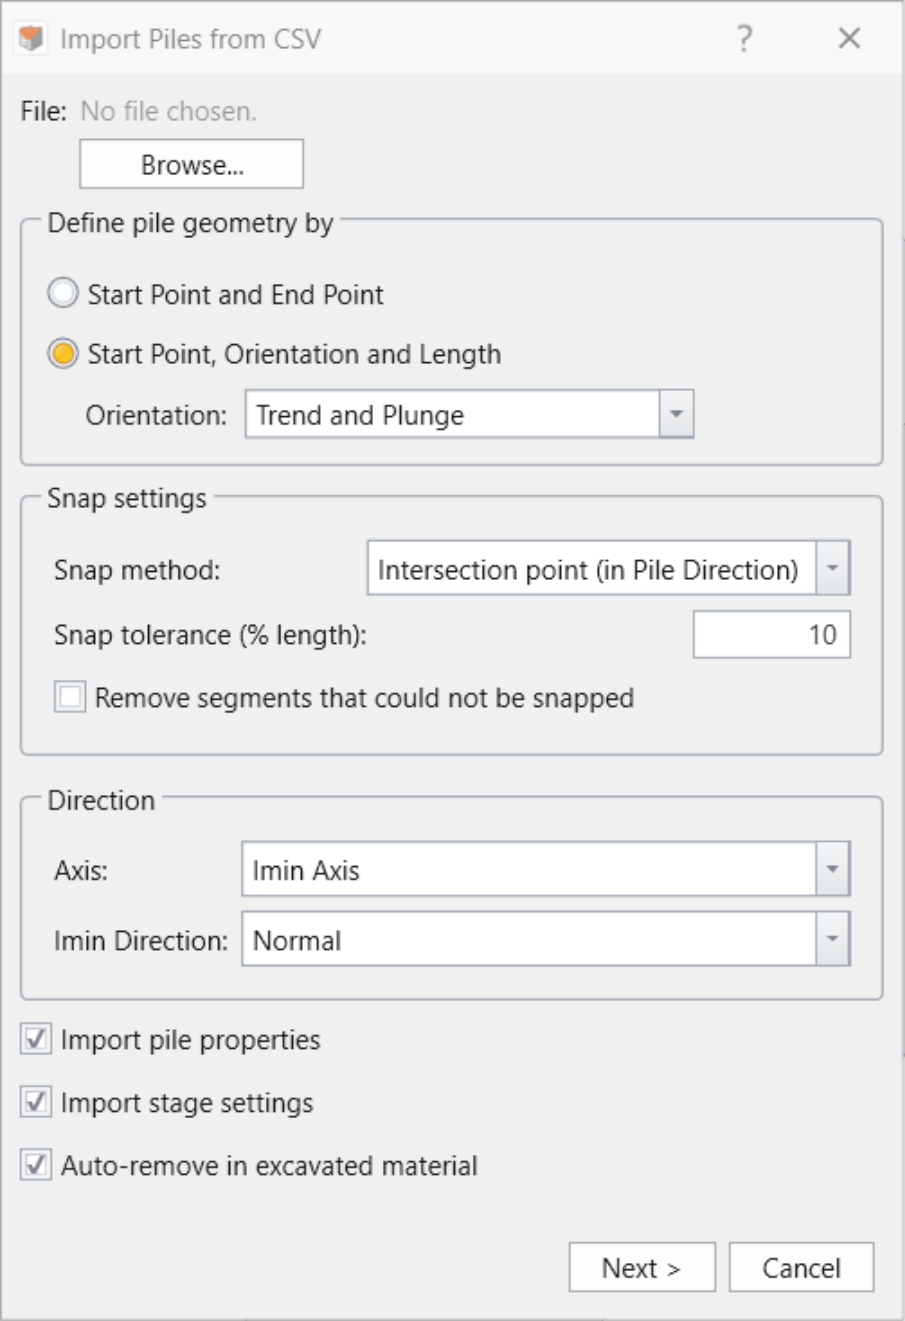
Import piles from csv dialog - Click the Browse button
- In the Open file dialog, select a delimited text file (.txt, .csv) and click Open to load it
-
Under Define pile geometry by, there are two options in which the pile geometry can be imported:
- Start Point and End Point
- Start Point, Orientation and Length
- In default Snap method is Intersection point (in Pile Direction) with the tolerance of 10 % to make sure those piles with their head locations in 10 % proximity to attach to the nearest surface. This can also be done after the importing process as a standalone feature to support this behavior is offered independent to Import Piles from CSV feature. For more information about the Snap Piles control, see linked topic.
-
Under Direction, define following parameters:
- Axis: Here you can choose either the Imin Axis or the Imax Axis option of the beam cross-section to represent the beam cross-sectional axis
- Imin/Imax Direction: The direction for the chosen beam axis can be Normal, Trend & Plunge, or Vector
- Optionally, users can select the Import Pile Properties checkbox if different pile property must be assigned for the imported piles. However, pile property items with matching names must exist in RS3 Pile Properties dialog. Note that this option is not intended to explicitly import the mechanical properties, which are controlled from the Pile Properties dialog within RS3, but to make distinguishment for different property assignment.
- The piles can also be imported with stage controls with Import Stage Settings checked (default). With this option enabled, it requires the imported database to have two separate columns for each pile to define Installation Stage and Removal Stage. Analogous to Import Pile Properties option, the project file must have the corresponding stages pre-defined with matching stage names as entered in the database.
- The piles can be automatically removed in excavated materials if the Auto-Remove in excavated material checkbox is selected
- Click Next.
-
A preview of the file is shown. From this window, the user can specify how the data is imported.
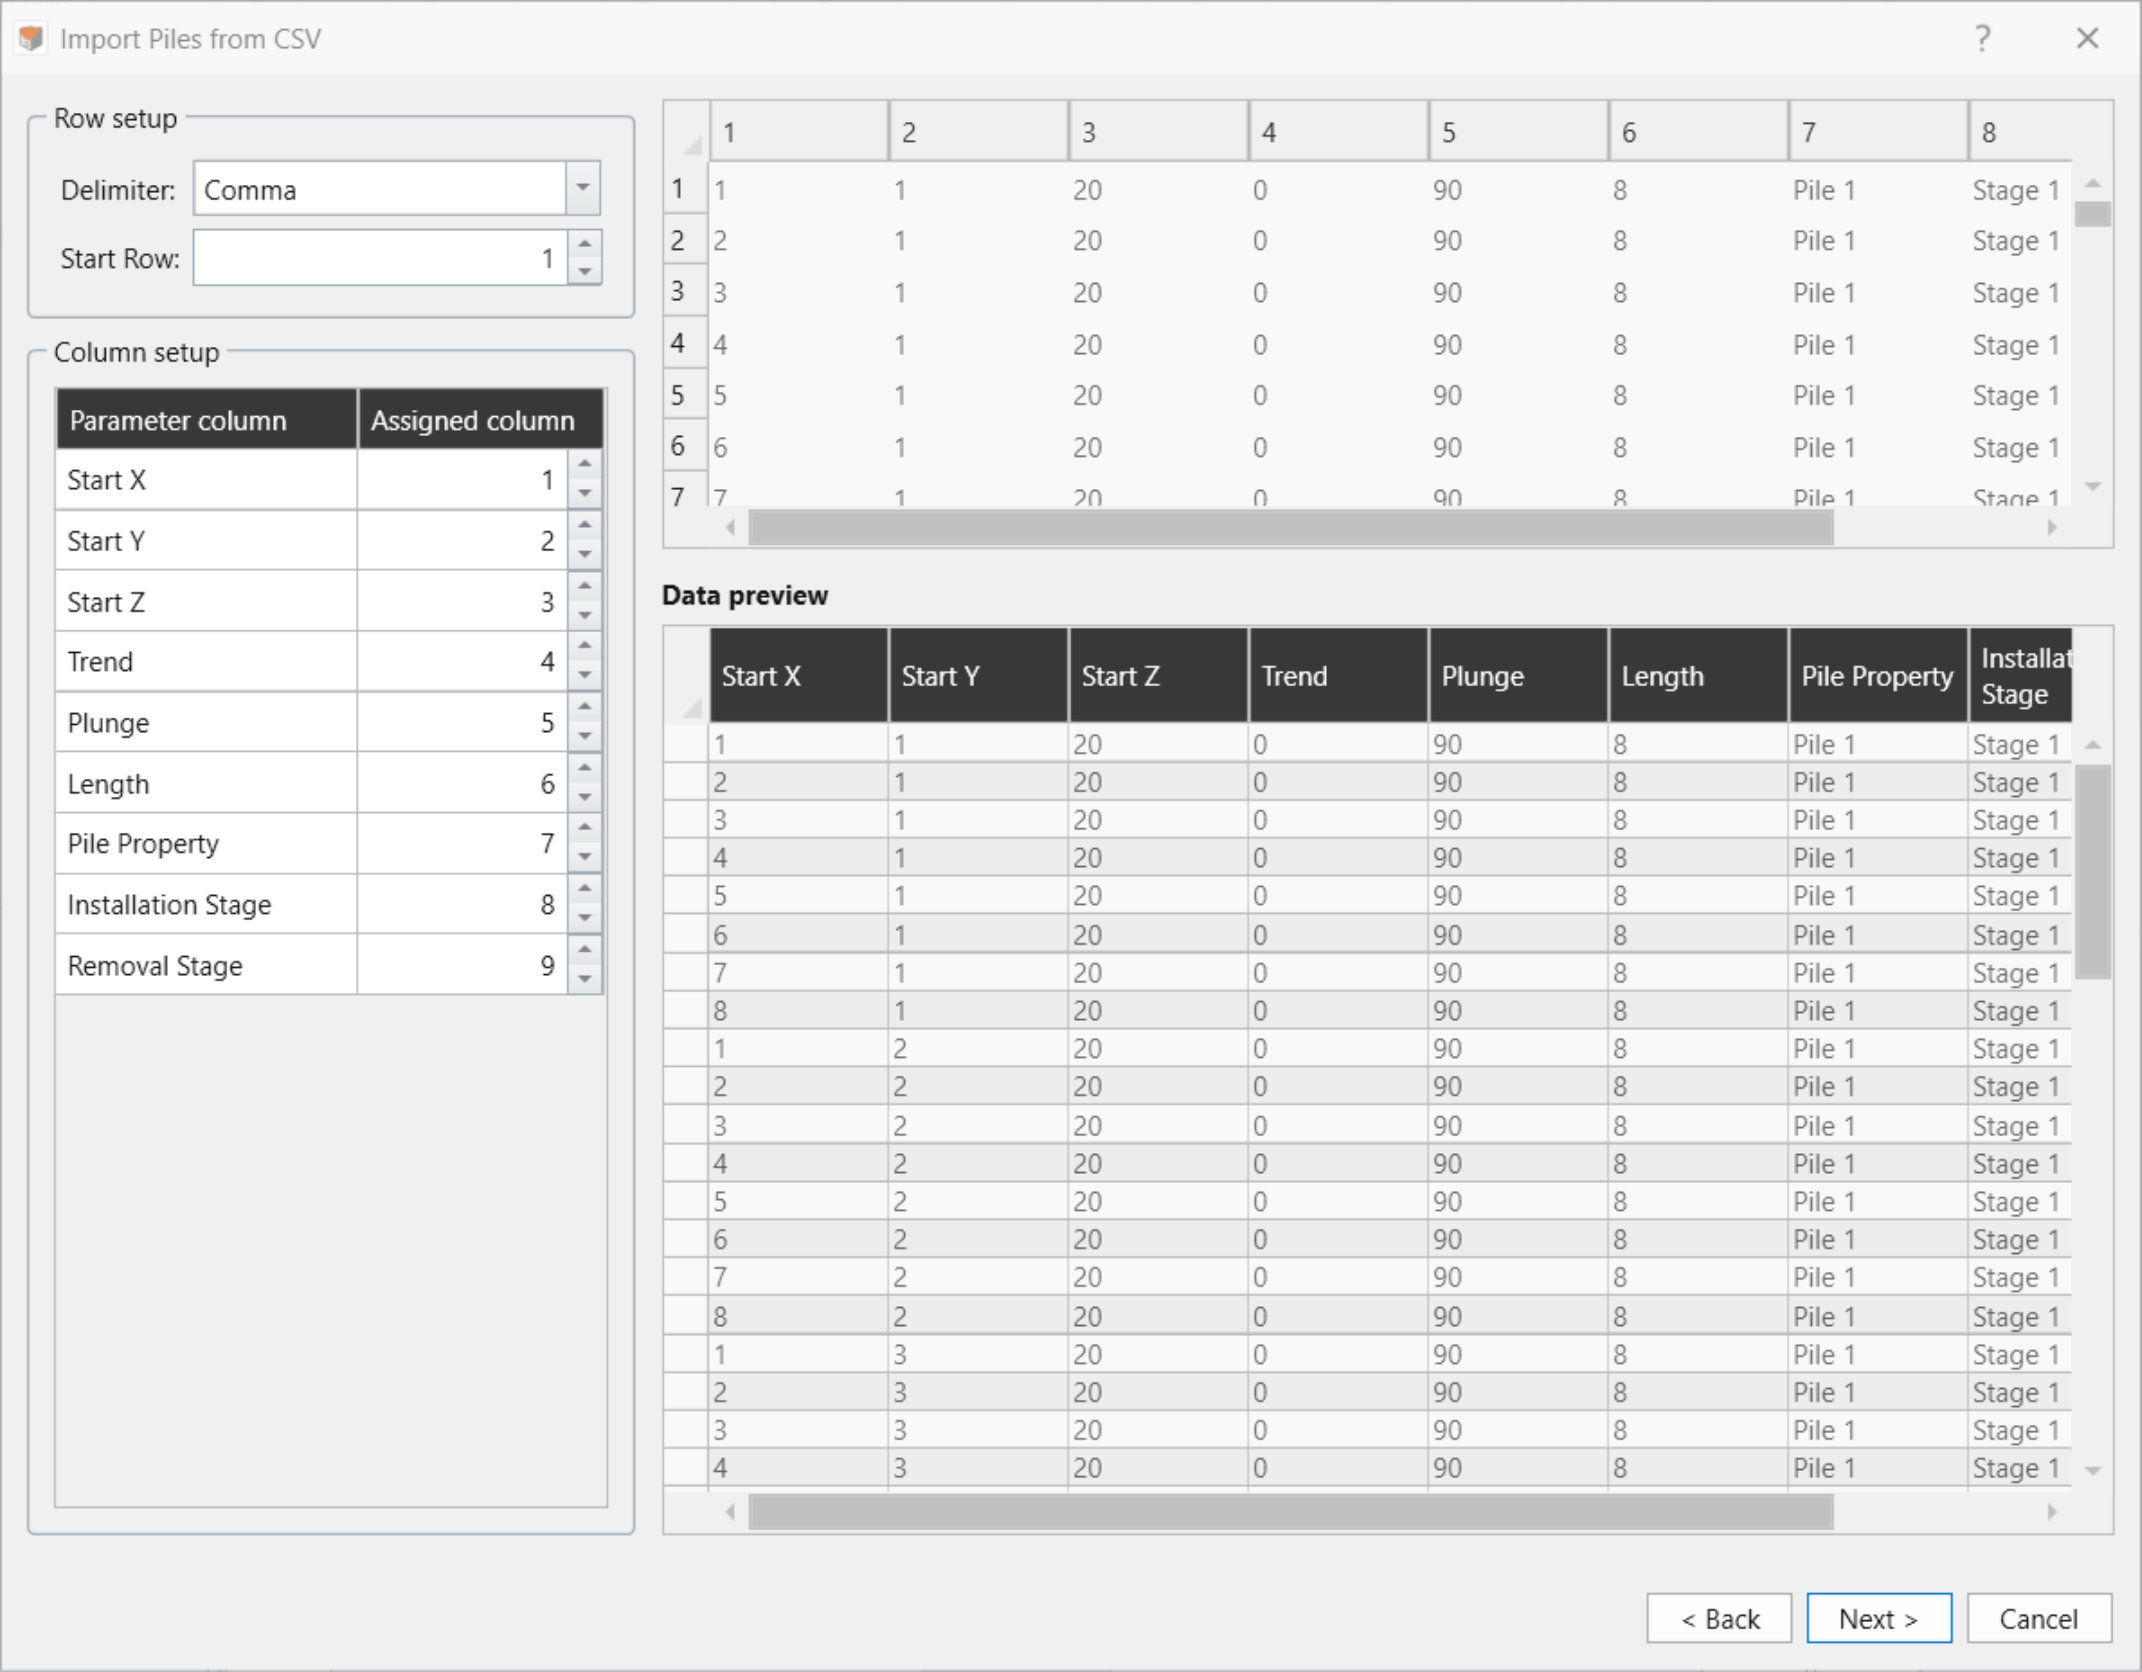
- Set the Data Delimiter (e.g., Comma, Semi-Colon, Space, Tab, Pipe, or All).
- Set the Start Row. Any data from rows before the start row are ignored.
-
Set the Data Column Selection for each of the expected columns by setting the column index.
Note: The file must contain, at minimum, the predefined columns. All additional columns are appended to the right of the predefined columns. - Click Next.
-
The next window shows a preview of the imported data and performs data validation on the pile parameters. Note that cells under Imported Piles, Installation Stage and Removal Stage can be modified/selected in this dialog based on the available options; however, the geometrical information can only be fixed from the source file.
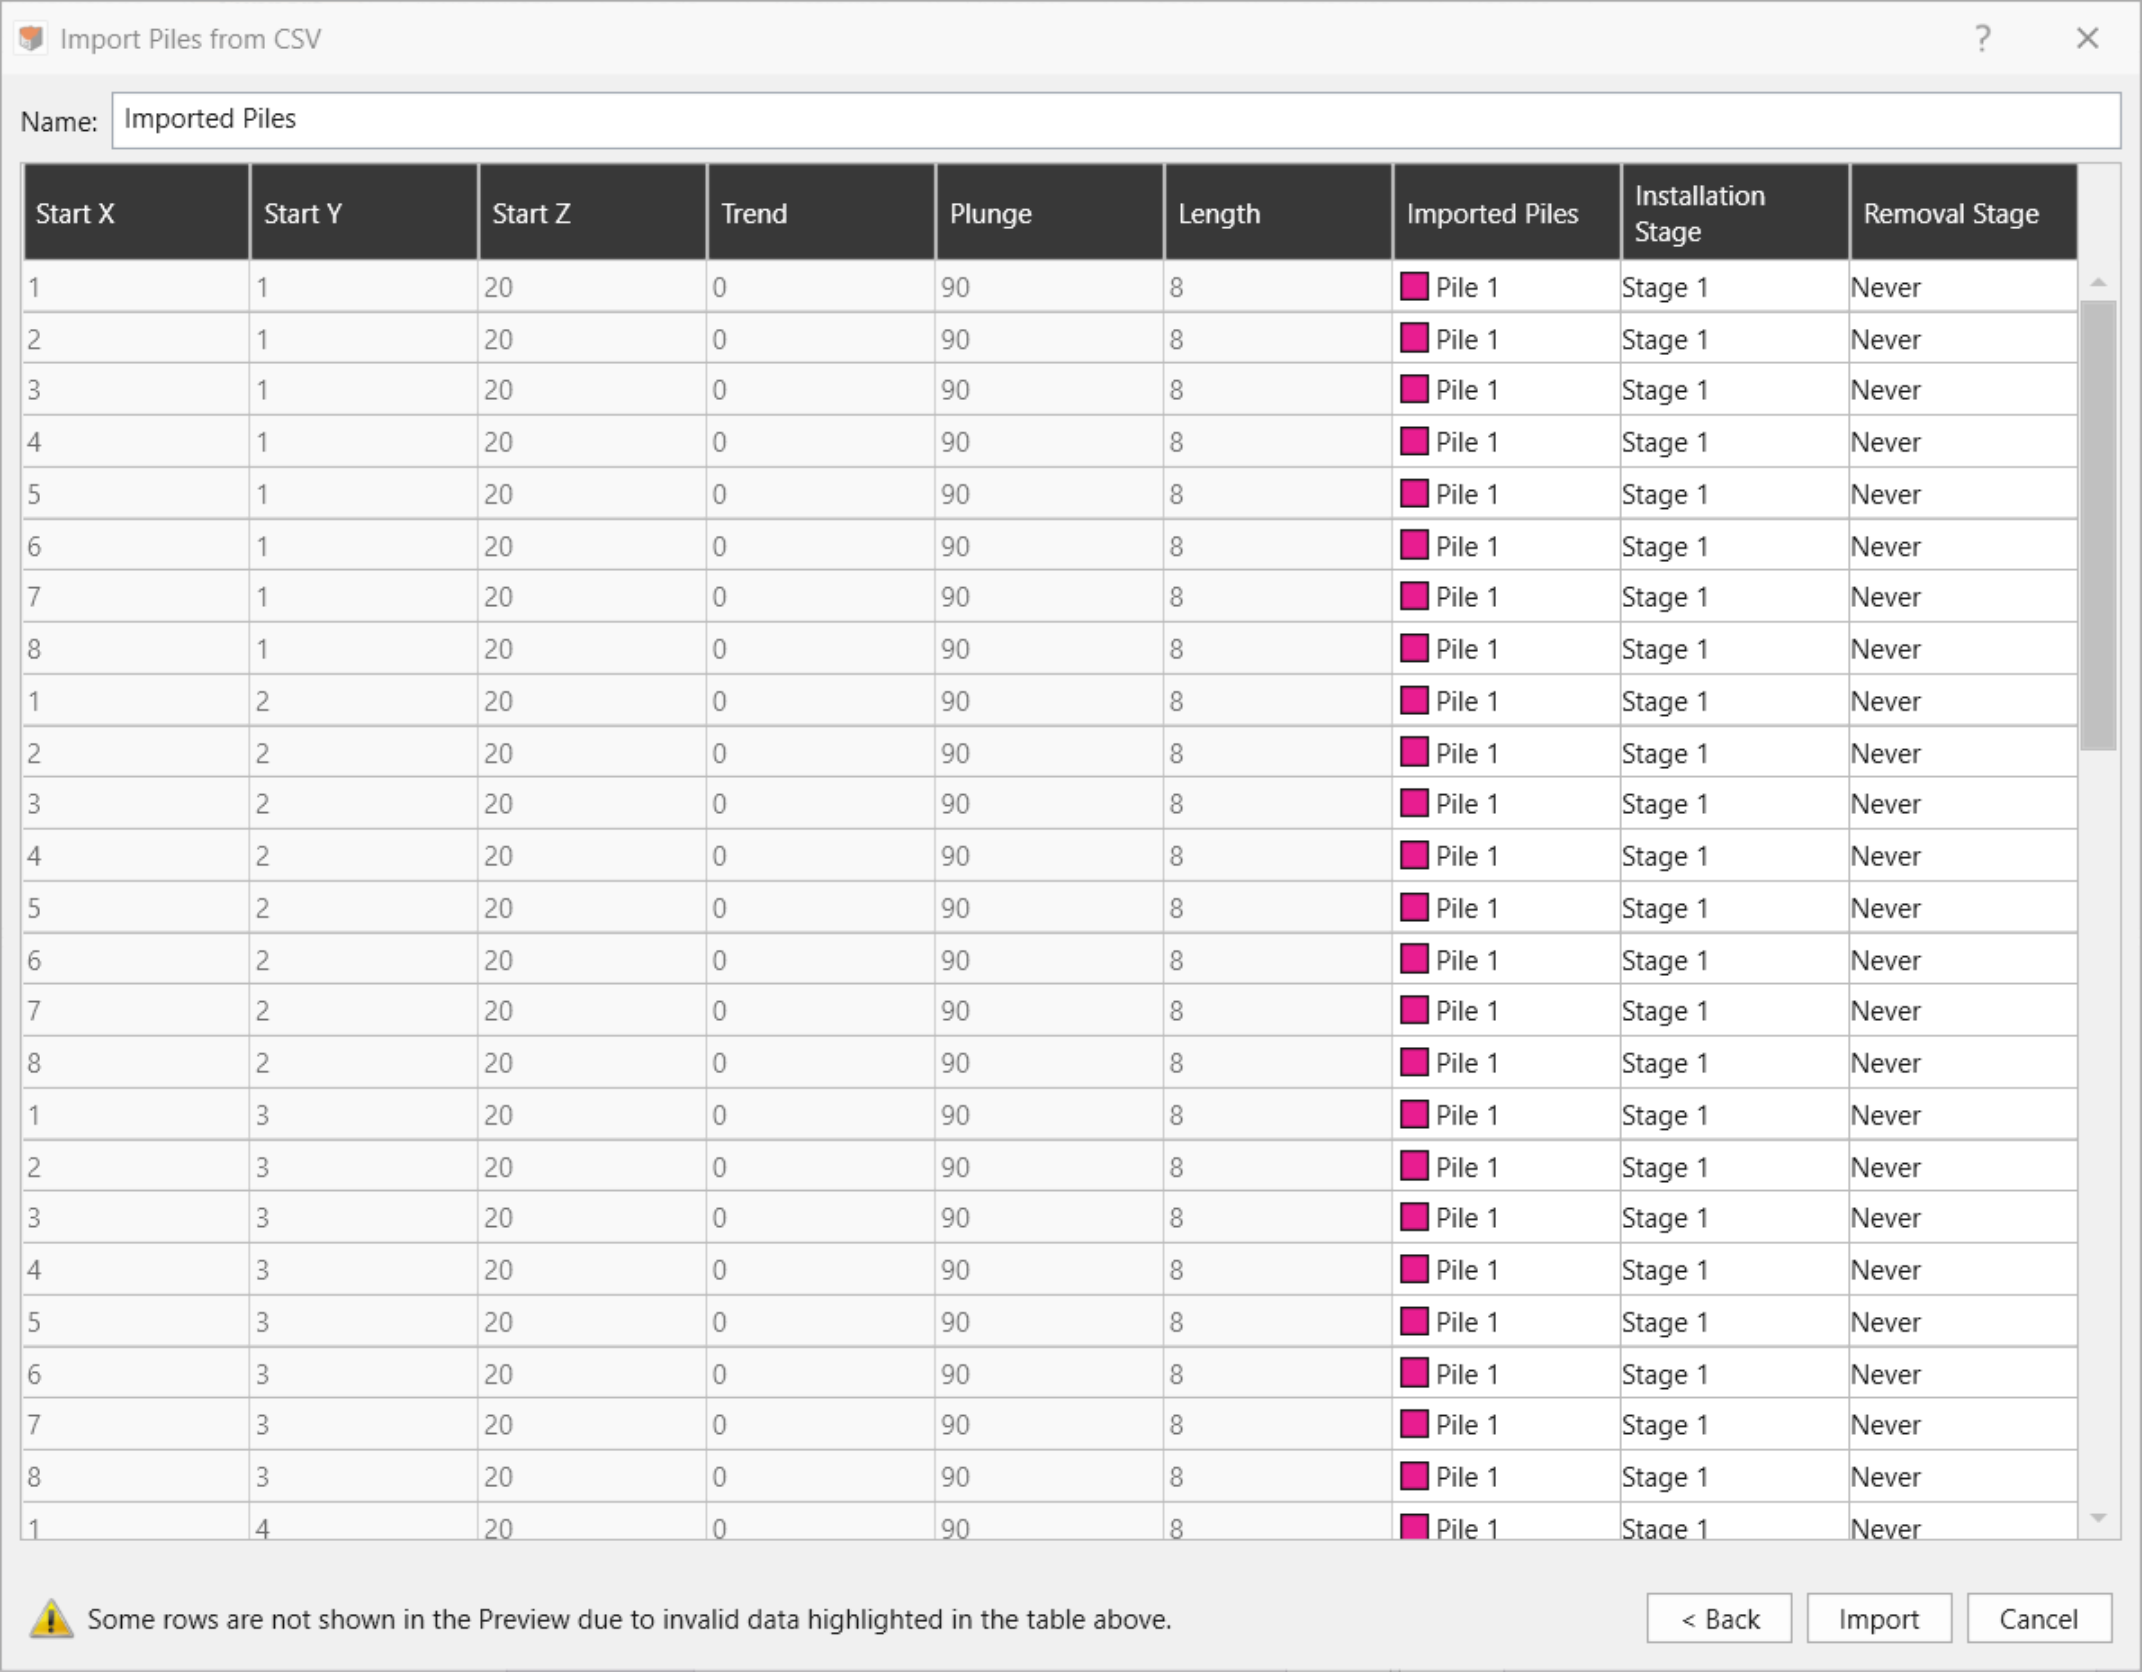
- Enter a Name for the Imported Piles.
-
Assign a Pile Property to each pile by double-clicking the cell to activate the drop down and select a predefined pile property.
- To assign an Imported Pile Property to all piles: right-click, select Assign Property to All, and then choose a predefined imported pile property.
- To assign a pile property to selected piles: highlight one or more cells/rows under the Imported Pile column, right-click, select Assign Property to Selected, and select a predefined imported pile.
-
If any cells contain invalid data (e.g., blank, mismatching Pile Property name), then those cells are highlight RED, and the message "Some rows are not shown in the Preview due to invalid data highlighted in the table above."
Note: Invalid pile entries are not shown in the Preview. - A Preview of piles for import is shown in the 3D CAD View, colored according to the Imported Pile Property color.
- Click Import to import the data.
-
The Import Summary dialog shows the number of piles which were imported successfully, and a list of import issues (if any).
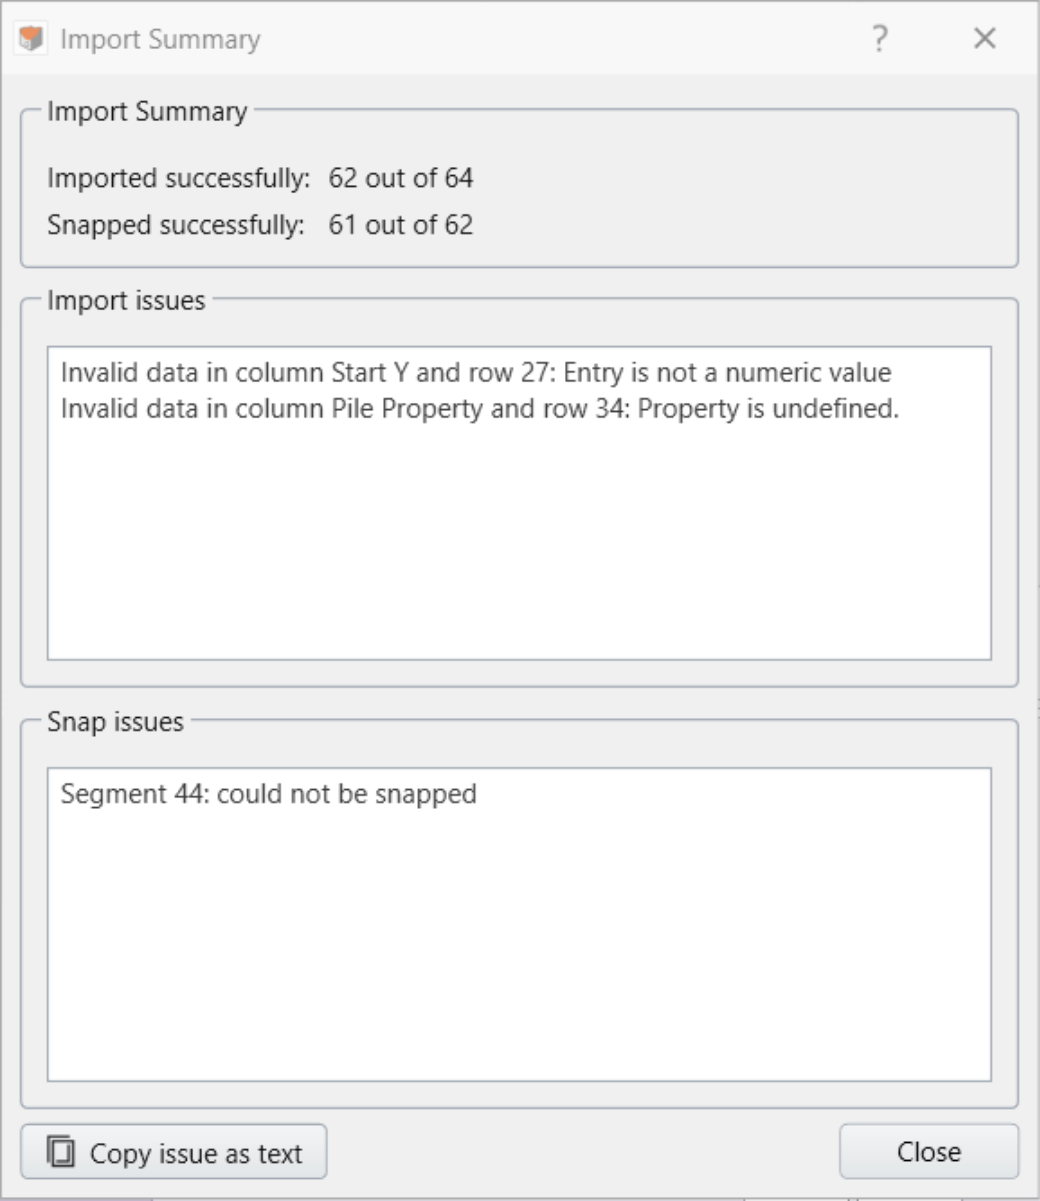
- Click Close to finish the import.
Once piles are successfully imported, piles that share the same Imported Piles Property are grouped under one Imported Piles entity in the Visibility Tree.