Stage Liner Properties
The properties of a liner can be modified at different stages of a multi-stage model. Any of the parameters entered in the Liner Properties dialog can be increased or decreased by user-defined factors at different stages.
The liner property type and corresponded parameters need to be priorly defined in the Liner Properties dialog, as the stage factors are applied based on the defined parameters. The Liner Properties dialog can be open with the Define Liner Properties option from the Liners sub-menu of Support menu. See the Define Liner Properties topic for more details.
Steps
Follow the steps to apply stage factors:
- Make sure you are in the Liners Properties dialog, and other properties of the liner has ben defined. See the Define Liner Properties topic for more details.
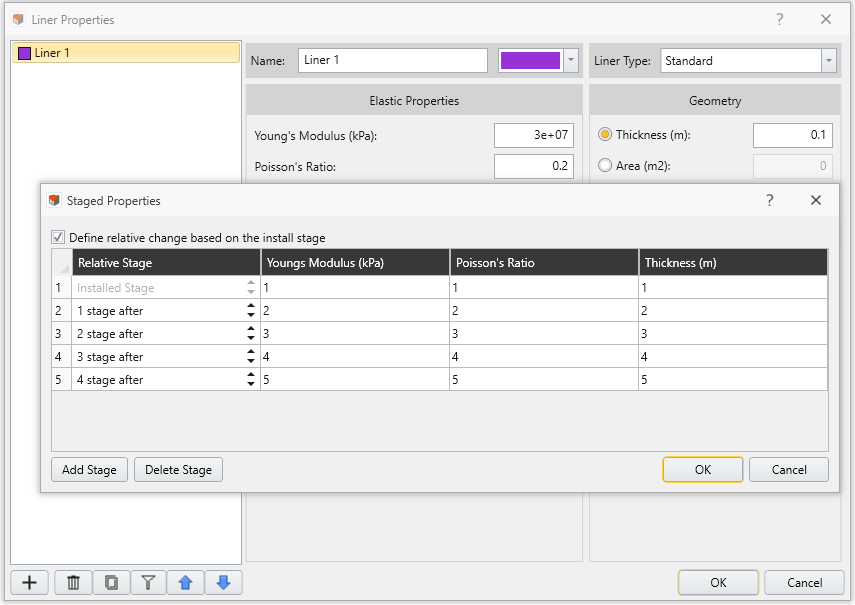
- Select the Define Factors button beside Stage Factors option, you will be prompted to the Staged Properties dialog.
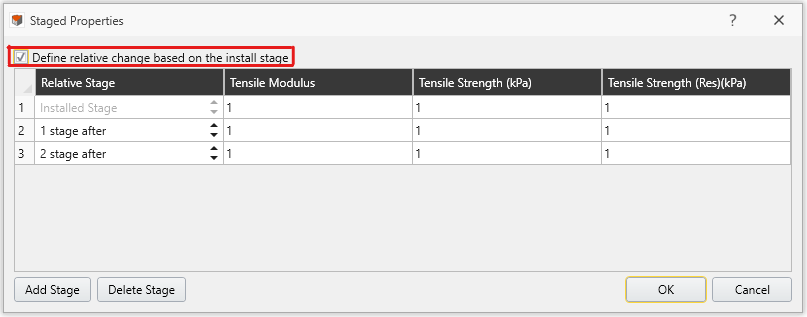
- Determine the staging method, whether it is based on the stage number, or liner installation stage. If it is the later one, select the Define relative change based on the install stage option.
- In the Staged Properties dialog, the parameters entered in the Liner Properties dialog are listed, with a default stage factor of 1.
- Select the Add Stage button to add the desired number of rows in the dialog.
- If the Define relative change based on the install stage option is OFF :
- For each row, select the stage number from the dropdown menu.
- If the Define relative change based on the install stage option is ON:
- By default, it starts with the “Installed Stage” – the stage which liners are first installed. For later rows, choose the stage relative to the installed stage.
- In each row, enter the required factor(s) which will be used to modify the indicated parameter(s).
- The factors are multiplied by the parameter values in the Define Liner Properties dialog.
- For example: if you want to increase Young’s Modulus by 20%, enter a Factor of 1.2 for Young’s Modulus, at the desired stage(s)
- Leave the Factor = 1 for any parameter which does not change value
- When finished, select OK to apply and exit the dialog.
Define Relative Change Based on the Install Stage
In the Staged Properties dialog, this option is provided to capture the material property change based on the install stage.
By default, this option is off, which means changes are tied to absolute stages. Alternatively, users can switch on the option, where changes will be applied relative to the stage where liners are installed.
This option is designed mainly for the application of sequential tunnel excavation with liners. An Example is provided to compare a case with and without the option. You can also see the Tunnel Sequence Designer tutorial model for another example.
For such applications, the liner might as well be installed to the excavated regions sequentially (i.e. installed at different stages). If the Define Relative Changes Based on the Install Stage option is OFF, we need to define a new liner for each installation.
However, if the Define Relative Changes Based on the Install Stage option is ON, only one liner needs to be defined. The liner property changes with stage can be captured, even if liners are installed at different stages.
Example
To showcase the use of Define Relative Changes Based on Install Stage option, an example is provided.
A tunnel is excavated sequentially, where one section is excavated per stage (see Figure 1 below).
Meanwhile, the same type of liners should be installed to excavated sections sequentially. In addition, for each installation, liner properties change with time.
Liners can be defined with the Define Liner Properties option under Support menu. Use the Stage Factors option to modify property changes with time. Since the changes are dependent on installation time, the Define Relative Changes Based on Install Stage option should be enabled.
Two methods are compared: a) without vs. b) with the Define Relative Changes Based on Install Stage option.
After Define Liner Properties, follow the steps to add liners to the model:
- Define each liner as a lining set with the Define Lining Composition option under Support menu.
- Select desired surfaces with the Faces Selection
 option
 - Select the Add Lining option from the Support menu. In the Add Lining dialog, choose a lining set and complete settings. Click OK. Now liners are added to the model.
a. Define Relative Changes Based on the Install Stage option is OFF
When the option is off, stage factors are consistent with stage numbers, regardless which stage the liner is installed from (e.g., if the liner is installed at different stages, its properties at one stage are the same).
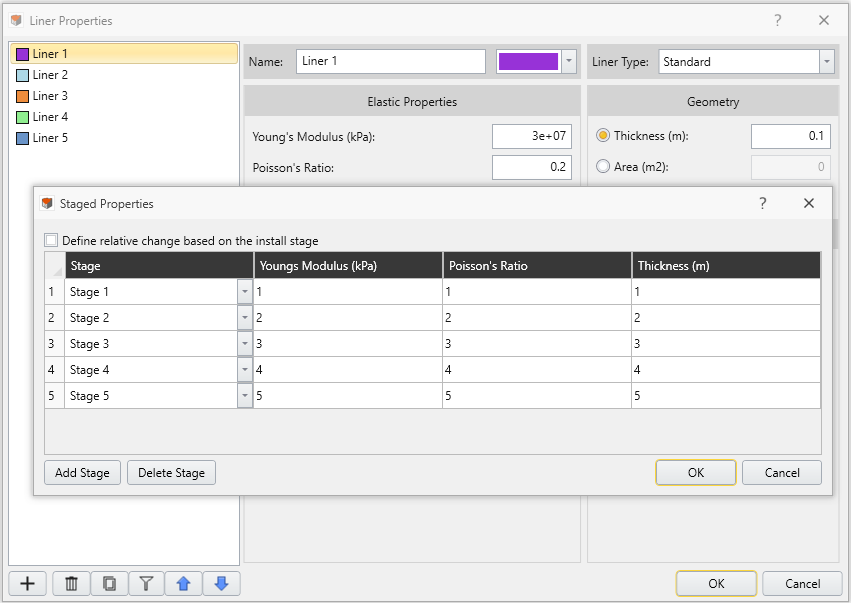
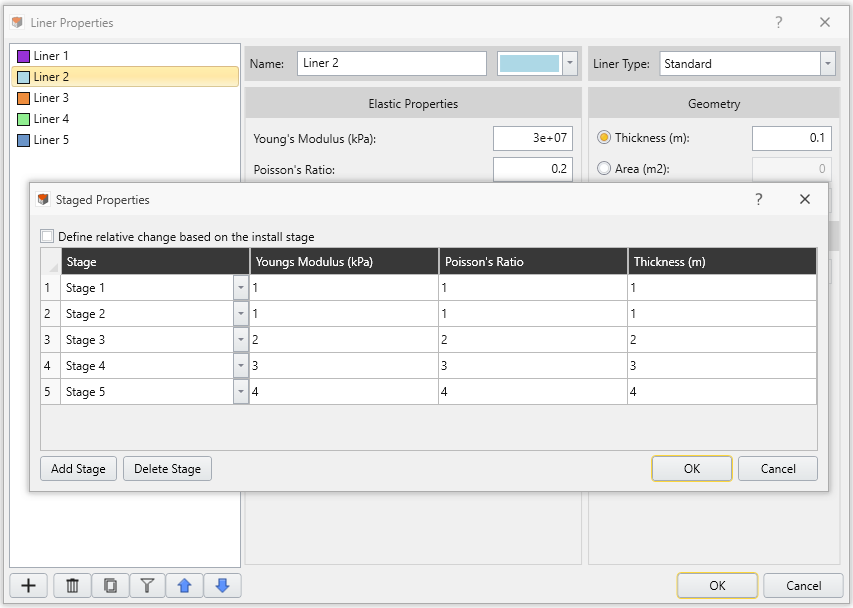
To ensure the independency of each installation, we need to define a liner for each of them. As shown below (Figure 2–6), five liners need to be defined, though their primary properties are the same:
Liner 1:
Liner 2:
Liner 3:
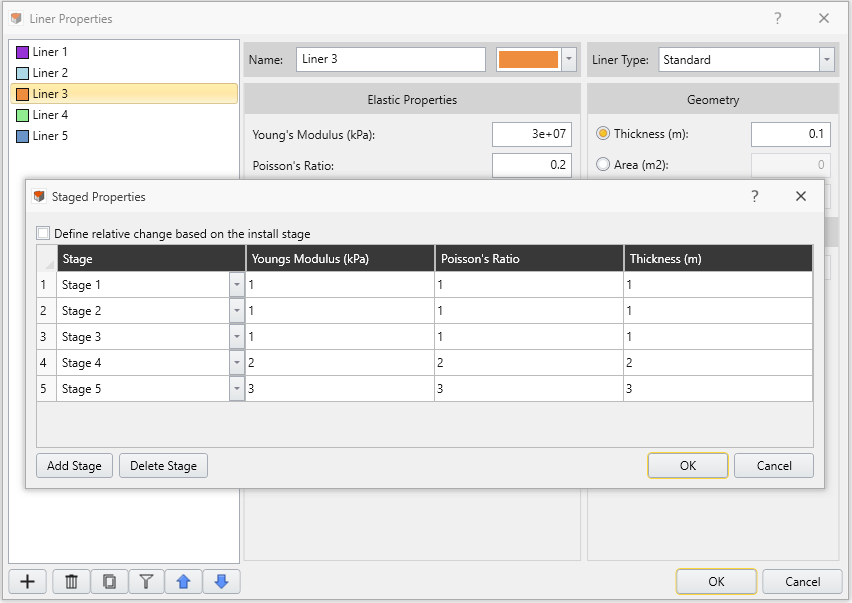
Liner 4:
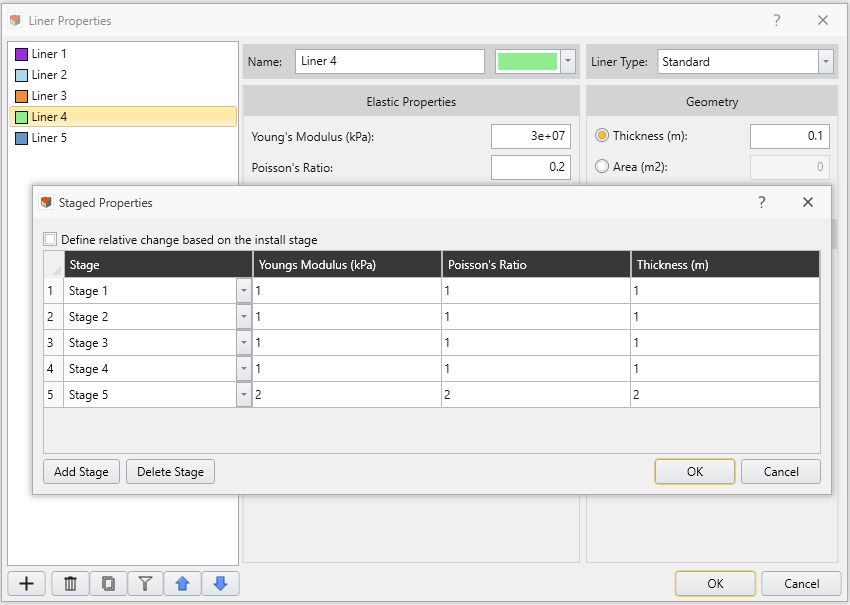
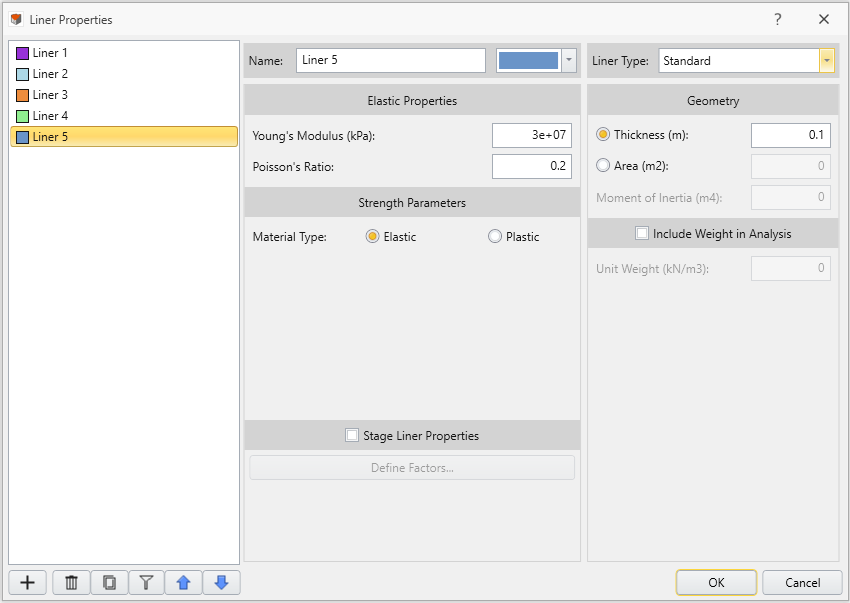
Liner 5:
After liners are added, they will display in the model as seen in Figure 7 below. As seen from the Visibility Tress in the figure, a different liner is added each time. See Add Lining page for steps to add liners.
b. Define Relative Changes Based on the Install Stage option is ON
When the option is on, stage factors are dependent on the installation stage. Thus, only one liner needs to be defined, as shown in Figure 8 below.
Add the liner to each excavated section at corresponded stage, it will display as seen in Figure 9 below. As seen from the Visibility Tree in the figure, one liner is added multiple times to the tunnel. See Add Lining page for steps to add liners.
Therefore, in complicated models where the same type of liners is installed at different times, the option is effective in terms of defining liner properties.