Display Themes
A rendering toolkit has been added that allows for additional customization of the model. A selection of preset themes has been included, or users may select the additional option of creating a customized display. Users can select the direction, location, color, and number of lights shining on the model. Furthermore, users can define the Brightness, Saturation, Specular, and Shininess of the materials.
These Display Themes can be accessed by selecting:
- View > Themes in the menu, or by selecting the Themes
 icon from the toolbar.
Adding a New Theme
Four pre-set themes are available. Selecting the Add button will add a new Theme, which can be edited using the Edit button.
Lights tab
The Lights tab allows edits to be made to the angle of the lights illuminating the model:
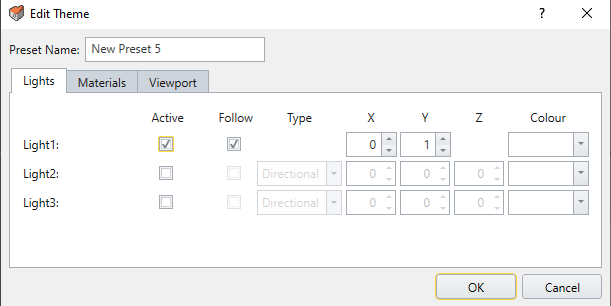
- Green arrows appear on the modeling interface and represent the lights.
- Checking the Active box enables the lights.
- Checking the Follow box means the lighting follows the angle and direction of green arrow on the modeling interface. Unchecking means that the light is in 3D space (Z coordinates are enabled).
- X, Y, Z values indicate the percentage of the model size, not actual coordinates on the modeling interface.
- For Lights 2 and 3, the Type option becomes available. Directional indicates that the light shines in one direction, while Point indicates that there is a sphere that is emanating light.
Materials tab
The Materials tab is a platform for tuning the appearance of the materials:
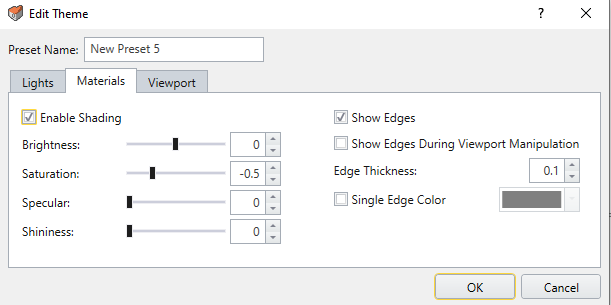
- Checking the box for Enable Shading allows for shadows on model, indicating that changes to the lighting will affect the model. Disabling this option makes the model one flat color.
- Other adjustments to the Materials can be made using the Brightness, Saturation, Specular, and Shininess options.
- Model edges can be altered using the Show Edges checkbox, Edge Thickness, and Single Edge Color options.
Viewport Tab
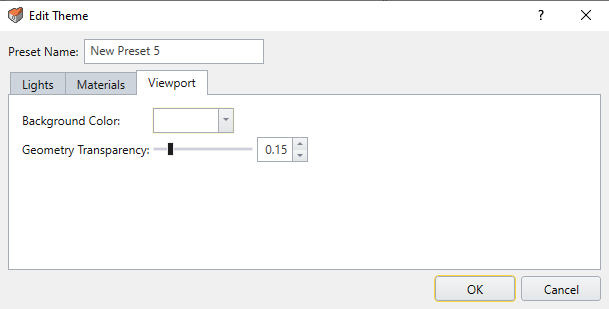
You can decide to change the Background Color or change the transparency with contour of the geometry by assigning a value 0 (no transparency) to 1 (Full transparency).
Saving a Theme
Themes can be saved across files. Saving defaults will only apply to the computer that the edits were performed on. File saving takes precedent.