Constrained Divide All
The Constrained Divide All option is used for models that contain geometries from the Tunnel Designer. It focused on preserving faces of the tunnel while dividing your External volume by intersecting surfaces and volumes.
The option can be used after defining the tunnel with the Tunnel Designer option and applying the tunnel to the model with the Add a Tunnel option, steps are listed below:
- Ensure that you have at least one External volume and one Tunnel added to the geometry. Only geometries with a geology or excavation role will be used to divide the External volume.
- Select the Constrained Divide All option from the Tunnel menu. You will see the Divide All Parameters dialog.

Image 1. Constrained Divide All Dialog - In the dialog, set the divide all parameters, including Quality and Advanced settings. The settings are the same as the general divide all option. See the Divide All Geometry topic for details.
- Click OK to apply.
- After dividing the geometry with Constrained Divide All, you can revert the divided External volume by using Un-divide All Geometry option. You will obtain back the original External volume before it was divided.
Divide All Geometry vs. Constrained Divide All
Both Divide All Geometry and Constrained Divide All options can divide geometries. Divide All Geometry is used for models that DO NOT CONTAIN geometries created from Tunnel Designer, while Constrained Divide All is used for models that CONTAINS geometries created from Tunnel Designer.
Comparing to Divide All Geometry, the Constrained Divide All option additionally divides the tunnel into smaller pieces to preserve all traits of the tunnel. See the Divide All Geometry topic for the general Divide All function.
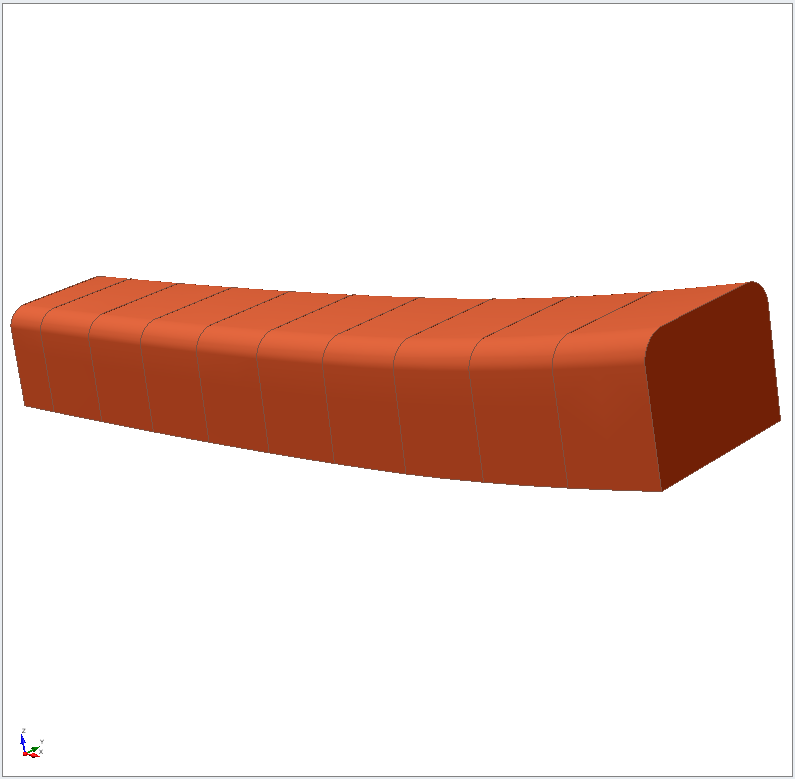
An example is presented below, to demonstrate the differences between two options.
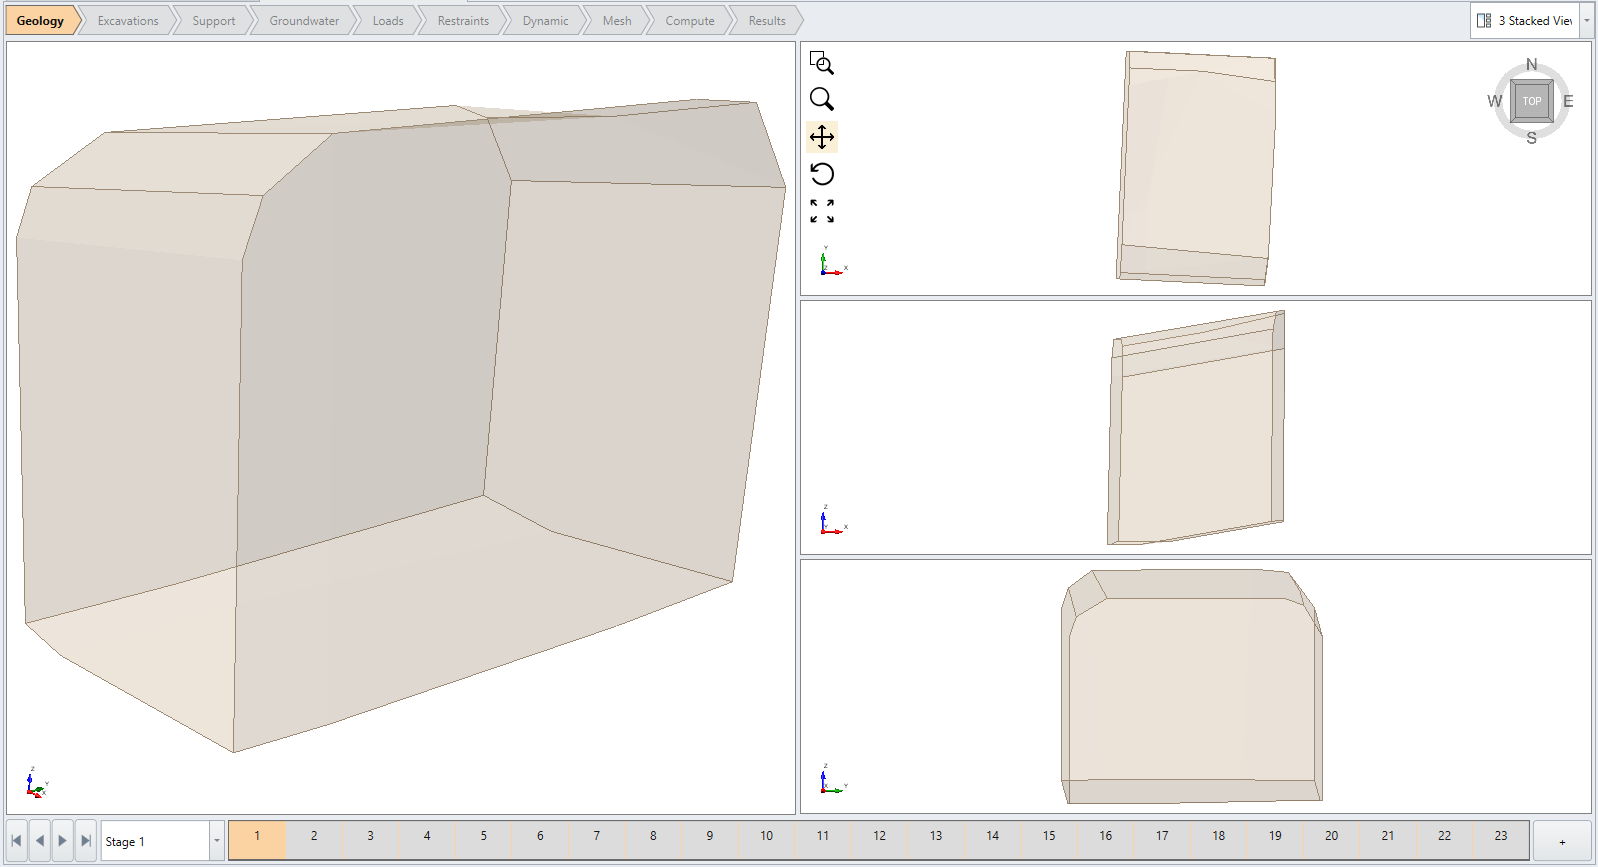
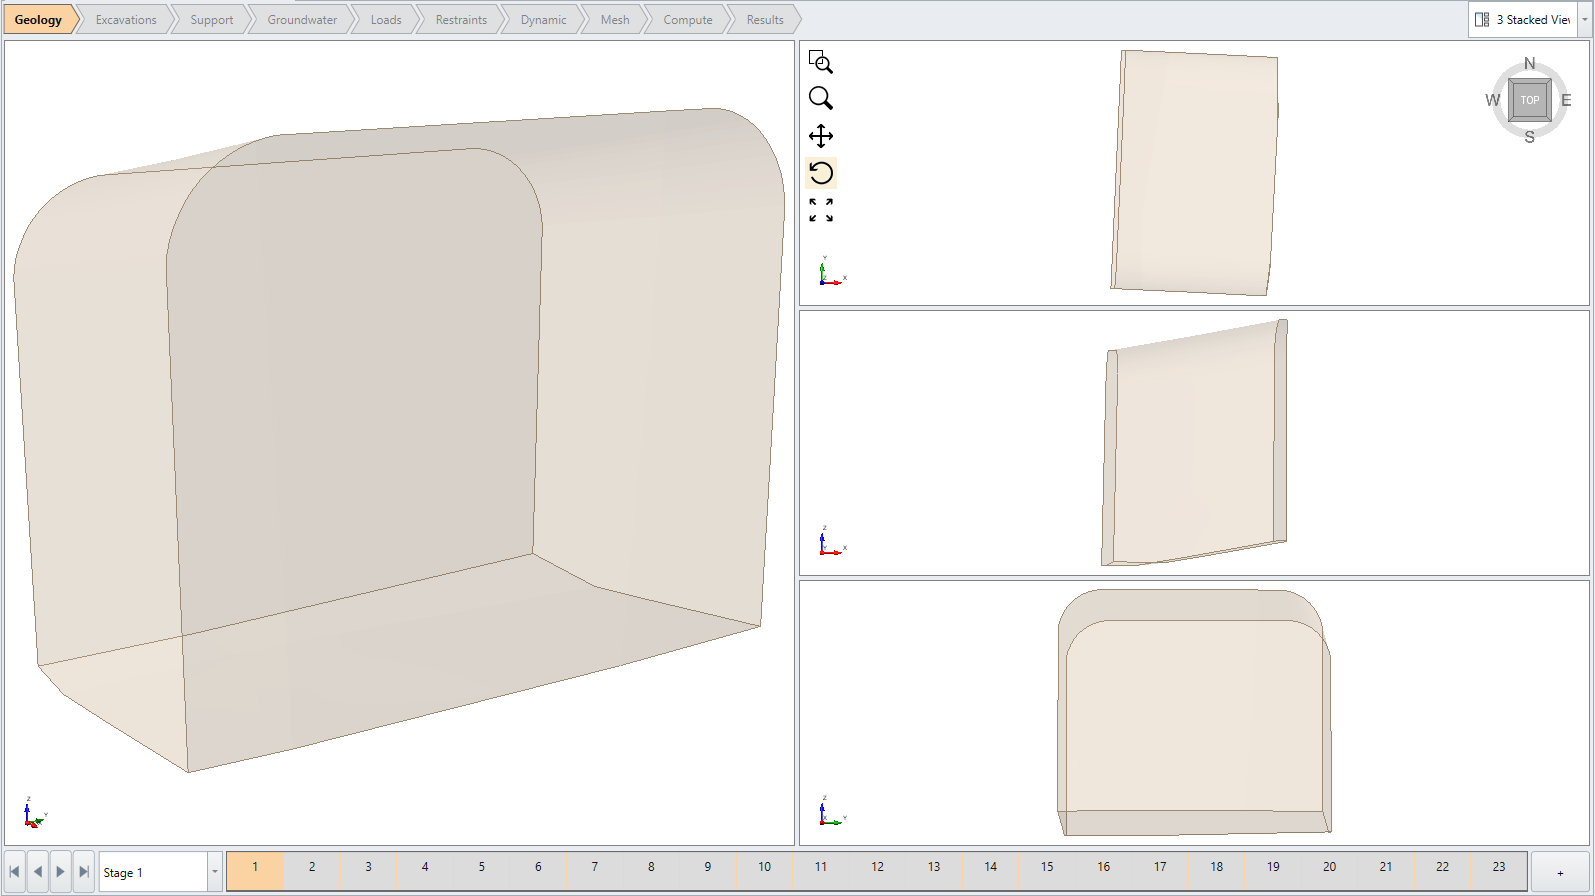
The original tunnel shape is shown in Image 2 below. Image 3 and 4 shows a tunnel section after the Divide All Geometry and Constrained Divide All operations respectively.
In image 3, the curves at top corners have sharp edges. Meanwhile in image 4, the curves are round and smooth, the shape is captured finer. It is because that the edges have been further divided into smaller pieces. The additional focus of the Constrained Divide All option on minimizing discrepancies for tunnel shapes is demonstrated.