Shrink Wrap
The Shrink Wrap Tool provides a way to generate a simplified, watertight surface mesh that encloses a given model or geometry. This tool is especially useful for creating a boundary representation for complex geometries, repairing meshes, or preparing models for further analysis.
The shrink wrap method works by surrounding the input geometry with a “wrapper” surface. This wrapper is controlled by parameters that balance between tightly following the original geometry and producing a smoother, more generalized shape.
The Shrink Wrap tool is controlled by two key parameters: Alpha and Offset. Together, they determine how tightly the wrapping surface follows the input geometry and how far it is offset from the original model. Adjusting these parameters allows users to balance between capturing fine geometric detail and producing a smoother, more generalized surface. The two parameters must be positive real numbers above 0.
Alpha
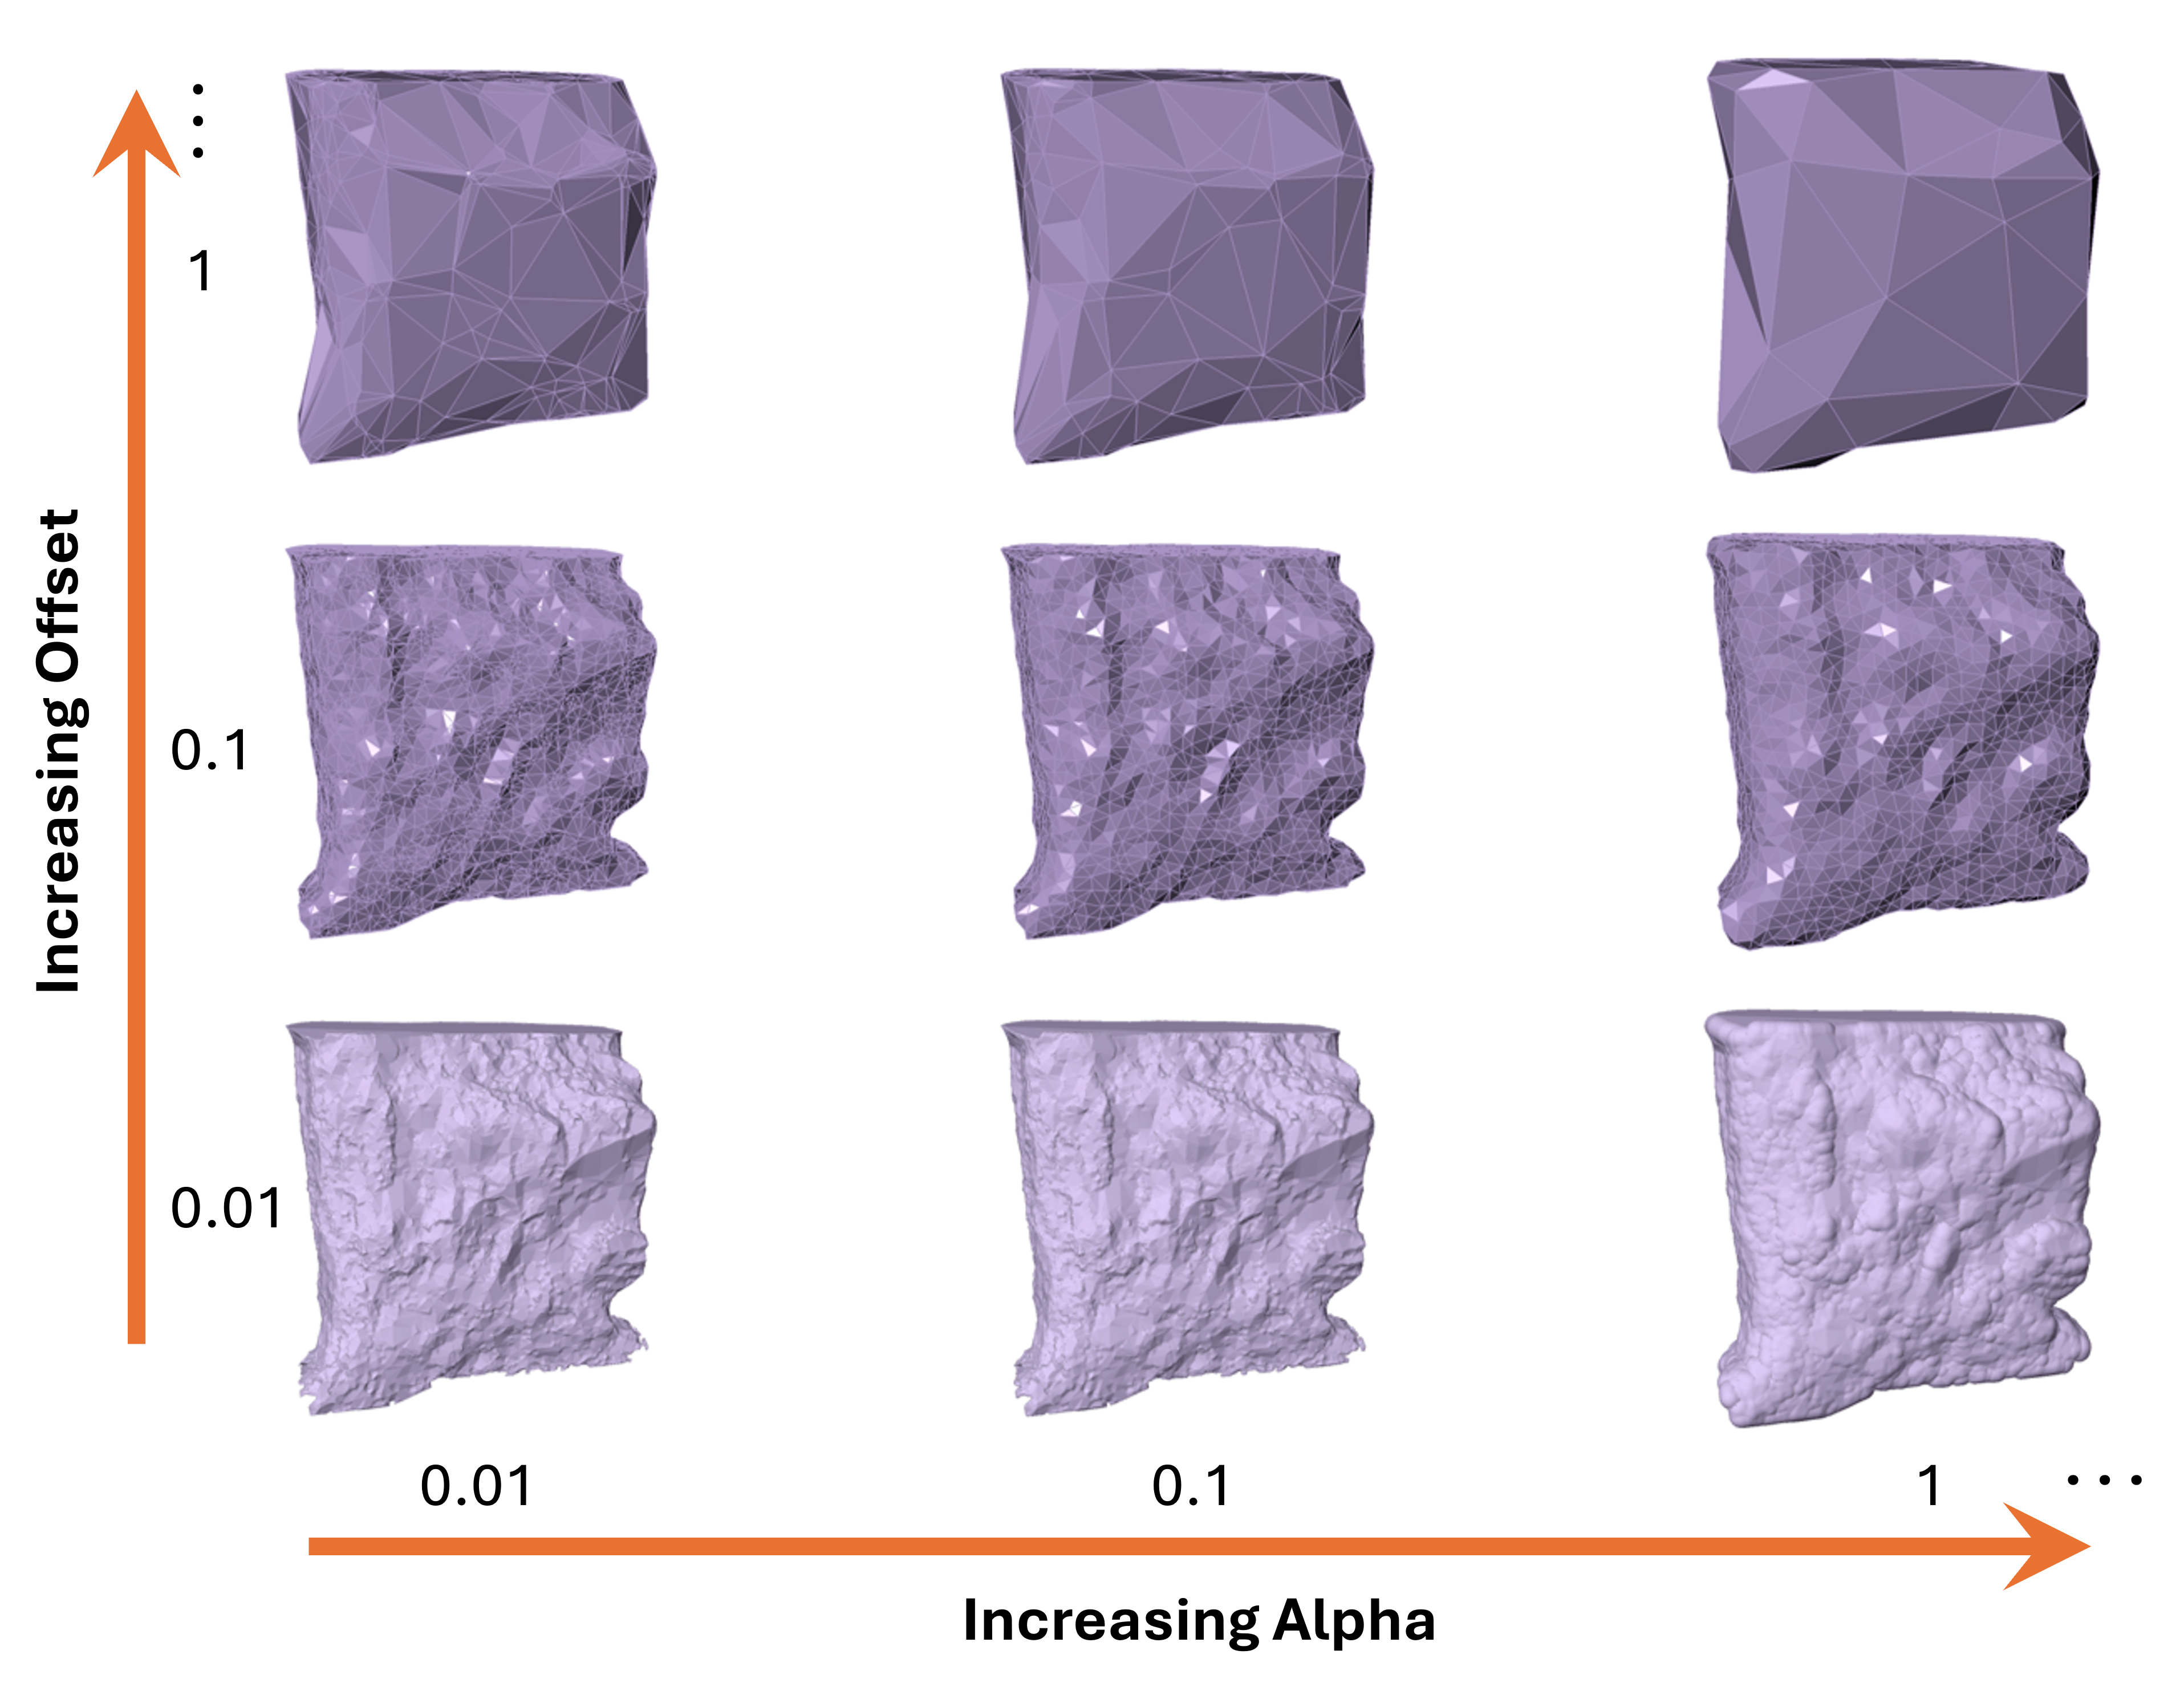
The Alpha parameter controls the tightness of the wrapping surface around the geometry.
- Smaller values → produce a tighter fit, capturing fine details and smaller features.
- Larger values → produce a smoother, more generalized surface that filters out minor features and noise.
Choosing the right alpha depends on the intended purpose: tighter values are suited for precise boundary definitions, while larger values are ideal for simplification or cleaning up noisy data. This parameter is particularly important when balancing geometric fidelity with surface smoothness
Offset
The Offset parameter defines the distance between the shrink wrap surface and the input geometry.
- Smaller values → the wrapper hugs the geometry more tightly, producing a surface nearly coincident with the model
- Larger values → the wrapper expands outward, creating a thicker buffer around the geometry
- This is useful when a clearance, tolerance, or buffer zone is required around the wrapped geometry.
 |  |
Procedure
- Select a single geometry entity or multiple entities
- Select Geometry > Surface Triangulation > Shrink Wrap
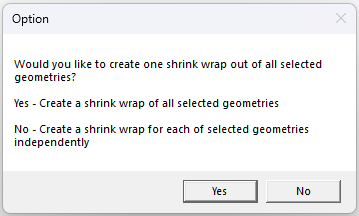
- If multiple entities are selected, a message box appears to either wrap the geometries all together or each individual > click Yes or No
- The Shrink Wrap control dialog appears to input Alpha and Offset parameters with Preview
- Click OK when satisfied with Shrink Wrap preview