Define Higher Order Regions
The Define Higher Order Regions option is used for hybrid mesh. It allows you to specify one or more regions to subject to the 10-noded tetrahedra mesh within the model, while the area outside of the region(s) will be meshed with 4-noded tetrahedron.
Higher order regions must be defined prior to initializing a hybrid mesh. See the topic for more detail about Hybrid Mesh.
A higher order region can be defined by a) creating a volume or b) selecting an existing volume. Steps for both methods are described below:
a. Create a volume
- Select the Define Higher Order Regions
 option from the Mesh menu.
You will be prompted to a dialog.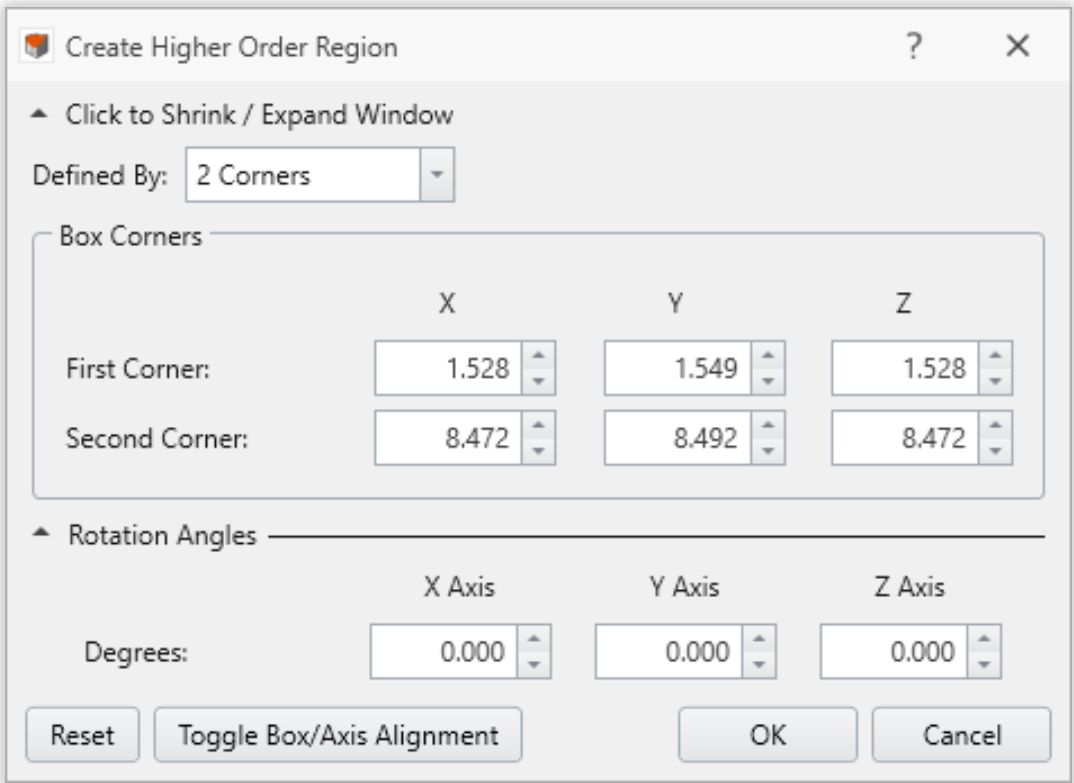
- From the Create Higher Order Region dialog, a box can be defined by either: entering values in the dialog, or using the Freehand Manipulation tool
 on the viewport.
- From the Create Higher Order Region dialog, choose a box dimension definition method from the dropdown list.
- If Defined By = 2 Corners, the XYZ coordinates for the two corner vertices of the box need to be specified.
- If Defined By = Dimensions, the XYZ coordinates for the center point of the box, as well as the length, width, and height dimensions of the box need to be specified.
The expandable Rotation Angles section can rotate the box. The rotation angles around the X, Y, and Z axes are required.
- A Freehand Manipulation tool will appear in the viewport. It is placed at the center of the box by default. You can hover the mouse to place the tool at any corner. When the Freehand Manipulator is at the center, you can drag the tool to translate the box, or drag the curve to rotate the box. When the tool is at a corner, you can drag the arrow to resize the box dimension along the corresponded axis.
- The dimension and rotation angle will be updated in the Create Plastic Region dialog.
- From the Create Higher Order Region dialog, choose a box dimension definition method from the dropdown list.
- The Reset (N) button in the dialog can reset the box to its original form. The Cancel button closes the dialog disregarding all changes made.
- When completed, select OK to apply and exit the dialog. The higher order region will be added to the model.
- An entity will be added under the Visibility Tree named: “Higher Order Region #”.
- The mesh discretization along box boundary will be shown in the model.
- The View Options for the region outlines are also available in the Properties pane.
b. Select an existing volume
- Select one or more desired volume entity(s) from the Visibility Tree or with the Entity Selection
 from the toolbar.
 - Select the Define Higher Order Regions
option from the Mesh menu.
- A higher order region will be created for each selected volume.
- An entity will be added to the Visibility Tree for each volume, named “Higher Order Region #”.
- The mesh discretization along volume boundary will be shown in the model.
Edit Higher Order Region
The locations of higher order regions can be modified after defined. To do this:
Edit location is only available for the regions defined with created volumes, rather than existing volumes.
- Select the higher order region from the Visibility Tree or in the model (with the Entity Selection tool).
- A Properties pane will be shown at the bottom left corner of the window, as shown below.
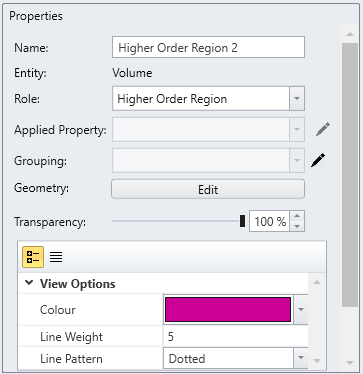
- Select the Edit
 button beside Geometry.
 - You will be prompted to a dialog, as shown below. Modify the parameters in the dialog or use the Freehand Manipulation Tool in the model to make changes.

The Reset (N) button can reset the box to its original geometry. The Cancel button closes the dialog disregarding all the changes. - When completed, select OK to apply the changes and exit the dialog.
- Intersected higher order regions are allowed.
- The Un-Divide action will not affect the defined higher order regions