Add a DFN
The Add a DFN option allows you to add DFN sets to the model, after they are defined in Define DFNs dialog. Note that:
- The geometries must have an External and no Mesh prior to adding DFN sets (the meshes need to be removed to use the option).
- In RS3, DFN sets can be added in two ways: by volume or by material. Steps are provided for both below.
- Alternatively, DFN sets can also be added with the Create DFN Control Volume option. Steps are provided in the below section. More details can be found in a separate Create DFN Control Volume topic.
- DFNs are added to the model as a set.
- If working with a multi-stage model, depending on the add DFN method, the DFN set(s) will be applied to any stage that contains the selected volume/material.
- Other DFN Adding Rules are also explained in the linked section.
Add a DFN by Volume
- Select one or more volume(s) from the Visibility Pane or with the Entity Selection
 tool from the toolbar.
 - Select the Add a DFN
 option under the Discrete Fracture Networks (DFNs) sub-menu from the Materials menu. You will see the Add DFN dialog.
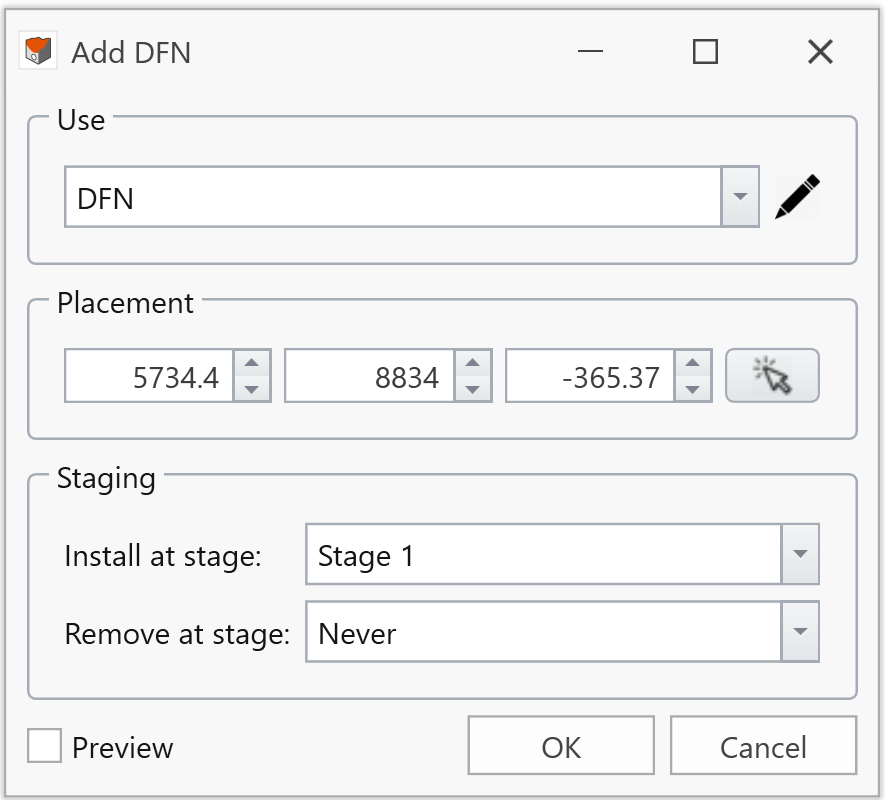
- In the Add DFN dialog:
- Use
Select a defined DFN set from the dropdown menu. If needed, click on the Edit icon, you will be prompted to modify DFN properties in the Define DFNs dialog.
Note that DFNs are added as DFN sets, not single DFNs, and only one DFN set can be added each time. - Placement
The location of the DFN set is defined by a specific point. The first point for the bounding box of the DFN set (i.e., the Box Min coordinates entered in the Define DFNs dialog, as highlighted in the screenshot below) in its local coordinate system will be placed to the defined point in RS3 global coordinate system.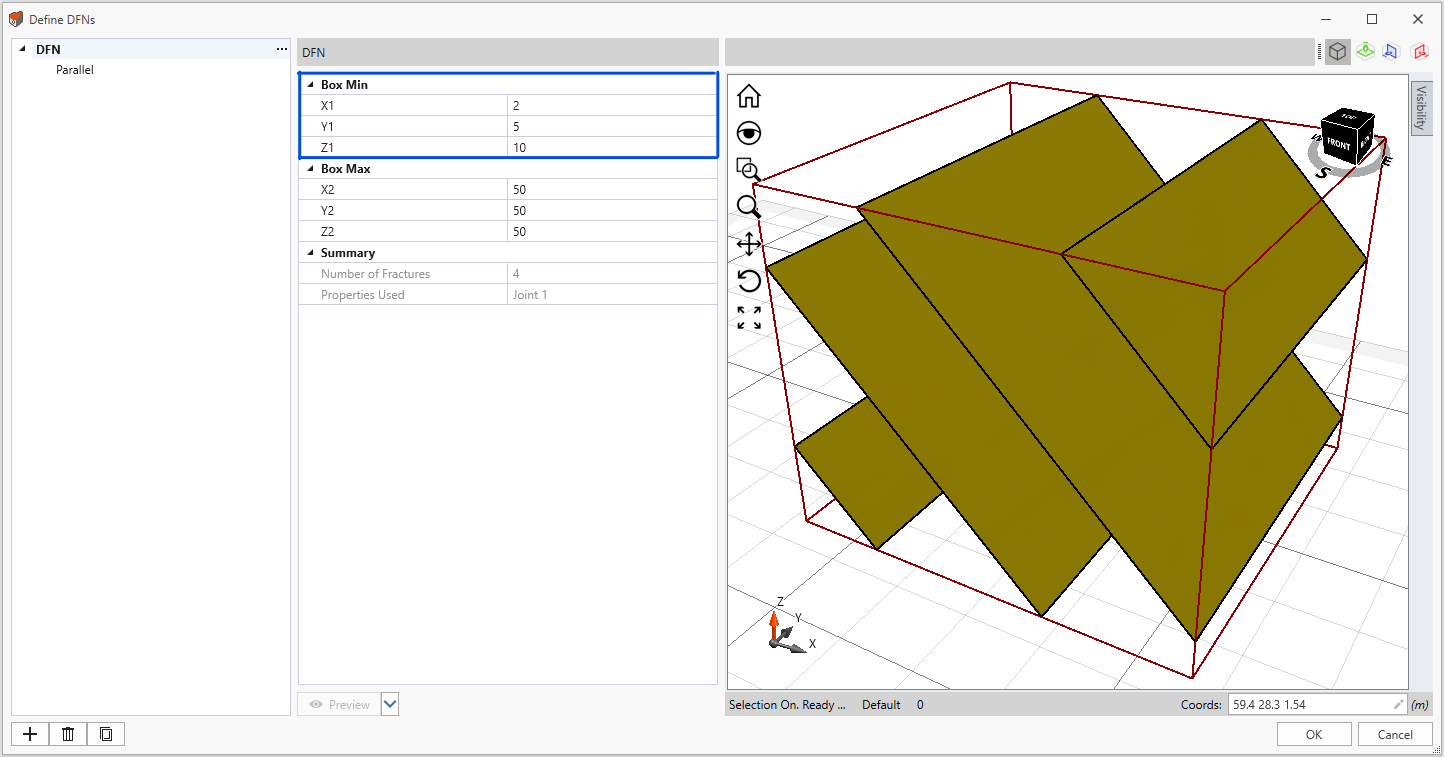
A placement point is generated by default, as specified XYZ coordinates. You can select the Preview checkbox to display in the model. The placement point will also be labelled out in the model.
You can adjust the placement point by:- Enter the XYZ coordinates, which are in RS3 global coordinate system.
- Select the mouse icon
 . Pick a point in the model with the mouse.
The new placement point will be updated both in the XYZ coordinates field and in the model (if Preview is enabled).
If you want to pick a different placement point, select the mouse icon again before to re-enable the function.
- Staging
Choose the installation stage from the Install at stage dropdown list. And choose the removal stage from the Remove at stage dropdown list. - Preview
- Use
- Select OK to apply.
- The DFN set is now added to the model, as seen in the below screenshot. Note that:
- Separate entities will be created for each DFN within the set. If a DFN contains more than one joint properties, each joint property will have one entity created.
- The DFN set can be viewed as a pattern, which will be extrapolated beyond or trimmed within the bounding box to fit the selected volumes in the model. No re-scaling will be involved. However, if the DFN set contains imported DFNs, will not be extrapolated, only trim can happen.
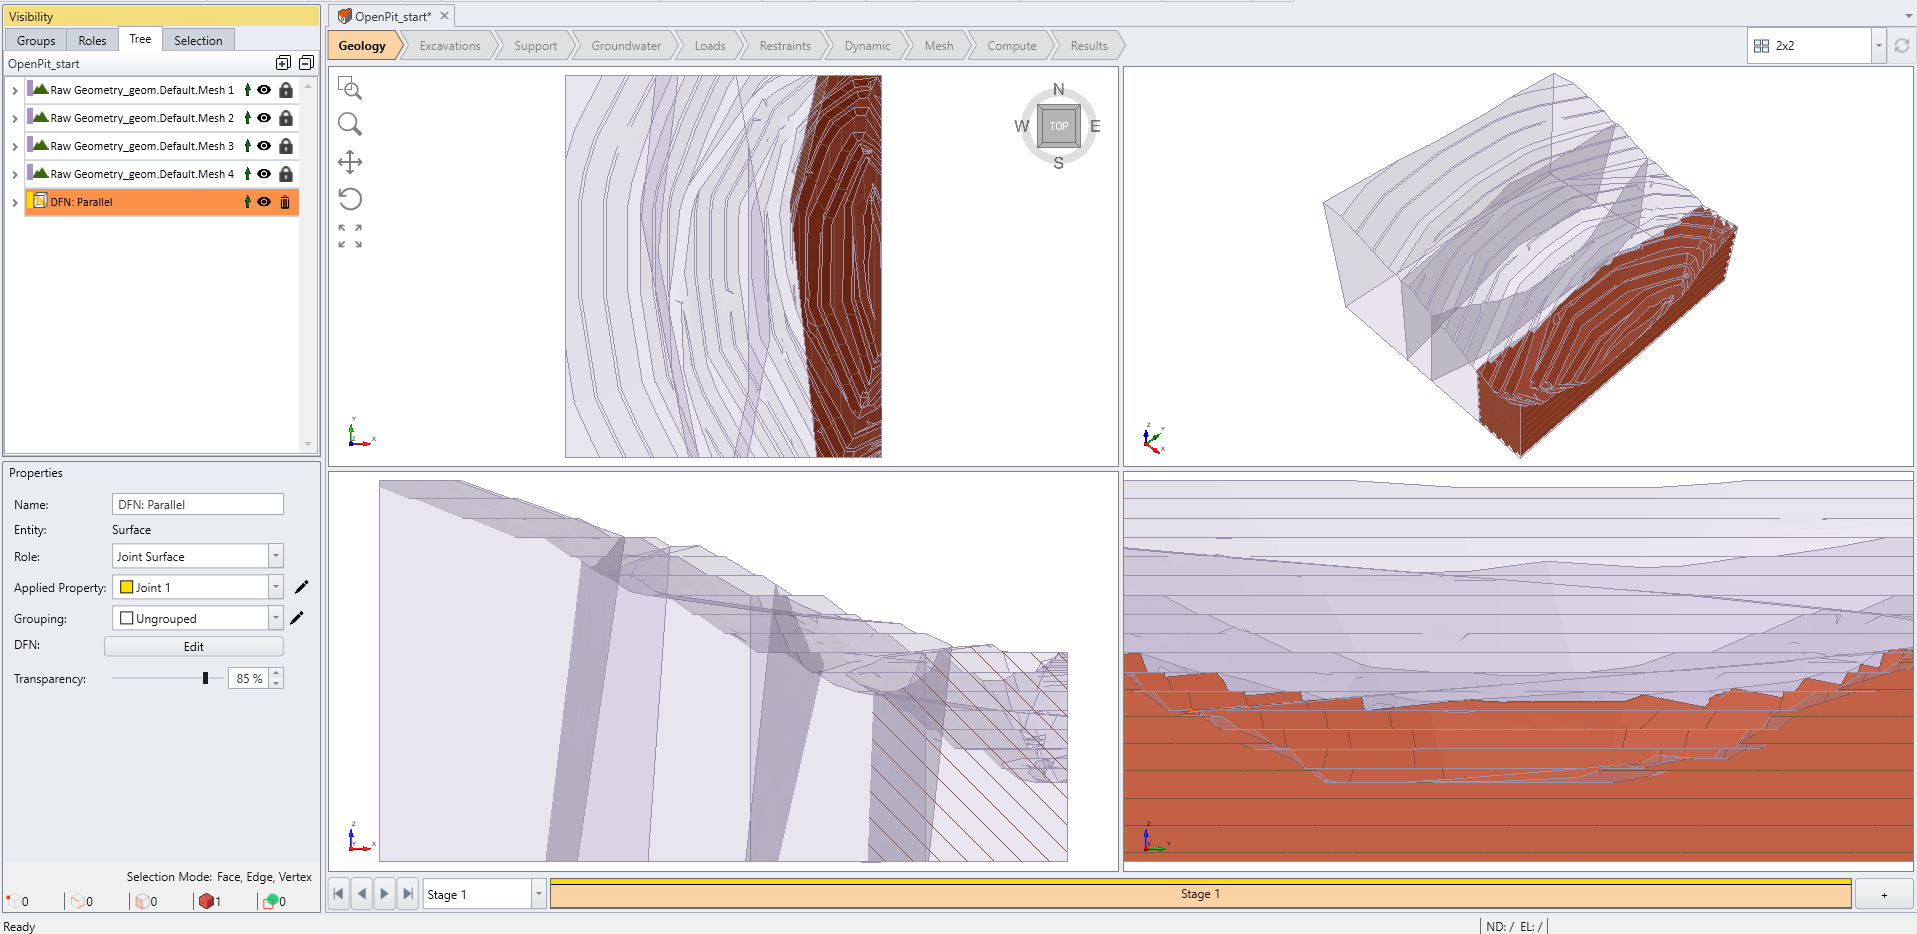
- You can edit the DFNs either from the Property Pane or from the Define DFNs dialog. See the Edit DFNs topic for more information.
- After adding and editing, you must perform Divide All Geometry function to the model. For more information, see the DFN and Divide All Geometry topic.
Add a DFN by Material
- Select the Add a DFN
option under the Discrete Fracture Networks (DFNs) sub-menu from the Materials menu. You will be prompted to a dialog.
- In the Select Volumes by Material
dialog, select the checkbox for one or multiple material(s) that the DFN set to be applied to.
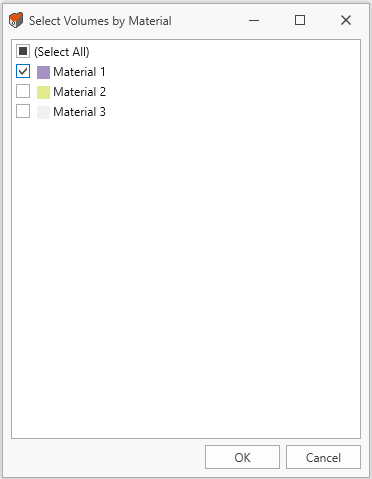
Click OK to apply. You will be prompted to a different dialog. - The Add DFN dialog is the same as described in Step 3 for Add a DFN by Volume.
Follow Step 3-7 from the Add a DFN by Volume methods.
Add a DFN using Control Volume
- Construct DFN control volumes with the Create DFN Control Volume option. See the topic for detailed steps.
- Select the Add a DFN option under the Discrete Fracture Networks (DFNs) sub-menu from the Materials menu. You will be prompted to a dialog.
- The Add DFN dialog is the same as described in Step 3 for Add a DFN by Volume.
Follow Step 3-7 from the Add a DFN by Volume methods.
DFN Adding Rules
- Only one DFN set can be added at a time.
Attempting to add multiple DFN sets at once is not permitted. See case 1 and 2 below for image illustrations, where the blue and green patterns represent different DFN sets
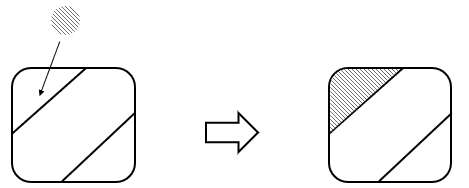
Case 1. One DFN set to one region at a time 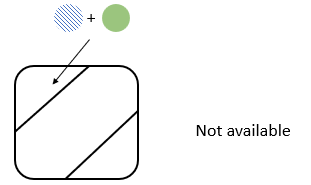
Case 2. Multiple DFN sets to one region at a time - Different DFN sets can be added to the same region separately.
See Case 3 below for image illustrations.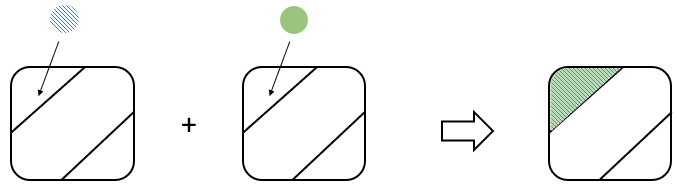
Case 3. Multiple DFN sets to one region separately - One DFN set to multiple regions.
To apply the same DFN sets to multiple regions, you can add it either together or separately. Only ONE entity will be created for each DFN within the set, regardless of adding them together or separately to regions.
See case 4 and 5 respectively for image illustrations.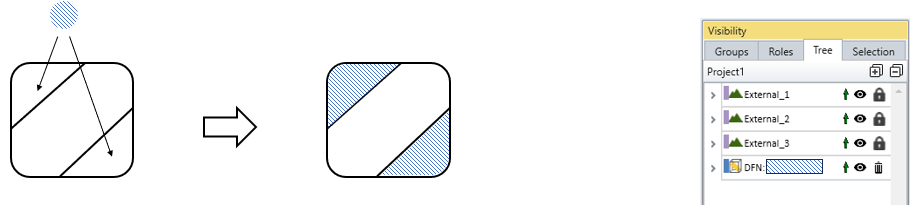
Case 4. One DFN set to multiple regions together 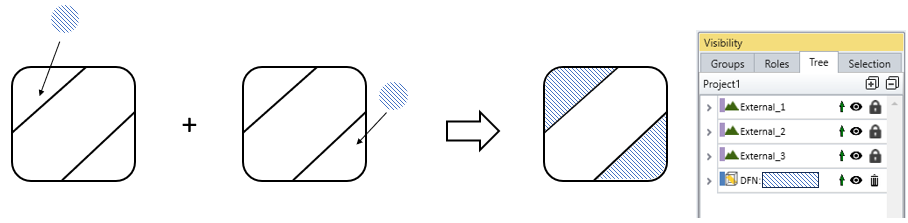
Case 5. One DFN set to multiple regions separately