Bridge
Bridges allow marking intact rock bridges between interrupted Traces. The start and end points of Bridge measurements are limited to the start and end points of the Traces. There have to be at least two Traces within the same Structure Set to mark a Bridge. Bridges are used for calculating persistence.
Standard operating procedure
- Activate “Measurements” in the toolbar of the Structure tab by clicking the corresponding radio button
- Click on the “Bridge”
 icon or use the shortcut key “B”
 - Mark the end point of a Trace with a left button mouse click
- Mark the start point of the Trace to connect with by clicking the left mouse button
- Finish the Bridge measurement and continue the mapping by pressing the “Space” key or finish the Bridge measurement by clicking “Enter” or by clicking the “Bridge” icon. The Bridge’s length (along the surface and the start-end distance) is displayed instantly in the Structure List.
Edit the Bridge measurement by a double click with the right mouse button on the item and move the points of the Bridge measurement to another Trace by clicking the right mouse button.
Below figure shows the Properties pane for Bridges. The pane is opened in the context menu with “Show Properties” or by a click on “Windows | Properties” in the menu bar. It comprises the name of the Bridge, information to which Structure Set the measurement belongs and values for the lengths. The name of the Bridge can be edited in order to use an intuitive name or for more detailed descriptions. Customized notes can be added to individual Bridges in the Notes tab.
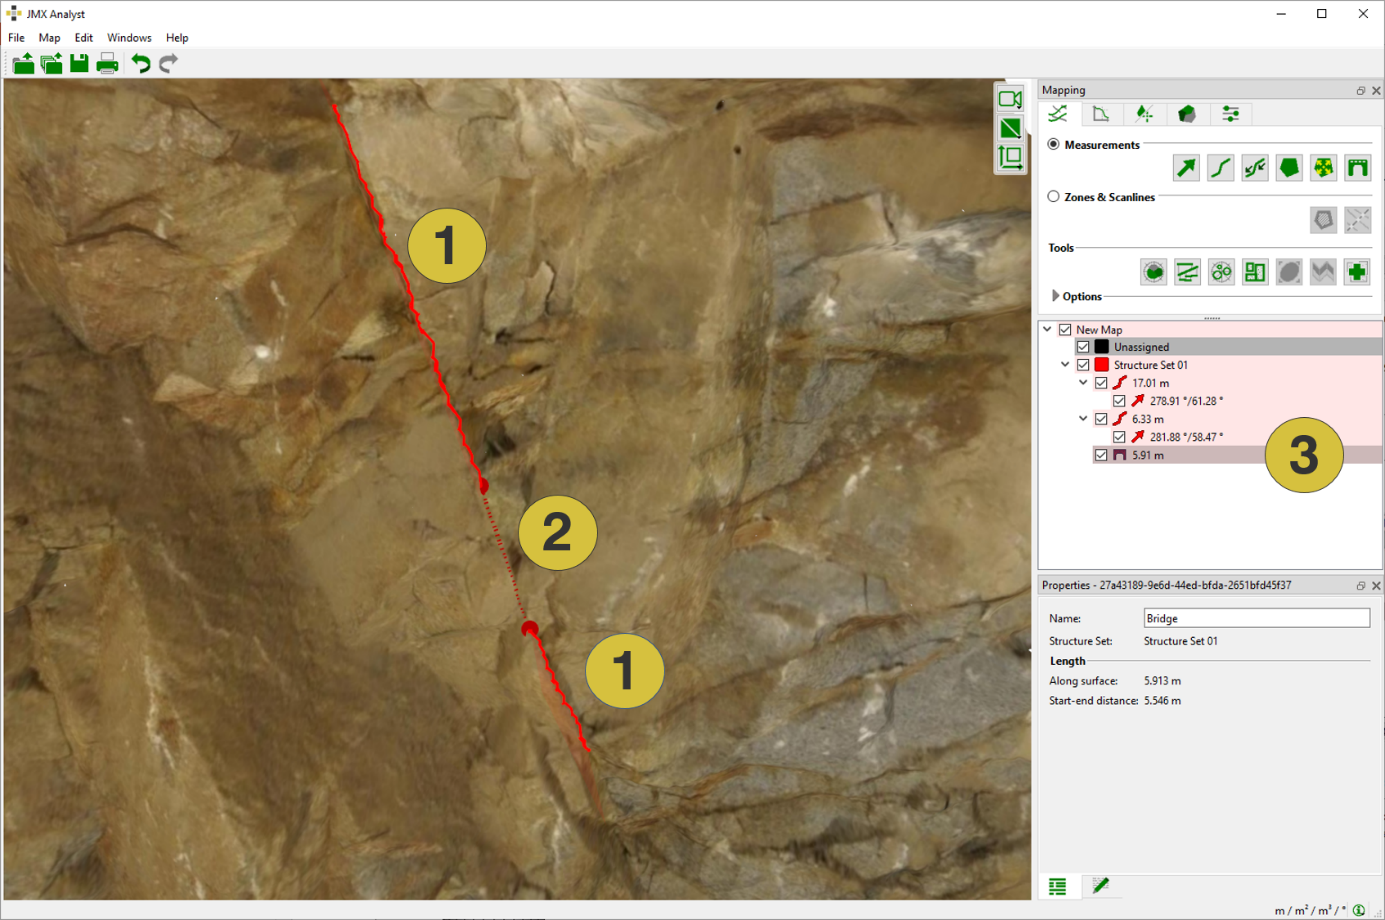
- Traces (solid line)
- Bridge (dotted line)
- Length (along surface and start-end distance)
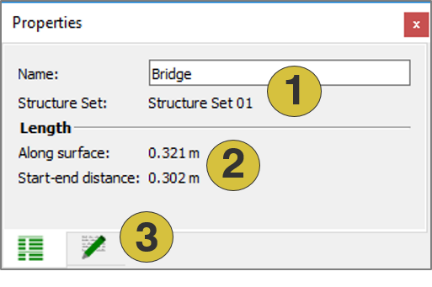
- Name of the Bridge (editable)
- Length of Bridge
- Notes (editable)
Context menu
- Edit
Moves the points of the Bridge measurement to a new Trace by clicking the right mouse button - Set Colour
Defines a new colour for the Bridge - Look at
Centers the Bridge in the 3D viewer - Look at and Zoom
Centers and zoom the Bridge in the 3D viewer - Delete
Deletes the selected Bridge - Show Properties
Opens the Properties pane for the Bridge - Move to
Moves the Bridge to another Structure Set - Export
- Export as DXF Exports the measurement as ”.dxf” file
- Export as VRML Exports the measurement as ”.vrml” file