Measuring Point
The Measuring Point provides the 3D co-ordinates of a single point of the 3D model. It is represented either in local co-ordinates or global co-ordinates depending on the reference frame of the 3D model.
Standard operating procedure
- Click on the “Measuring Point”
 icon in the toolbar of the Geometry tab or use the shortcut key “M”
 - Mark the point for the measurement with a left button mouse click. Clicking on a different location resets the measurement.
- Finish the measurement and continue the mapping by pressing the “Space” key or finish the Measuring Point measurement by clicking “Enter” or by clicking the “Measuring Point” . The co-ordinates of the Measuring Point are provided instantly in an individual list in the Geometry tab.
Edit the Measuring Point by a double click with the right mouse button on the item and set a new position of the Measuring Point by clicking the left mouse button.
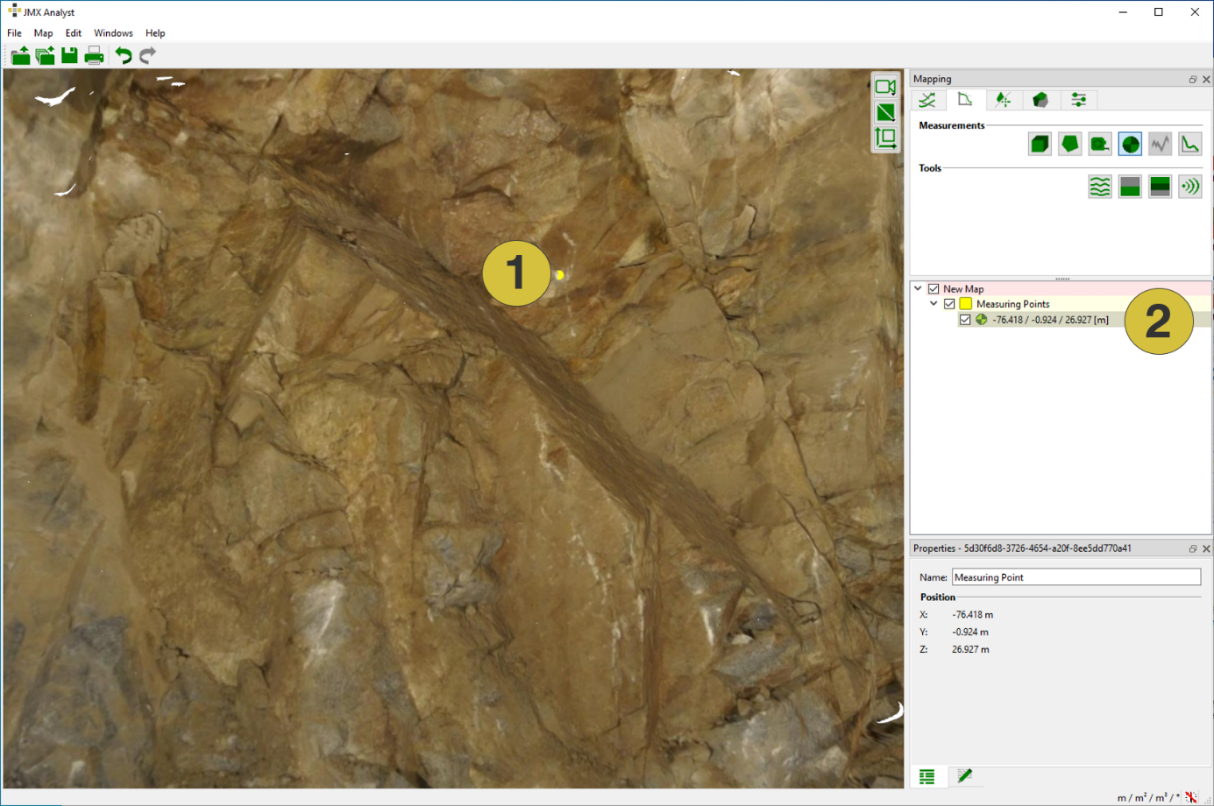
- Measuring Point
- Co-ordinates of the Measuring Point
The below figure shows the Properties pane for Measuring Points. The pane is opened in the context menu with “Show Properties” or by a click on “Windows | Properties” in the menu bar. It comprises the name of the Measuring Point and co-ordinates. The name of the Measuring Point can be edited in order to use an intuitive name or for more detailed descriptions. Customized notes can be added to individual Measuring Points in the Notes  tab.
tab.
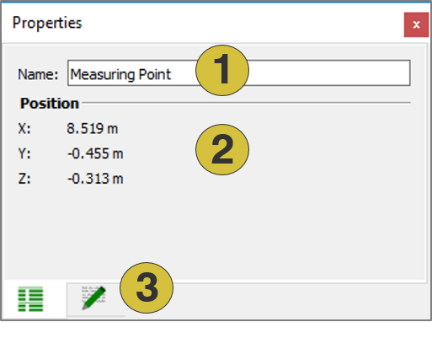
- Name of Measuring Point (editable)
- Co-ordinates
- Notes (editable)
Context menu
- Edit
Move the point by clicking the right mouse button - Set Colour
Defines a new colour for the Measuring Point - Active
Activates (shows) and deactivates (hides) the selected item - Look at
Centers the Measuring Point in the 3D viewer - Look at and Zoom
Centers and zoom the Measuring Point in the 3D viewer - Delete
Deletes the selected Measuring Point - Show Properties
Opens the Properties pane for Measuring Points - Export
- Export as DXF - Exports the measurement as ”.dxf” file
- Export as VRML - Exports the measurement as ”.vrml” file