Search Results

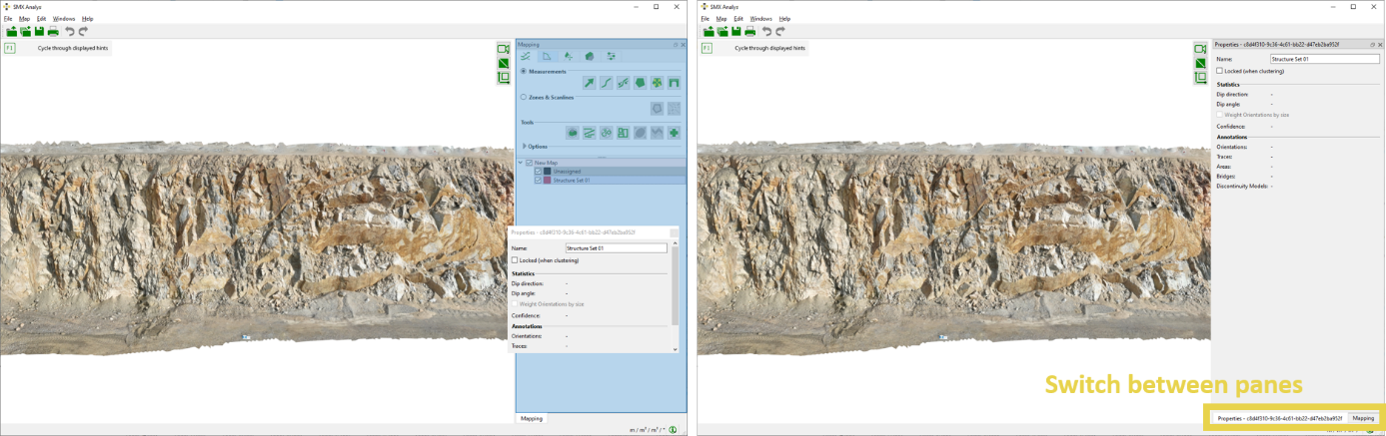
Detachable Panes

Analyst has three panes i.e. Mapping, Properties and Plot, which are requested from the menu “Window” or from the context menu of individual Annotation Elements. Panes can be attached and detached from the main window. The size and the shape of the panes can be adjusted with the mouse. Undocked panes can be placed on different screens. The layout of the user interface can be reset by selecting the menu “Window | Reset Layout”. The viewer and the panes are arranged to its original layout.

Mapping pane

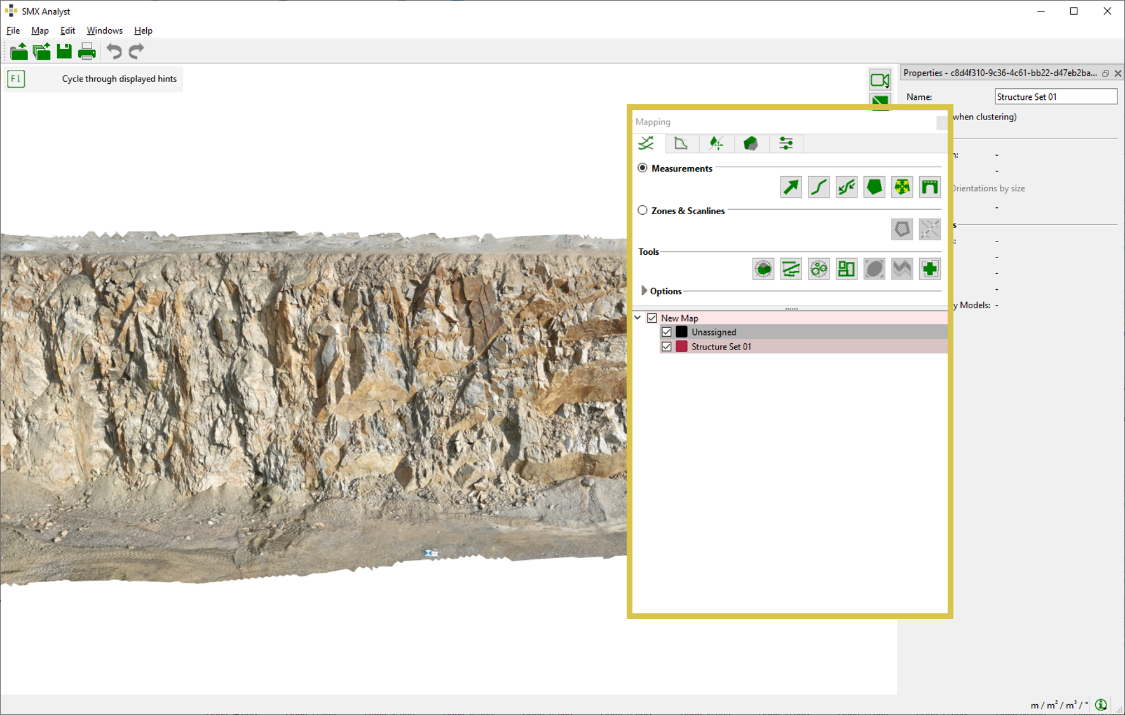
The Mapping pane comprises four tabs providing individual Annotation Elements and Tools; i.e. Structure, Geometry, Occurrences and Area Partitioning. The additional Settings tab allows the adjustment of the general mapping performance. 
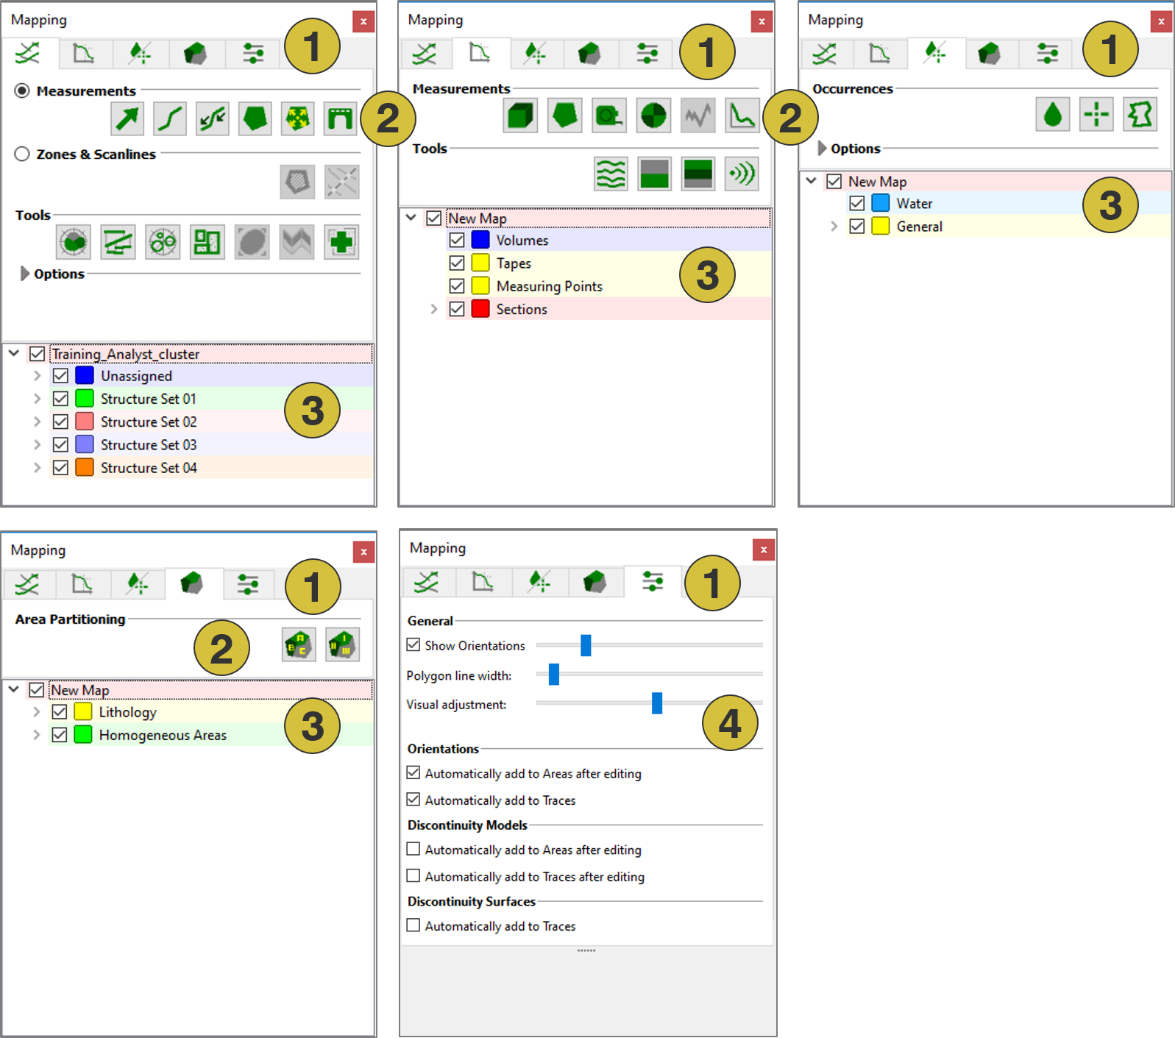
Mapping pane with individual tabs: Structure (top left), Geometry (top middle), Occurrences (top right), Area Partitioning (bottom left) and Settings (bottom middle)
  1. Individual tabs                                      
  2. Tab-specific toolbar
  3. List of Annotation Elements
  4. General settings                                   

Properties pane 

The Properties pane displays the information of the selected Annotation Element. The layout of the pane depends on the selected element and is shown in the individual chapters in this manual.
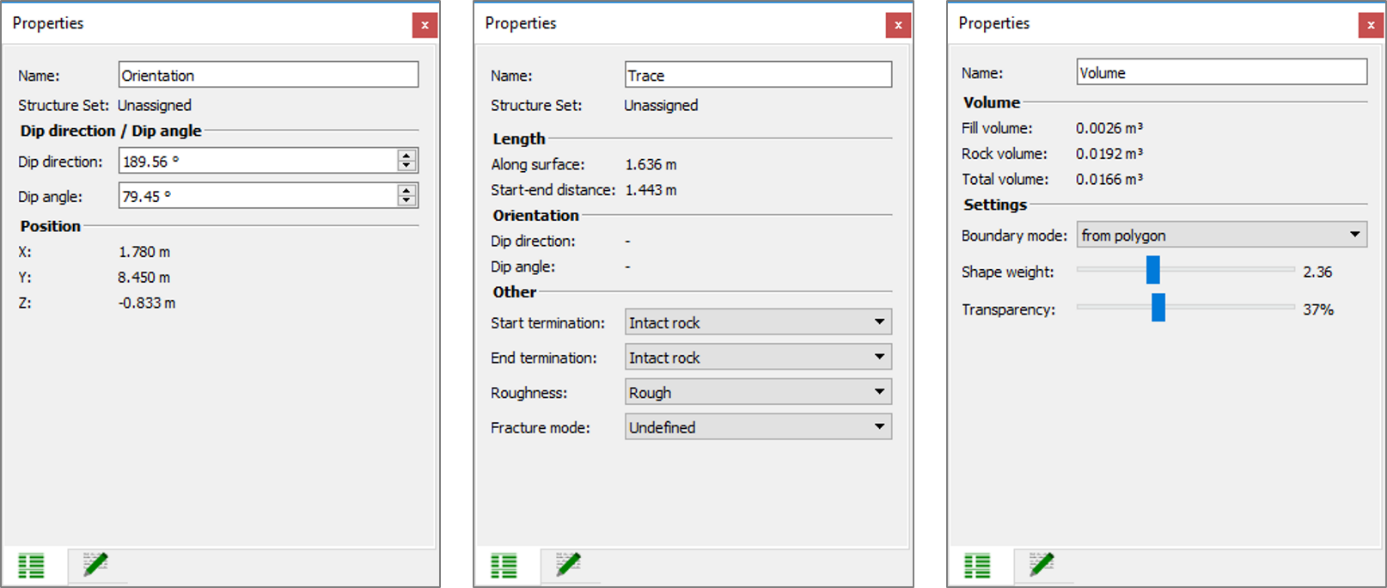
Examples of Properties panes
Notes can be added to each Annotation Element in the Notes  tab in the Properties pane. 

Plot pane

The Plot pane features the plot of the Section, Tape Measure and the Profile (profile plots along the surface), as well as plot of Lithologic Regions and Homogeneous Areas (pie charts). The specific Plot panes are shown in the corresponding chapter in this manual. 

Attaching and detaching panes

Attaching and detaching panes serves for customizing the layout of the Analyst and arranging panes with different functionality at your personal preference. A detachable pane has a dock bar at the top of its window.

Attaching panes:

  1. Drag the window of the detached pane close to your desired dock position.
  2. A blue placeholder opens. Two options are possible:
    1. The placeholder can open a non-overlapping field 
    2. The placeholder can overlap with another view 
  3. Once you release the left mouse button, the pane will dock to the place holder. In case of overlapping panes a flag at the pane´s bottom appears allowing switching between the panes.
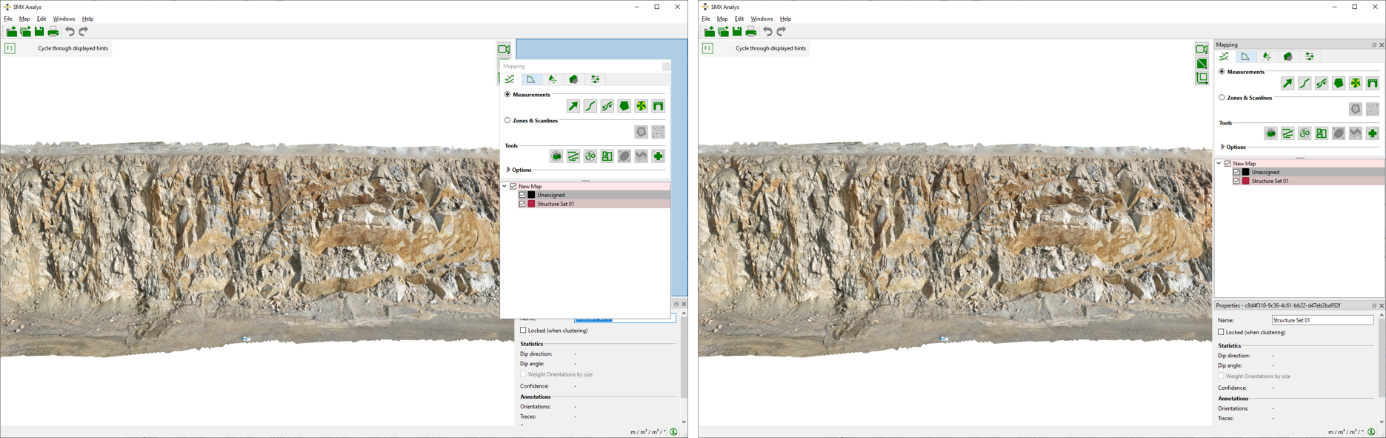
Attaching a pane into a non-overlapping placeholder. The pane docks and takes the shape of the placeholder after releasing the mouse button.
Attaching a pane into a placeholder overlapping with another pane. The pane docks and takes the shape of the placeholder after releasing the mouse button. A flag appears at the bottom of the view, which allows to switch between the overlapping panes.

Detaching panes:

  1. Click with the left mouse button on the dock bar.
  2. Drag the view to the desired position while holding the left mouse button

Additional properties:

  • Panes are shown or hidden through the menu “Windows” in the menu bar by selecting the corresponding entry. 
  • The size and shape of the pane scan be adjusted with the mouse by clicking at the pane´s boundary. The mouse cursor turns into a double arrow.
  • Detached panes can be placed on different screens.
  • The layout of the user interface can be reset with selecting the menu "Windows | Reset Layout”. The viewer and the panes are arranged to its original layout.
Detaching a pane with the mouse cursor in the dock bar while holding the left mouse button.
Rocscience logo, click here to return to the homepage Portal Account Portal Account Portal Help Log In Log Out Home Shopping Cart icon Click here to search our site Click here to close Learning Tech Support RSInsight+ Logo Documentation Info Chevron Delete Back to Top View More" Previous Next Edit PDF File Calendar Location Language External Link Apply to ACC External Link Fees Video Click here to visit Rocscience's LinkedIn page Click here to visit Rocscience's YouTube page Click here to visit Rocscience's X page Click here to visit Rocscience's Facebook page Click here to visit Rocscience's Instagram page Click here to visit Rocscience's Reddit page Bookmark Network Scroll down for more Checkmark Download Print Back to top Single User Multiple Users RSLog RocFall3 CPillar Dips EX3 RocFall RocPlane RocSlope3 RocSupport RocTopple RS2 RS3 RSData RSPile RSWall NovoTech Bundle RSSeismic Settle3 Slide2 Slide3 SWedge UnWedge RocTunnel3 RocSlope2 BlastMetrix ShapeMetriX FragMetriX TestLicense Commercial License Education License Trial License Shop safe & secure Money-back guarantee