Block Search
A Block Search is one of the Search Methods which can be used in Slide2 for locating the Global Minimum safety factor for NON-CIRCULAR slip surfaces. In order to perform a Block Search, the Surface Options dialog must be configured as follows:
- Surface Type = Non-Circular
- Search Method = Block Search

Block Search Objects
A Block Search requires one or more Block Search objects to be defined by the user. The Block Search objects are used to generate the locations of slip surface vertices.
A Block Search object can be:
- a window (arbitrary quadrilateral)
- a single point
- a line (single line segment)
- a polyline (consisting of one or more line segments)
For details about creating Block Search Objects, see the Block Search Objects topic and the Block Search Polyline topic.
How Does the Block Search Work?
Slide2 performs the Block Search using:
- the Block Search objects created by the user
- the Block Search parameters entered in the Surface Options dialog
as described below.
Block Search Windows, Lines, Points
If your search uses Block Search Windows, Lines or Points:
- For EACH Block Search object, a single point is randomly generated (i.e. within a window object, or along a line object. If a point search object is used, then the exact point is used).
- The points generated by the search objects, are then joined by straight line segments.If more than two Block Search objects have been used, the points are first sorted by X-coordinate, to ensure that the slip surface is a kinematically admissible surface i.e. it does not reverse direction at any point.
- The Left and Right Projection Angles (entered in the Surface Options dialog, see below for details) are then used, to project the slip surface up to the ground surface, from the leftmost and rightmost points generated by the Block Search objects.
- Steps 1 to 3 are repeated, for the Number of Surfaces specified in the Surface Options dialog.
Block Search Polylines
A Block Search Polyline works differently than other Block Search objects. It allows you to easily perform a slip surface search which can follow a weak layer of material. For a Block Search Polyline:
- TWO points are randomly generated along the polyline.
- The slip surface is constrained to follow the polyline between the two points.
- If NO other search objects are defined (windows, lines or points):
- then the Left and Right Projection Angles are used to project the slip surface up to the ground surface, from the Left and Right points generated on the polyline.
- If you are using a Block Search Polyline with other search objects (window, line or point):
- the portion of the slip surface which is generated by the Block Search Polyline, will be incorporated into the overall surface, including the vertices generated by the other search objects.
- The Left and Right Projection Angles are used to project the slip surface up to the ground surface, from the leftmost and rightmost points generated by all Block Search objects.
For more information, see the Block Search Polyline topic.
Multiple Groups
The Multiple Groups option allows you to simultaneously search different regions of a model (e.g. multiple weak layers) using a single Block Search. This works as follows:
- Select the Multiple Groups checkbox in the Surface Options dialog.
- When you define a Block Search object (window, line, point or polyline) you will be able to assign a Group ID number to the object.
- When the analysis is run, the Block Search will be carried out independently for EACH GROUP of Block Search objects, according to the algorithm described above.
- For example, if you wanted to simultaneously search two (or more) weak layers, you could define a Block Search Polyline in EACH weak layer, and assign a different Group ID to each polyline.
- A group may consist of a single block search object, or multiple block search objects with the same Group ID number.
- The total number of surfaces specified for the Block Search is divided equally among the number of groups. For example, if Number of Surfaces = 5000, and two groups have been defined, then approximately 2500 surfaces will be generated for each group during the search.
Left and Right Projection Angles
The definition of the Left and Right Projection Angles used for the Block Search, is shown in the following figure.

Notes
- The Projection Angles can always be previewed using the refresh button in Surfaces Options dialog for Block Search.
- The angle measurement convention is degrees COUNTER-CLOCKWISE from the positive horizontal axis, for BOTH the Left and Right Projection Angles.
- If the Start Angle = End Angle for the Left or Right Projection Angles, then that exact angle will be used for the Left or Right Projection Angle, for ALL slip surfaces in a Block Search. (By default, the Start Angle = End Angle = 135 degrees for the Left Projection Angle, and the Start Angle = End Angle = 45 degrees for the Right Projection Angle).
- To specify a RANGE of possible Projection Angles, then specify a Start Angle and an End Angle, for the Left and / or Right Projection Angles. Slide2 will then randomly generate a Projection Angle within the specified range, for each slip surface in a Block Search.
- The counter-clockwise angle measurement convention means that the Start Angle must always be LESS than the End Angle.
- For a typical Block Search, the Start and End Angles should be within the following angular limits, in order to generate kinematically valid slip surfaces. This is illustrated in the following figure.
Left Projection Angle | Right Projection Angle | |
Minimum Start Angle | 95 | 5 |
Maximum End Angle | 175 | 85 |

However, sometimes it is necessary to search for slip surfaces which daylight into the slope face, and have a downward dip angle (for example, to follow a weak layer which dips downwards into the slope face). For such cases, the allowable Start and End angles are as follows:
Left Projection Angle | Right Projection Angle | |
Minimum Start Angle | 95 | – 85 |
Maximum End Angle | 265 | 85 |
- For a left-facing slope, a Maximum Angle = 265 degrees, can be specified for the Left Projection Angle. This is illustrated in the following figure, for a vertical slope face.
- For a right-facing slope, a Minimum Angle = – 85 degrees, can be specified for the Right Projection Angle. This represents the mirror image of the figure below.

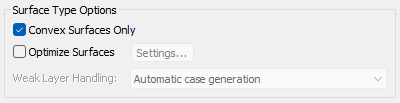
Convex Surfaces Only
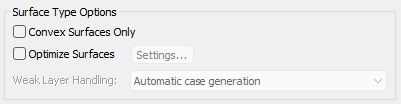
During the Block Search surface generation process, it is possible (depending on the number and relative placement of your Block Search objects) that NON-CONVEX slip surfaces may be generated – i.e. the EXTERNAL angle between any two adjacent line segments of a slip surface, is LESS THAN 180 degrees, as illustrated in the above diagram from the Surface Options dialog.
If you DO NOT want Slide2 to analyze such surfaces, then select the Convex Surfaces Only checkbox in the Surface Options dialog. In this case, during the Block Search surface generation process, only CONVEX surfaces will be accepted – i.e. the EXTERNAL angle between any two adjacent line segments of a slip surface is GREATER THAN (or equal to) 180 degrees. If a NON-CONVEX surface is generated, it will be discarded. Therefore only CONVEX surfaces will be analyzed.
Optimize Surfaces
A supplementary optimization can be applied to slip surfaces, after the initial analysis, in order to locate slip surfaces with an even lower factor of safety. See the Optimize Surfaces topic for details.
Surface Filter
See the Surface Options topic for details about the Minimum Elevation, Minimum Depth, Minimum Area, Minimum Weight slip surface filter options.
Random Number Generation
The generation of slip surfaces by the Block Search is based on the generation of random numbers. For the Block Search, random numbers are used to generate:
- Slip surface vertices within Block Search Windows
- Slip surface vertices along Block Search Polylines or Lines
- Slip surface Projection Angles, if a range is specified for the Left and/or Right Projection Angles
The method of generating random numbers is determined by the Random Numbers option in the Project Settings dialog. There are two options available, Random or Pseudo-Random. Pseudo Random generation uses a constant seed value to generate random numbers. For a given model, this will generate exactly the same slip surfaces each time the analysis is run, and therefore the results will be reproducible. Random generation uses a variable seed value. This will generate DIFFERENT surfaces each time the analysis is run, and therefore results will be different each time Compute is selected. For details about the Random and Pseudo Random options, see the Random Numbers topic.