Auto Grid
A slip center grid is used to generate the slip circles used in the critical surface search when the Surface Type = Circular, and the Search Method = Grid Search, in the Surface Options dialog. Each slip center in a grid represents the geometric center of a series of circles, determined according to the current Slope Limits or focus object, and the Radius Increment. This is described in the Grid Search topic.
The Auto Grid option in the Surfaces menu will automatically create a square grid of slip centers, positioned and sized according to the current Slope Limits. To create an Auto Grid:
- Select Auto Grid
 from the toolbar or the Surfaces menu.
 - You will see the Grid Spacing dialog. Enter the number of intervals in the X and Y directions (default is 20) and press OK.
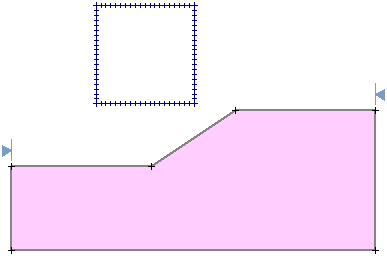
- The Auto Grid will appear above the slope, as shown in the figure below.
Example of Auto Grid

The location and size of the Auto Grid are determined from the current Slope Limits and are based on the optimum grid location for a typical slope. The critical surface slip center(s) will usually be located somewhere in this grid. However, it is important to note the following:
The Auto Grid option is intended as a shortcut and convenience for quickly generating a grid of slip centers. However, the position and size of a grid located using Auto Grid are not always the most suitable, especially for more complex slope geometries. The creation of the Auto Grid is based on relatively simple assumptions about the slope geometry. The user should not rely too much on Auto Grid, and is encouraged to position grids manually using the Add Grid option, once they are familiar with suitable grid locations for given slope geometries.
Tips
- Auto Grid always creates a square grid.
- An arbitrary rectangular grid can be created manually with the Add Grid option.
- The display of slip center locations within a grid can be turned on or off in the Display Options dialog.
- Grids can be deleted, moved or stretched (re-sized), using the options in the Edit sub-menu in the Surfaces menu, or by using convenient right-click options.