Groundwater Overview
Within the Slide2 program, Slide2 has the capability to carry out finite element groundwater seepage analysis for steady-state or transient flow conditions.
- The groundwater analysis engine in Slide2 is completely separate from the slope stability analysis engine. You may perform a groundwater analysis in Slide2, without necessarily performing a slope stability analysis.
- However, after a groundwater analysis is performed, the results (pore pressures), can be automatically utilized by the slope stability analysis engine in Slide2.
In order to use the Slide2 program for a groundwater analysis, the following general procedure is required.
PROJECT SETTINGS
In order to perform a groundwater seepage analysis, you must first define the groundwater project settings. You can choose steady-state analysis, transient analysis or both steady-state and transient.
- Select Project Settings
 from the toolbar or the Analysis menu.
 - Select the Groundwater tab in the dialog.
- For steady-state analysis, set the Groundwater Method = Steady State FEA (finite element analysis).
- For transient analysis, select the Advanced checkbox and select the Transient option. Then select the Transient page and enter the number of stages and the time at each stage.
- Select OK and the Slide2 toolbar will display an Analysis Mode option as described below.
If you have chosen both steady-state and transient analysis, the steady-state analysis results will define the initial groundwater conditions for the transient analysis.
GROUNDWATER ANALYSIS MODE
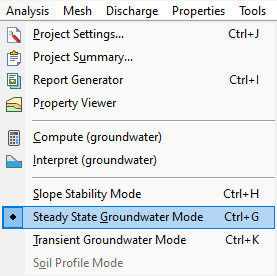
When you choose either steady-state or transient groundwater in Project Settings, you will notice an option in the Slide2 toolbar which allows you to switch between different analysis modes – Slope Stability, Steady State Groundwater or Transient Groundwater.
The Slope Stability mode allows you to define the elements of your model which are relevant to the slope stability analysis. The Groundwater modes (steady-state or transient) allow you to define the elements of your model which are relevant to the groundwater analysis.
When you switch between Slope Stability and Groundwater modes, you will notice that the menus and toolbars are automatically updated so that the appropriate modelling options are available. See the Groundwater Analysis Mode topic for details.
BOUNDARIES
The SAME boundaries are used in both the groundwater and slope stability analysis. However, the model boundaries can only be defined when the analysis mode = Slope Stability.
- You CANNOT create or edit the model boundaries, when analysis mode = Steady State Groundwater or Transient Groundwater.
- You MUST create the model boundaries, when analysis mode = Slope Stability.
See the topics in the Boundaries section of this Help system, for full details about defining and editing model boundaries in Slide2.
MESHING
The groundwater analysis in Slide2 is a finite element analysis, and therefore a finite element mesh is required in order to solve the problem.
To create the finite element mesh:
- You can do this with a single mouse click, by selecting the Discretize and Mesh
 option. This will automatically create a graded finite element mesh within your model boundaries.
 - If the mesh requires customization, several options are available in the Mesh menu, which allow you to customize the total number of finite elements and the element type (in the Mesh Setup option), customize the discretization of the model boundaries (Custom Discretize option) and more advanced mesh refinement options (see the Mesh Refinement topic).
GROUNDWATER BOUNDARY CONDITIONS
Once the finite element mesh is satisfactory, you must then define the boundary conditions of the groundwater problem you wish to solve. This is done with the Set Boundary Conditions  option or Set Transient Boundary Conditions option, which allow you to define the groundwater boundary conditions (e.g. head, pressure, infiltration, flow) along the model boundaries.
GROUNDWATER MATERIAL PROPERTIES
The permeability (hydraulic conductivity) characteristics of each material are defined with the Define Hydraulic Properties  option. You may define a saturated permeability for each material, and various models are available for defining the unsaturated permeability.
GROUNDWATER COMPUTE
When all of your groundwater boundary conditions and material properties have been defined, then you are ready to run the groundwater seepage analysis. To run the analysis:
- Select the Compute (Groundwater)
 option from the toolbar or the Analysis menu. This will run the Slide2 groundwater analysis engine.
 - You will see a Compute dialog while the analysis is running. When the analysis is finished, you will be returned to the Slide2 Model program.
After you have computed the groundwater analysis, you should view the results of the groundwater analysis, by selecting the Interpret Groundwater option.
If the groundwater analysis results are satisfactory, then you can return to the Slide2 Model program, switch the Analysis Mode = Slope Stability, and proceed with your slope stability analysis.
When you select the slope stability Compute option, the slope stability analysis will automatically use the pore pressures calculated from the groundwater analysis.
Groundwater Interpret
The Groundwater analysis results are viewed in the Slide2 Interpret program, and can be viewed simultaneously with the slope stability analysis results. For information, see the Groundwater Results Overview topic.
After you perform a groundwater analysis with Slide2, it is always a good idea to first use the Interpret program, to check that the groundwater analysis results are reasonable. If not, then you should go back to the Slide2 Model program, and check that you have defined your model correctly.