Assign Materials Using Cutting Plane
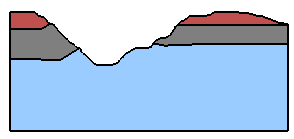
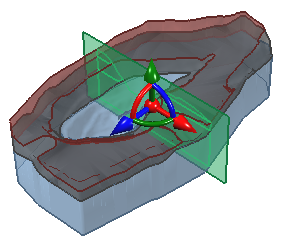
The Assign Materials Using Cutting Plane option is an alternative method of assigning materials. It can be useful for complex 3D models in which the geometry makes it difficult to visualize and identify all material regions. Using a moveable 2D cutting plane, you can click on regions in the 2D section plane to assign materials to the 3D model. The cutting plane can be moved or rotated to any location or orientation.
Assign Using Cutting Plane option


- Select Assign Materials Using Cutting Plane
 from the toolbar or the Materials menu.
 - You will see a dialog with the current Cutting Plane section displayed at the bottom right of the dialog. This shows the material boundaries and material assignments on a 2D section of the model.
- To assign a material - select a material from the list at the left of the dialog and click in a material zone in the Cutting Plane view.
- To change the location of the Cutting Plane - use the Plane Location slider control in the dialog, or use the Freehand Manipulation tool in one of the model viewports. This will move the cutting plane in a direction normal to the current orientation.
- To change the orientation of the Cutting Plane - use the Plane Orientation buttons (XZ, XY, YZ) in the dialog, or use the Freehand Manipulation tool and drag the rotation handles.
- Materials Used in Model - this checkbox will only display materials which are currently assigned to the model in the material list.
- When you are finished assigning materials, select OK to save the assignments.