Slide3 Overview
This page provides an overview and summary of the main steps required to create a Slide3 model and analyze the results.
Slide3 is designed to be as straightforward as possible to use, for a fully 3D numerical analysis program. The most complex aspect of modelling is Geometry creation and editing. Most other features are quick to learn and interpret, once you have mastered the Geometry aspect of the program.
The general workflow is as follows:
- Project Settings (Units, Analysis Methods, etc.)
- Geometry (Add Geometry, Set External, etc.)
- Groundwater
- Define/Assign Materials
- Support
- Loads
- Surface type/Search Method (Slope Limits)
- Compute
- Results
Project Settings
 Select Analysis > Project Settings
The Project Settings dialog is the starting point for all Slide3 models, and allows you to configure the main settings for your analysis.
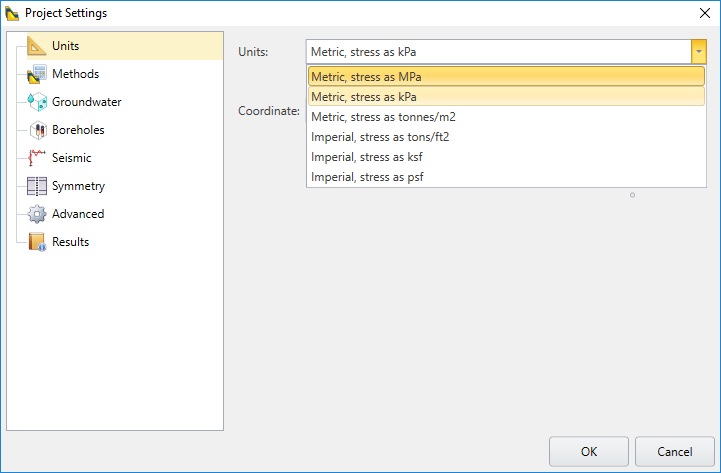
Units
Slide3 offers several choices of metric or imperial units. The units should always be selected before any other modelling is carried out.
Analysis Methods
The Analysis Methods can be selected at any time. Available methods are Bishop, Janbu, Spencer and GLE. At least one method must always be selected.

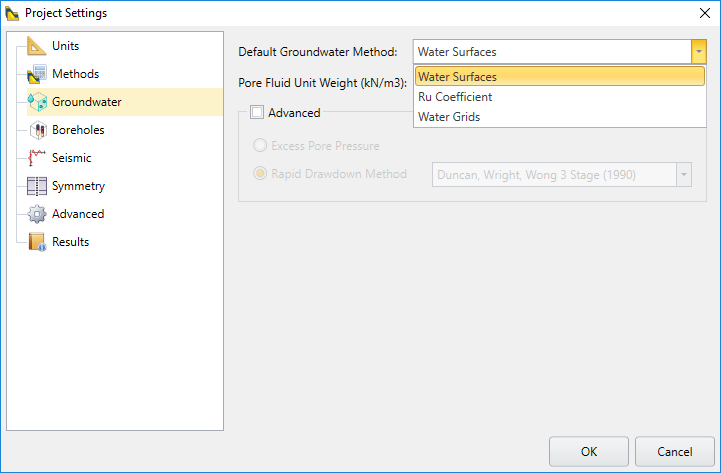
Groundwater
For pore pressure modelling, Groundwater methods include:
- Water Surfaces (e.g. water table, piezo surface)
- Ru coefficients
- Water Grids (total head, pressure head, pore pressure)
Advanced groundwater options include:
- Excess Pore Pressure
- Rapid Drawdown Methods
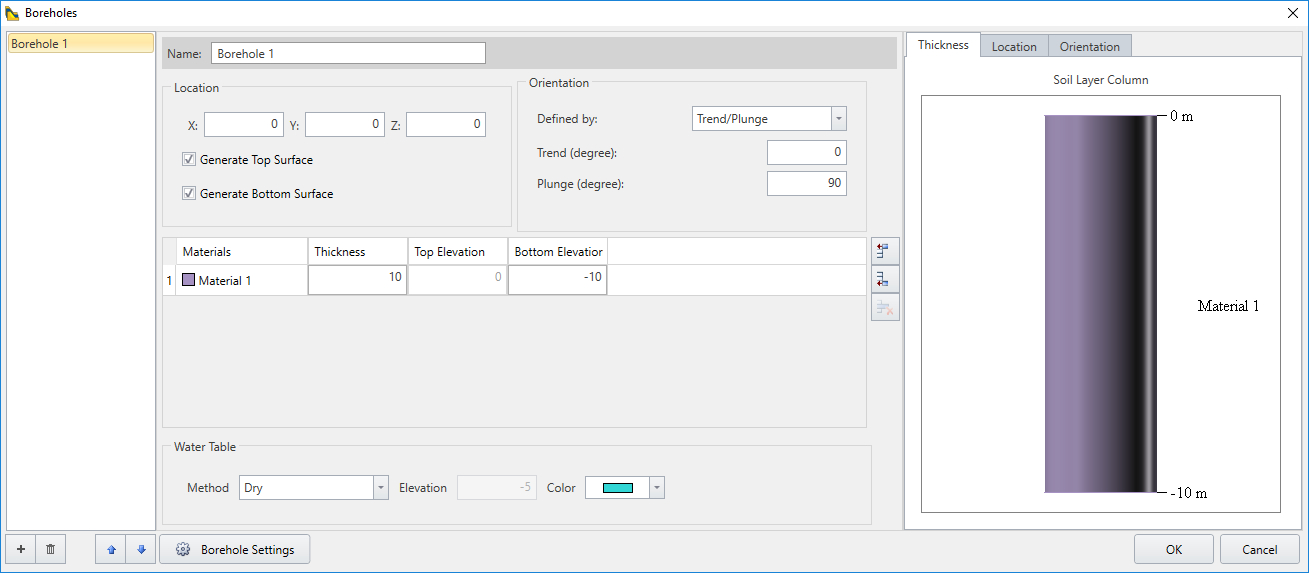
Boreholes
If your Geometry is defined from borehole data, the Boreholes tab in Project Settings allows you to choose the interpolation method for surface reconstruction.
Seismic
The Seismic tab in Project Settings allows you to select advanced options including:
- Compute Ky for all failure surfaces
- Staged Pseudostatic strength
Results
The Results tab in Project Settings allows you to configure some settings related to data output.
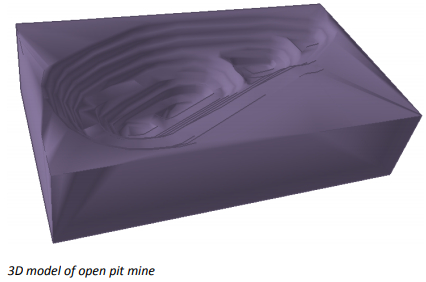
Geometry
Geometry is by far the most complicated aspect of creating a Slide3 model. Slide3 models can range from very simple 2D extrusions to very complex 3D geometry requiring many steps to create.
Geometry can be created entirely within Slide3 and/or imported from a variety of file formats. Boundary surfaces can be interpolated from borehole data using the Borehole Manager.
A wide array of geometry modelling tools allows you to create any complexity of 3D slope model with any number of material regions. Since the steps required to create Slide3 model geometry will vary greatly depending on the model and its complexity, and there are multiple ways to achieve tasks, it is impossible to provide a simple checklist of required steps for geometry creation that apply to all models.
Geometry Modelling
A summary of the main geometry creation and editing tools is given below. We can add geometry using the following tools:
- Import/Export various file formats
- Reconstruct Surface from Table values entered by the user
- Adding External Geometry
- Adding Polylines
- Adding 3D Primitive Geometry, such as boxes, cylinders or cones
- Create Surfaces from Selected geometry
- Extract Bounding Curve from surfaces
- Planar Section Tool to extract polylines from geometry using a cutting plane
We can also edit geometry shape by applying the following tools:
- Extrude/Sweep/Loft operations to add depth dimensions
- Transform operations such as translate and rotate
- 3D Boolean operations to combine, remove or divide geometry
For details see the Slide3 help documentation and tutorials.
External Volume
One mandatory step which is common to ALL Slide3 models is the necessity to define an External volume from your model geometry. This defines the total extent of your slope. There are different options for defining the External volume:
- Set as External
- Create External Box
- Create External from Surface
- Add to External
Materials
 Select Materials > Define Materials
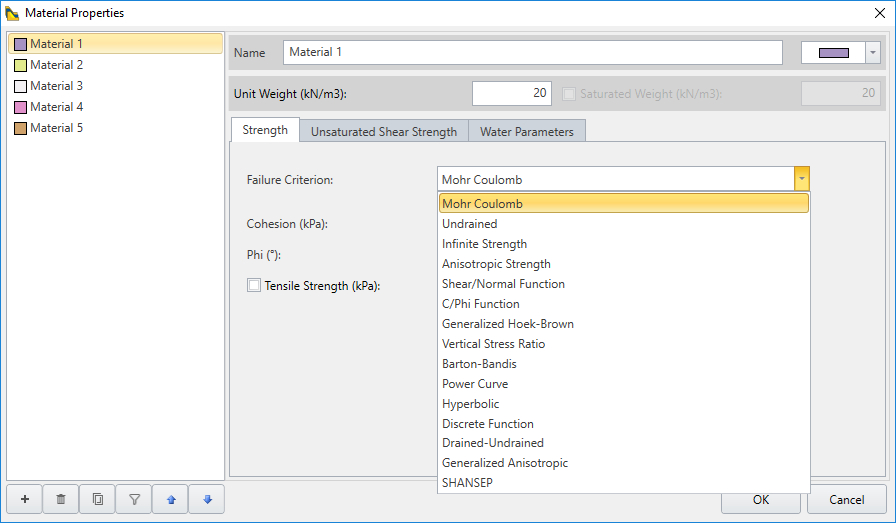
Slide3 offers 18 different strength modelling options for soil and rock, including:
- Mohr-Coulomb
- Undrained
- Infinite Strength
- Anisotropic Strength
- Shear/Normal Function
- C/Phi Function
- Generalized Hoek-Brown
- Vertical Stress Ratio
- Barton-Bandis
- Power Curve
- Hyperbolic
- Discrete Function
- Drained-Undrained
- Generalized Anisotropic
- SHANSEP
- Block Model
- Undrained/Vertical Stress Function
- CNI Rock Mass
After defining material properties, you must assign them to the different material zones in your model, using the Assign dialog or the sidebar panel.
Groundwater
Groundwater Methods in Slide3 include:
- Water Surfaces (water table or piezo surfaces)
- Ru Coefficients
- Water Grids
If the Groundwater Method = Water Surfaces, then you can define a Water Table or Piezometric Surfaces to define pore pressure.

![]() Select Groundwater > Add Water Surface
Select Groundwater > Add Water Surface
Water Surfaces can be defined by assigning an existing geometric surface, or by entering XYZ coordinates and interpolating a surface. If a Water Table elevation is above the ground surface, ponded water is automatically accounted for in the stability calculation.
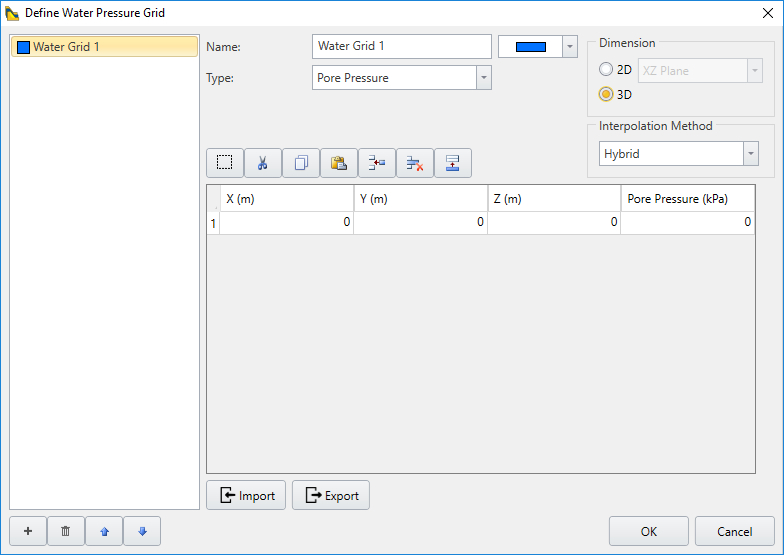
![]() Select Groundwater > Add Water Grid
Select Groundwater > Add Water Grid
If the Groundwater Method = Water Grids, then you can enter XYZ coordinates defining a grid of pore pressure, pressure head or total head. Interpolation is used to determine pore pressure at any location. Pore pressure grids can be imported into Slide3 from an RS3 finite element analysis or another source.
The Groundwater Method can be assigned independently for individual materials, giving a great deal of flexibility in defining pore pressure conditions.
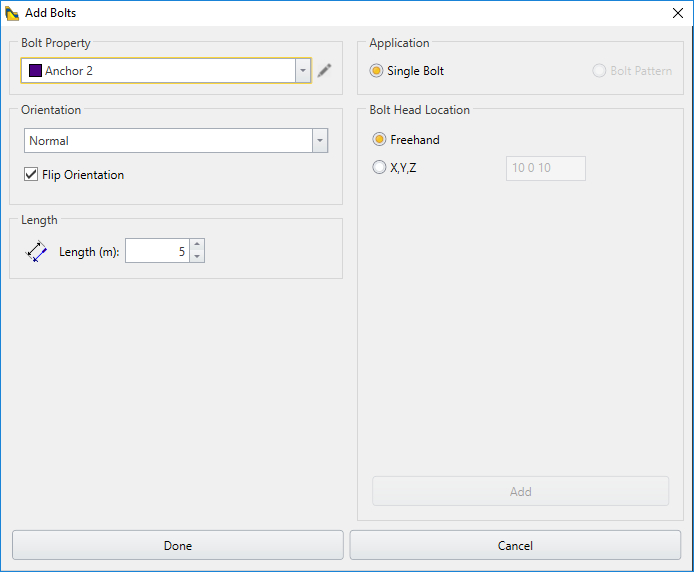
Support
![]()
Support types which can be modelled in Slide3 include:
- End Anchored
- Grouted Tieback
- Grouted Tieback (with Friction)
- Soil Nail
- Pile/Micro Pile
- RSPile
- Geosynthetic
- Launched Soil Nail
- Helical Anchor
- User-Defined
 Select Support > Define Support
The Support Properties dialog looks as follows:
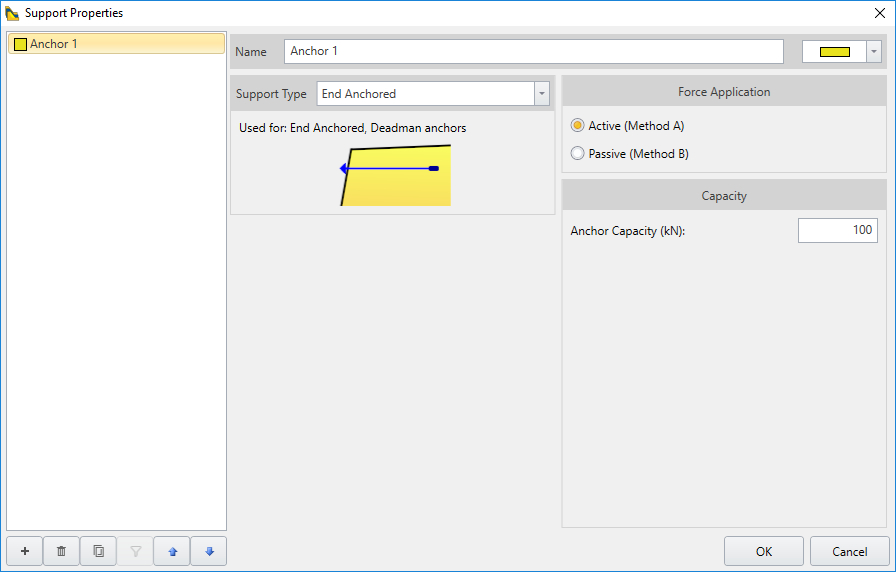
 Select Support > Add Support to add support to the model
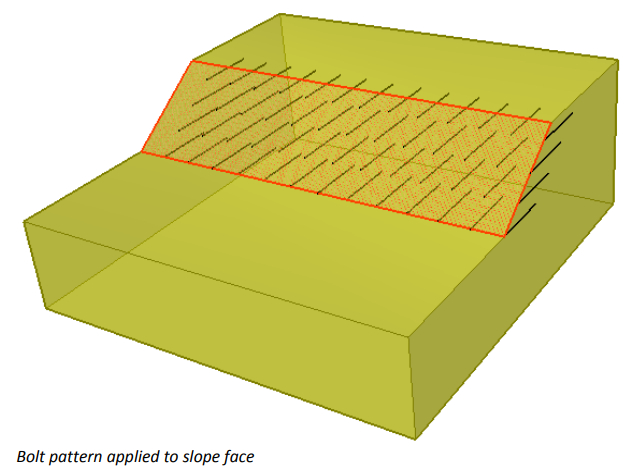
Support can be applied at any orientation in 3‐dimension, either as individual bolts or patterns. Orientation options include normal, trend/plunge or vector.
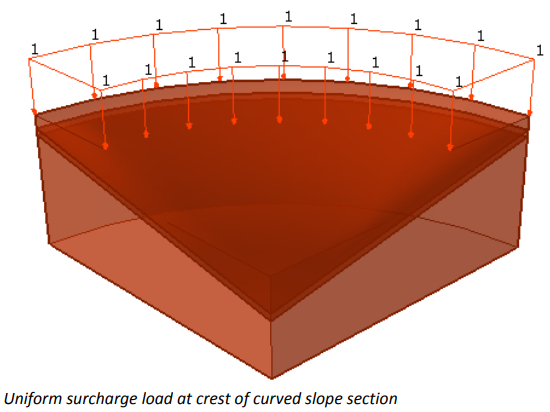
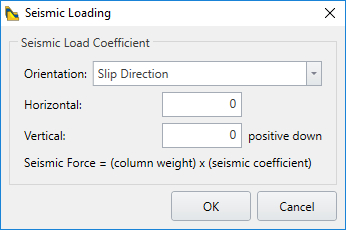
Loads
Loading options in Slide3 include:
- Point Loads
- Distributed Loads
- Seismic Loads
Loads can be applied at any 3D orientation or location.
Slip Surfaces
The Slip Surface Options dialog gives a variety of slip surface shapes and search options.
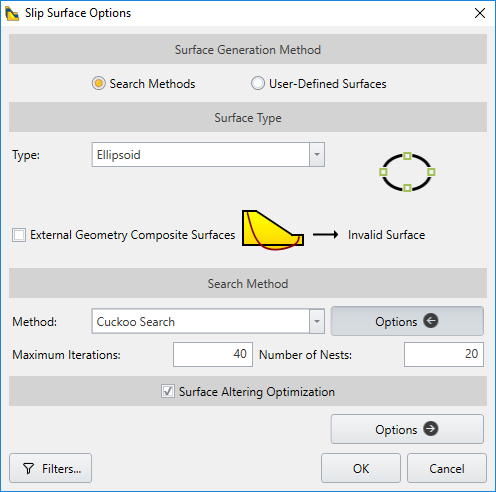
The 3D slip surface shapes which can be generated are:
- Spherical
- Ellipsoidal
- Spline Surface
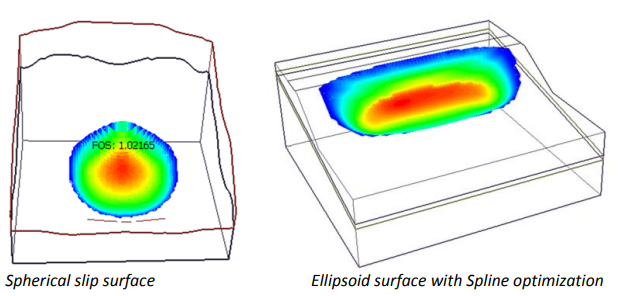
When using Spherical or Ellipsoid surfaces, the initial search is constrained to a spherical or ellipsoid shape. An additional Surface Altering Optimization can be applied to search for a Spline surface with a lower safety factor.
Search Methods
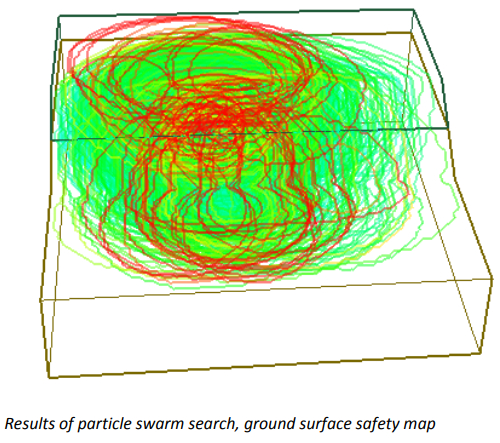
Search methods include advanced methods optimized for speed and efficiency (Cuckoo and Particle Swarm), as well as more traditional methods (e.g. Grid Search and Auto Refine):
- Cuckoo Search
- Particle Swarm
- Grid Search
- Auto Refine
- Intelligent Search
- User-Defined Surfaces
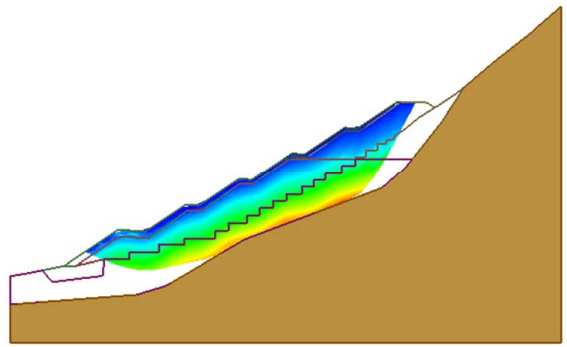
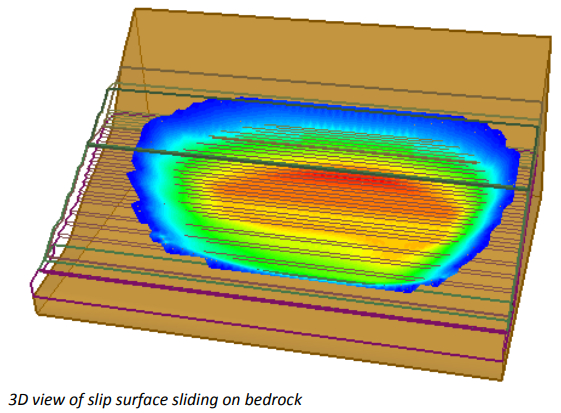
Slip surfaces can conform to the shape of bedrock using an Infinite Strength material region (see the following figure). The 3D failure direction is automatically determined during the analysis; it is not necessary for the user to specify a failure direction.
The default search options are highly automated. For a typical initial analysis, the default settings are:
- Surface Type = Ellipse
- Search Method = Cuckoo Search
- Surface Altering Optimization = ON
Using the default settings, the user can run an analysis and obtain results without changing the settings. Of course, the user should become familiar with the available search methods, and always try different options to ensure that critical slip surface(s) are located.
Search limits
To narrow down the search areas of the model, the Slope Limits option can be used to define inclusion or exclusion zones to focus the search on particular regions of the slope.
The default search limits include the entire External Volume. Slope limits do not have to be defined by the user unless you wish to customize the search area on the slope.
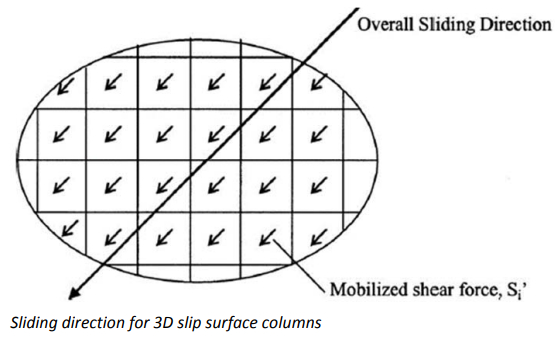
One advantage of the 3D slope stability analysis in Slide3 is that the user does not have to specify a sliding direction. The sliding direction is an outcome of the limit equilibrium analysis and is automatically computed for each slip surface.
See the Slide3 Theory Overview for more information.
Compute
![]() Select Analysis > Compute
Select Analysis > Compute
The Compute dialog will indicate the progress of the analysis, for each selected analysis method and search method.
If the Compute option is disabled, then the model is incomplete and cannot be computed. For example, if the External volume is undefined.
Results

After Compute has completed, to view analysis results select the Results tab.
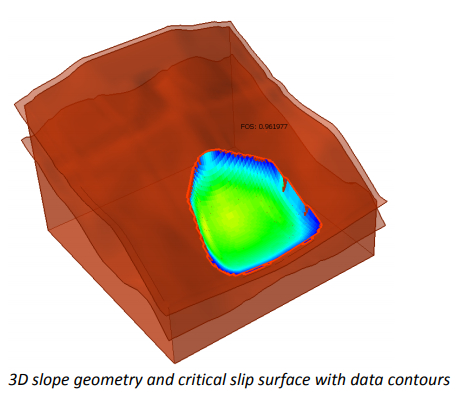
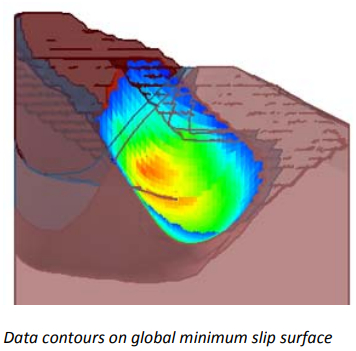
Data interpretation options include:
- View 3D global minimum slip surface
- View contours of analysis data on slip surface (e.g. stress, strength, pore pressure)
- View all slip surfaces
- View safety maps on the surface of the model or on cutting planes through your model
- View support forces
- View column forces
The Data on (XY/YZ/XZ) Plane options allow you to view safety factor, pore pressure and other analysis data on cutting planes through the model. You can sweep the cutting plane along an axis to show the data at different locations. The results displayed represent data from all slip surfaces generated throughout the model volume.

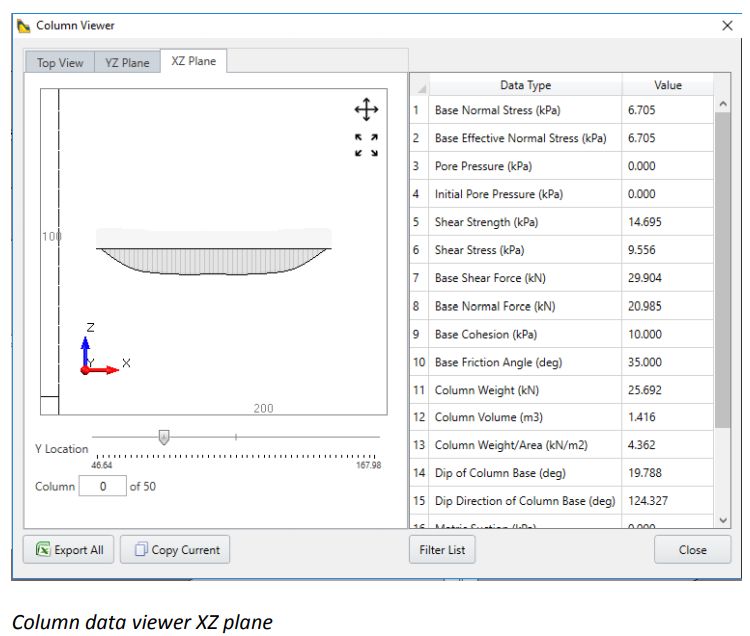
The Column Viewer option allows you to view analysis data for individual columns, as selected in the XY, YZ or XZ planes.