Import Image
The Import Image option allows you to add an image file (.bmp, .jpg or .gif) to the Plan View, to use as a drawing guide or to customize screen captures. For example:
- Add an image of a model at a particular scale, and use it as a drawing guide to graphically add boundaries or other geometry.
- Add a company logo or other bitmap image in order to customize output for presentations and reports.
To add an image to the Plan View:
- Select Import Image
 from the Import sub-menu of the File menu.
 - If you get the warning message with "Unable to load picture file", check the support image file type. Settle3 supports following file types: *.bmp, *.jpg, *.gif.
- You will see the Import Image Wizard dialog:
- Step 1: Select the Browse button and choose the image file you would like to import (.bmp, .jpg or .gif files can be imported).
- Step 2: (Optional) You can select Scale Image to specify the size and location of the image (see below for further information).
- Step 3: You can choose display options for the image (e.g. transparency).
- The image will be added to the view. If you used the Scale Image option, the size and location of the image are determined by the coordinates you specified. If you did NOT use Scale Image, then the image will be centered in the view, and you can re-size or scale the image at a later time.
After an Image has been added, it can be moved, re-sized, formatted or deleted. See the Edit Tools Overview for more information.
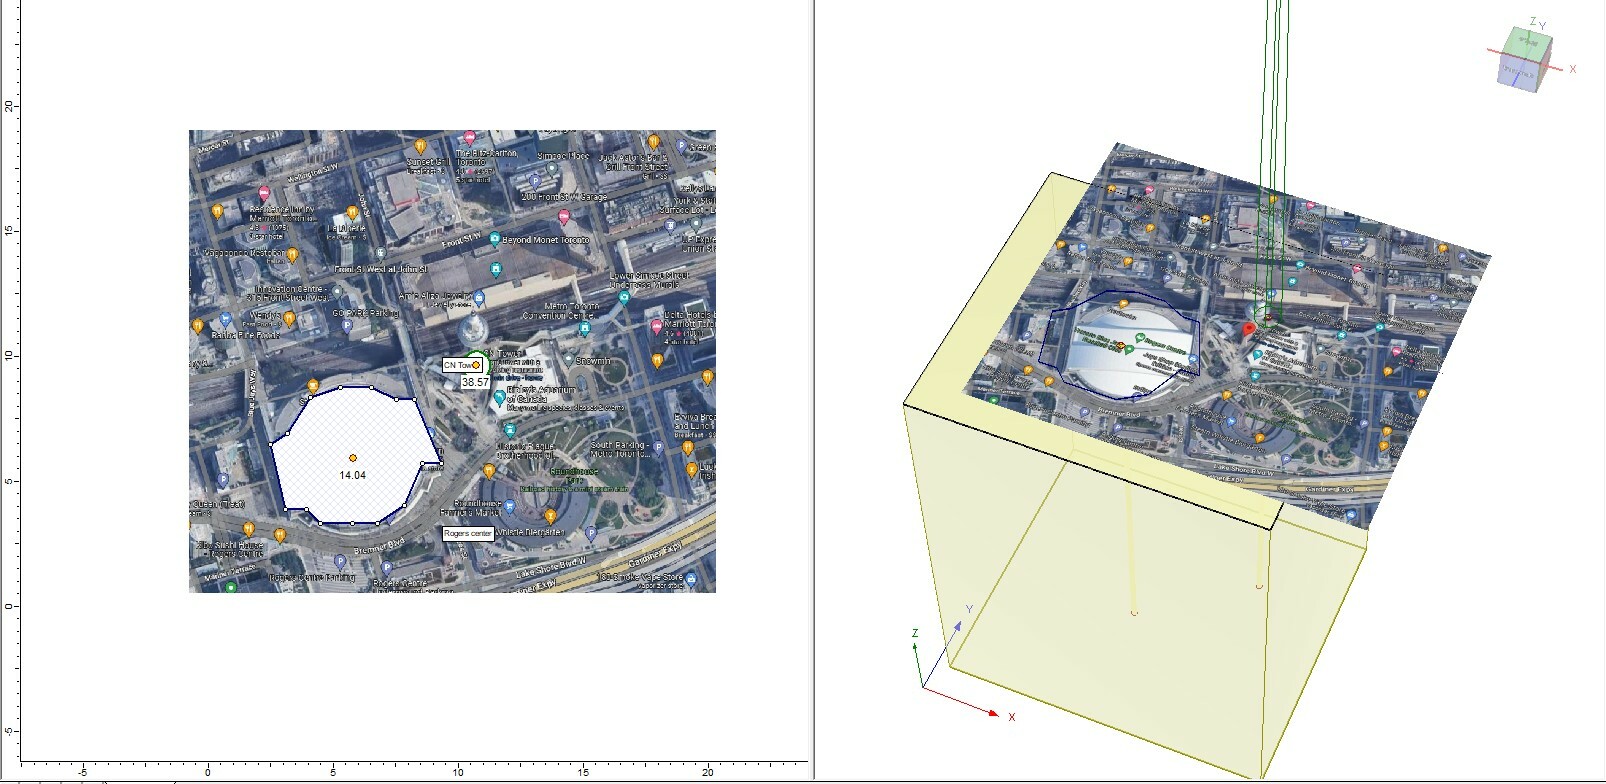
Import the image to 3D
The imported image can be copied over to 3D view. After importing the image and applying loads, right click on the image and select "Create 3D Copy". You'll be able to see the imported image to the 3D view. You can freely scale the image or move the image in 3D CAD view by selecting the image. Below is an example of copied image over to the 3D view.
Scale Image
The Scale Image option allows you to specify the exact size and location of an image on the Plan View. Scale Image is available when you initially add an image, or from the right-click menu after an image has been added. See the Scale Image topic for details.
Resize Image
Images can also be graphically resized. If you left-click on an image, the control points on the image will be highlighted and you can click and drag them to resize the image.
- Images can also be imported using the Add Tool > Image option in the Tools menu. This is equivalent to using the Import Image option in the File menu. In either case, the image is considered a drawing tool, and can be edited using the drawing tool editing options.
- Imported image files are not saved directly in the Settle3 file. Instead, the filename path where the image is currently stored is saved. If you delete, rename or move the image file from its original folder on your computer, Settle3 will not be able to find the file, and it will not be displayed.