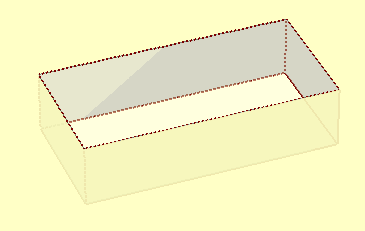
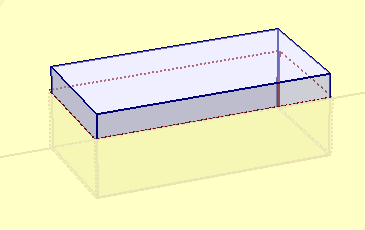
Add Excavation
Excavations can be defined with the Add Excavation option. An excavation is defined as a polygon in the Plan View, and represents the removal of material to a specified depth. Loading can be applied within excavations, and both loading and excavation (depth) can be staged.
IMPORTANT NOTE:
- Excavations in Settle3 are only intended to model the unloading effect of the removed material.
- The true 3-dimensional stress and displacement distribution due to excavation is NOT computed.
- The true 3-dimensional groundwater (pore pressure) distribution due to excavation is NOT computed. However, if the material is excavated below the water table, the water table is dropped locally within the excavation. See the Excavations and Groundwater topic for more information.
In most cases, it is expected that loading will be applied within excavations. Therefore the main purpose of defining an excavation in Settle3 is to accurately model the net loading at some depth below ground surface within an excavated area.
To add an excavation:
- Select Loads > Excavation

- In the Plan View, enter the vertices of the excavation as described in Entering Coordinates.
- An excavation polygon must be closed. To close the excavation boundary, after all vertices are entered, right-click and select Close, or you can type c and Enter in the prompt line. This automatically and correctly closes the polygon, and saves you the trouble of having to re-enter the first vertex to complete the boundary. If the Snap option is activated, you can also close a polygon by snapping to the first vertex after all other vertices are entered.
- After the polygon is closed, you will see the Define Excavation dialog. Enter the following information:
- Excavation Properties (depth/bottom elevation, staging information)
- Load Properties (magnitude, staging information)
- When you are finished entering the excavation/load information, select OK. The excavation/load will be added to the model, and displayed in both the Plan View and 3D View.
See below for details about the input parameters.

The parameters which define an excavation/load are described below.
Excavation Properties
- The excavation Depth / Bottom Elevation must be specified. The Depth is measured from the ground surface and is entered as a positive number.
- If your model uses multiple stages, the Installation Stage of the excavation can be selected. See below for more information about staging.
- The Variable option enables you to define different elevations for each vertex, making it possible to create excavation with non-horizontal bases. Additionally, advanced staging allows for different excavation bases to be applied at each stage. Applying loads at the base of excavation will apply loads with different elevation at the vertices. Refer to Add Polygonal Load variable elevation / depth for more information on loads.
Loading Properties
Loading can be applied within excavations, by selecting the Add Load to Bottom of Excavation checkbox in the Define Excavation dialog, and entering the load magnitude.
- This will automatically apply a uniform load over the entire area of the excavation, at the specified depth of the excavation.
- If your model uses multiple stages, the Installation Stage of the load can be selected. See below for more information about staging.
This is the recommended method of applying loading within an excavation, if you want to apply a uniform load to the entire area of the excavation.

- You can also apply loading within excavations using the Add Load options (e.g. Add Rectangular Load, Add Polygonal Load), and superimposing the load and excavation at the same depth. However, if you only need to apply a uniform load to an excavation, then it is simpler to use the Add Load to Bottom of Excavation checkbox, as described above.
- If you want to apply a variable (non-uniform) load within an excavation, or you want to apply a load to only part of the excavation area, then you must use the Add Load options (e.g. Add Rectangular Load, Add Polygonal Load), this cannot be done within the Define Excavation dialog. In this case, you must be careful to apply the load at the correct depth(s) / elevation(s).
Excavation / Load Staging
If your model uses multiple stages, the installation stage of the excavation and load can be specified. The excavation depth and/or load magnitude can be staged using the Advanced Staging option.
- Select the Advanced Staging checkbox. The dialog will expand, allowing you to enter the Excavation Depth and Load Factor (if applicable) for each stage.
- The Excavation Depth can be staged by entering the excavation depth at each stage. The depth is entered as a positive number.
- The Load Factor is a multiplying factor for the Load Magnitude, and is only applicable if you are applying a load within the excavation. For example:
- If you want to double the load magnitude at a given stage, enter Load Factor = 2 for that stage.
- If the load does not exist at a given stage, enter Load Factor = 0.
- If you want the original load magnitude, enter Load Factor = 1.
Installation Stage
If you wish to apply the excavation or load at a particular stage of a multi-stage model, then select the Installation Stage for the excavation and the load. The excavation and load can be applied at different stages.
Advanced Staging
For more complex excavation/load staging, the Advanced Staging option allows you to stage the excavation depth and/or load magnitude. To use the Advanced Staging option:
If your excavation/load is staged, it is a good idea to select the Stage Tabs, after adding the excavation to check that the excavation/load is applied at the correct stage(s), and that the magnitudes and depths are correct. If not, then edit the excavation properties, and make sure that the correct values are applied at the correct stages.
Excavations and Groundwater
For information on how pore water pressures are calculated when an excavation is added, see the Excavations and Groundwater help topic.
Excavations and Section Creator
When you use an excavation with the Section Creator, the layers under the excavation needs to be consistent throughout the excavated region. For instance, if one of the vertices of the excavation has only 2 layers while the other vertex has has 3 layers, Settle3 will not be able to calculate the effective volume of soil weight removed.