Import of GCP co-ordinates / CRS transformation
The co-ordinates (E/N/H or latitude/longitude/altitude) of the GCPs (Full Reference mode and Single Point mode) can be loaded from a “.txt” file or other text based files (e.g. “.csv”, “.prt”, “.dat”). The format has to be defined correctly during the import process. Examples:
- Point – Comma
XX.XXX,YY.YYY,ZZ.ZZZ - Comma – Semicolon
XX,XXX;YY,YYY;ZZ,ZZZ - Point – Space
XX.XXX YY.YYY ZZ.ZZZ - Co-ordinates:
Easting / Northing / Elevation
9453674.75 456235.21 248.45
9452978.18 456576.89 223.15
9458763.65 456832.76 287.83 - Point name and co-ordinates:
GCP_Name / Easting / Northing / Elevation
GCP1 9453674.75 456235.21 248.45
GCP2 9452978.18 456576.89 223.15
GCP3 9458763.65 456832.76 287.83
Standard operating procedure for a Generic co-ordinate import
- Click on the “Load GCP from Text File” button.
- A dialog window (Figure 29) appears requiring following inputs:
- Character encoding
- Used separator
- Data classification (E/N/H and name or latitude/longitude/altitude and name)
- Select the Source co-ordinate reference system Generic from the pull-down menu
- Select the unit from the pull-down menu for undefined source co-ordinate reference systems. Available units are (millimeter [mm], meter [m], inch [in], international foot [ft], US survey foot [ft])
- Click the “OK” button to import the co-ordinates
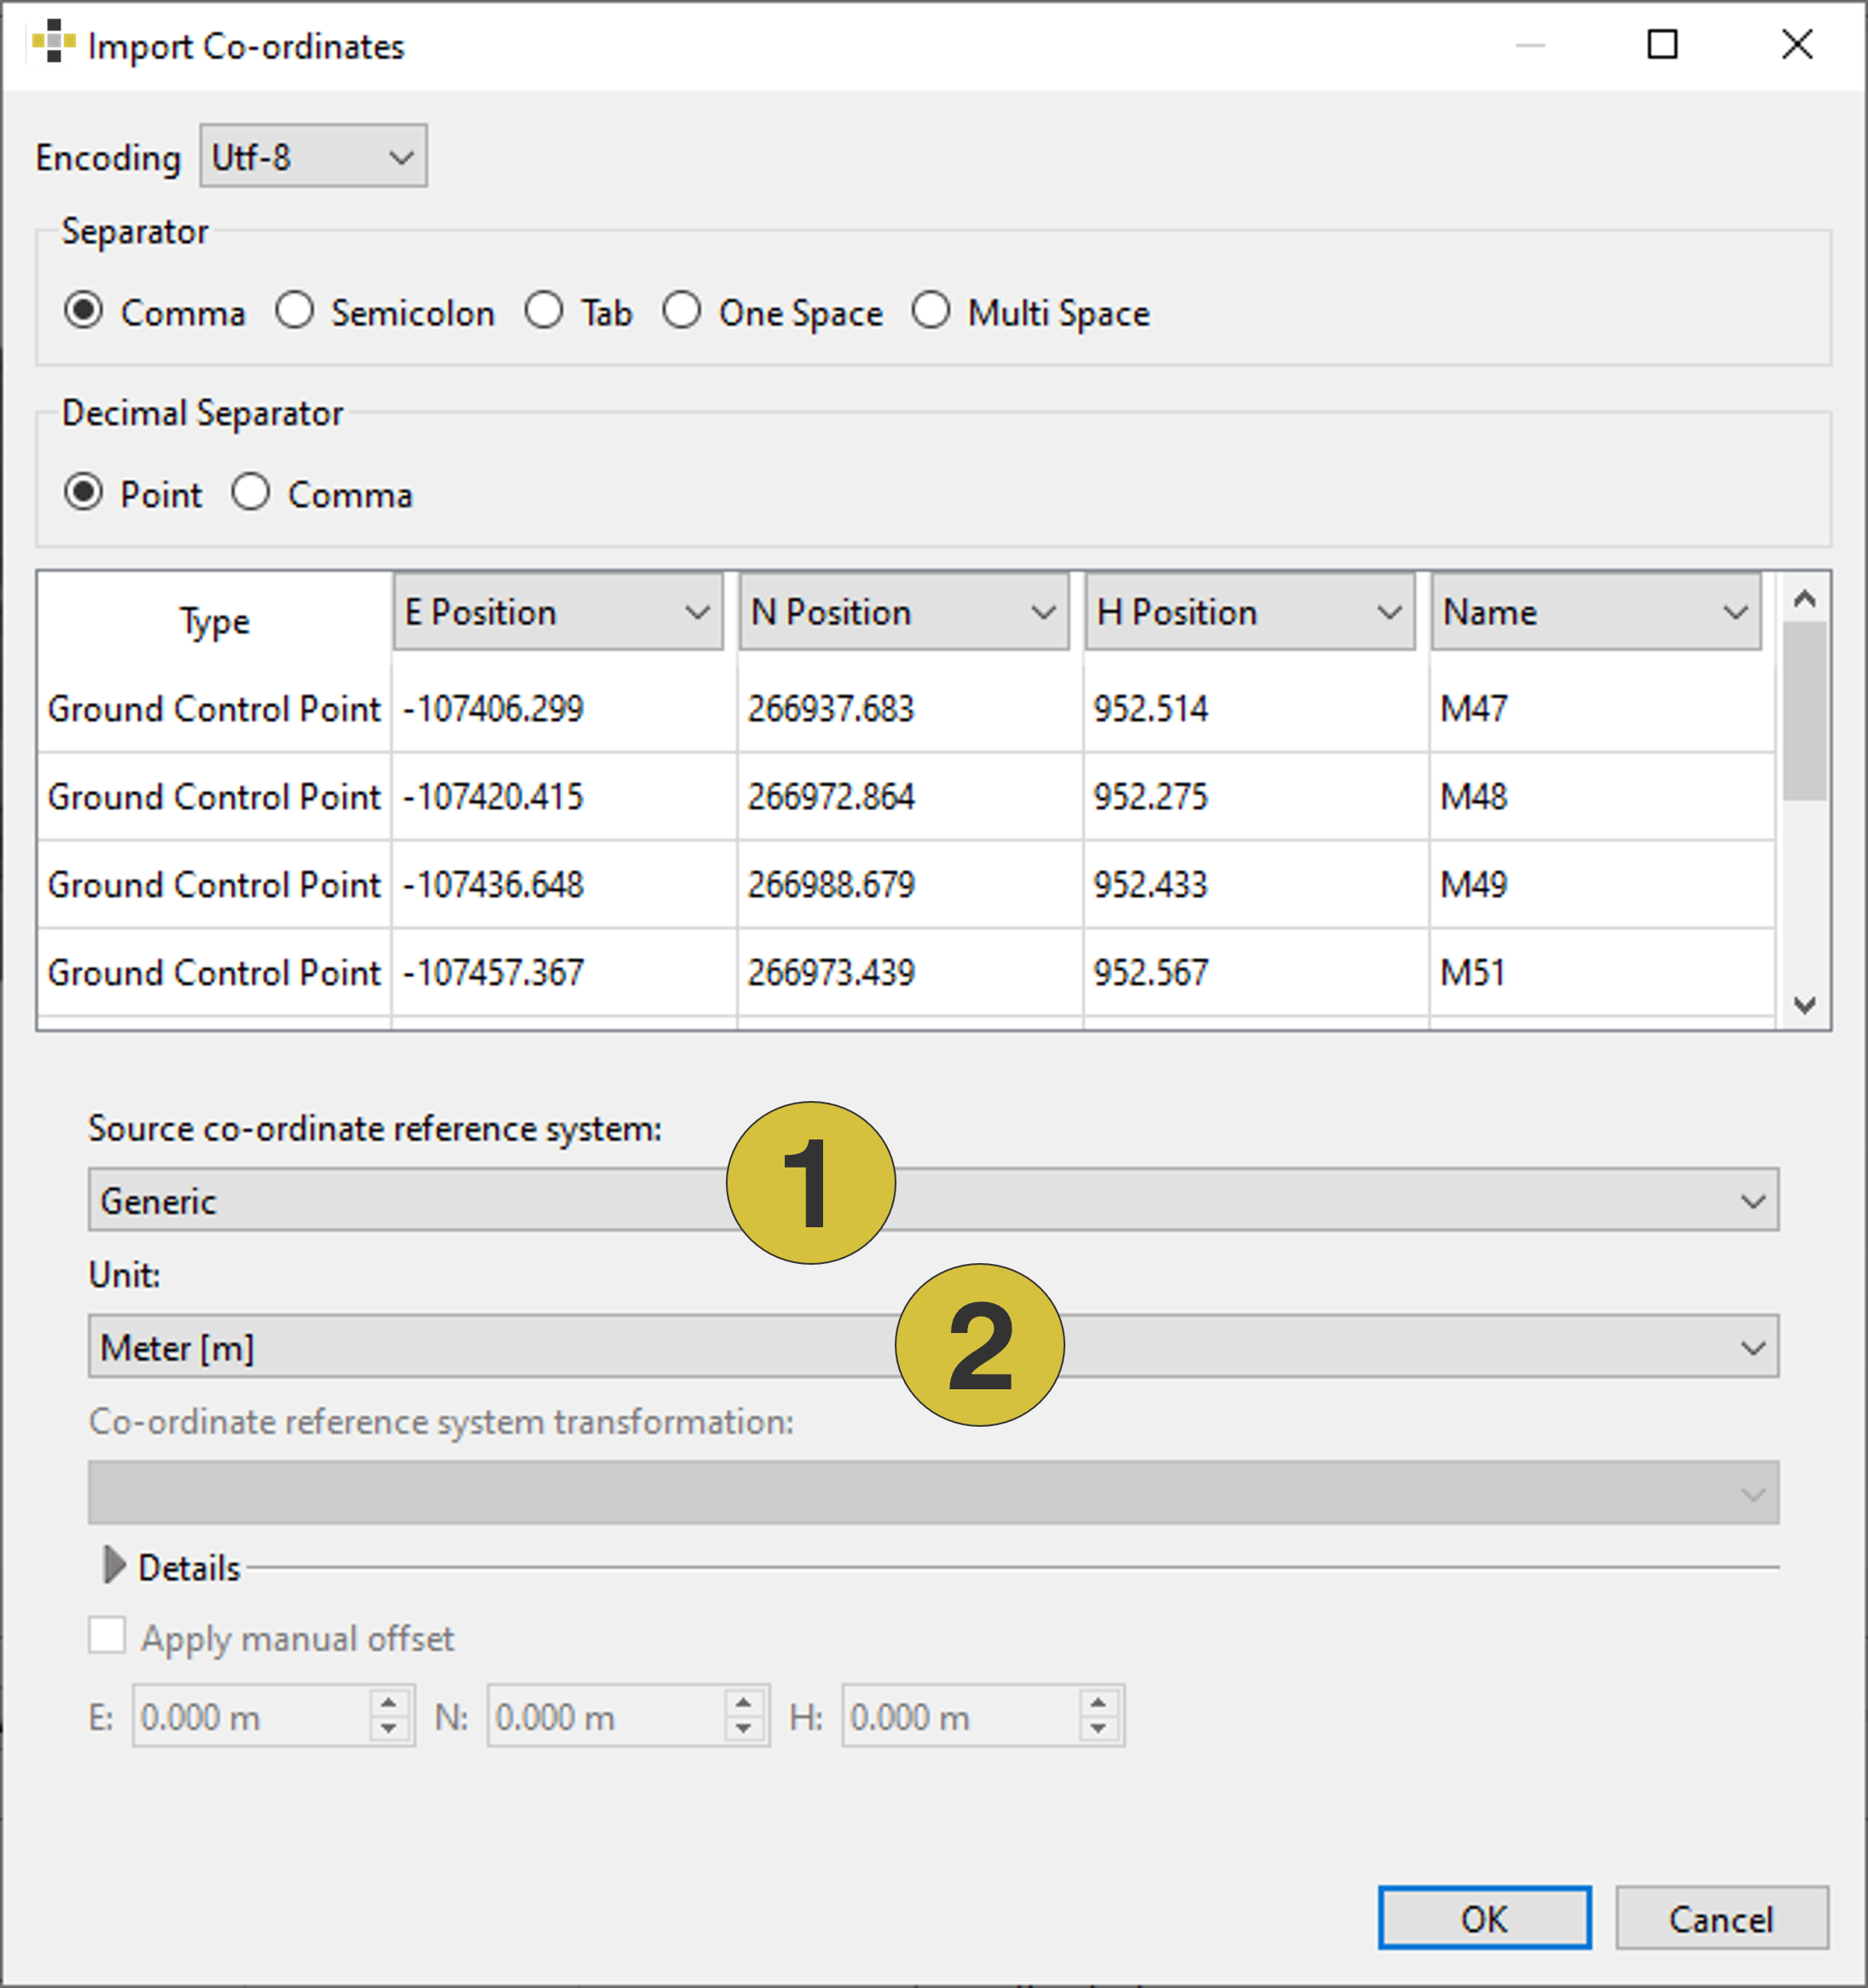
- Source co-ordinate reference system Generic
- Desired unit
Standard operating procedure for a specific co-ordinate system import
- Click on the “Load GCP from Text File” button.
- A dialog window (Figure 29) appears requiring following inputs:
- Character encoding
- Used separator
- Data classification (E/N/H and name or latitude/longitude/altitude and name)
- Select the Source co-ordinate reference system from the pull-down menu Browse Co-ordinate System” and define the system in the Select Co-ordinate Reference System dialog (horizontal and vertical system).
- Select “Same as Source” from the pull-down menu for the Destination co-ordinate reference system
- Optional! Apply a manual, user-defined offset to the transformation by enabling the “Apply Offset” checkbox. Then enter the corresponding values for E, N, and H in the provided fields.
- Confirm the import by selecting the “Apply” button.
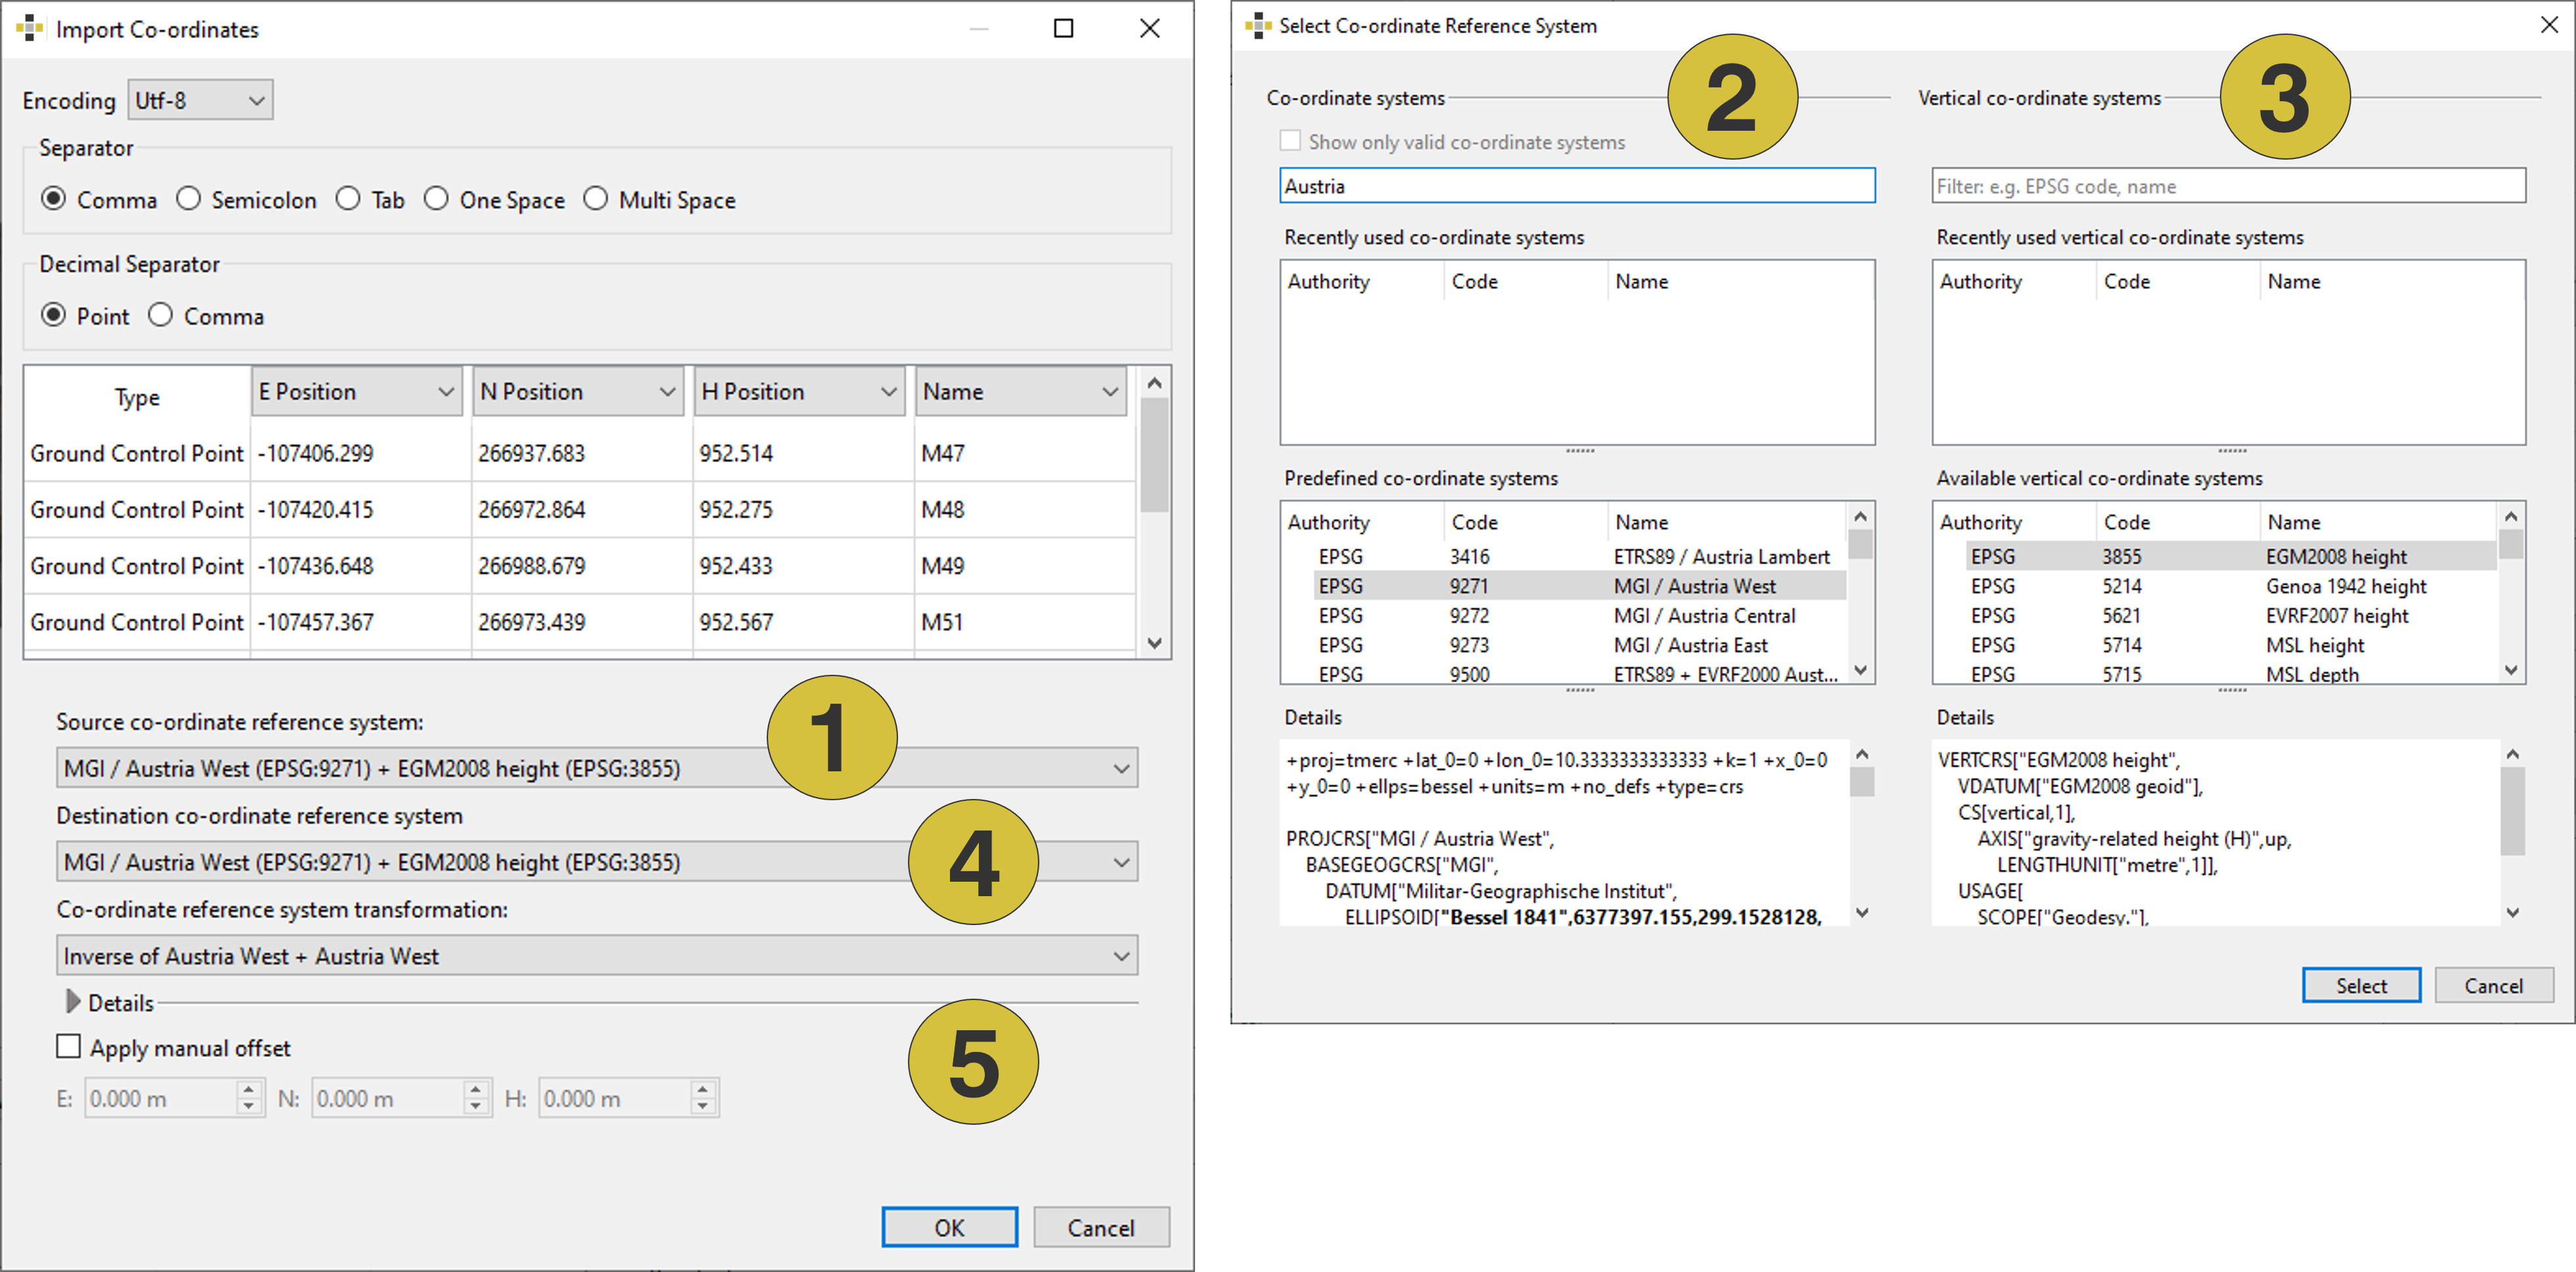
- Source co-ordinate reference system
- Selection of Source co-ordinate reference system
- Selection of the Source co-ordinate reference system – vertical system
- Destination co-ordinate reference system “Same as Source”
- Manual offset (optional)
Standard operating procedure for a specific co-ordinate import and CRS transformation
Both horizontal and vertical transformations are fully supported, including geoid-to-ellipsoid height conversions, ensuring seamless integration of local 3D photogrammetric models with global coordinate systems by following standard operating procedure:
- Click on the “Load GCP from Text File” button.
- A dialog window appears requiring following inputs:
- Character encoding
- Used separator
- Data classification (E/N/H and name or latitude/longitude/altitude and name)
- Select the Source co-ordinate reference system from the pull-down menu Browse Co-ordinate System”
- Specify the co-ordinate system (horizontal and vertical system) in the Select Co-ordinate Reference System dialog and click the “Select” button.
- Select the desired transformation from the “Co-ordinate Reference System Transformation” pull-down menu and check the PROJ-based transformation displayed in the Details section below.
- Optional! Apply a manual, user-defined offset to the transformation by enabling the Apply Offset checkbox. Then enter the corresponding values for E, N, and H in the provided fields.
- Confirm the transformation by selecting the “Apply” button.
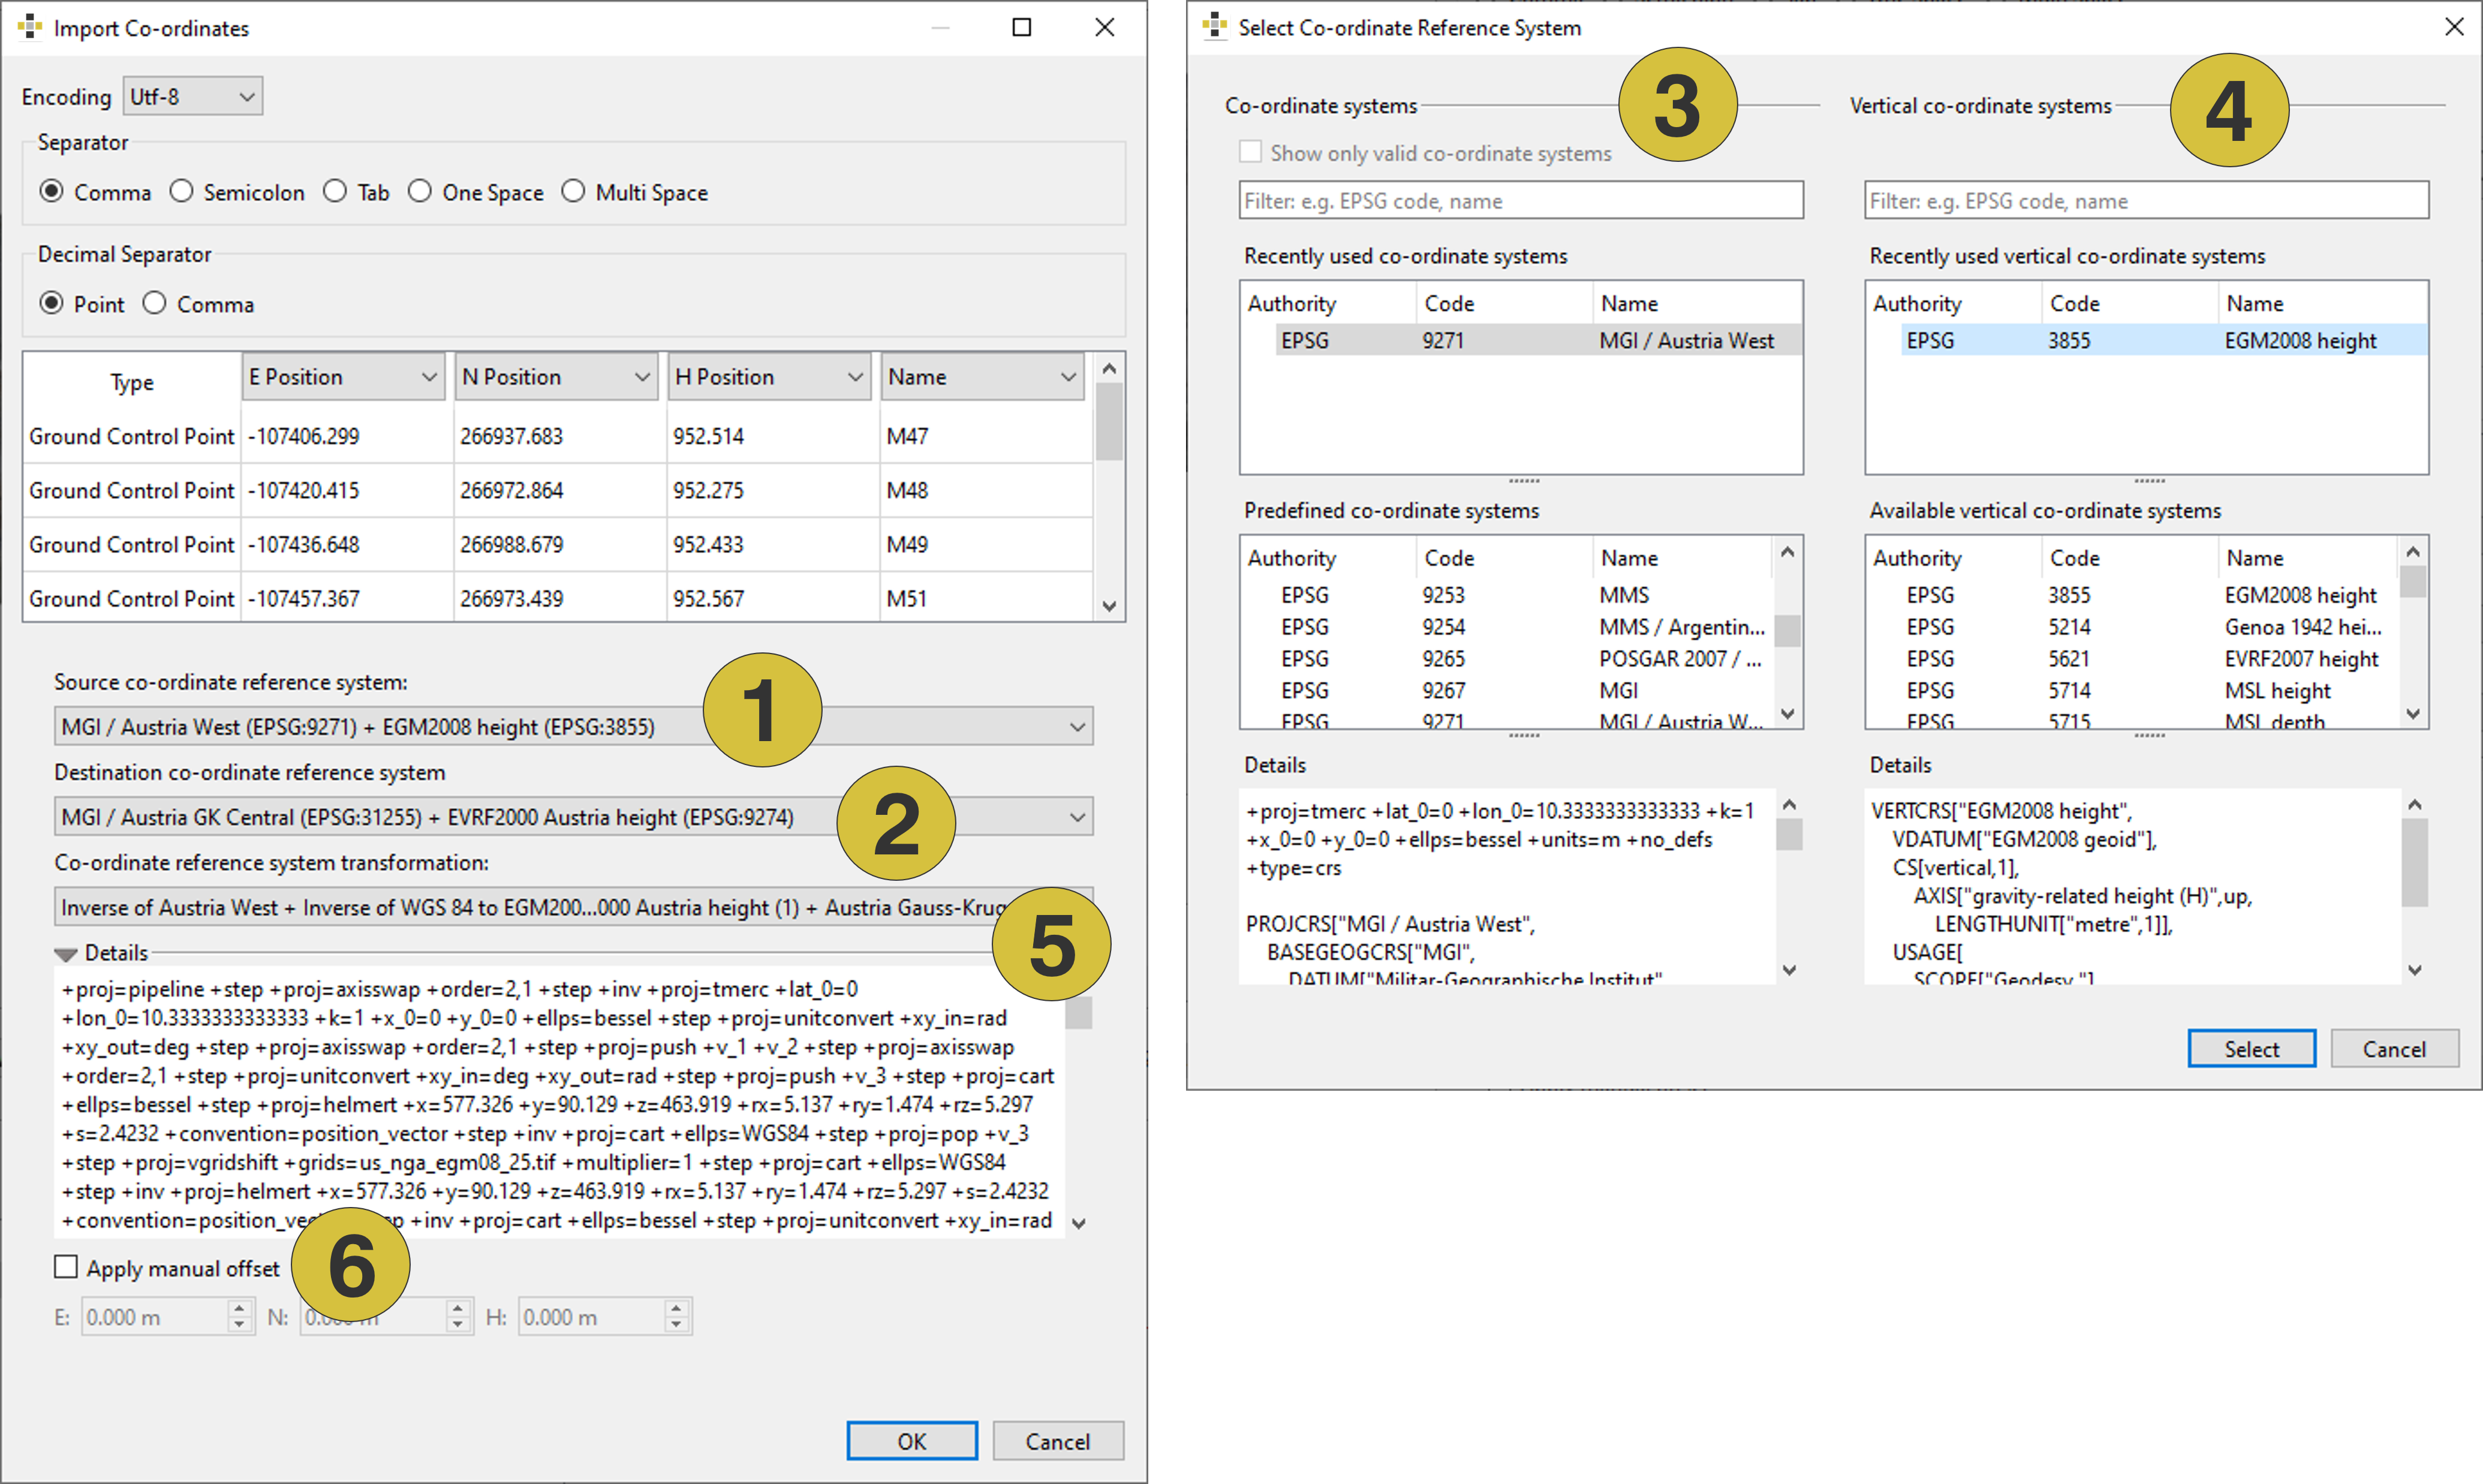
- Source co-ordinate reference system
- Destination co-ordinate reference system
- Selection of the co-ordinate reference systems
- Selection of the co-ordinate reference systems – vertical systems
- Co-ordinate reference system transformation
- Manual offset (optional)