Standard Operating Procedure
Standard operating procedure:
- Activate the first point to define by clicking the “Upper Target” (Left Range Pole) entry in the point list.
- Localize the position in the 3D viewer by clicking the left mouse button. The list of reference images is updated and the active image is shown in the viewer.
- Choose the “Manual Target Mode” icon or the “Automatic Mode Icon” and centre the target by clicking with the mouse in the viewer. For locating the target discs the image should be zoomed as much as reasonable for visual interpretation. Check the position of the center by changing the size of the reticule. The reticule is well-centered if the circles touch the target’s boundary simultaneously at two opposing points and in two perpendicular directions .
- Choose at least 2 images (3 or more are recommended) showing the same target point and click the center of target. The status signals Baseline and the Inliers turn into green.
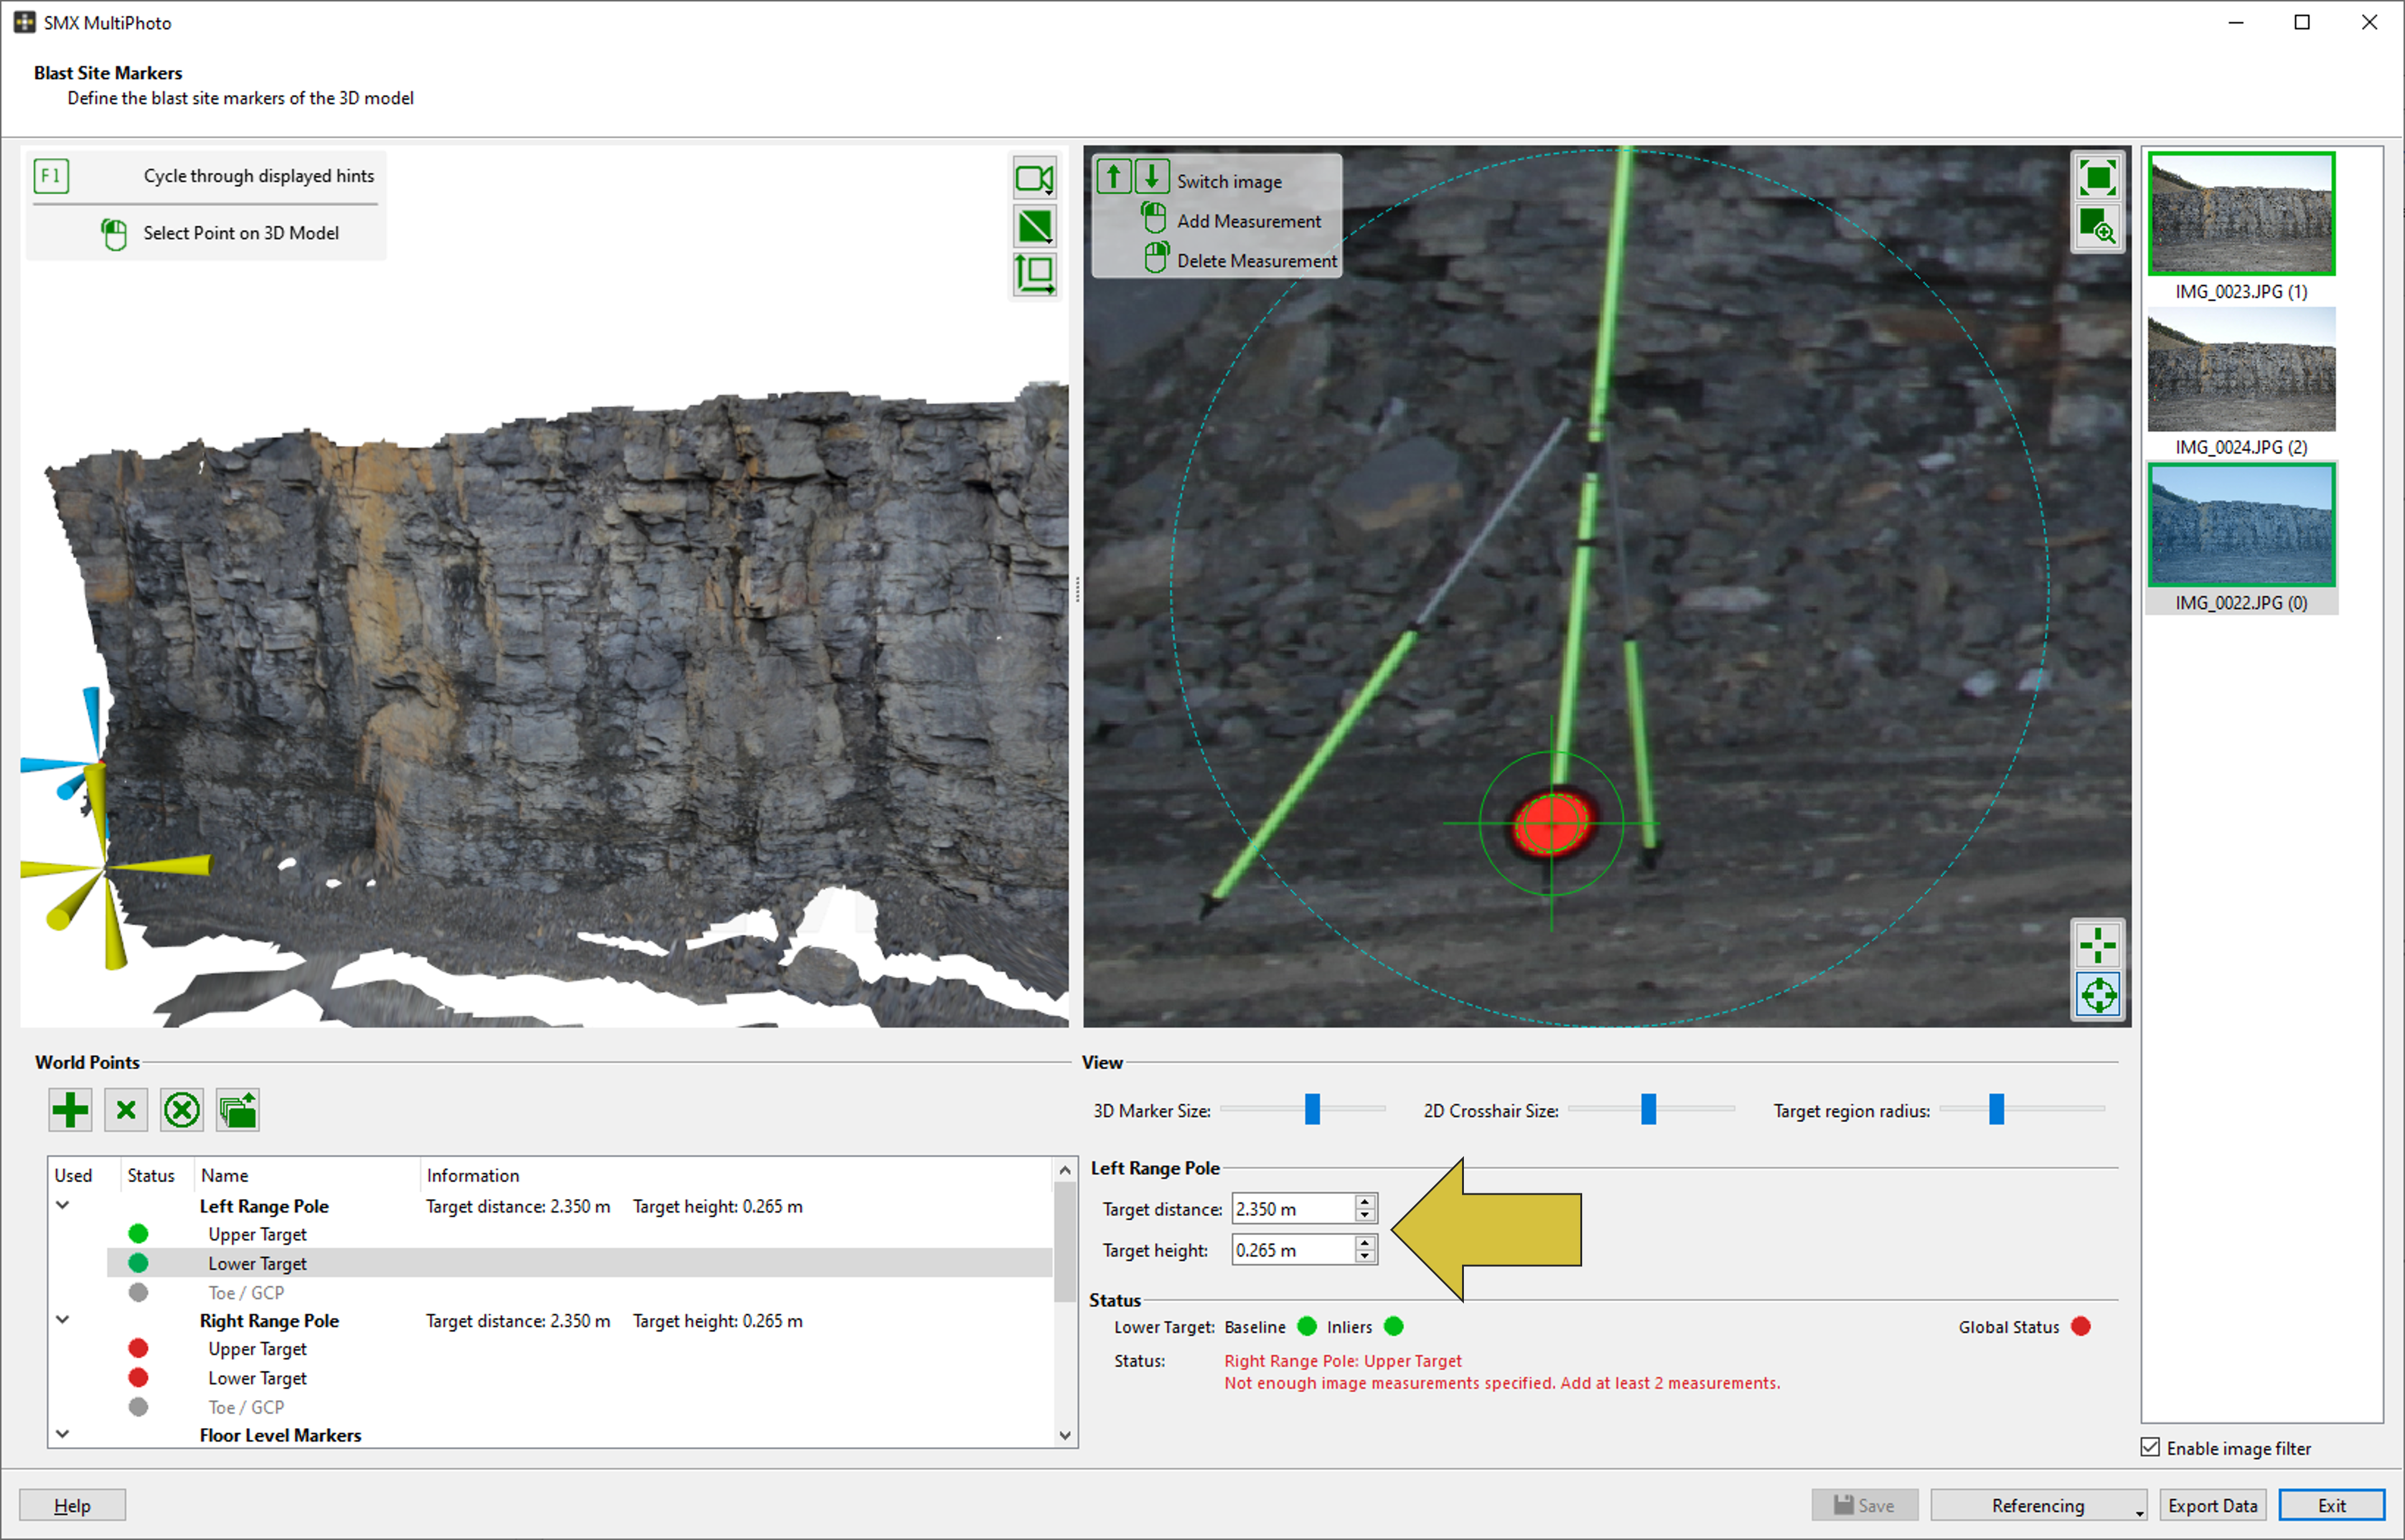
- Activate the “Lower Target” (Left Range Pole 1) in the list and repeat steps 3 – 5.
- Enter the distance between the Upper and Lower Target.
- Repeat steps 2 – 7 for the RightRange Pole .
- The Left Floor Level Markers and Right Floor Level Markers are automatically determined based on the measured targets of the Left and RightRange Poles. In case the locations are not on the desired bottom level, they can be set manually to another location by repeating steps 2 – 7.
- Repeat steps 2 – 7 for the Rightand Left Delimiter
- Enable referencing by clicking the “Save” button
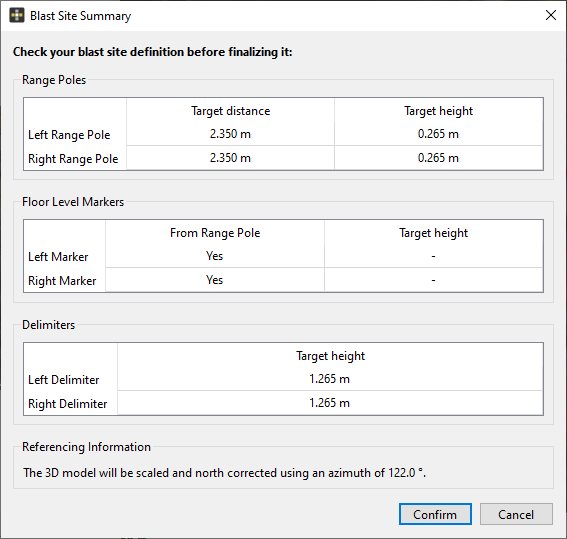
- Check the all markers set, heights and distances in the Confirm Blast Site dialog and confirm by clicking the “Confirm” button.
- Close the MultiPhoto by clicking the “Exit” button.
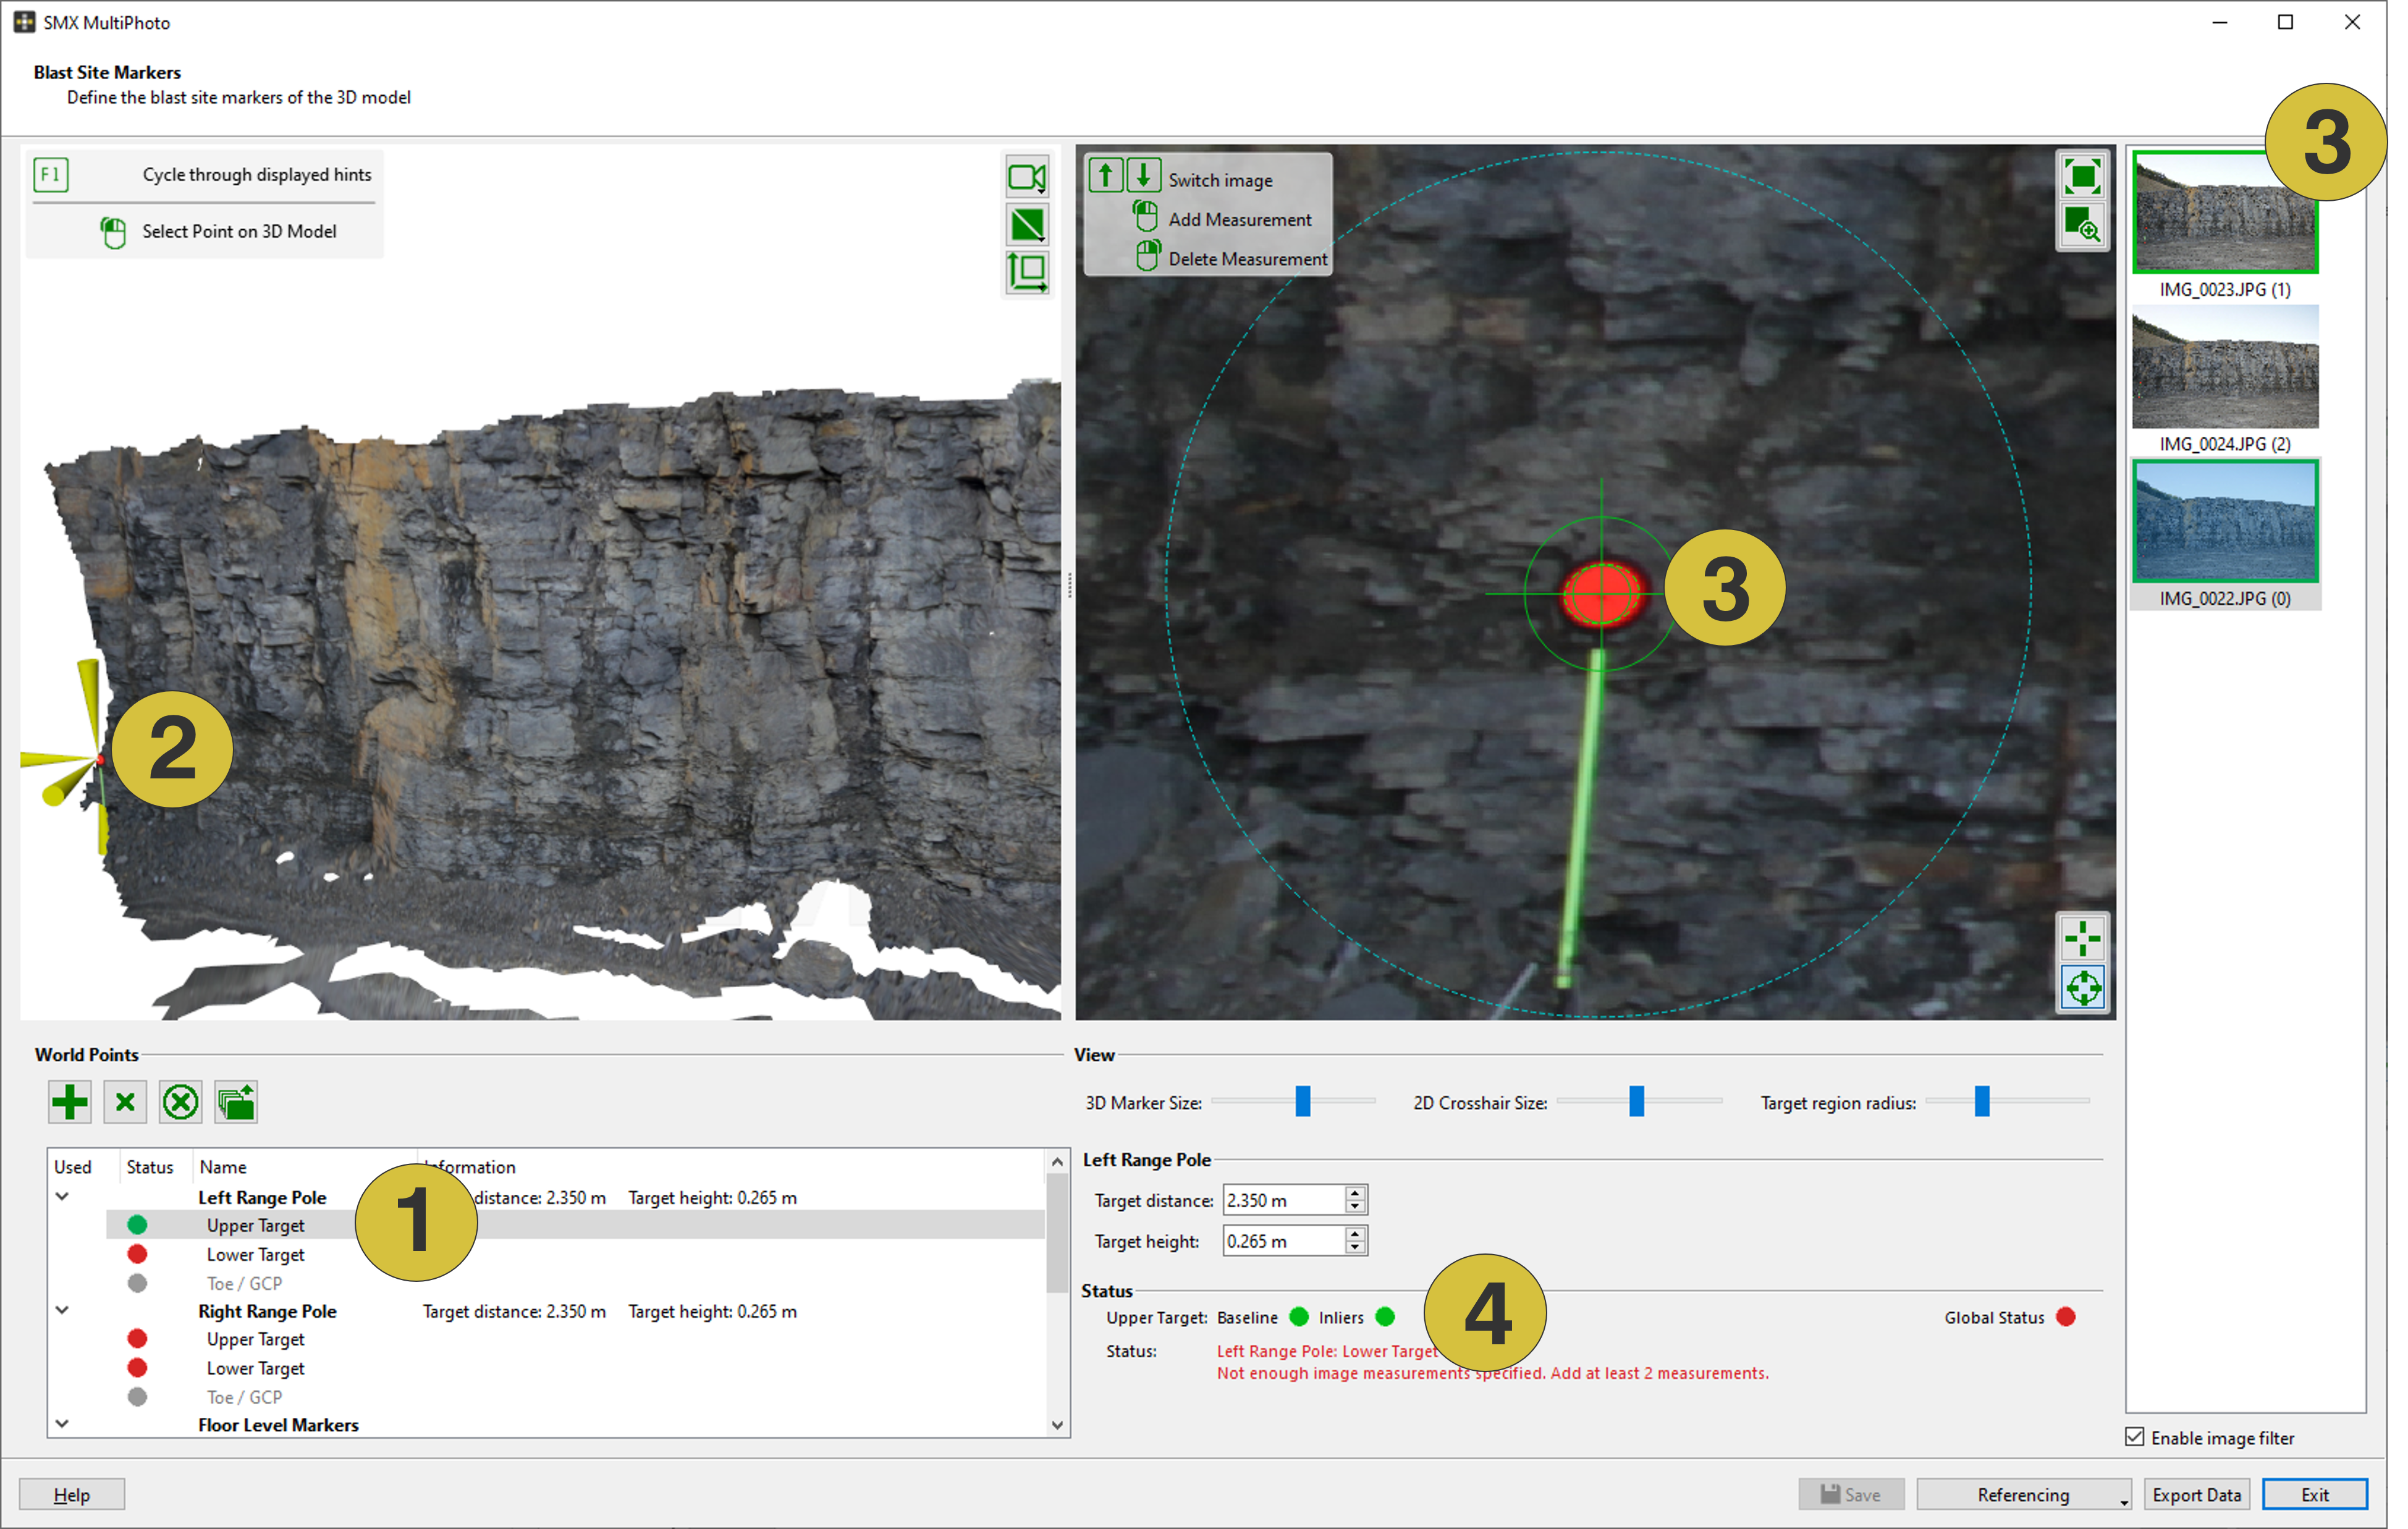
- Marker in the list
- Localization of the target in the 3D viewer
- Target in individual images
- Status of the individual targets
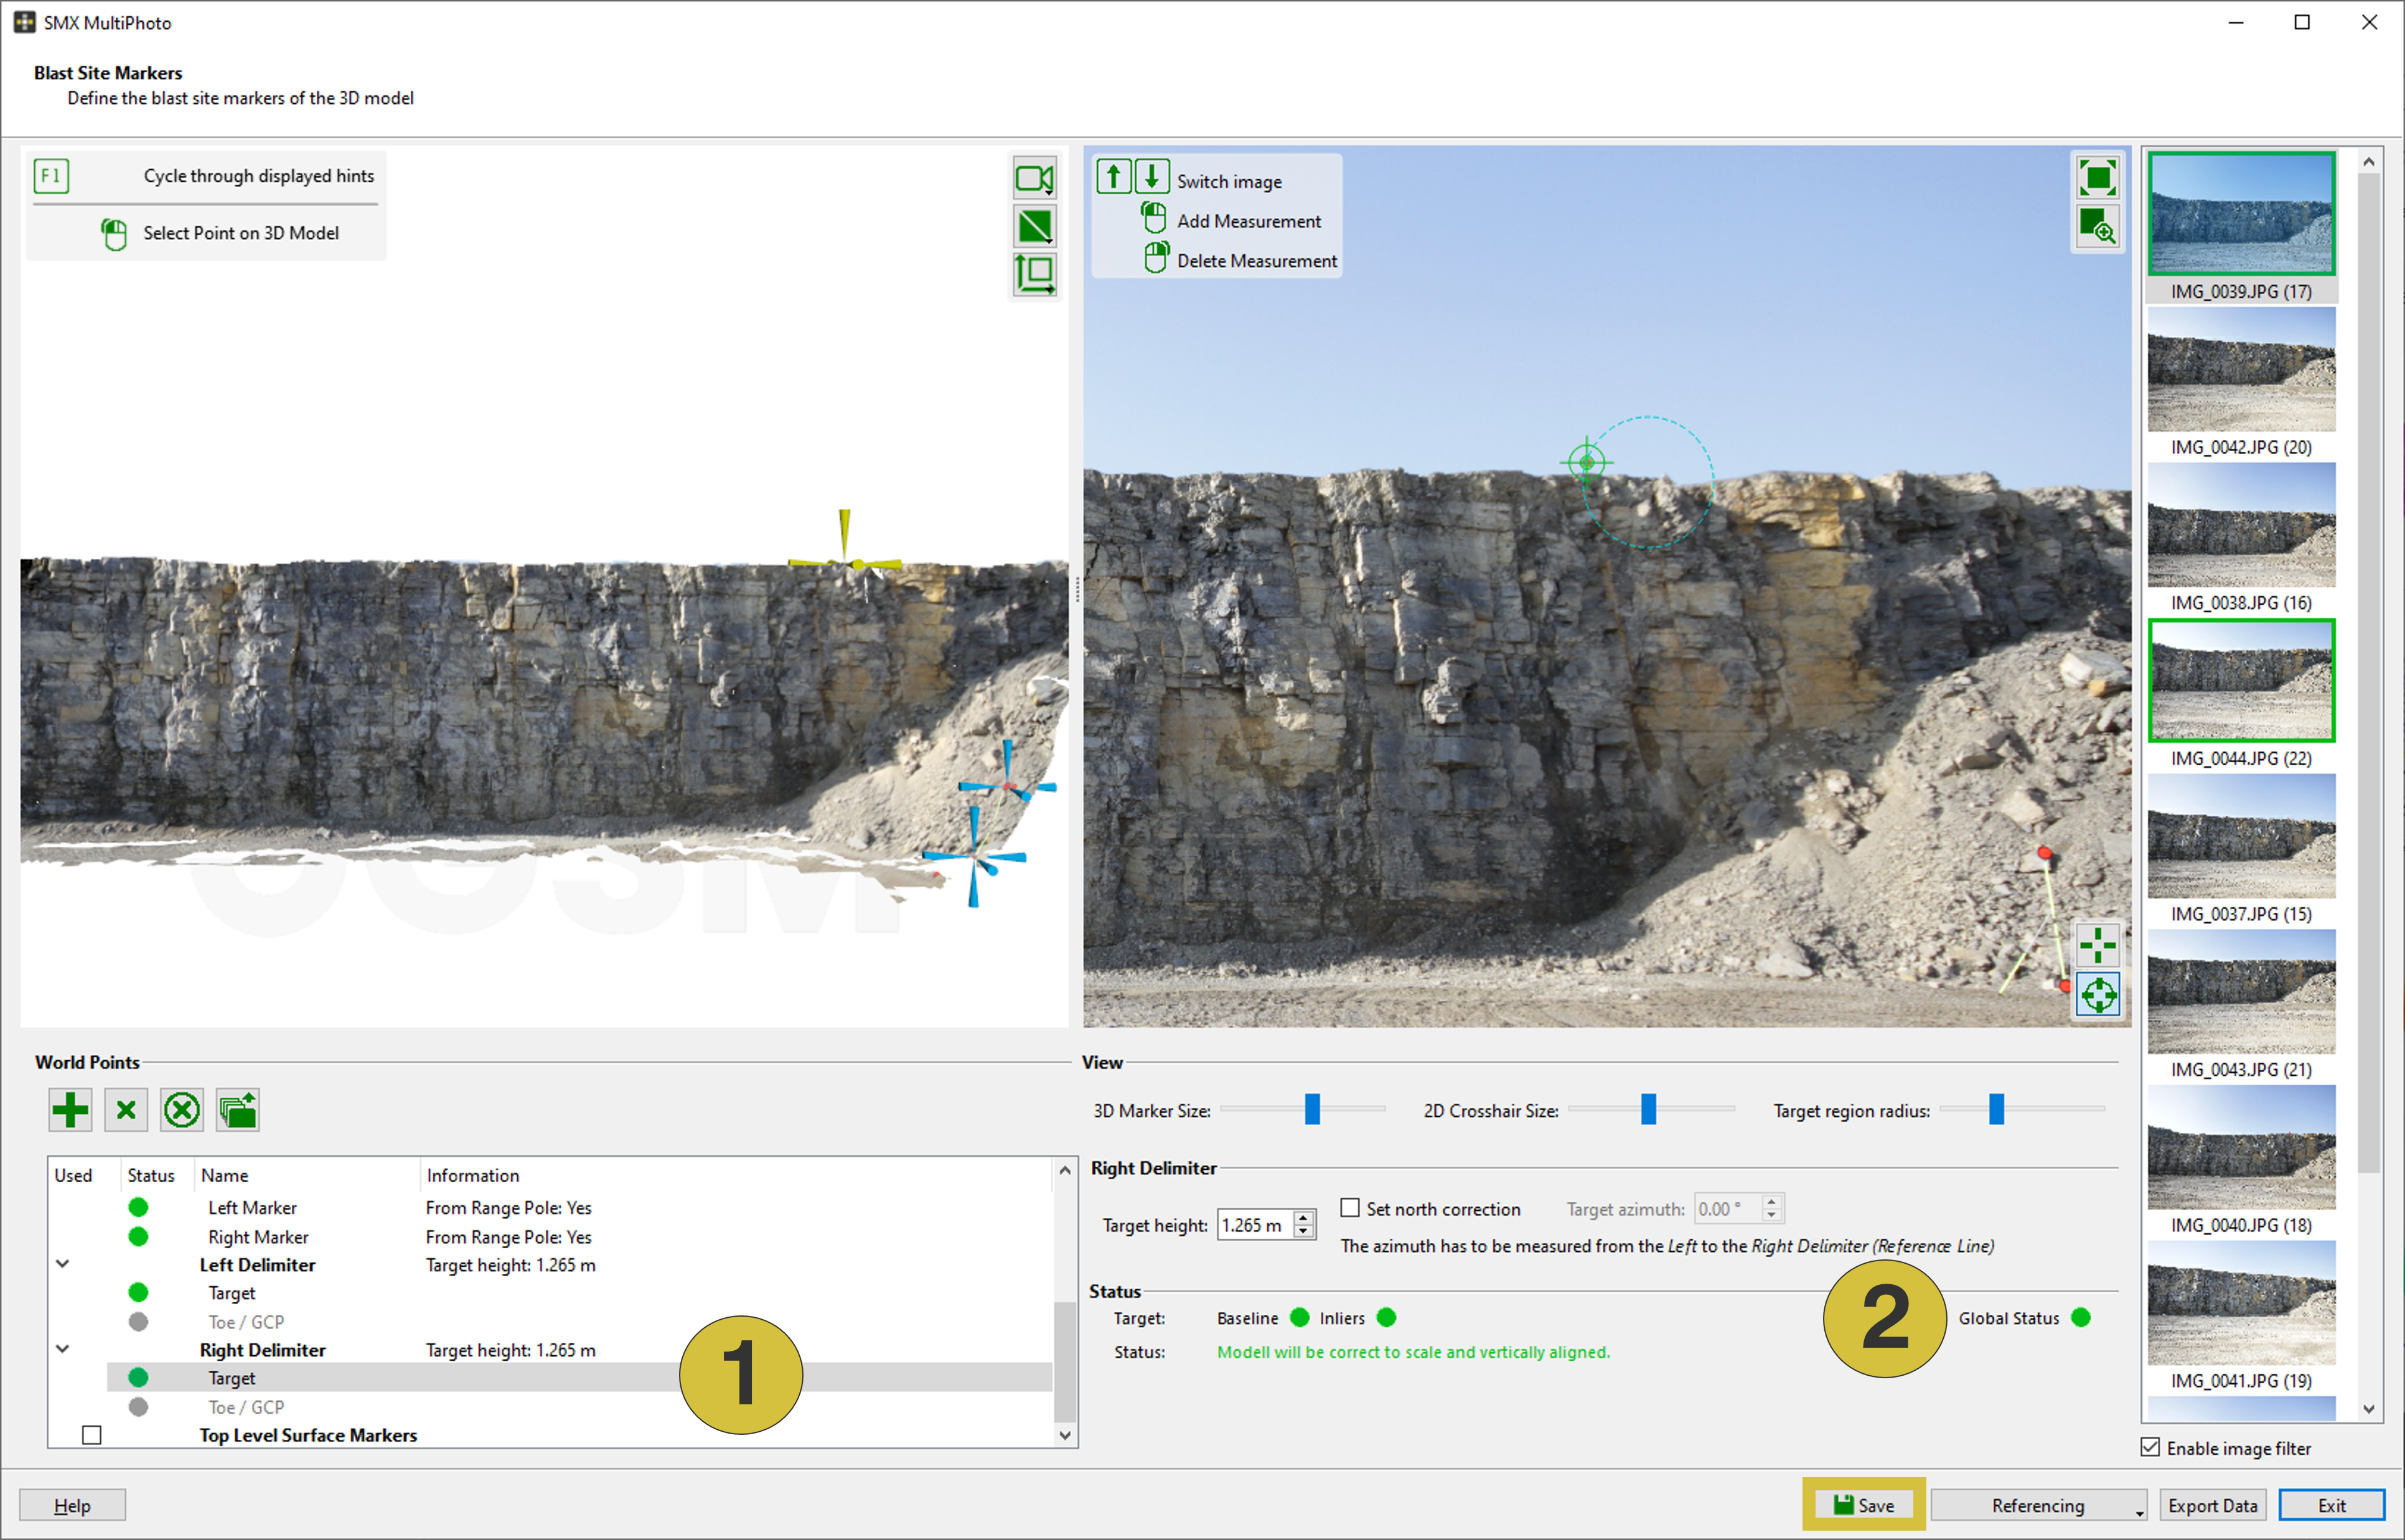
- Required markers set
- Global status