Software Layout, Features and Use
General
The present version of MultiPhoto comes with the file format “.jm3x”, 3D model files from previous versions (“jm3” files) are not supported in the current version. Models from previous versions (“.jm3”) can be converted in the ModelEditor (see corresponding user manual). Note, Project Files (“.smm” files) generated with former versions can be used to generated a new 3D model with the file format “.jm3x” The work flows “Generate modified 3D model” and “Perform constrained referencing” are supported).
MultiPhoto processes the data in a sequential procedure. The essential steps include:
- Coarse Reconstruction: The Coarse Reconstruction determines the camera orientations and positions among all photographs relative to each other and relative to the coarsely reconstructed object. The result of the Coarse Reconstruction is the Project File (“.smm” file).
- (Optional) Region of Interest: MultiPhoto features the definition of a Region of Interest (ROI), which limits the generation of the 3D model (Dense Reconstruction) to a selected area. The definition of the ROI is an intermediate step in the MultiPhoto and it has to be outlined on the coarse point cloud after the Coarse Reconstruction.
- Dense Reconstruction: The Dense Reconstruction calculates the detailed object geometry including a detailed point cloud, surface mesh and texture. The result of the Dense Reconstruction is the 3D model file (“.jm3x” file)
- Referencing and Scaling: MultiPhoto supports referencing by the use of Ground Control Points (GCP) as well as scaling of 3D models in a local co-ordinate system.
Reconstruction features
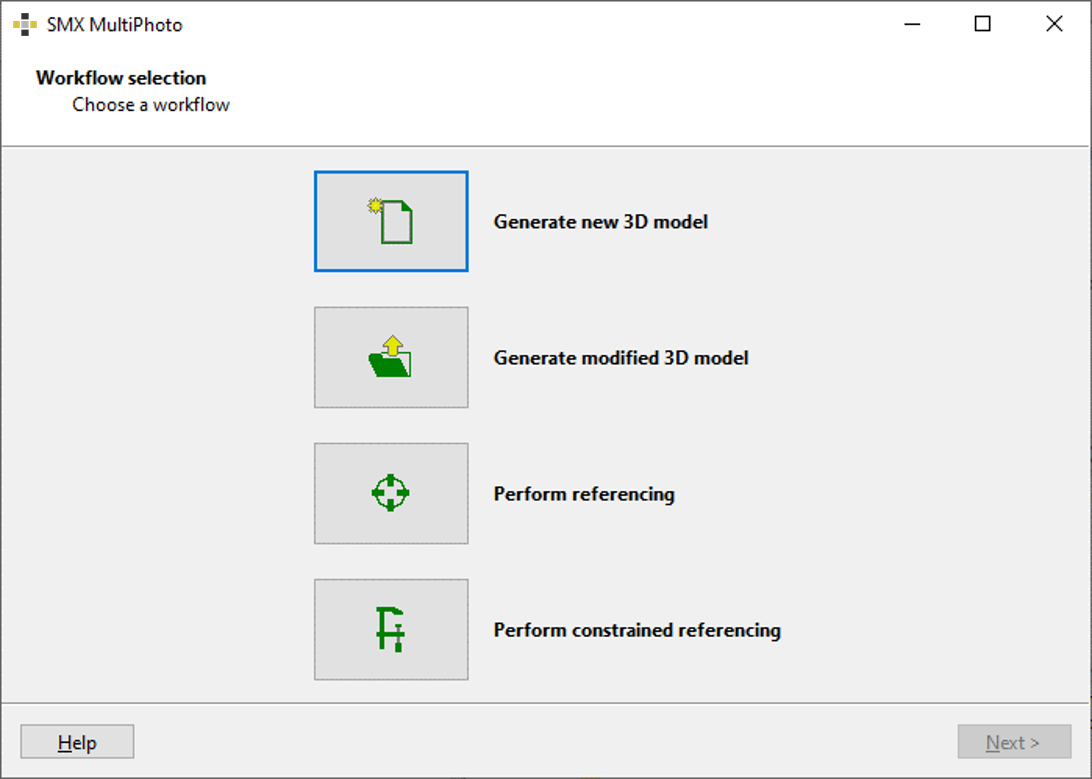
MultiPhoto supports four different workflows that can be selected by the user (Figure 1):
- Generate new 3D model
- Generate modified 3D model
- Perform referencing
- Perform constrained referencing
Generate new 3D model
Load photos, define the co-ordinate system [optional] and perform 3D model reconstruction (coarse and dense reconstruction). Standard operation procedure:
- Open MultiPhoto
- Select the workflow “Generate new 3D model” by clicking the corresponding icon

- Follow the standard operating procedure as described in later topics.
Generate modified 3D model
Load a Project File (“.smm” file; coarse reconstruction), modify the settings and perform 3D model reconstruction. Standard operation procedure:
- Open MultiPhoto
- Select the workflow “Generate modified 3D model” by clicking the corresponding icon

- Load the “.smm” file and the software automatically switches to the Select Scene Region of Interest window.
- Follow the standard operating procedure as described in later topics
Perform referencing/scaling
Load a Project File (“,smm” file; coarse reconstruction) and 3D model file (“.jm3x”; dense reconstruction) and perform referencing using surveyed Ground Control Points or scaling of the 3D model. Standard operation procedure:
- Open MultiPhoto
- Select the workflow “Perform referencing” by clicking the corresponding icon

- Load the “.smm” and the corresponding “.jm3x” file (Figure 2). The Project File and the 3D model is loaded and the software automatically switches to the 3D Model window.
- Choose the action “Control Points” from the pull down menu “Referencing” and follow the standard operating procedure as described in later topics.
Loading Project File
Perform constrained referencing
Load a Project File (“.smm” file; coarse reconstruction), modify the settings, optimize the reconstruction using surveyed Ground Control Points and perform 3D model reconstruction (“.jm3x”; dense reconstruction). Standard operating procedure:
- Open MultiPhoto
- Select the workflow “Perform constrained referencing” by clicking the corresponding icon

- Load the “.smm” file and the software automatically switches to the Select Scene Region of Interest window.
- Follow the standard operating procedure as described in later topics.