Import Point Cloud Data from E57
Standard operating procedure
- Import the 3D data (“.e57” file) by using “File | Import 3D Model | Import from E57” from the menu bar and choose the file from the directory of your computer.
- The “Import E57” dialog appears requiring the following input in the “Scans” tab:
- Select the scan(s) by enabling the checkbox(es)
- Reconstruction tab:
- Select the reconstruction mode from the drop-down menu. The Preset setting (Fast, Medium, High) controls the resolution of the generated mesh.
- Select the texture source: scanner projection, point colours, or none
- Trim the point cloud in the 3D viewer by the is use of the provided features:
- Click the “Select Region to Trim” button and enclose the region to delete by dragging the cursor across the 3D point cloud while keeping the left mouse button pressed. Release the mouse button and the selected region is highlighted in red. Delete the desired region by pressing the “Enter” key.
- Click the “Clear Selection” button to delete the selection.
- Click the “Restore Point Cloud” button to keep the original loaded point cloud
- Referencing tab:
- Choose the referencing mode from the pull-down menu. Following options are available:
- Unreferenced (x, y, z)
- Referenced (specific co-ordinate system)
- Referenced (generic E, N, H)
- Referenced (generic N, E, H)
- Selection of the co-ordinate system:
- The referencing modes Unreferenced (x, y, z), Referenced (generic E, N, H) and Referenced (generic N, E, H) requires the selection of the unit from the pull-down menu. Millimetre, meter, inch, international food and US-survey foot are available.
- Referenced (specific co-ordinate system) requires the selection of the specific co-ordinate system in the “Select Co-ordinate Reference System” dialog open by clicking “Browse Co-ordinate Systems”. Specify the co-ordinate system [horizontal and vertical system] in the Select Co-ordinate Reference System dialog and click the “Select” button.
- Choose the referencing mode from the pull-down menu. Following options are available:
- View tab:
- Checkbox Point Cloud hides/shows the imported point cloud in the 3D viewer
- Checkbox Bounding Box hides/shows the extension the point cloud
- Checkbox Scanner Positions hide/shows the scanner position by green pyramids in the 3D viewer
- The size of the scanner can be adjusted by using the slider Scanner View Size
- If texture information (images) is provided with the import, the images can be inspected in the Images tab
- Confirm the conversion by clicking in the “Generate 3D Model” button and choose the directory on your computer to save the “.jm3x” file
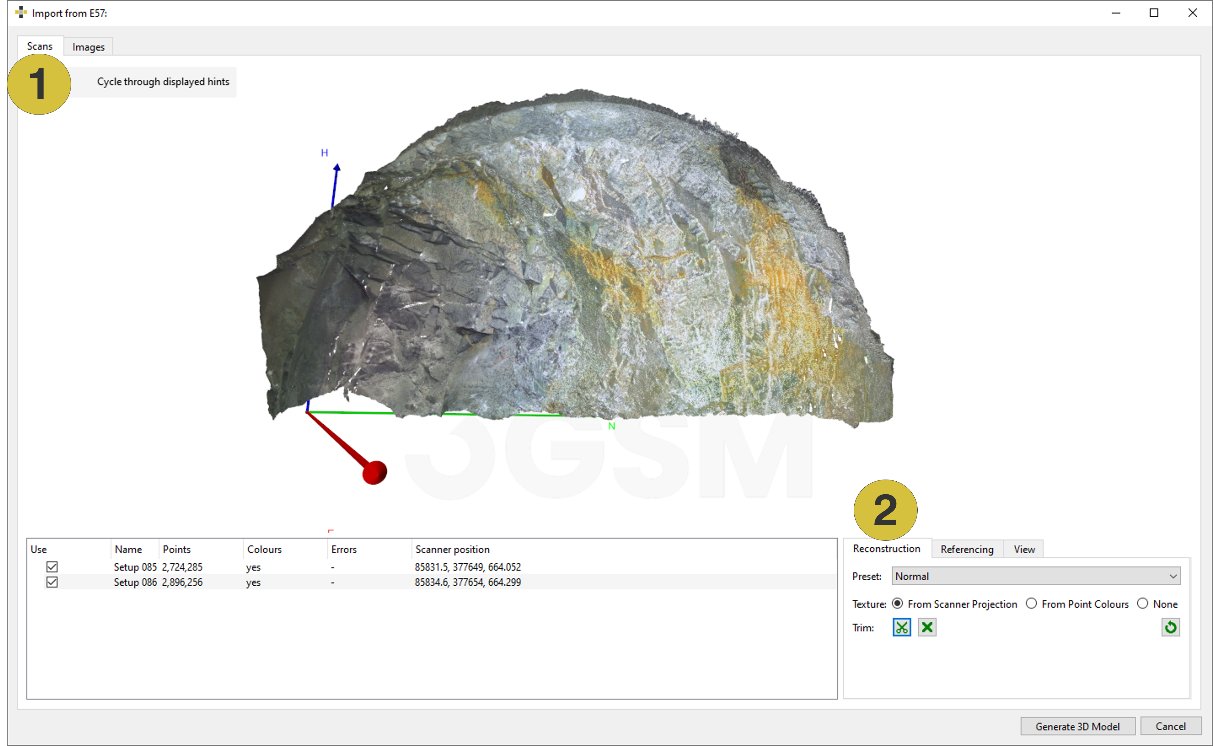
- Scans tab – 3D viewer
- Reconstruction settings
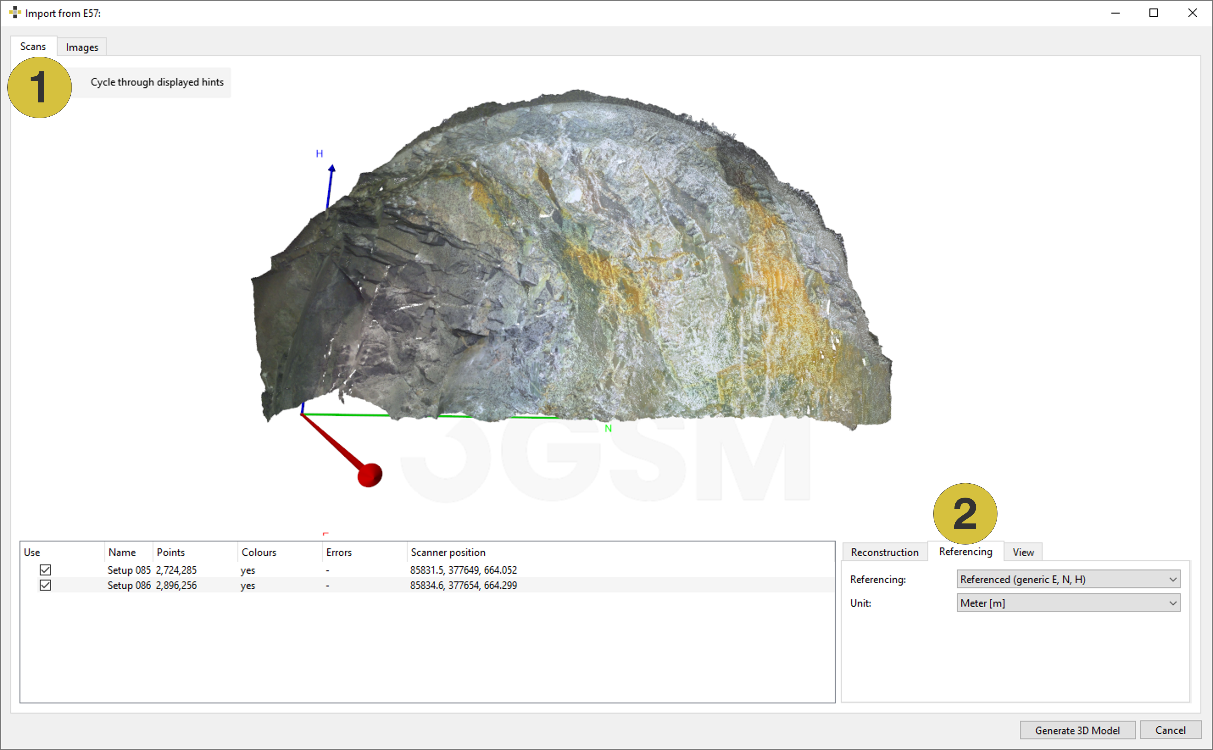
- Scans tab – 3D viewer
- Referencing settings
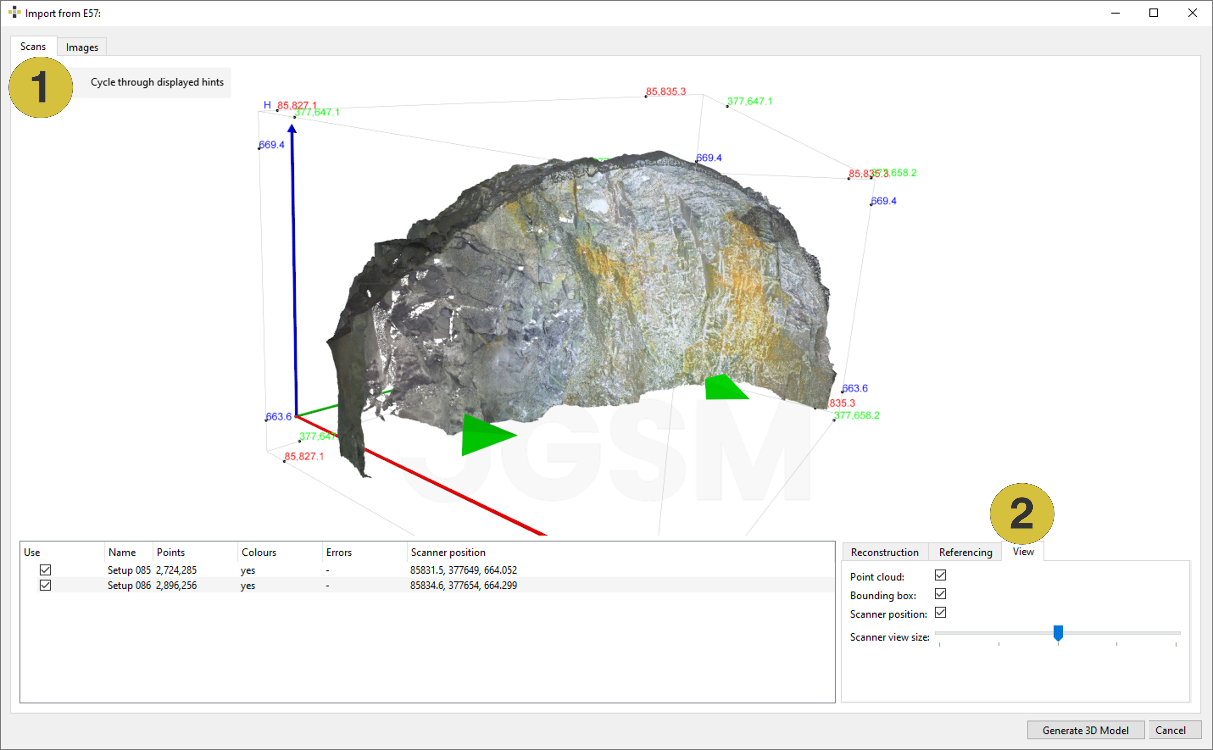
- Scans tab – 3D viewer
- View settings
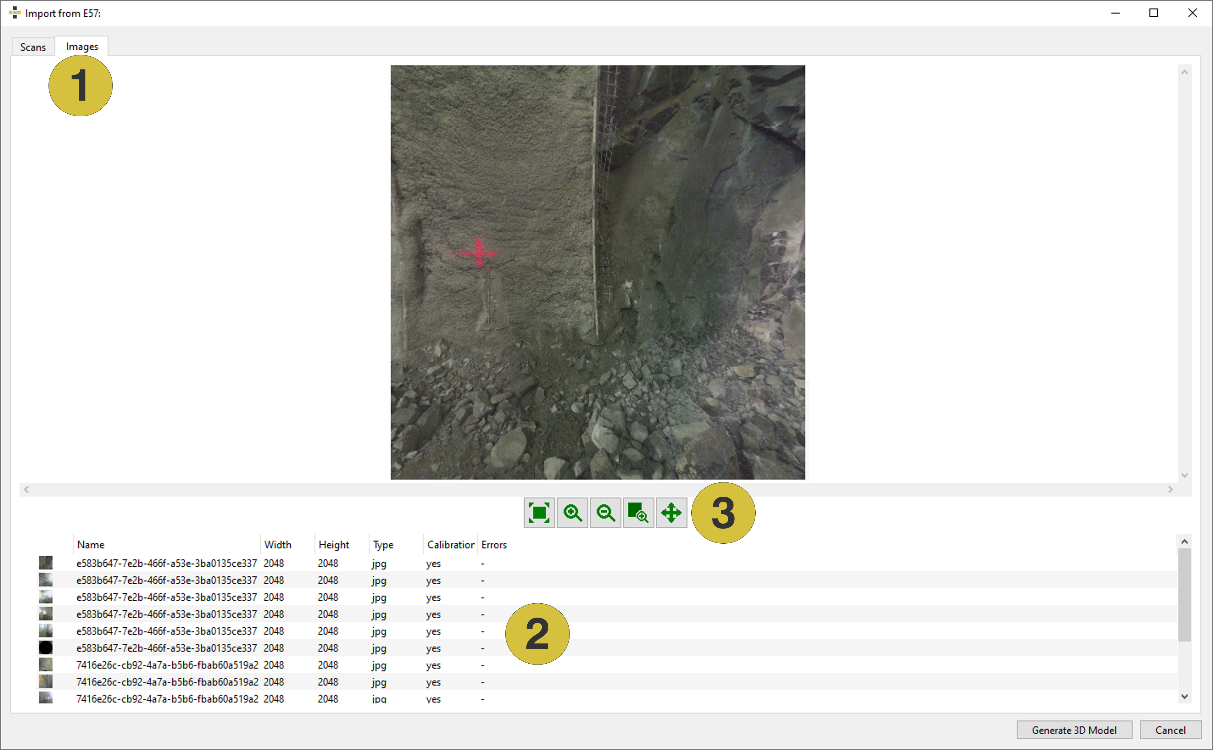
- Images tab
- List of images
- Navigation bar
Navigation bar 2D viewer

The viewer window comprises two scroll bars and five buttons supporting the image display:
- Window fit
 - Fits the size of the image to the size of the viewer
 - Zoom in
 - Zooms into the photo
 - Zoom out
 - Zooms out of the photo
 - Zoom to region
 - Enables to zoom in and out by using the computer mouse
 - Move
 - Enables mouse navigation