Edit Bolt Pattern
The Edit Bolt Pattern option (Perimeter Support) allows you to edit Bolt Patterns which have been added to the perimeter of the excavation.
- You can edit any of the pattern parameters such as bolt length, spacing, offset.
- You can also edit the installation points of a pattern (start, end, and drilling point if applicable).
It is not possible to edit individual bolts in a pattern. Pattern bolts can only be edited as a group. All bolts will have the same properties, length, spacing, etc. If you require different bolt properties for certain bolts, you will have to use multiple Bolt Patterns, or use the Add Spot Bolt option.
To edit Bolt Patterns on the perimeter:
- First, make sure you are viewing the Perimeter Support Designer view (select the Perimeter Support Designer
 button from the toolbar).
 - Select the Edit Bolt Pattern
 option from the Sidebar or the Edit sub-menu of the Support menu.
TIP: You can also right-click directly on any bolt in the pattern you wish to edit and select Edit Bolt Pattern from the popup menu. This will directly display the Edit Bolt Pattern On Perimeter dialog, so you can skip step 3. - You will be prompted to select a Bolt Pattern. To select a Bolt Pattern click on any bolt in the pattern. The entire pattern will be selected (highlighted by dotted lines). Right-click and select Done Selection
 , or press ENTER and you will see the Edit Bolt Pattern On Perimeter dialog.
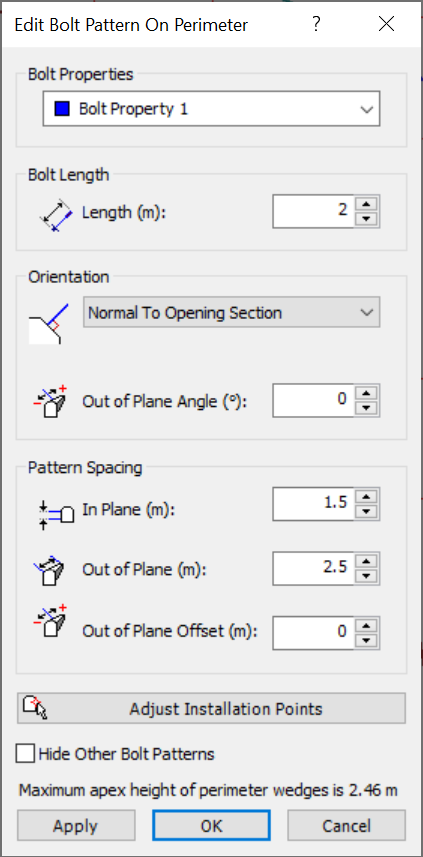
Edit Bolt Pattern on Perimeter dialog - In the Edit Bolt Pattern On Perimeter dialog, you can edit any of the parameters such as Bolt Properties, Bolt Length, Orientation, and Pattern Spacing. For a description of these parameters see the Add Bolt Pattern topic.
- You can select the Apply button to view the results of changes without closing the dialog.
- You can also edit the installation points of the pattern, from the Edit Bolt Pattern On Perimeter dialog, as follows:
- Select the Adjust Installation Points
 button in the dialog.
 - The dialog will close, and you will be prompted to select an installation point of the pattern. This includes the start and end points, and the drilling point (if applicable). Each installation point will be highlighted by a cross-hair icon.
- Hover the mouse over an installation point, and the cursor will change to a 4-way arrow symbol.
- When you see this, you can click and drag the point to a new location. The start and endpoints can be moved along the perimeter, and the drilling point (if applicable) can be moved within the perimeter.
- As you move the installation point, the pattern will be interactively updated on the screen.
- When the installation points are moved to the desired locations, right-click and select Done
 , or press ENTER, and the updated pattern will be applied to the model.
- Select the Adjust Installation Points
- Remember, if you made a mistake with the editing, you can always just select Undo