Multiple Load Cases
The Multiple Load Cases feature allows users to import multiple piles with different load cases from a spreadsheet into RSPile. The user can import piles assigned with different pile types, with each pile assigned with different loads.
To enable the Multiple Load Cases feature:
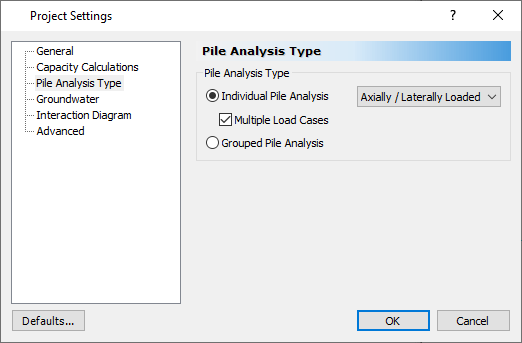
- Select Home > Project Settings and go to the Pile Analysis Type tab.
- Select Individual Pile Analysis and set the type to Axially / Laterally Loaded.
- Tick the checkbox for Multiple Load Cases.
The Multiple Load Cases option will be enabled. Selecting the Axially/Laterally Loaded option ensures that each pile can have both axial and lateral forces for the feature.
After enabling this option, the user can define the soil properties, boreholes, pile sections and pile types.
Ensure the pile types are defined with the same name as what your spreadsheet has labelled for each pile. For example, if your spreadsheet contains pile prefixes with Pile Types from A1, A2, and A3, then in the Pile Types dialog, the user should create pile types with names A1, A2, and A3.
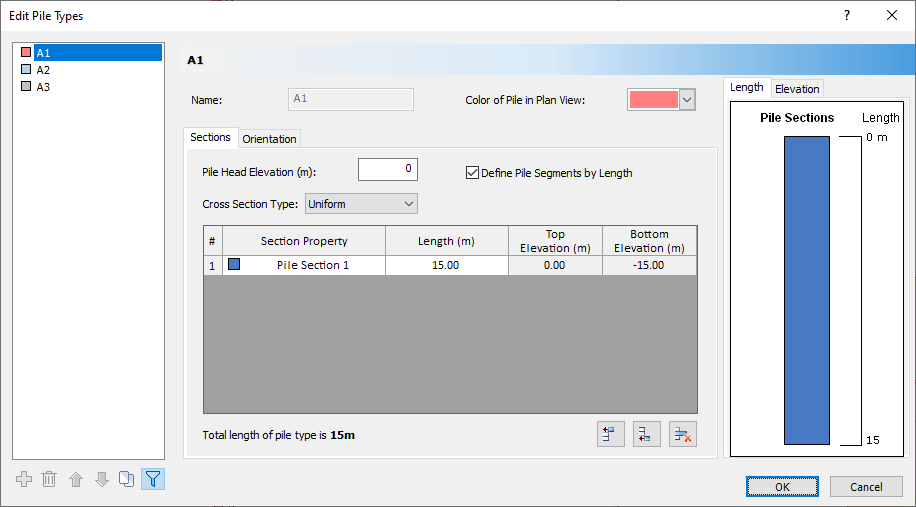
The section properties for each pile type will be assigned to the imported piles with the matching pile type.
If there are unmatching pile types between the spreadsheet and the program, RSPile won’t allow users to continue with the multiple load cases import. This is because there is no pile type for the program to assign the piles with. For this same reason, the user will not be able to modify the name of pile types after the multiple load cases are imported, as the pile types are already checked with the selected spreadsheet.
If in case the user would like to modify the name of the pile type or edit the spreadsheet, the user should re-save the file to the new working directory and re-import the spreadsheet.
Saving the Project
Before importing the multiple load cases, the RSPile project file must be saved in an empty folder. This RSPile project file (*.rspile2) will be the ‘base’ model template file for the multiple load cases. ‘Sub’ model files will be generated from the ‘base’ model. See the Results section below for details on the results files generated.
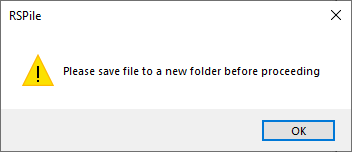
If the file is currently in a folder that contains other RSPile files (*.rspile2), you will see the below warning message:
The excel spreadsheet template (see below) of multiple load cases must also not be in the project folder prior to import. After import, a copy of the of excel template will be automatically placed in the project folder.
Importing Multiple Load Cases
Once the project is saved to an empty folder, the user can import their multiple loads cases. To do so:
- Select Piles > Multiple Load Cases
- Click Create to close the dialog and create the models for each imported load case.
- The Multiple Load Cases dialog will appear. Click Browse… and select the Excel spreadsheet containing the load cases and pile information.
See Tutorial 17: Multiple Load Cases for an example of this process.
Excel Template
When importing multiple load cases, the load cases and pile information should be provided in a spreadsheet (*.xlsx file), that is formatted as explained below.
1. Pile information
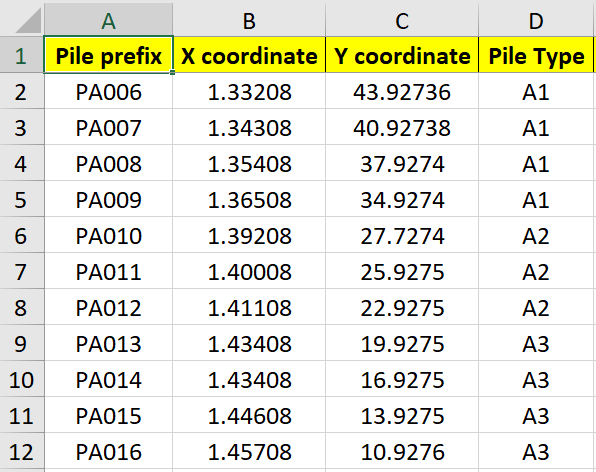
The first sheet contains information of the pile such as Pile designation/prefix or pile name, followed by (X,Y) coordinates of the piles, and pile type for each pile. They can also include p,y curve, t,z curve and Q,z curve information. Note that these are constant values applied throughout the depth of the pile defined in RSPile. The template for the pile information sheet is provided as shown below:
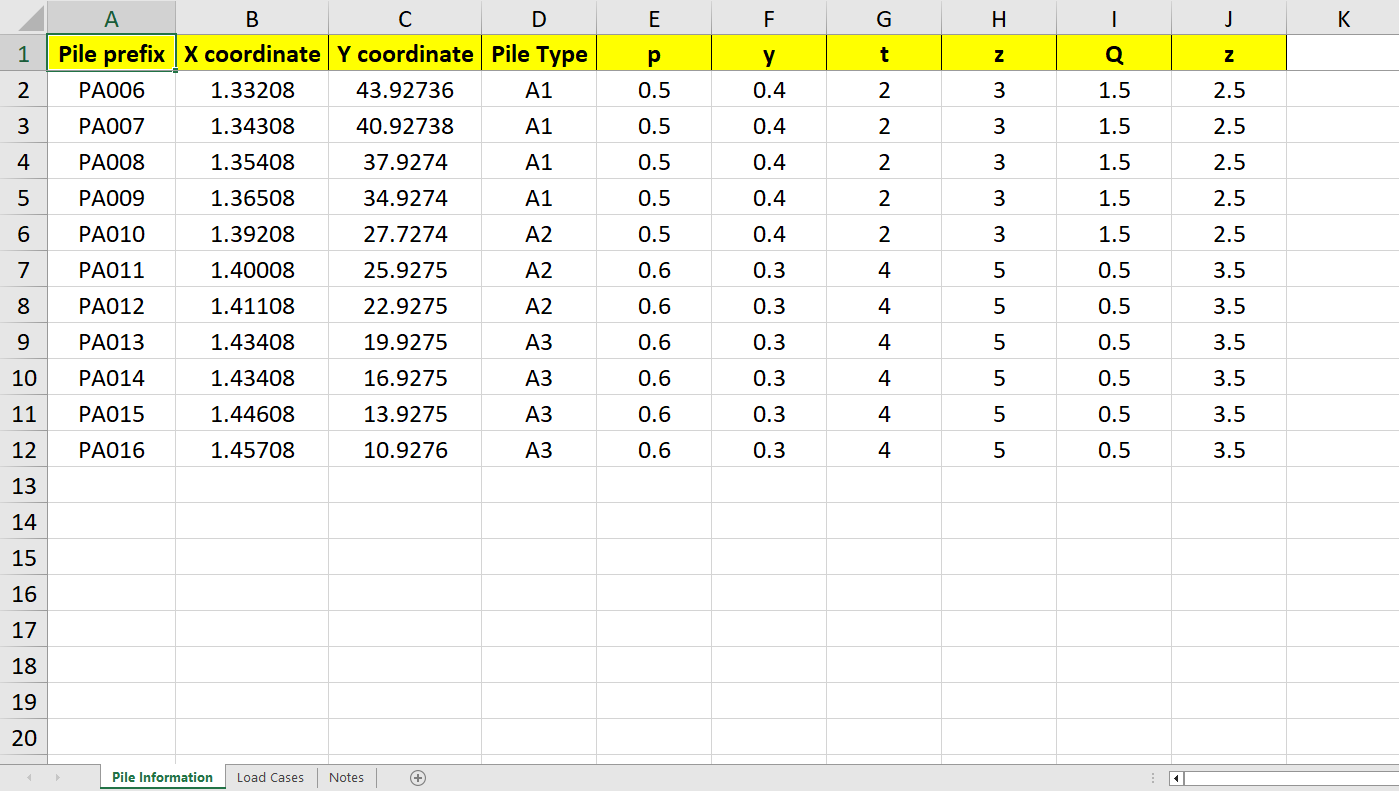
The column order of the Pile Information sheet should be as follows:
- Pile prefix
- X-coordinate
- Y-coordinate
- Pile type
- 5. p-multiplier in p-y
- 6. y-multiplier in p-y
- 7. t-multiplier in t-z
- 8. z-multiplier in t-z
- 9. Q-multiplier in Q-z
- z-multiplier in Q-z
2. Load Cases
The second worksheet provides more information related to the piles with their corresponding loads. Users can define the pile prefix (which is the previously labelled pile designation). Then, they can define the load case (Ex SLS1, SLS10A, etc). Apply the forces in Shear X, Shear Y, Force in Z direction followed by Moment X, Y, restraints in X and Y, and restraints in rotation about Y-axis and X-axis, and rotational stiffness in X and Y axis. Below is the outline of the columns for all the inputs for load case spreadsheet.
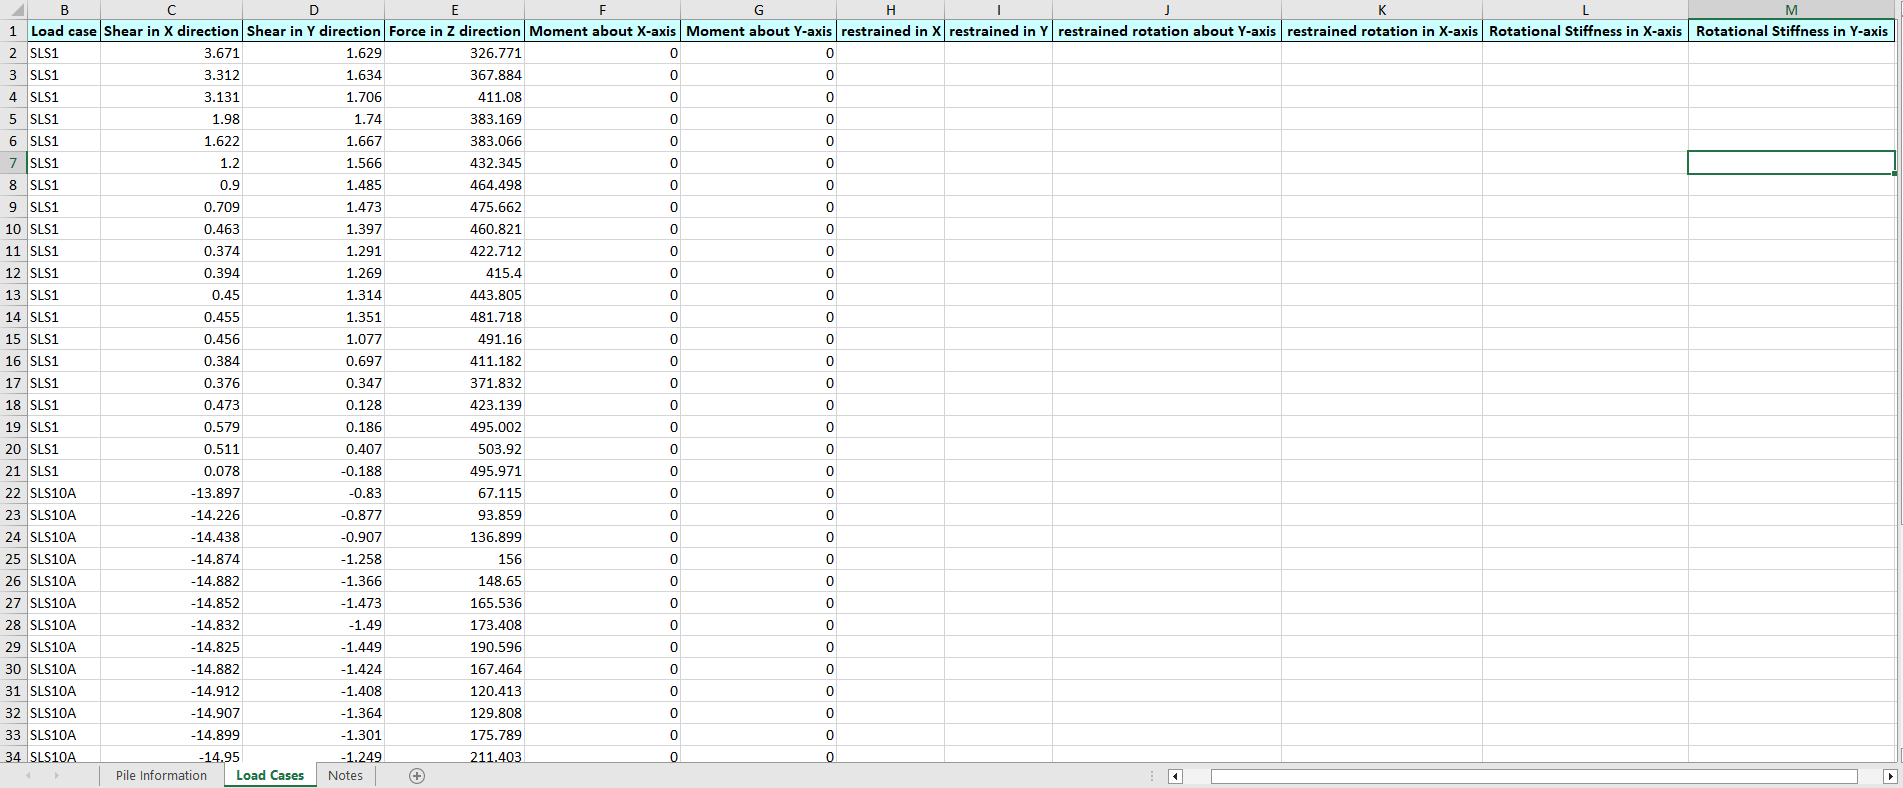
The column order of the Load Cases sheet should be:
- Pile Prefix
- Load Case
- Shear X
- Shear Y
- Force Z
- Moment X
- Moment Y
- Restraint in X
- Restraint in Y
- Rotational Restraint in Y
- Rotational Restraint in X
- Rotational Stiffness in X
- Rotational Stiffness in Y
Using the Excel Template
If you face any issues importing the spreadsheet provided in the install, you should review the Additional Notes section below or the Notes sheet in the provided template spreadsheet. There are a few criterion that needs to be met before the piles with matching pile types can be imported into RSPile.
If in any case you would like to delete the cells in the spreadsheet:
- Make sure to delete by selecting the spreadsheet, and right click > Delete..
- Clearing contents (such as pressing on delete key) will not delete the cells of the spreadsheet, it will just clear out the contents. Please always ensure to delete with provided steps above to avoid any potential issues with pile type mismatch.
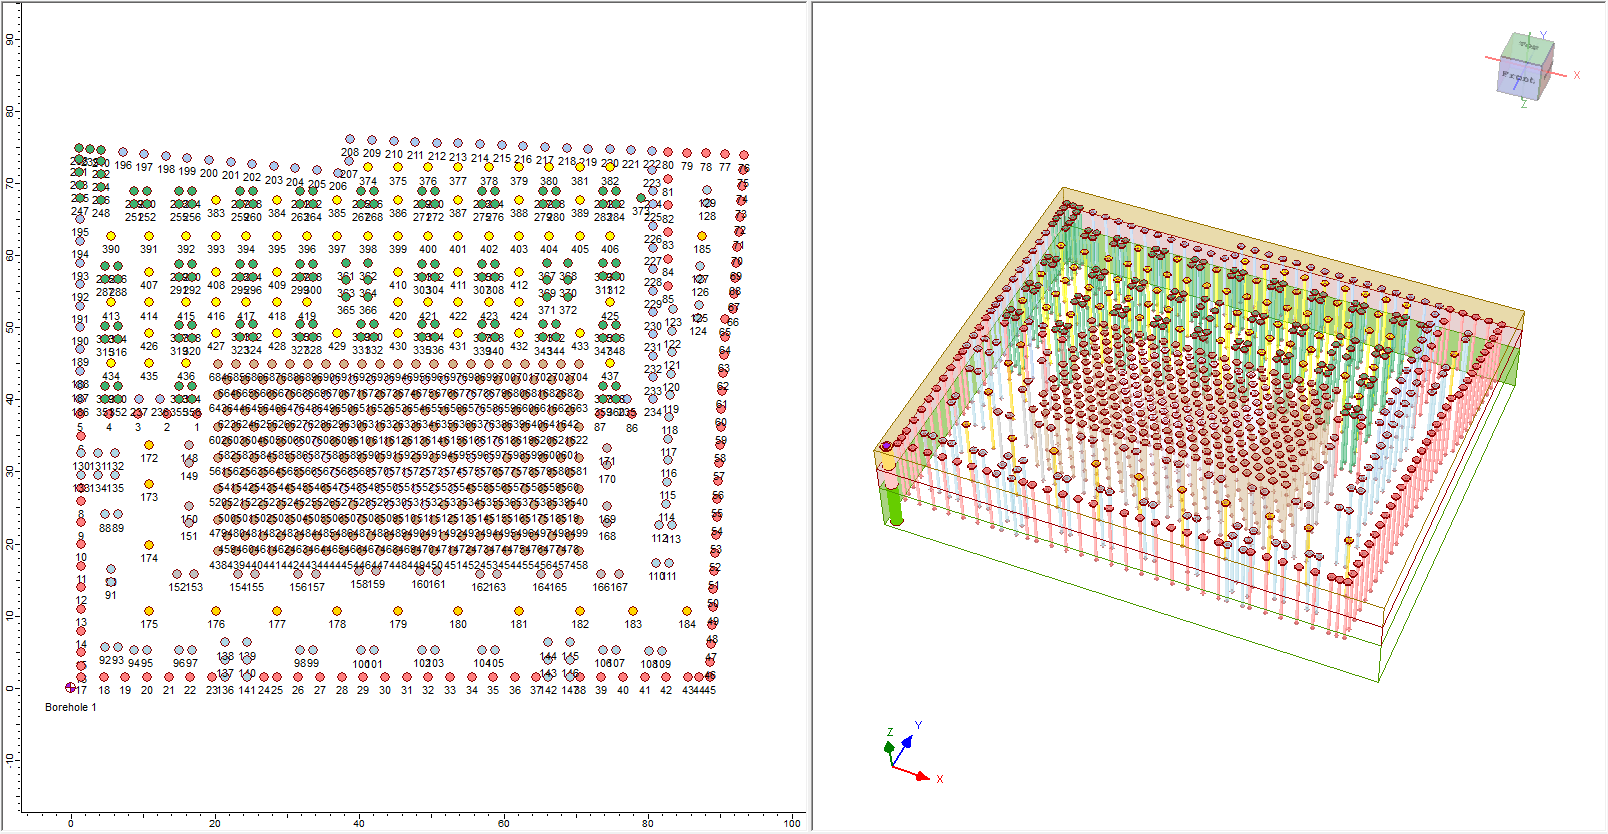
Once correctly imported, the user will see all the piles imported in the base model. Below shows the model creation after importing all piles with loads for each piles:

Viewing Results
Once the model has load cases imported, Compute (select Results > Compute) and the model will generate an output file with basename_output.xlsx. This excel should open automatically after computing, but can also be opened by selecting Results > Multiple Load Cases.
In addition to the base model, the sub files are generated with each load case, allowing users to review each load case, and run the analysis separately to view the results.
Note that the ‘base’ model is the template file for multiple load case, but the ‘sub’ files are generated from the ‘base’ model with the soil properties, boreholes, groundwater, pile section and pile types. In ‘base’ file, the user will not see any results in the RSPile program, but in ‘sub’ files, the user will be able to see the results for its corresponding load case. This makes it much easier for users to check each individual pile analysis for specific load cases.
Below shows displacement result for one of the load cases (Live load):
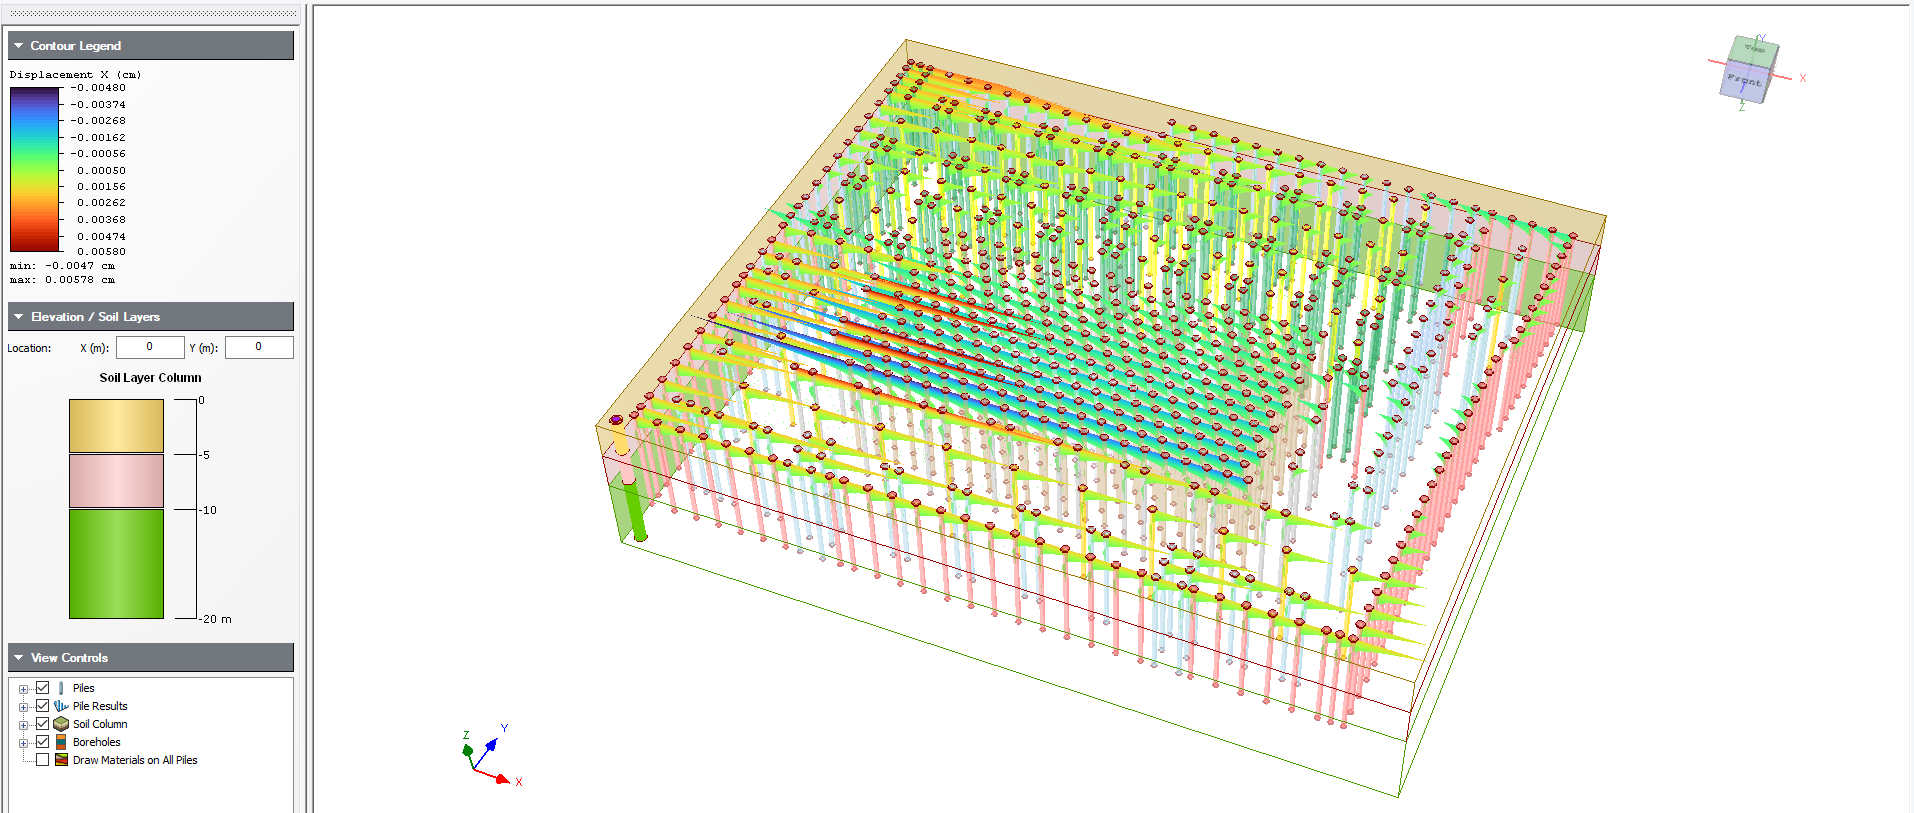
The user can filter through the spreadsheet and select the maximum deflection plots for each piles, or decide to filter through and select the load case where the capacity ratio exceeded value of 1, etc. This feature provides a vast number of possibilities for the user to simulate different load case analyses in their pile design.
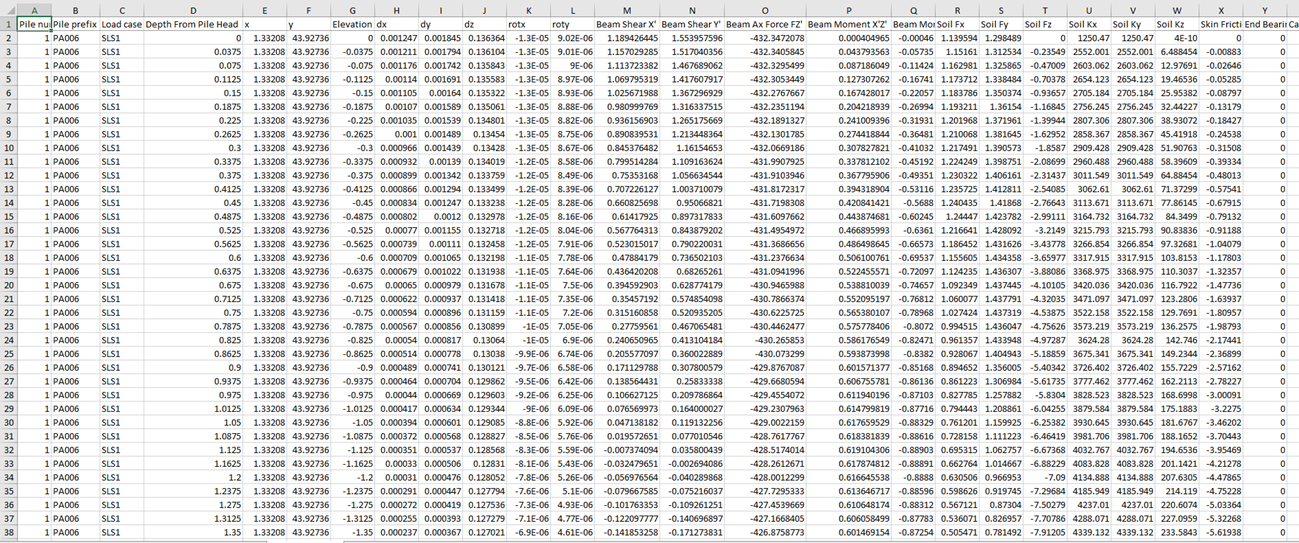
Below shows the full list of results for output from the multiple load case feature.
In sum, this feature allows users to apply and analyze multiple piles with different load cases, saving engineers hundreds of hours if done manually. This will change the way engineers design and analyze projects with multiple piles with multiple load cases.
Additional notes
- The feature starts with a ‘base’ model file (*.rspile2) where the user will have no control over the piles, only the soil properties, borehole, pile section and pile types. This is to allow users with this template file to import load cases where the ‘sub’ files which are generated with piles and the loads defined from the load case spreadsheet.
- This feature only allows the user to have one ‘base’ model to be saved in a folder that does not have any RSPile files. This is to ensure that the user is working with one template model from which they can analyze multiple load cases for the given template model which contains the pile type, pile sections and soil properties. If the user wishes to see different load cases for the same ‘base’ model as template, they can re-save this file to a different empty folder and re-import load cases.
- The imported spreadsheet will remain in the current working folder. If you would like to analyze different load cases from different spreadsheets with the same ‘base’ file, simply re-import the spreadsheet and the new spreadsheet will replace the previously saved load case spreadsheet.
- If the user wants to move the base file, they should save it in empty folder where there are no RSPile file present. Otherwise, the multiple load case will proceed as intended with the other RSPile files inside the folder but will not influence the overall multiple load case analysis.
- Please wait until the results are presented. The user should be prompted with final output spreadsheet (basefile name_output.xlsx) containing all the results. Press CTRL + arrow to go to the last page of the spreadsheeted in excel.