Create 2D Section From Selected Polyline(s)
The Create 2D Section From Selected Polyline(s) option works similarly to the RocFall2 Section Creator. With this feature the user is able to create one or multiple 2D sections from a polyline drawn in the viewport.
To create a 2D section from a polyline:
- Click the Draw Polyline
 icon in the toolbar or select Geometry > Draw Polyline in the menu.
 - Left-click to draw a polyline.
To create a valid section from a polyline, the polyline must intersect with (or have the ability to intersect with) the model, but does not need to extend the entire length of the model. The Section Creator will automatically extend each line segment to fully intersect the length of the model.
If the polyline has multiple segments, a 2D section will be created for each segment, as long as that segment can intersect with the model. Line segments that cannot intersect with the model will be disregarded.
If the polyline has multiple segments, a 2D section will be created for each segment, as long as that segment can intersect with the model. Line segments that cannot intersect with the model will be disregarded.
- When done drawing the polyline, right-click and select Done

- Select the polyline in the Visibility Tree. (Multiple polylines may be selected at the same time.)
- Select Geometry > Create 2D Section from Selected Polyline(s) in the menu. The Create/Edit Sections dialog will open.
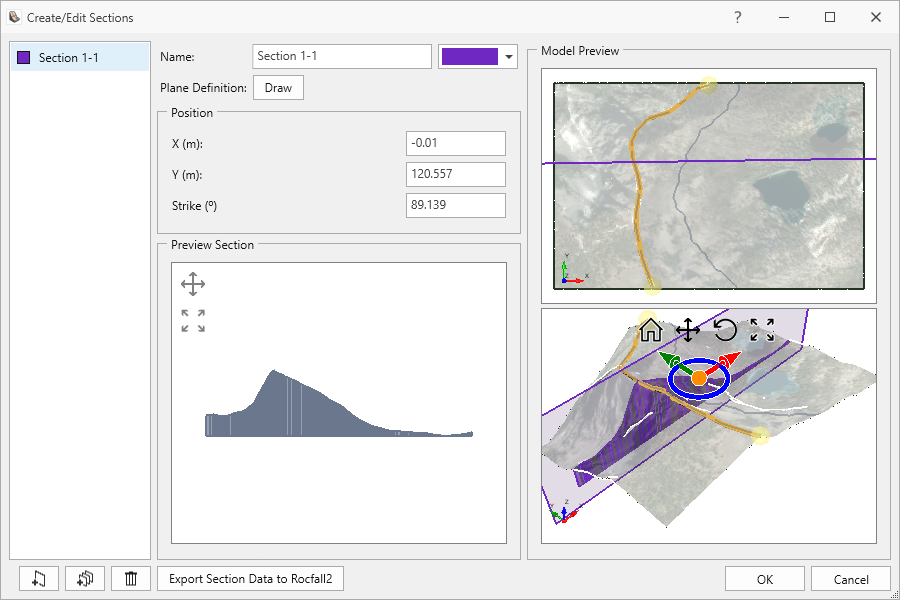
Create/Edit Sections Dialog - From this dialog, the section can be previewed and adjusted. To move the section, the following options are available:
- Use the Position fields to type new coordinates or a new strike angle.
- Use the Freehand Manipulation tool to move the section with your mouse.
- Under Plane Definition, click Draw and then use the mouse to draw a new plane on the Model Preview.
- If Multiple Sections are created from the polyline, then select the section you wish to edit in the list on the left side of the dialog, and then proceed as instructed above to edit the section.
- When done, click OK to close the dialog and to create the section(s). The section(s) will be listed in the Visibility Tree.
After a 2D section is created, it can be exported to RocFall2 for analysis by selecting Analysis > Export All Sections to RocFall2. For more details on exporting 2D sections to RocFall2, see Tutorial 5: RocFall2 Section Creator.