Add Loads
The Add Loads option can be used to add a load without preemptively selecting a surface on which to apply the load.
To use the Add Loads function:
- Select the Loading & Support workflow tab
- Select Loading > Add Loads

- The Add Load dialog will appear.
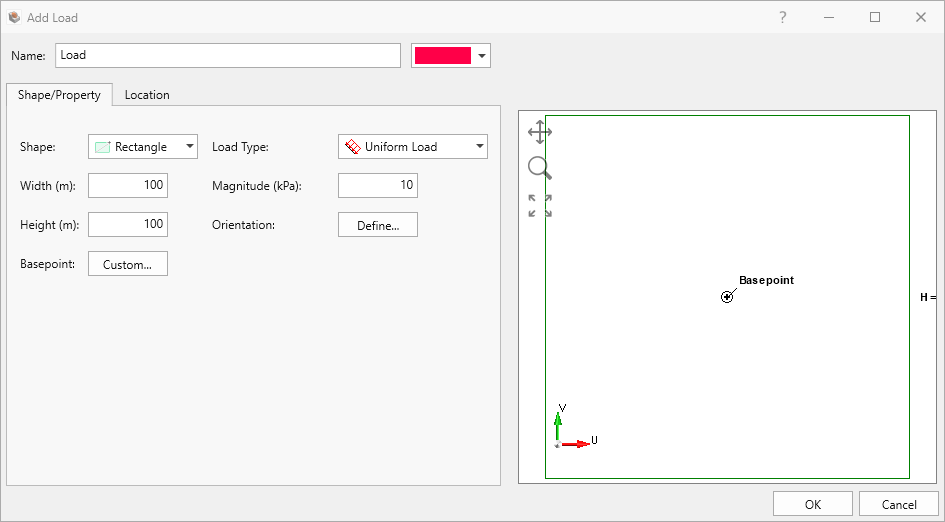
- Define your load Shape and Property under the Shape/Property tab:
- Select load Shape (rectangular, circular, polygon).
- Select Load Type (uniform, non-uniform, elevation).
- Set the Magnitude and Orientation of the load.
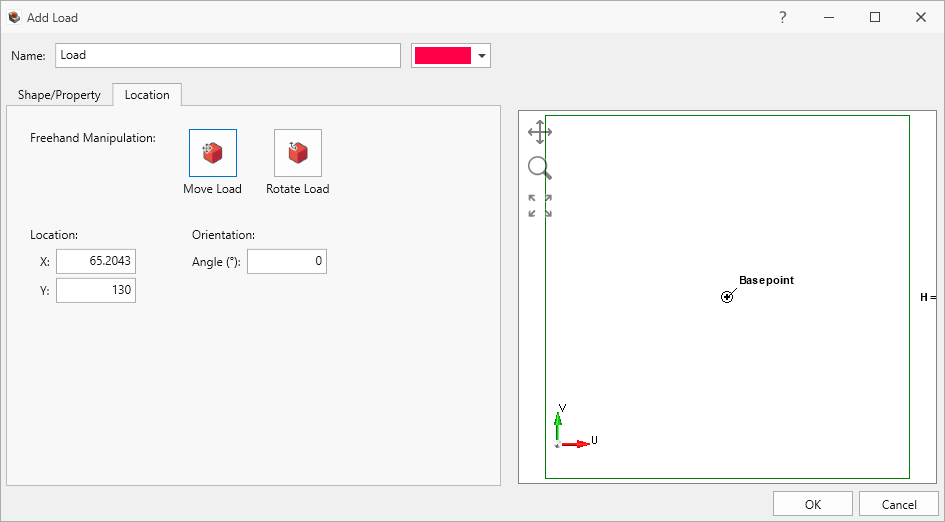
- Select the location on the model to be loaded using the Location tab. Enter a Location (X, Y) and Orientation, or use Freehand Manipulation functionality.
- Click OK to add the Load node.
Shape/Property Tab
Define Load Shape and Properties
- Rectangle
- Width (m) and Height (m)
- Magnitude (kPa)
- Load Type (Uniform, Non-Uniform, Elevation)
- Basepoint (default or custom)
- Orientation (vector, trend/plunge, normal, local +x, local +y, local +z)
- Circle
- Radius (m)
- Load Type (Uniform, Non-Uniform, Elevation)
- Magnitude (kPa)
- Basepoint (default or custom)
- Orientation (vector, trend/plunge, normal, local +x, local +y, local +z)
- Polygon (use table to enter custom coordinates)
- Basepoint (default or custom)
- Magnitude (kPa)
- Orientation (vector, trend/plunge, normal, local +x, local +y, local +z)
- Coordinates [U(m) and V (m)]
Base Point
The Basepoint is defined relative to a local coordinate system corresponding to the shape of the load. The Basepoint (u, v) snaps to the Location (x, y) in the global coordinate system. The U and V axes correspond to horizontal and vertical axes in the local shape, which is indicated at the right side of the shape/property dialog.
Orientation
The load orientation may be specified using one of the following options:
- Normal - loads are applied normal to the boundaries.
- Local +x - loads are applied to the boundaries in the positive x-direction (i.e., +x).
- Local +y - loads are applied to the boundaries in the positive y-direction (i.e., +y).
- Local +z - loads are applied to the boundaries in the positive z-direction (i.e., +z).
- Vector (x, y, z) - specify a vector from the x, y, and z-directions.
- Trend/Plunge - specify a trend and plunge (see Sign Convention for more information).
Location Tab
Location options allow loads to be either placed freehand on the model using the Freehand Manipulation commands or defined by coordinate on the modelling interface.
- Freehand Manipulation: These commands will minimize the large define load dialog and allow the user to place the load freely on the model.
- Move Load: Move the mouse around the modelling interface and click to place the load in the desired location.
- Rotate Load: Move the mouse to rotate the orientation of the load, using the center as the base.
- Numerical Definition:
- Location: Enter the coordinates to define where the basepoint (previously defined in the Shape/Property tab) of the load will be located on the model.
- Orientation: Enter an Angle to finalize the load definition. The load rotates with respect to the base point.
The load is applied to the External by projecting the load down onto the External surface.