Block Information
After blocks and kinematics are computed, information about all or specific blocks can be displayed in the Block Information pane. To view Block Information:
- Navigate to the Results workflow tab

- Select Interpret > Block Information

The results for each block are displayed in a table format.
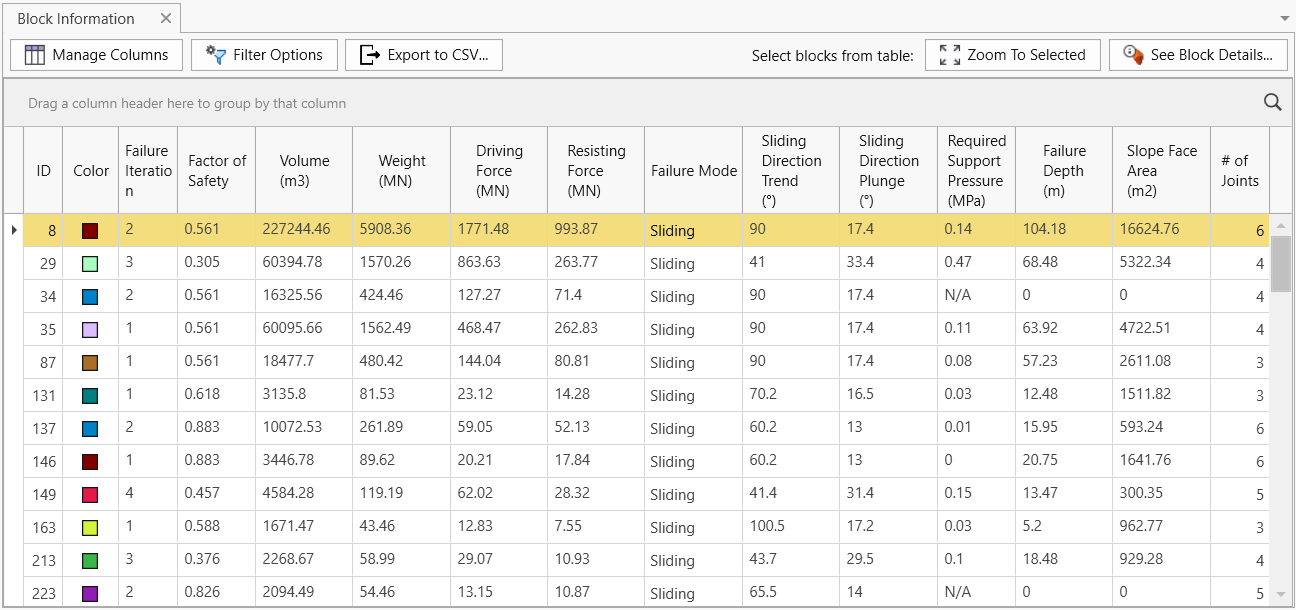
The following columns are available:
- ID: Unique block IDs for all valid blocks
- Color: Corresponds to the color of the block which depends on the Block Colors option selected (e.g., Random Colors, Active Contour, etc.)
- Removable?
- FS < Design FS
- Failure Iteration
- Factor of Safety
- Volume
- Weight
- Driving Force
- Resisting Force
- Failure Mode
- Sliding Direction Trend
- Sliding Direction Plunge
- Required Support Pressure
- Failure Depth
- Min. Factor of Safety
- Max. Support Pressure
- Max. Failure Depth
- Probability of Failure
- Slope Face Area
- # of Joints
The default visibility of columns is automatically set depending on:
- Block type and Results Set
- If the Block Type is Unit and Combined Blocks, then the Block Information does not list any entry and is inaccessible.
- If the Block Type is Unit Blocks, then only Unit Blocks belonging to the selected Results Set (All Valid Unit Blocks, Removable Unit Blocks, Failed Unit Blocks) are listed.
- If the Block Type is Combined Blocks, then only Combined Blocks belonging to the selected Results Set (Removable Combined Blocks, Failed Combined Blocks) are listed.
- Deterministic Analysis or Probabilistic Analysis
Manage Columns
The visibility of any of the columns listed above can be toggled by selecting the Manage Columns  button at the top of the Block Information pane and then by checking/unchecking the column names in the left pane.
Filter Options
Filtering can be applied to blocks viewed in the viewport and listed in the Block Information pane by selecting the Filter Options  button at the top of the Block Information pane.
Edit Filters
A handful of quick filter controls are available in the Edit Filter section in the left pane.
The quick filters include:
- Failure Iteration (if Successive Failure is selected in Project Settings)
- Factor of Safety
- Volume
- Failure Depth
- Weight
- Support Pressure
- Failure Modes
Enter range values in the edit boxes or slide the sliders to specify the inclusive range (i.e., >= min and <= max) of the numeric quick filters.
The Full Filter Editor allows users to define other filters not included in the quick filters or create more advanced filters using combinations of conditional statements to query the column data.
To create a filter:
- Select the Full Filter Editor button in the Edit Filters section.
- In the Filter Editor dialog:
- Click the Add
 button to Add Condition.
 - To define the Condition:
- Select the Column Name (e.g., Factor of Safety) to query
- Select the Operator (e.g., Is less than)
- Select the Operand (e.g., 1)
- Select the drop down beside the Add button to Add Condition, Add Group, or Add Custom Expression.
- Any number of Conditions or Groups can be added which can be treated as "And" or "Or" statements.
- Click the Add
- Click OK to finish defining the filter and apply to the results.
When a filter is applied:
- The bottom of the Block Information pane will show the applied filter as checked.
- The listing of blocks in Block Information will only show blocks meeting the filter criteria.
- The visibility of blocks in the 3D View will only show blocks meeting the filter criteria.
To edit the filter:
- Select the Full Filter Editor button in the Edit Filters section, or
- Select the Edit Filter button at the bottom right of the Block Information pane.
To clear the filter:
- Select the Clear Current Filter button from the Edit Filter section, or
- Select the Clear Filter button at the bottom right of the Block Information pane.
To save the filter:
- Select Save Current Filter button from the Edit Filter section.
- In the Save Filter dialog:
- Select Save As New Filter
- Enter the Name for the filter.
- Click OK to save the filter.
Saved filters appear under Saved Filters section of Results Options.
Saved Filters
The Saved Filters option allows users to save filters and load saved filters from previous projects to be applied to the current project.
To load and apply a previously saved filter, select it from the list.
To delete a saved filter:
- Select the saved filter from the Saved Filters list.
- Click the Delete Current Filter button.
Zoom To Selected
To zoom to a specific block in the 3D CAD View:
- Select a block from the Block Information grid. The selected block's row is highlighted.
- Select Zoom To Selected
 .The viewports are zoomed to the extents of the selected block. The selected block is highlighted in PINK.
If a block is graphically selected by clicking on a block in the 3D View, the corresponding Block Information row will be highlighted and scrolled to the top of the table.
See Block Details
For any selected block (Unit Block or Combined Block), Detailed Block Information can be viewed for that block.
Export to CSV
The Export to CSV option allows the user to export the data currently being shown in the Block Information table to a CSV file (in .txt or .csv format).