Export 2D Sections to Slide2
1. Introduction
This tutorial will demonstrate how to use the Slide2 Section Creator tool. The
In this tutorial, the Slide2 Section Creator will be used to create better visibility of the slip surface by taking a snapshot of the model and analyzing it in Slide2.
2. Open the Model
- Select File > Recent > Tutorials and read in the file Section Export to Slide2 - starting file from the installation folder.
3. Slide2 Section Creator- Single Section
- Select: Analysis > Project Settings

- Only select Janbu Simplified under analysis methods to reduce computation time for the model.
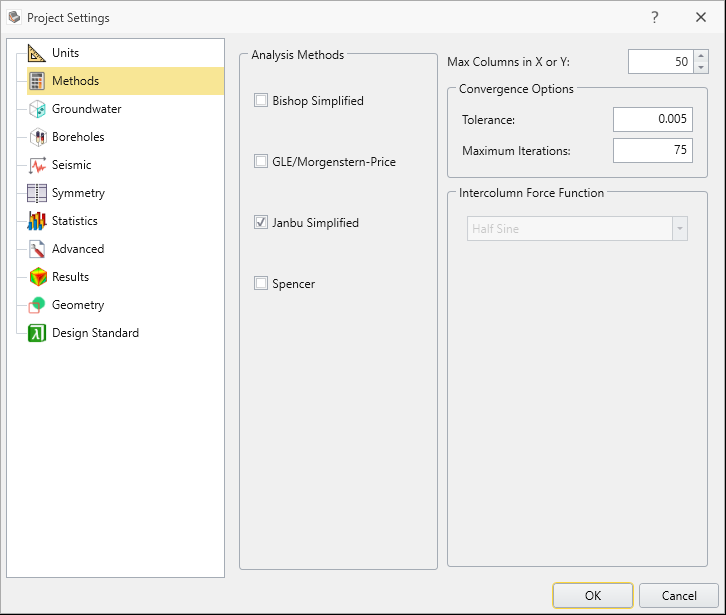
- Select OK.
- Select the Results workflow tab.

- Compute
 the model.
 - Select the Results tab to view the failure surface on the model.
- Turn on the contours by selecting the Show Contours
 option on the toolbar. The model should look as follows:
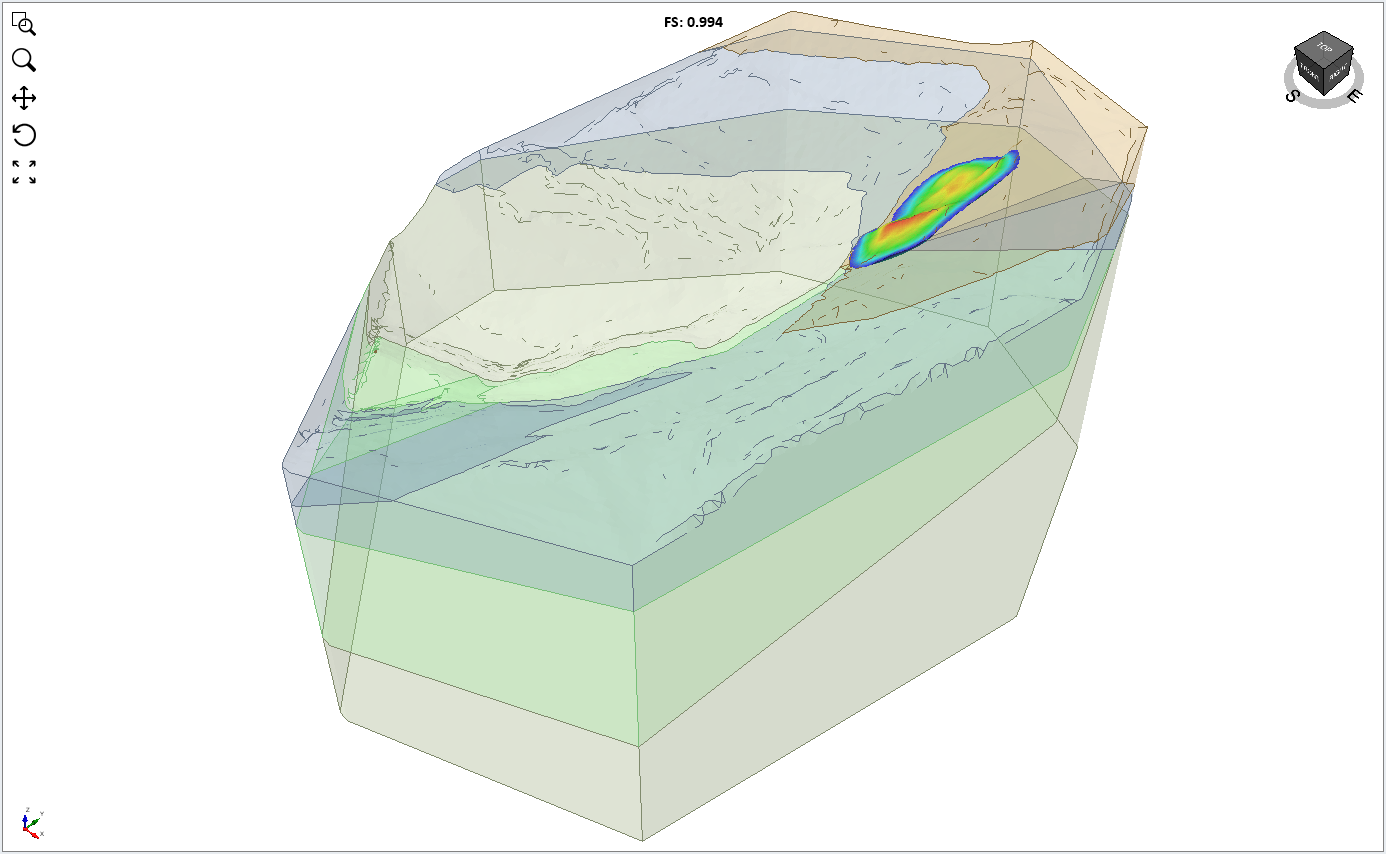
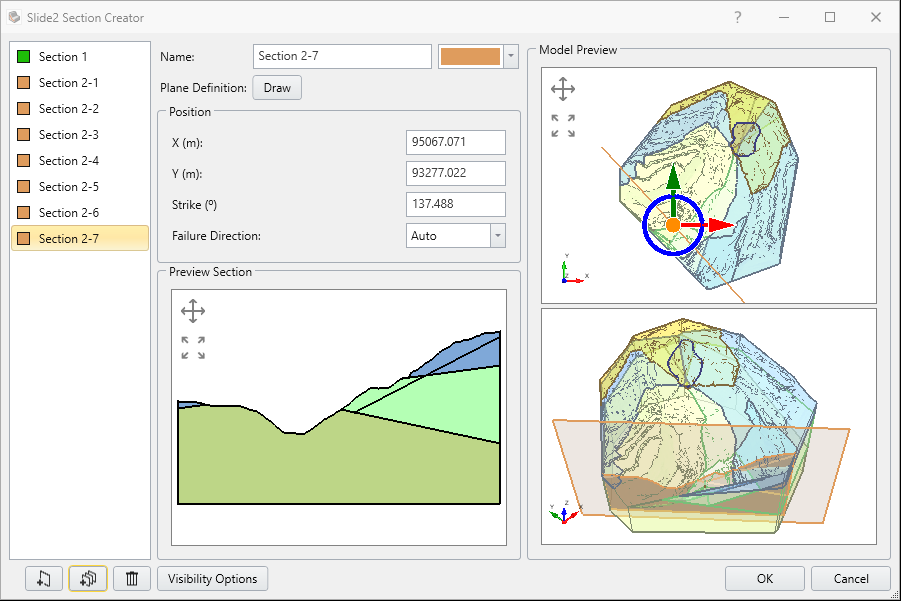
- Select View > Slide2 Section Creator or click the Slide2 Section Creator
 button on the toolbar.
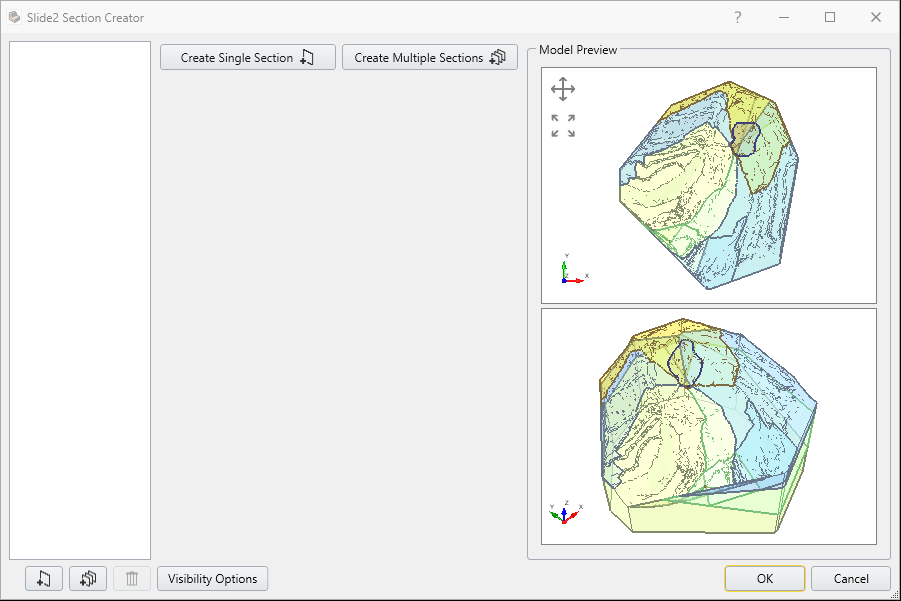
- Click on Create Single Section

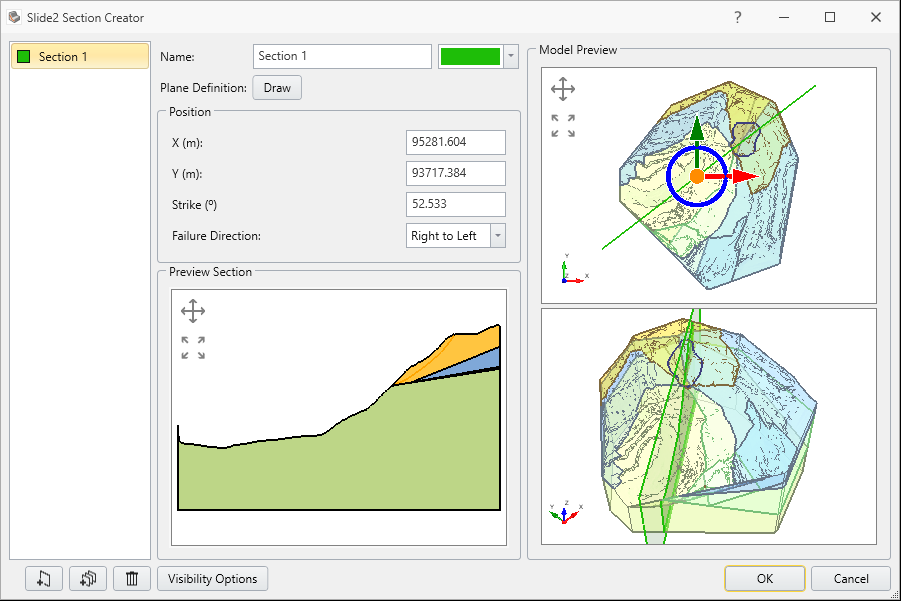
The Section Tool can be used to get a better view of the failure surface. Let's adjust the section plane to cut through the failure surface. The section can be defined either by adjusting the section manually in the Model Preview pane, or by entering coordinates under Plane Definition. - Enter the following U/V coordinates to draw a plane slicing through the failure surface:
- X: 95381.604
- Y: 93717.384
- Strike: 52.533
- Select the Right to Left option for Failure Direction.
It is important to select the appropriate Failure Direction to ensure that the failure surface can be located in 2D. Select OK to exit the dialog.
The section is now visible on the model and in the visibility tree.
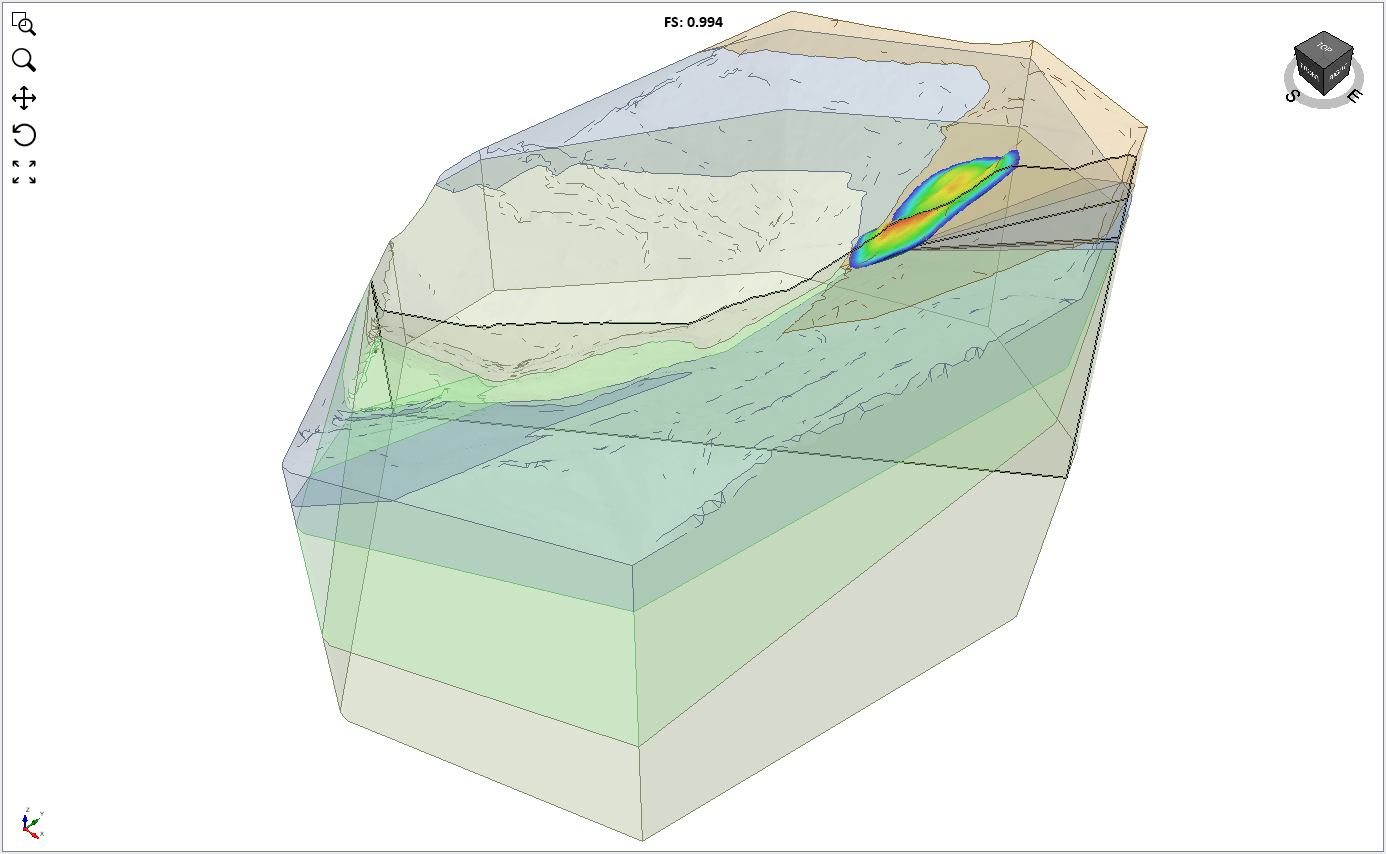
To view only the section created, use the eye icon in the Visibility Tree to hide the layer "Global Min: Bishop". This will hide the results from the 3D analysis and display only the 2D section.
4. Slide2 Compute
- Select: Analysis >Slide2 Integration > Compute/Export to Slide 2… or click the Slide2 > Compute/Export to Slide 2 icon on the toolbar.
Compute/Export to Slide 2 option allows you to run 2D analysis for the sections you just created using Slide2 Compute Engine (Slide2 must be installed for this feature).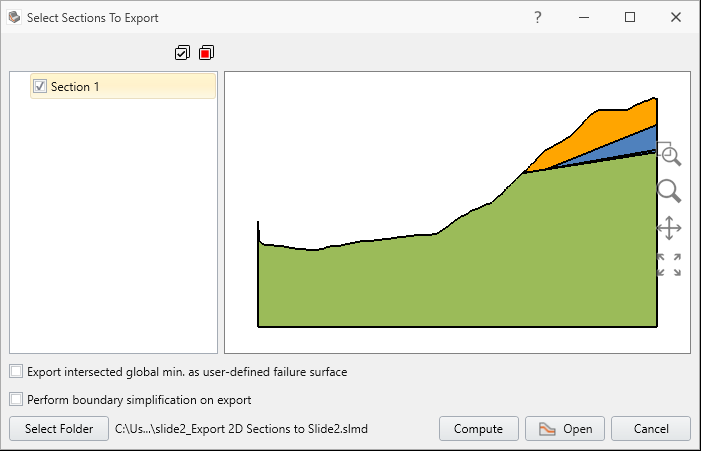
- Section Selections to Export dialog will show up to select exporting sections.
- Select the Section1 to be computed and press Compute. The selected sections will be exported as a Slide2 Multi-Group file. The Slide2 compute engine will now open and begin to compute the section. The Slide2 engine will now open and begin to compute the section.
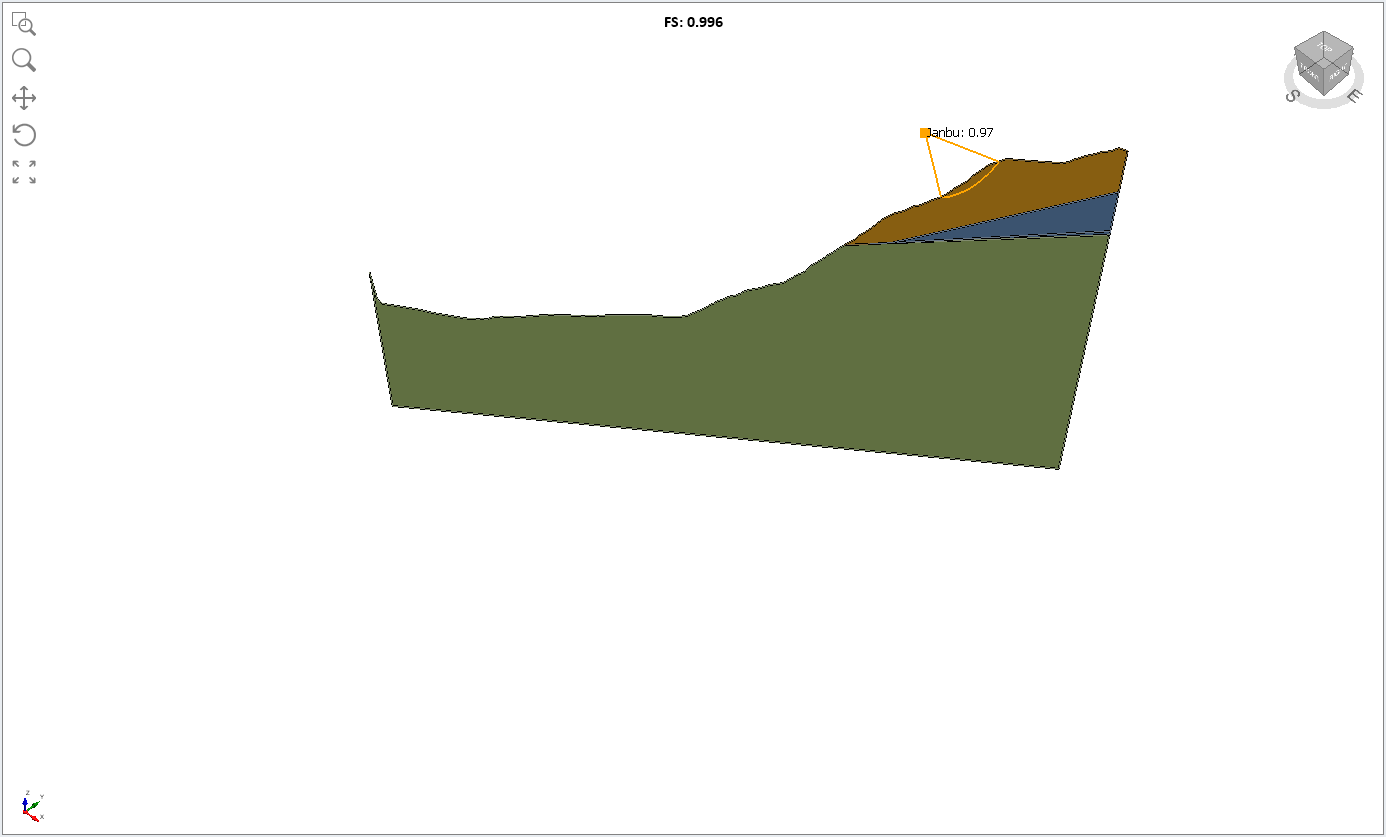
When the engine has finished the computation, the results will appear on the section.
To better visualize the 2D surface:
- Select
 Toggle: visibility of Global Min: Bishop off using the eye icon in the Visibility pane.

You should now be able to see 2D global minimum surface displayed on the section.
Let's proceed to add multiple sections using the multi-section tool.
5. Slide2 Section Creator - Multi-Section
- Select: View > Slide2 Section Creator or select Slide2 Section Tool button on the toolbar.
- Select the Create Multiple Sections
 from the bottom left corner of the dialog.
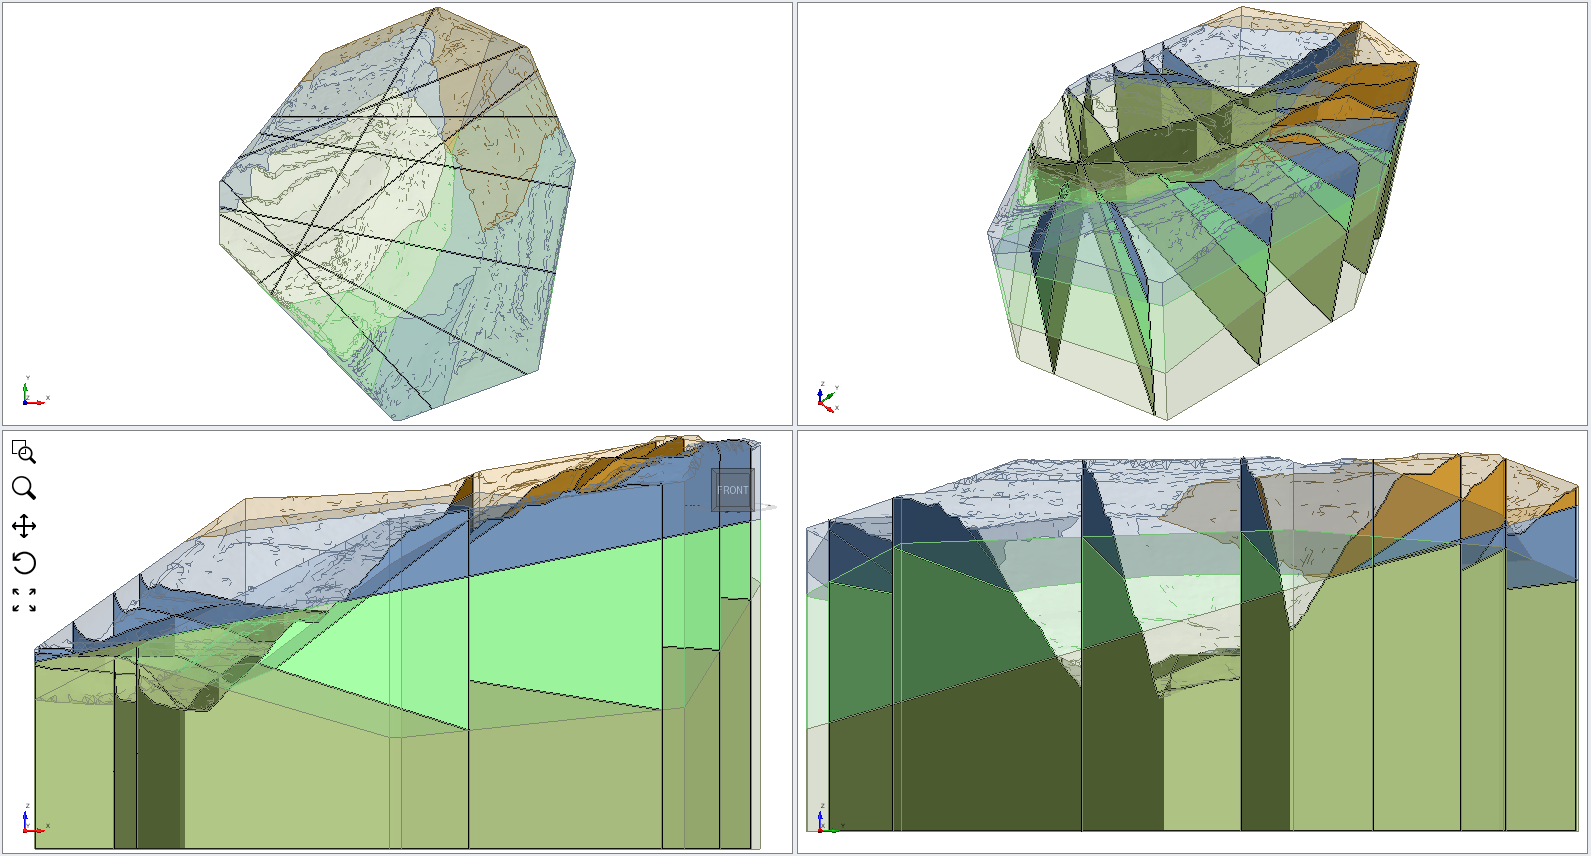
A Multi-Section data will be added into the list of sections. The first step for adding multi-sections is to draw the path that the sections will follow. This can be done either manually or by entering U/V coordinates. - In order to do that, first select a Creation method. For this example, select “Section per Segment”
- Assign 2 for the Number of Sections
To enter U/V coordinates in the grid:
- Add 8 rows to the table by selecting the "Append rows to bottom of grid" button on top of the table.
- Enter the following U/V coordinates: to add multi-section data.
An alternative option is to use 'Draw' function which allows users to draw path on the model in model view pane. After path is drawn you can select Done to exit the menu. For this tutorial we will be using the U/V Coordinates in grid. - Enter the following coordinates:
- Select: OK to exit the dialog.
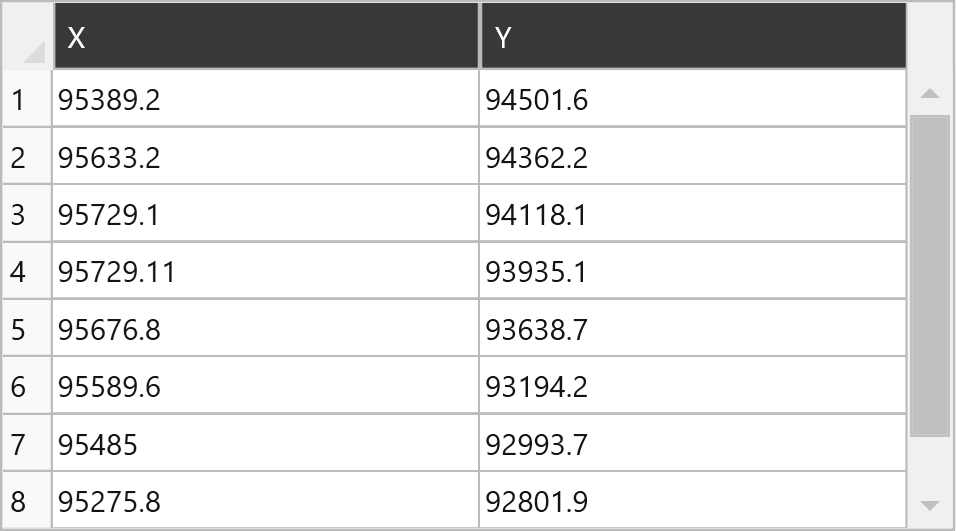
You can copy and paste the following Inputs into columns:
U |
| 95389.2 |
| 95633.2 |
| 95729.1 |
| 95729.11 |
| 95676.8 |
| 95589.6 |
| 95485 |
| 95275.8 |
V |
| 94501.6 |
| 94362.2 |
| 94118.1 |
| 93935.1 |
| 93638.7 |
| 93194.2 |
| 92993.7 |
| 92801.9 |
The path will now appear on the Model Preview pane (select Top View).
New sections will be added into the model automatically. You will see the following section cuts as shown below.
You can export or compute these sections by using Compute/Export Slide2 options.
- Select: Compute/Export Slide2… from toolbar or File > Export > Slide2 Export… from the menu.
This ends the Export 2D Sections to Slide2 from General 3D Geometry tutorial.