Import Slide2 Model
1.0 Introduction
The simplest type of 3D slope model is a 2-dimensional slope profile which has been extruded in the third dimension to create a 3D slope with a constant profile.
In this tutorial, we will demonstrate the Slide2 Import option, which allows you to import 2- dimensional slope models from the Slide2 program into Slide3 as 3D extruded slope models.
This feature is useful for comparing 2D slope stability results with equivalent 3-dimensional models, to evaluate the significance of 2D versus 3D modelling. In general, 3D extruded slope models tend to give higher safety factors than the 2D counterparts, due to the “end effects” of the 3D surface. However this may not always be the case, and results can vary depending on the model.
2.0 Slide2 Model Files
It is assumed that you are familiar with the Slide2 program and have access to it.
We will be importing the Slide2 file from: C:\Users\Public\Documents\Rocscience\Slide3 Examples\Tutorials\Import Slide2 Model
There are two (equivalent) ways to import a Slide2 file into Slide3:
- Select File > Import > Import Slide2 Project and navigate to the folder above to open Composite Surfaces.slmd.
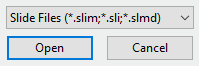
- Select File > Open Project, select Slide Files as the File Type, and within the above folder, open Composite Surfaces.slmd.
3.0 Slide2 Tutorial 4: Composite Surfaces
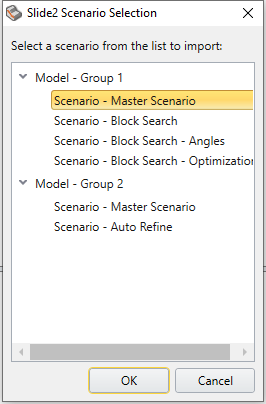
- Select Group 1, Scenario - Master Scenario in the Slide2 Scenario Selection dialog.
- Click OK.
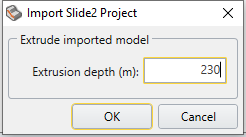
- In the Import Slide Project prompt, change the Extrusion Depth to 230m, then click OK.
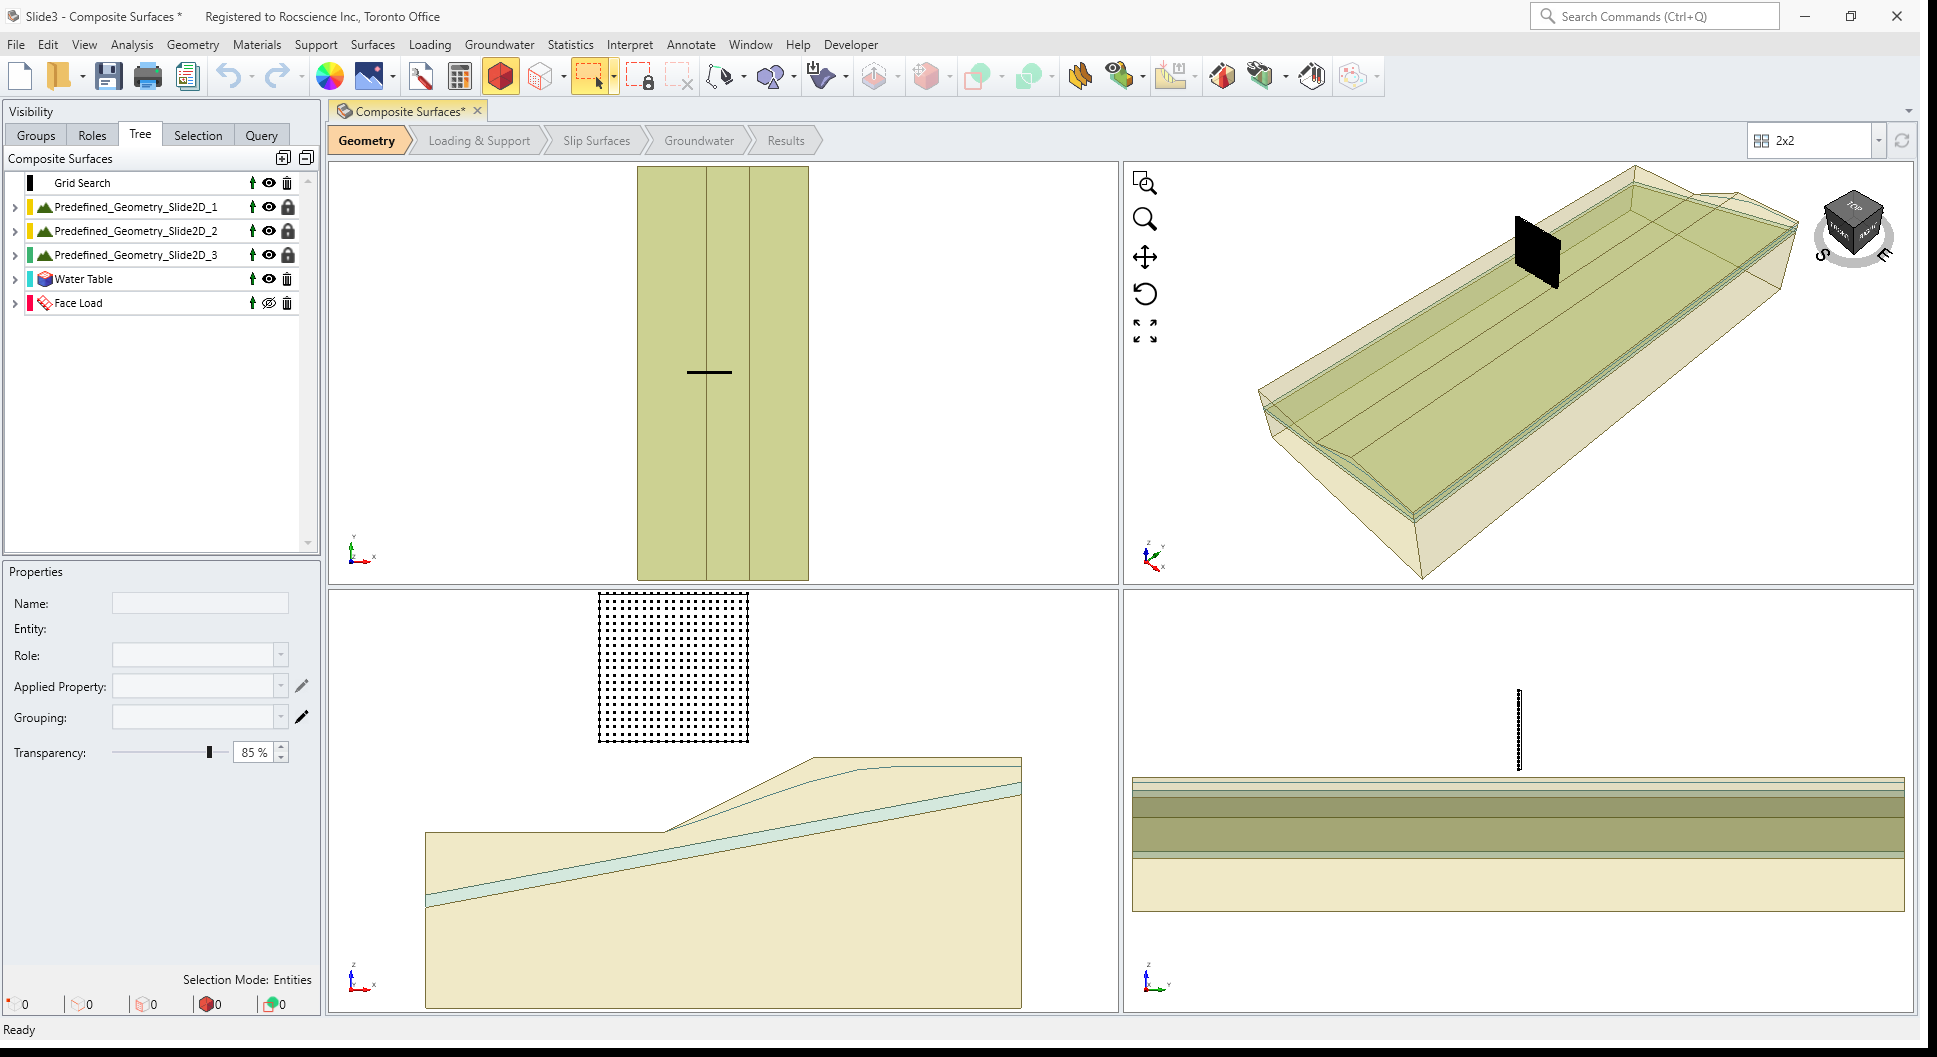
You should now see the following 3D model. It is a “weak layer” model which is assumed to have strong bedrock below the weak layer. The model also has a water table and a distributed load at the top of the slope.
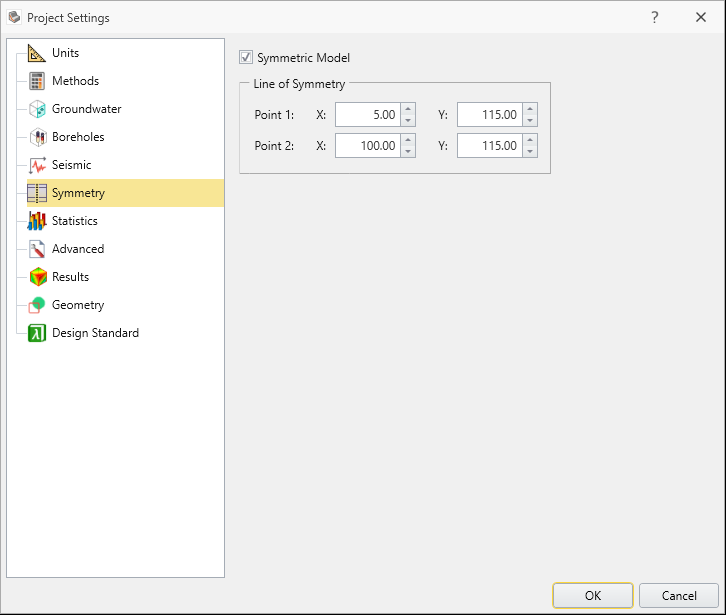
3.1 Symmetry
When you import Slide2 models into Slide3, the Symmetry option in Project Settings is automatically turned on, and the location of the line of symmetry is automatically calculated based on the extruded length of the model.
- Select: Analysis > Project Settings > Symmetry
 to view the line of symmetry.
- Select Cancel in Project Settings.
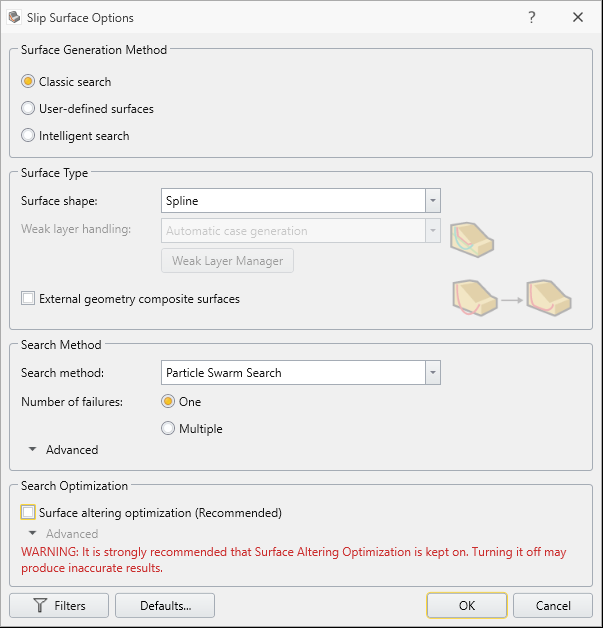
3.2 Slip Surface Options
- Select: Surfaces > Slip Surface Options

Notice that the checkbox for External Geometry Composite Surfaces is selected. This option considers all slip surfaces which intersect the lower edge of the External volume, to travel along the External boundary.
Notice that the Surface Type = Spline and the Search Method = Particle Swarm Search.
- Select OK.
4.0 Compute
- Save the model.
- Select: Analysis > Compute, or the Compute
 icon from the toolbar.
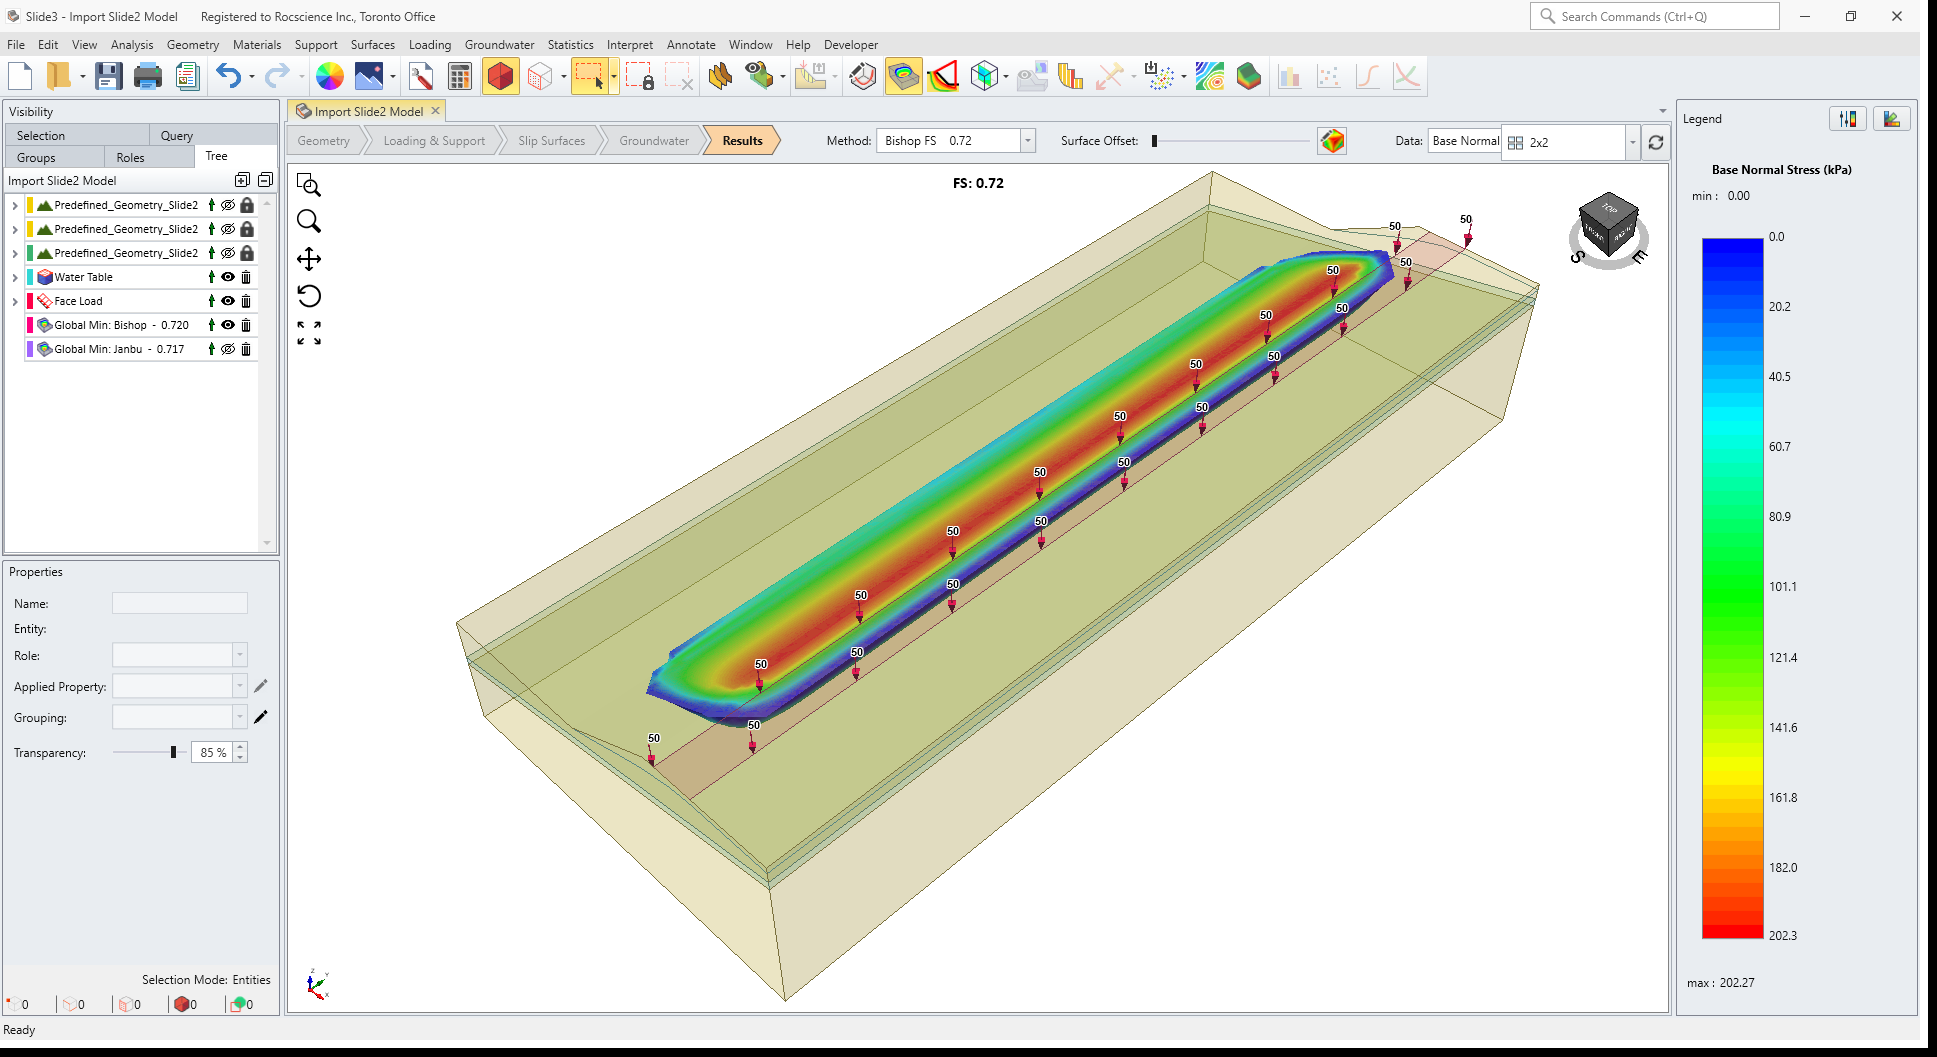
5.0 Results
- Select the Results workflow tab

- Select Show Contours
 from the toolbar. You should see the following:

6.0 Search Options
- Select: Surfaces > Slip Surface Options
- Turn on the Surface Altering Optimization checkbox. Select OK.
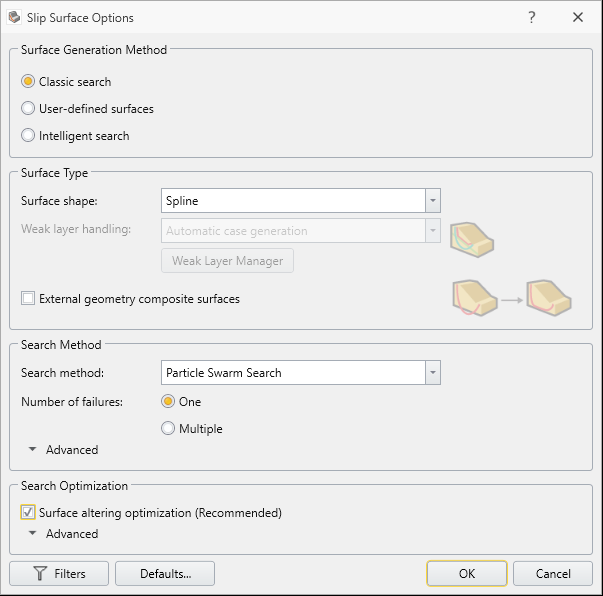
- Save and select Compute to re-run the analysis.
7.0 Results
- Select the Results workflow tab
- With Surface Altering Optimization, you should see the following results. The safety factor has been lowered with surface altering optimization. This highlights the importance of search methods. In general, the Surface Altering optimization search option should be turned ON for most models.
- Compare the 3D and 2D results by running the model in Slide2.
- Try opening and running other Slide2 models in Slide3, and compare the 2D and 3D surfaces and safety factors, with and without surface altering optimization.
8.0 Additional Exercises: Slope with Tieback Support
- Open the Slide2 file Tutorial 06 Support (choose the scenario – With Tieback Support).
- Compute the results and compare