26 - Import From RSWall
1.0 Introduction
This tutorial will demonstrate how to import an RSWall model into Settle3 and perform settlement analysis beneath a gabion retaining wall.
Topics Covered in this Tutorial
- Importing an RSWall file
- Configuring extruded soil layers
- Defining soil stiffness parameters
- Applying surcharge loading
- Reviewing settlement results
1.1 Model Description
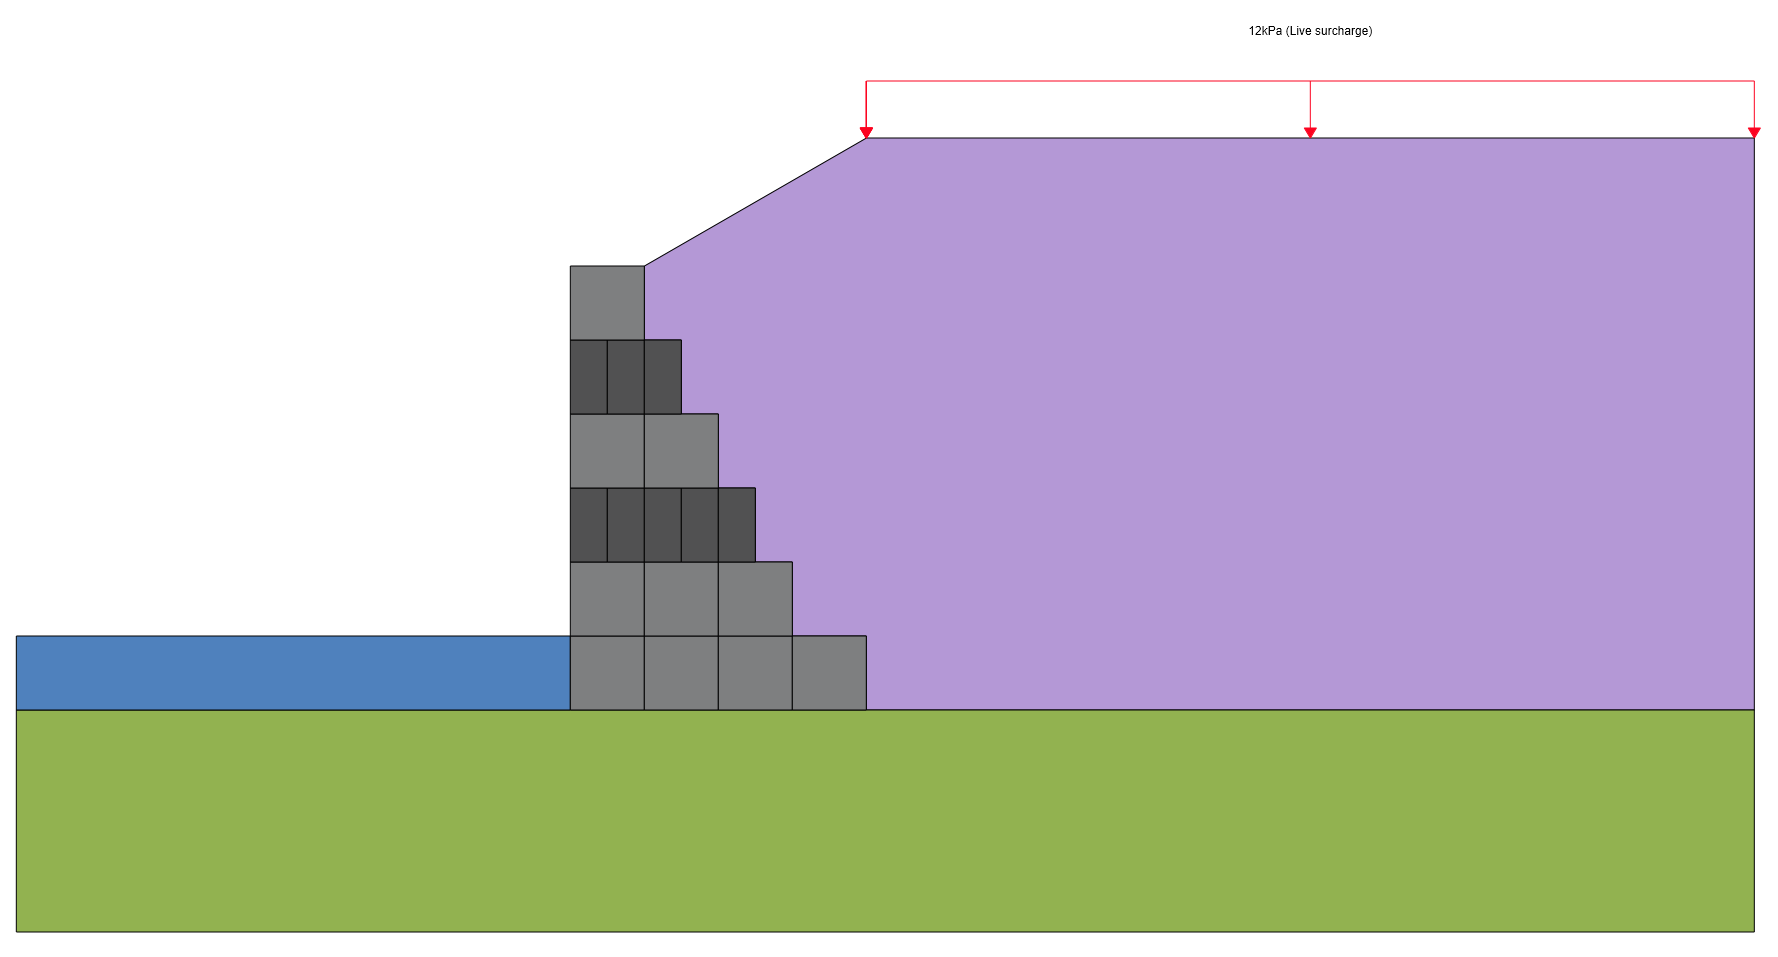
The model features a 6 m high gabion wall with six rows of baskets of varying dimensions, designed in accordance with AASHTO (2020) standards, as shown below.
2.0 Model
2.1 Project Settings
- Select Home > Project Settings

- In the General tab set:
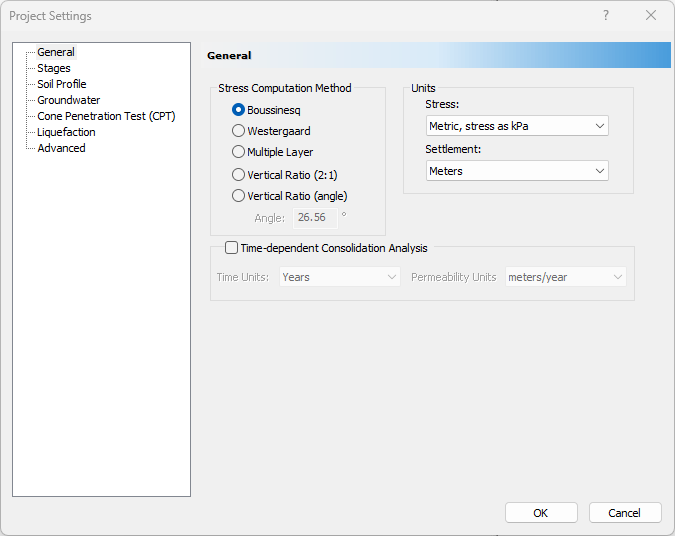
- Stress Units = Metric, stress as kPa
- Settlement Units = Meters
- In the Soil Profile tab:
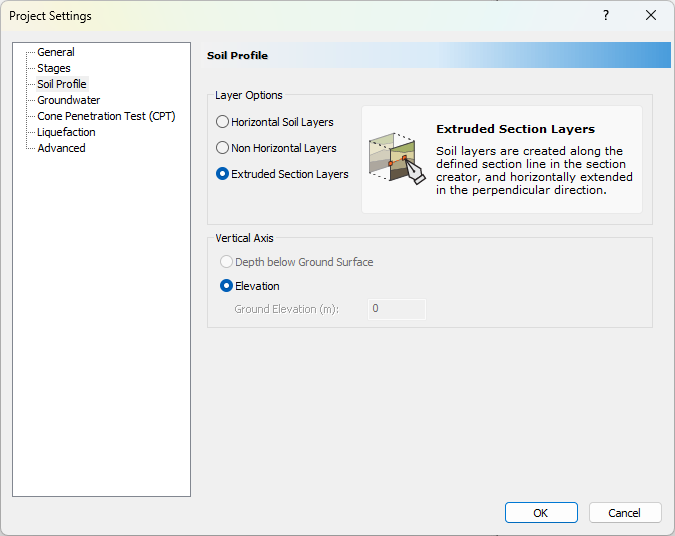
- Select the Extruded Section Layers radio option.
- Click OK
2.2 Soil Properties
Define the soil stiffness parameters used for settlement calculations.
- Select Soils > Define Soil Properties

- For Soil Property 1:
- Go to the Immediate Settlement tab and enable Immediate Settlement by ticking the checkbox.
- Set:
- Es = 32500 kPa
- Esur = 100000 kPa
- Leave the remaining parameters as default.
- Go to the Primary Consolidation tab and uncheck primary consolidation.
- Click OK.
2.3 Import from RSWall
To import the retaining wall model:
- Select Loads > Import > Import from RSWall

- Select the Tutorial26GabionWall.rswalltosettle3 file in the Tutorials folder
- Click Open
The Import from RSWall dialog will appear after successfully importing.
The user must specify the following parameters:
- Extrusion Factor - A multiplier applied to the wall height to determine the out-of-plane extrusion width used in the settlement model.
- Extrusion Depth - An optional direct specification of the extrusion width used for the embankment geometry. When defined, this value overrides the extrusion factor.
These parameters control how the imported cross-section geometry is converted into the three-dimensional geometry required by Settle3.
To review or modify the imported geometry:
- Click Open Embankment Designer to view or edit the embankment geometry representing the wall and retained soil
- Click Open Section Creator to view or edit the foundation profile generated from the imported coordinates
For this tutorial,
- Select Extrusion depth and set the value to 23m.
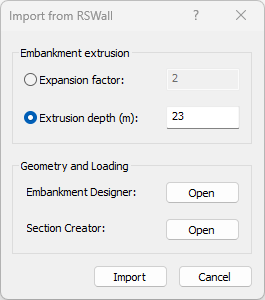
- Click Import.
The wall geometry will now appear in the modeler:
After importing the file from RSWall,
- If not already enabled, immediate settlement will be turned on for all soils used in the section creator
- A query line and field point grid will automatically be added beneath the wall
2.4 Loading
Settle3 will also import loads defined in the RSWall file. To view the load:
- Right-click the rectangular load and select Load Properties.

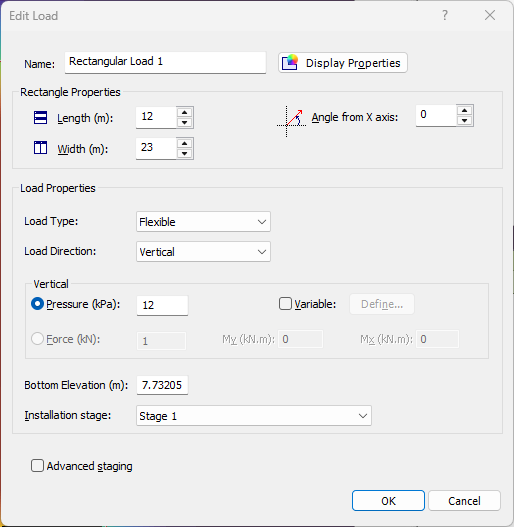
Observe the 12kPa load pressure from the original RSWall file. The load dimensions are based on the length of the wall and the extrusion depth.
3.0 Results
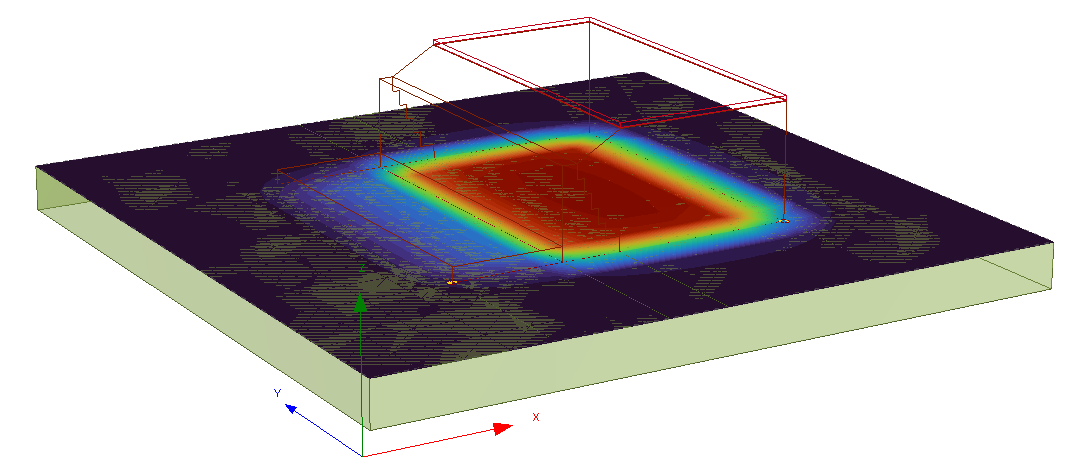
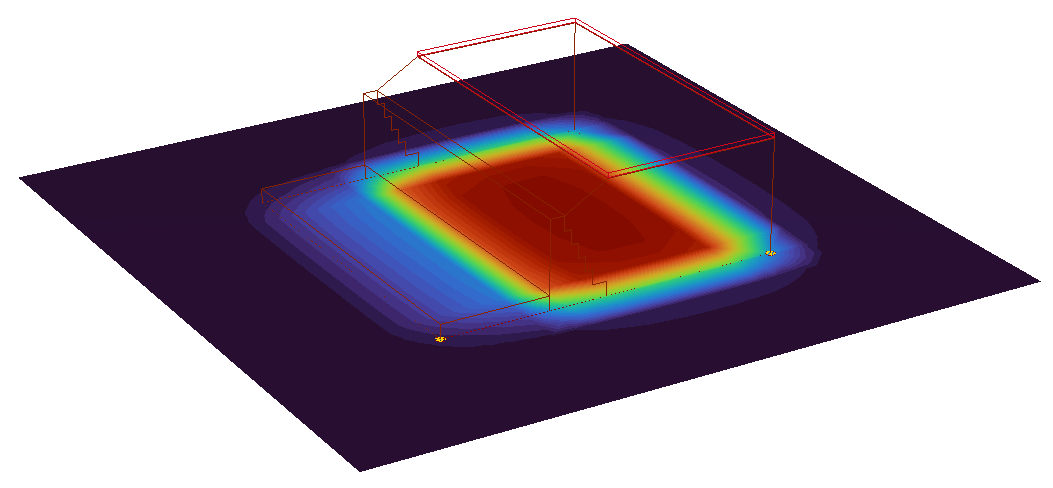
As previously mentioned, a query line beneath the wall is automatically added after the import is complete. A field point grid of query points is also added to visualize settlement results.
After computing the model, settlement contours will be displayed.
- In the View Controls (on the left of the screen), turn off the Soil Columns to better view the settlement results.
The total calculated settlement is approximately 0.0155 m, which is within an acceptable range for the wall foundation.