23 - Stone Column Drainage
This tutorial introduces the Ground Improvement feature in Settle3 that allows users to specify regions where they want to improve the ground using the Stone column technique, specifically related to the drainage option.
The stone column drainage feature along with its theory is provided more in detail here: Stone column drainage.
By the end of this tutorial, you will be able to use stone columns with permeability parameters to accelerate the consolidation process with any type of load in different stages.
Topics Covered in this Tutorial:
- Ground improvement
- Stone columns drainage
Finished Product:
The initial/final model of this tutorial can be found in the Stone column drainage_initial.s3z, and Stone column drainage_final.s3z. All tutorial files installed with Settle3 can be accessed by selecting File > Recent Folders > Tutorials Folder from the Settle main menu.
1.0 Introduction
The model used in this tutorial is the modified version of the example in Jie Han (2012) chapter 5.3.5 Consolidation of stone columns.
Our model will consist of a 40 m wide x 18 m length load with total stress of 162 kPa. The following soil properties are shown. (𝛾 = 15 kN∕m3, Es = 1.1 MPa, kr = 3.47 × 10⁻⁹ m∕s, and kv = 1.16 × 10⁻⁹ m∕s).
We will be examining the consolidation that occurs after 1 month of construction for embankment with the stone column drainage.
2.0 Model
- First, open the initial file in the tutorial folder Stone column permeability_initial.s3z.
You will see the load already has been applied and soil properties defined in the file. We will check the project settings to see the model.
2.1 PROJECT SETTINGS
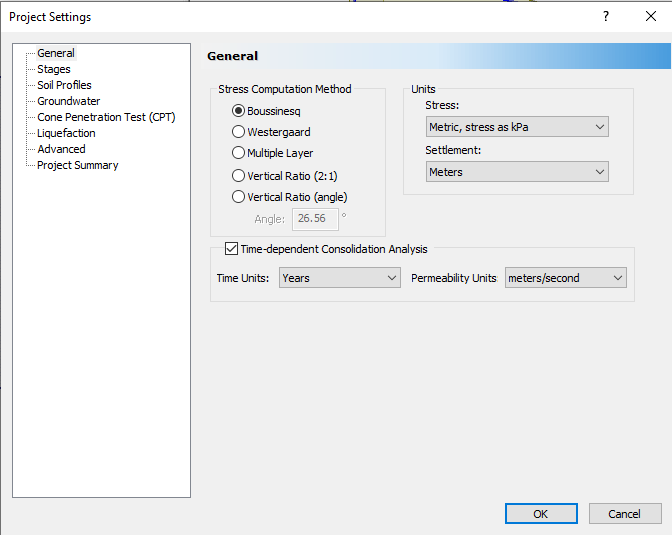
- Select Home > Project Settings

- In the General tab, make sure Boussinesq as the Stress Computation Method.
- Set Units for Stress as Metric, Stress as kPa and Units for Settlement as Millimeters.
- Under Time-dependent consolidation analysis, Time Units should be in Years and Permeability units in meters/second.These permeability units are applied to soil properties (k, cv) and also in stone column permeability.
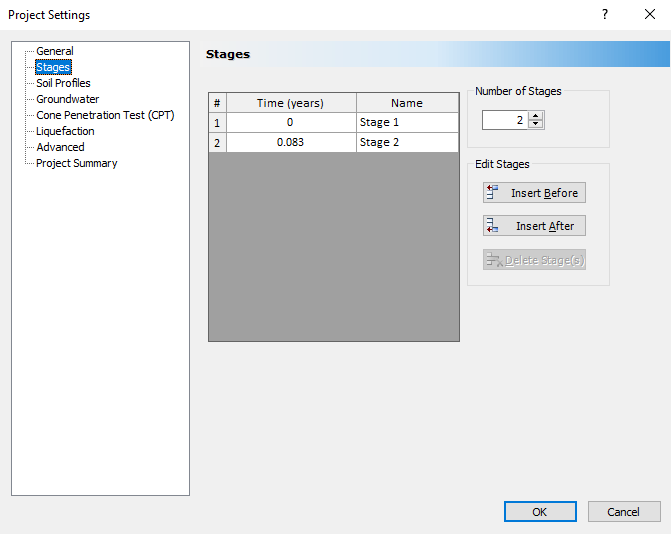
- In the Stages tab, there should be two stages with the first stage at initial stage, and the second stage with 0.083 years (1 month).
- In the Soil Profiles tab, select the 'Depth below Ground Surface' option.
- In the Groundwater tab, make sure Groundwater analysis is selected. Keep the default values.
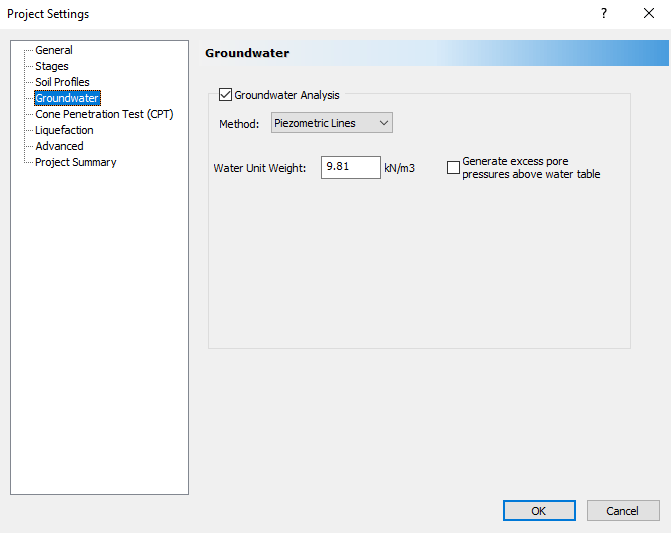
- Click OK to close the dialog.
2.2 SOIL PROPERTIES
We next see the soil properties used in the model using the Soil Properties dialog.
- Select Soils > Define Soil Properties

There should be soft clay with the properties defined below:

The mv is parameter converted from Elastic Modulus of 1.1 Mpa. Unit weight of soil, and permeability of soil (k) are all defined from the paper example. The example outlines there is a stiff clay layer but it's very small in thickness and does not provide the properties, so we will assume the model has homogeneous soil of soft clay.
2.3 GROUNDWATER
We also want to make sure the groundwater is in the model.
- Select Groundwater > Edit Piezometric line.
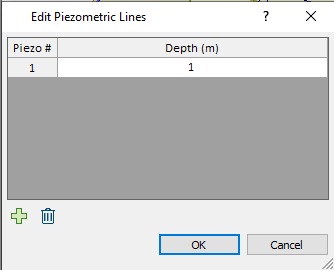
We have assigned groundwater 1m below the ground surface.
2.4 LOAD
- Right-click on the load and select Load properties.
You should see the load applied below with pressure defined from the paper which is installed in the first stage.
The 162 kPa is the load applied by the embankment in the paper: (1.8*18)*5 = 162 kPa .
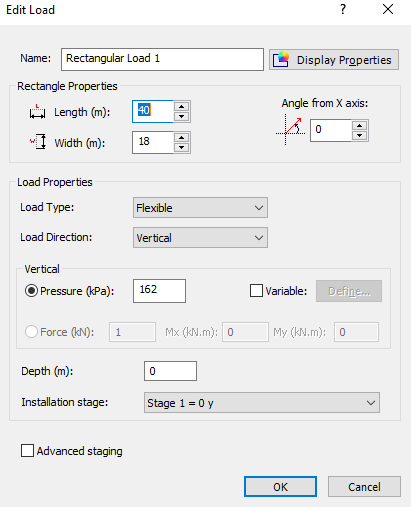
- Select OK to close the dialog.
2.5 Query Point
- Select Query > Add Query point

- Add a query point in the middle of the load (0.54, 29.188). You should be able to see the settlement with the added query point.
3.0 Ground Improvement
3.1 Assign Stone columns
Next, we assign stone columns to the model using the Ground improvement.
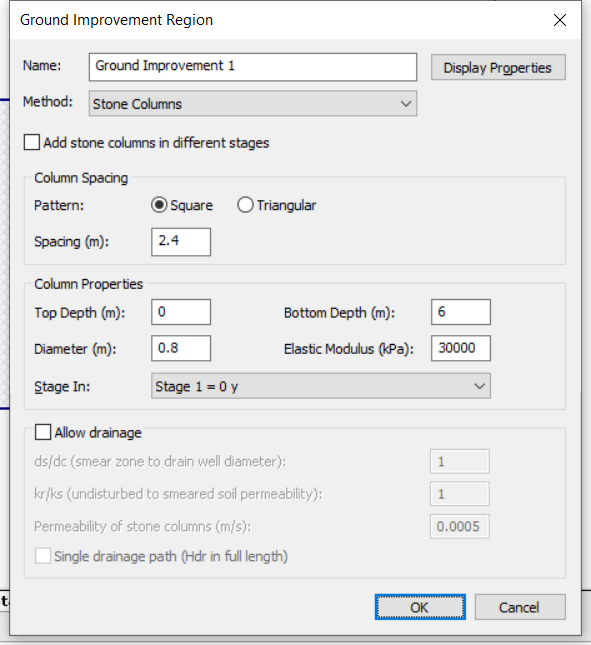
- Select Soils > Add Region (Ground Improvement)

- Select Stone columns and enter the following properties.
- Top Depth: 0 m
- Bottom depth: 6 m
- Spacing: 2.4 m
- Pattern: Square
- Diameter: 0.8 m
- Elastic Modulus: 30,000 kPa
- Installation stage = initial stage (Stage 1 = 0y).

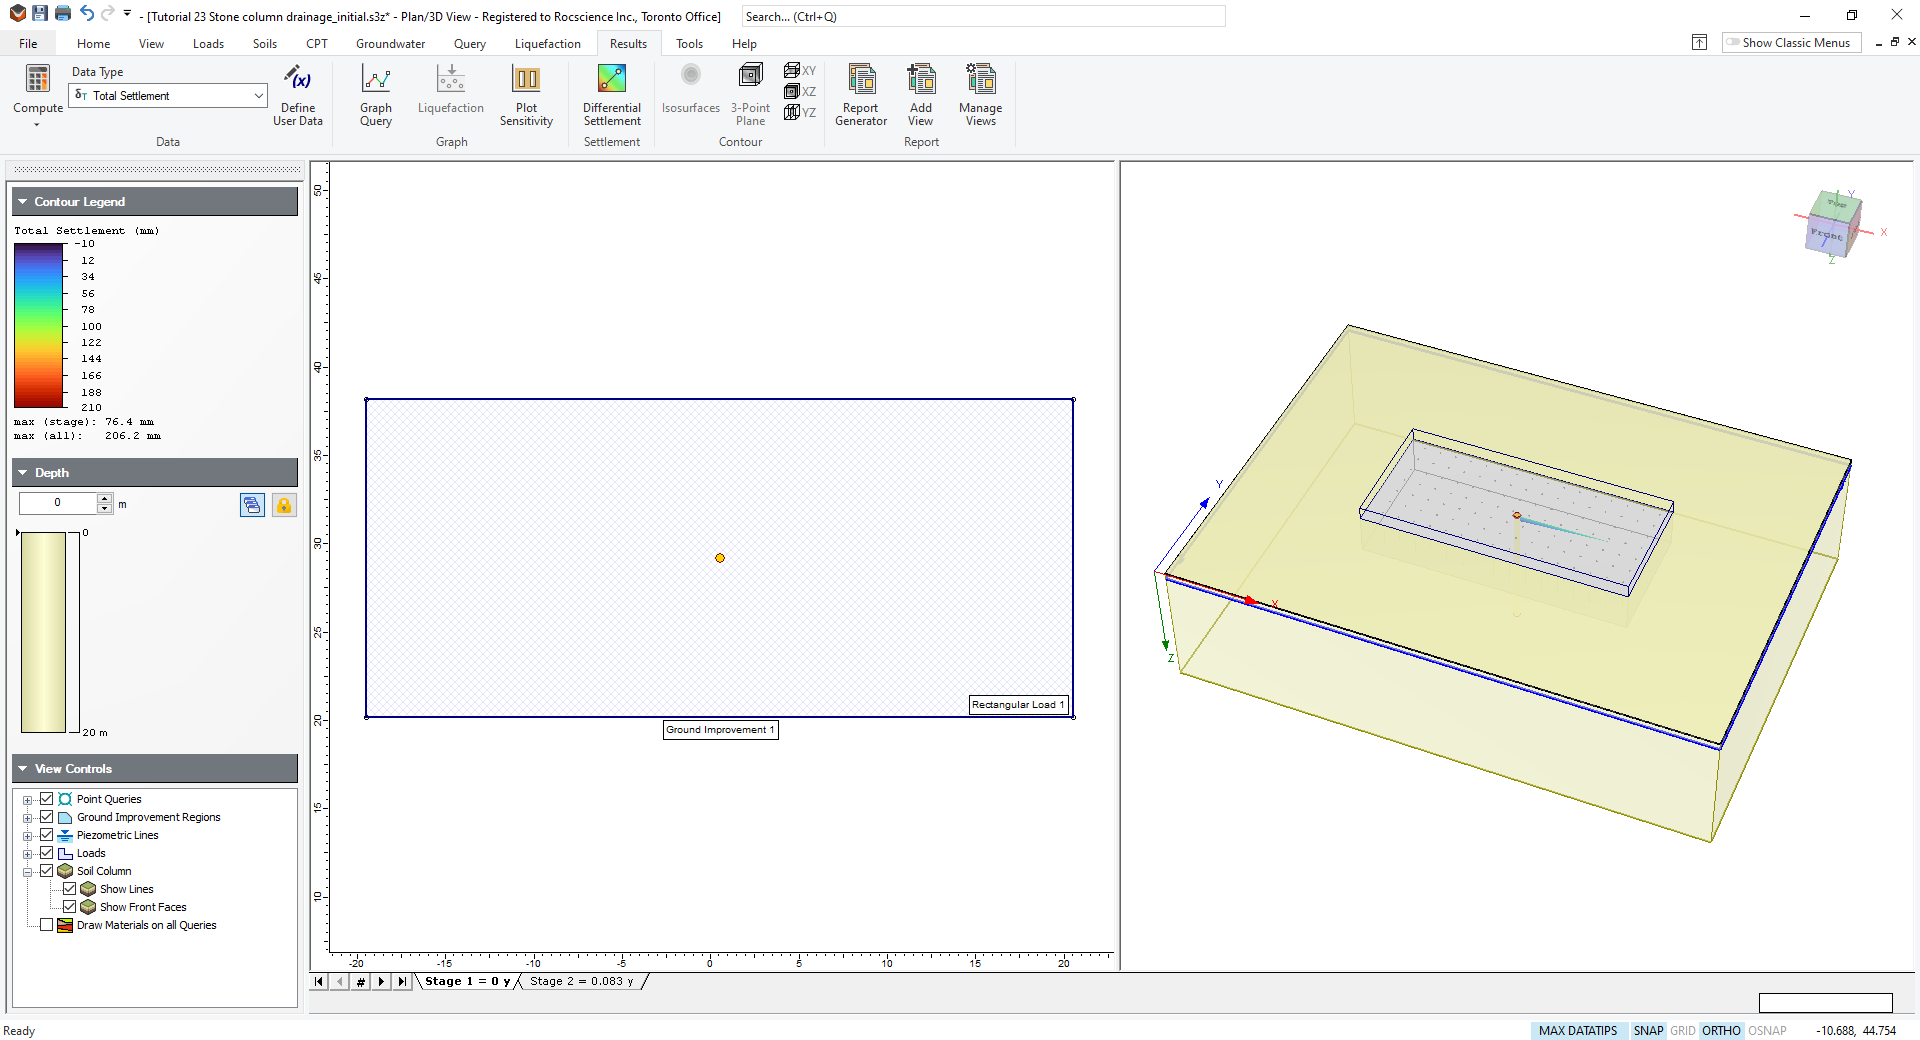
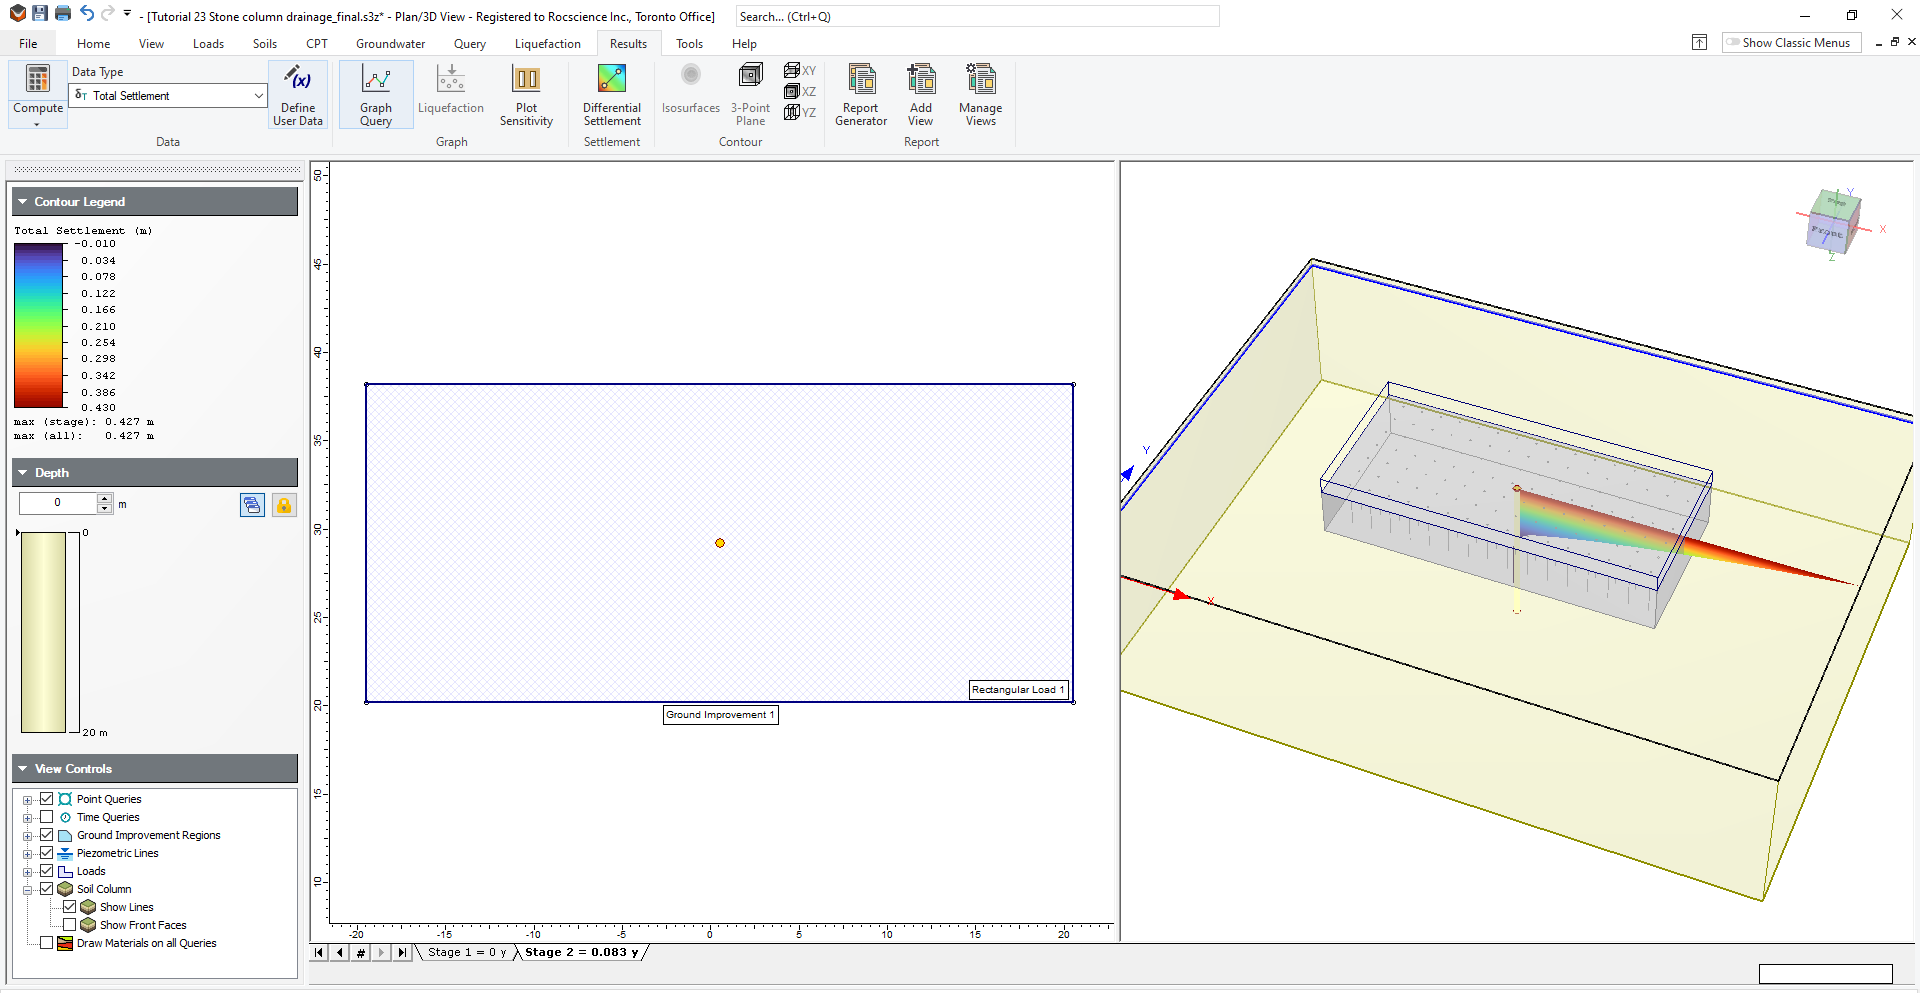
You will see the results shown below. You will see around ~80mm with stone column ground improvement at the initial stage.
3.2 ASSIGN STONE COLUMNS DRAINAGE
Now we will apply stone column drainage properties to the model.
- Select Soils > Edit (Ground Improvement)
 to open the Ground Improvement Editor.
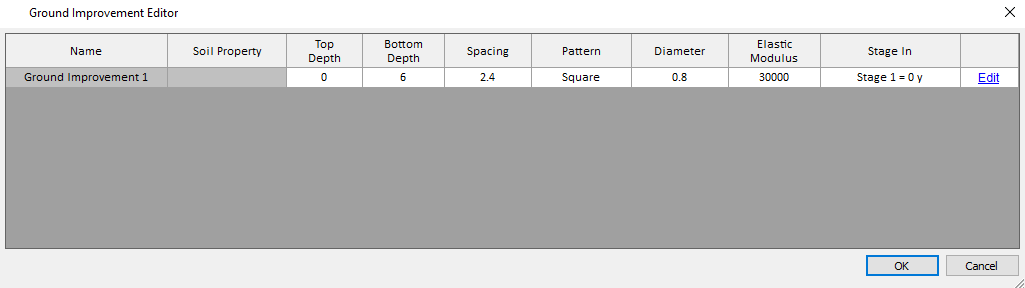
- Click the Edit button on the ground improvement 1. Select Allow drainage.
- Enter the following properties:
- ds/dc: 1
- kr/ks: 1
- permeability of stone columns (m/s): 3.67e-7 m/s.
- Stage In: Stage 1 = 0 y.
The inputs should look as the following:

Now we will compute the model with the drainage option.

As you can see, the consolidation settlement has progressed much faster with the addition of drainage option in stone columns. Also note that before the drainage, the consolidated settlement after 1 month was around 0.2 m, as opposed to 0.5 m after 1 month with drainage option.
We can also see the difference in the result when the single drainage path option is enabled. Select Soil > Ground Improvement > Ground improvement region editor.
Select Edit and select the option to use the single drainage path.

You will see the displacement has reduced slightly after one month with a single drainage path.
Thus, the drainage option provides significant improvement in process of accelerating consolidation. We will demonstrate this using the time query in the next step. Before we create the time query point, we'll modify the model so that a double drainage path is used. Unselect the use single drainage path option.
4.0 Results
4.1 TIME QUERY
Now we will add time query to see how long it takes for 95% of primary consolidation to occur.
- Select Query > Add Time Point

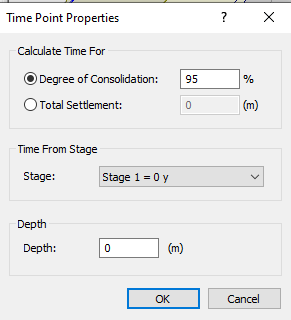
- Enter the following properties:
- Degree of consolidation to reach: 95%
- Time from Stage: Stage 1 = 0 y.
- Depth = 0 m.
The dialog should look as below:
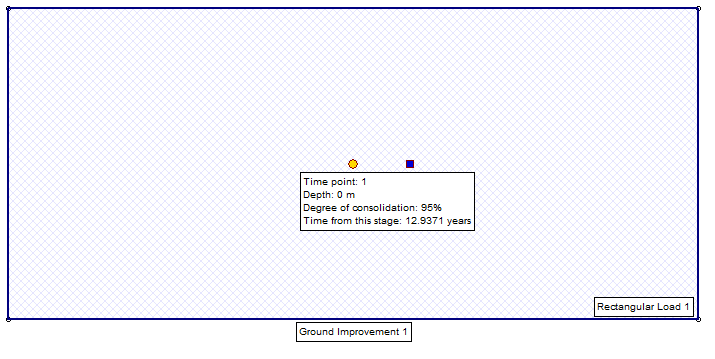
With drainage:
In comparison, for case without drainage, you can select: Soils > Edit (Ground improvement). Simply turn off the drainage option and recompute. You will see that it takes much longer time to consolidate to 95% of consolidation as shown below.
Without drainage:
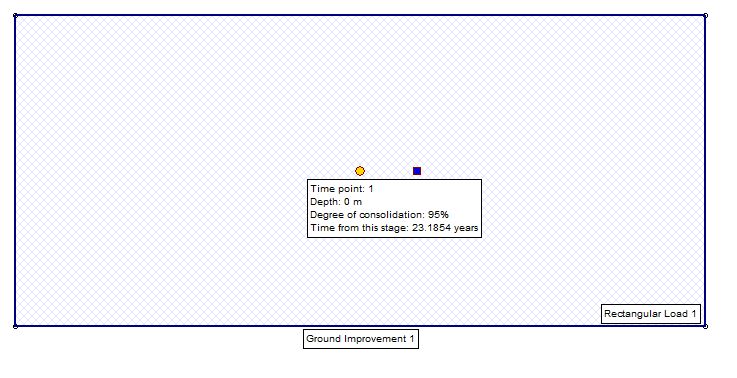
Thus, this feature allows you to see the significant impact of accelerated consolidation by adding drainage in stone columns.
5.0 References
- Han, J. (2012) "Principles and practice of Ground improvements” John Wiley & Sons. ISBN 978-1-118-25991-7. ,165-167