24 - Import from RSLog
1. Introduction
This tutorial provides you with instructions for creating a soil profile in Settle3 using boreholes imported from RSLog. You can select multiple boreholes directly from RSLog to create a list of boreholes in Settle3. These boreholes will then be displayed in the plan view where you can use the boreholes to create a soil model for settlement analysis.
Below is a screenshot of the project borehole information shown in RSLog:
In this tutorial, we’ll be importing a project from RSLog that contains 6 boreholes from site investigation.
Topics Covered in this Tutorial:
- Import boreholes from RSLog
- Creating soil profile using the imported boreholes from RSLog
Finished Product:
The final model of this tutorial can be found in Import from RSLog_final.s3z. All tutorial files installed with Settle3 can be accessed by selecting File > Recent Folders > Tutorials Folder from the Settle main menu.
2.0 Project Settings
- Select Home > Project Settings

- In the General tab, change Units for Stresses to Imperial, stresses as tons/ft2.
- Go to the Soil profile tab and select Extruded Section Layers.
- Click OK to close the dialog.
3.0 Importing Boreholes from RSLog
3.1 Import from RSLog
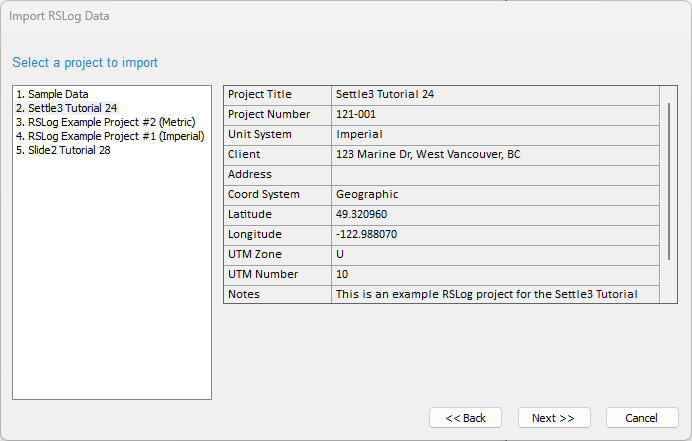
- Select Soils > Import RSLog

- User will be prompted for log-in information for RSLog. You can use our demo account for the tutorial. Enter the following credentials in order to import the boreholes from RSLog.
- Company: tutorials
- Username: demo
- Password: Test2022@
3.2 Importing boreholes
After selecting the project, Settle3 will import the borehole log of the project.
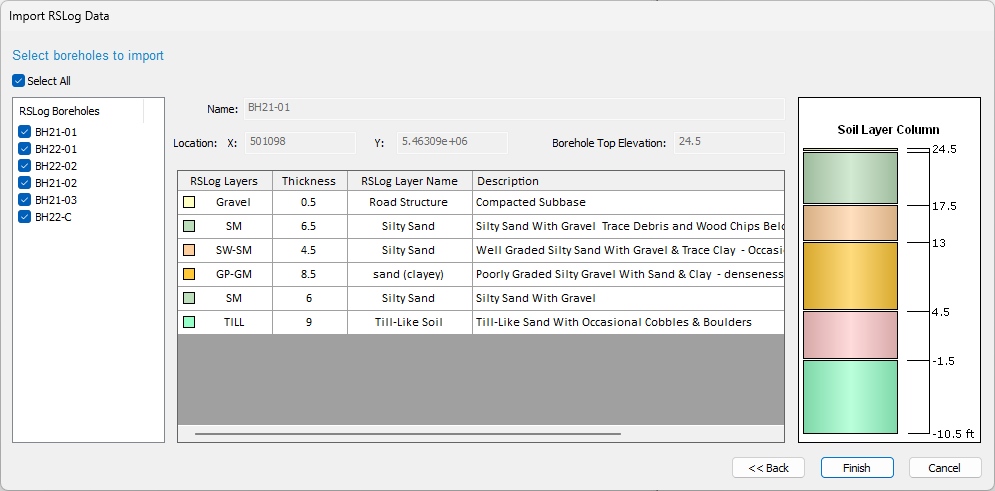
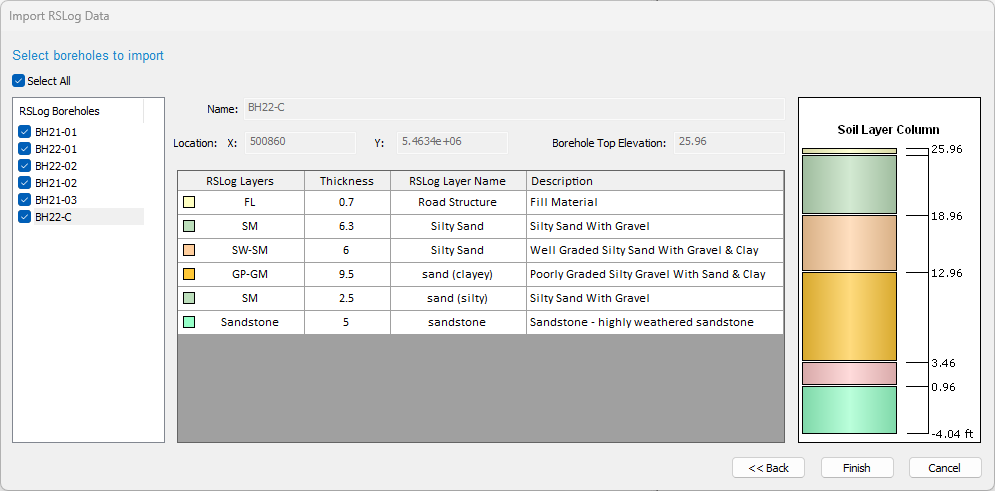
These are some of the boreholes that were obtained from the site investigation with its coordinates, layer depth, and soil stratigraphy. As you can see, the layer description is imported in Settle3 as well.
- Check each borehole and click Finish.
4.0 Creating soil model with the imported boreholes
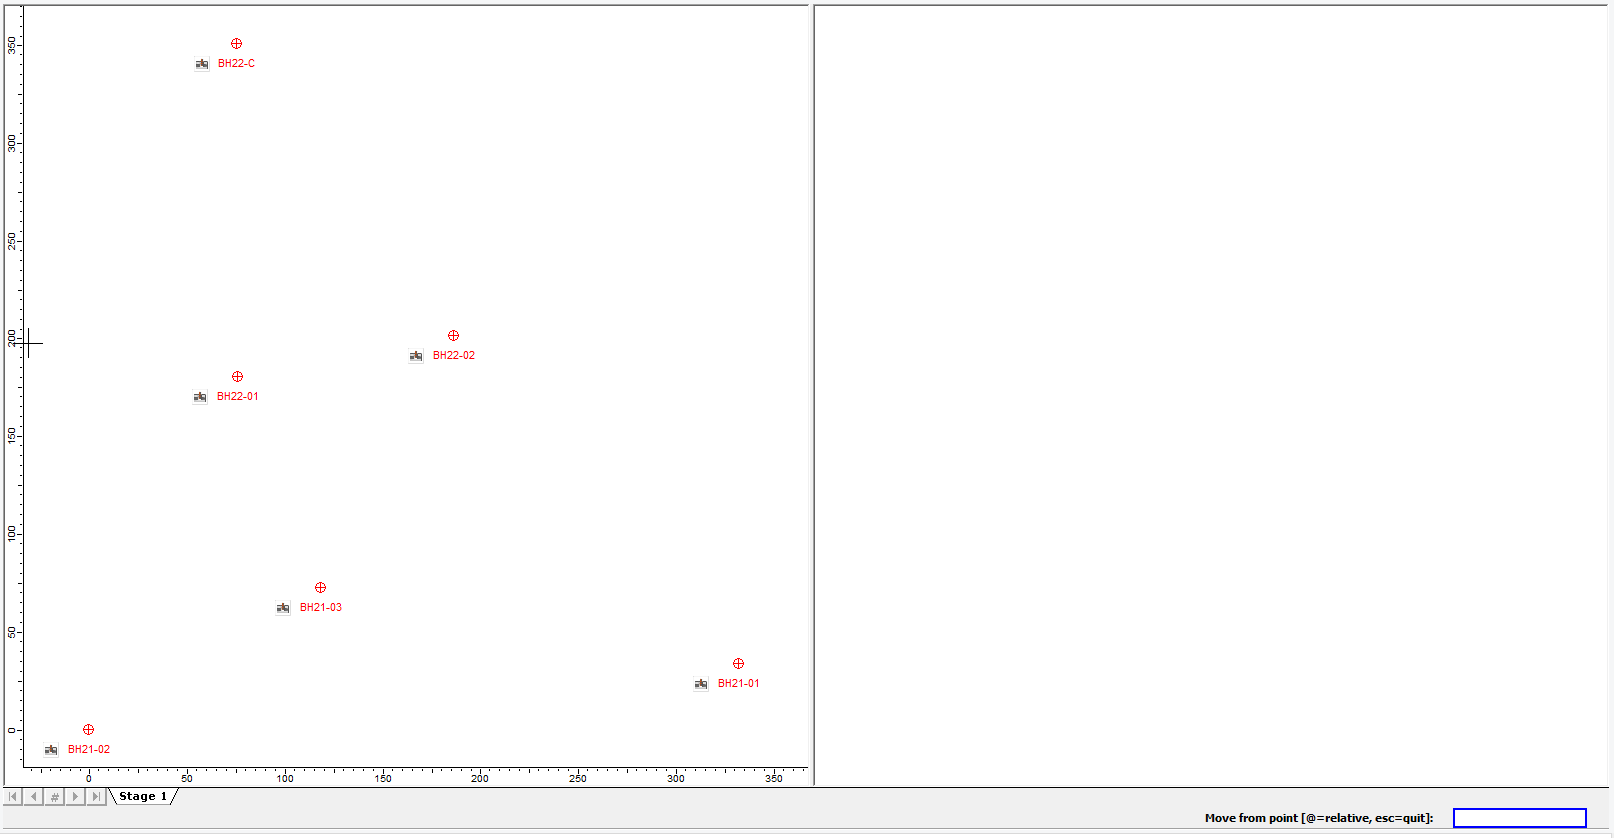
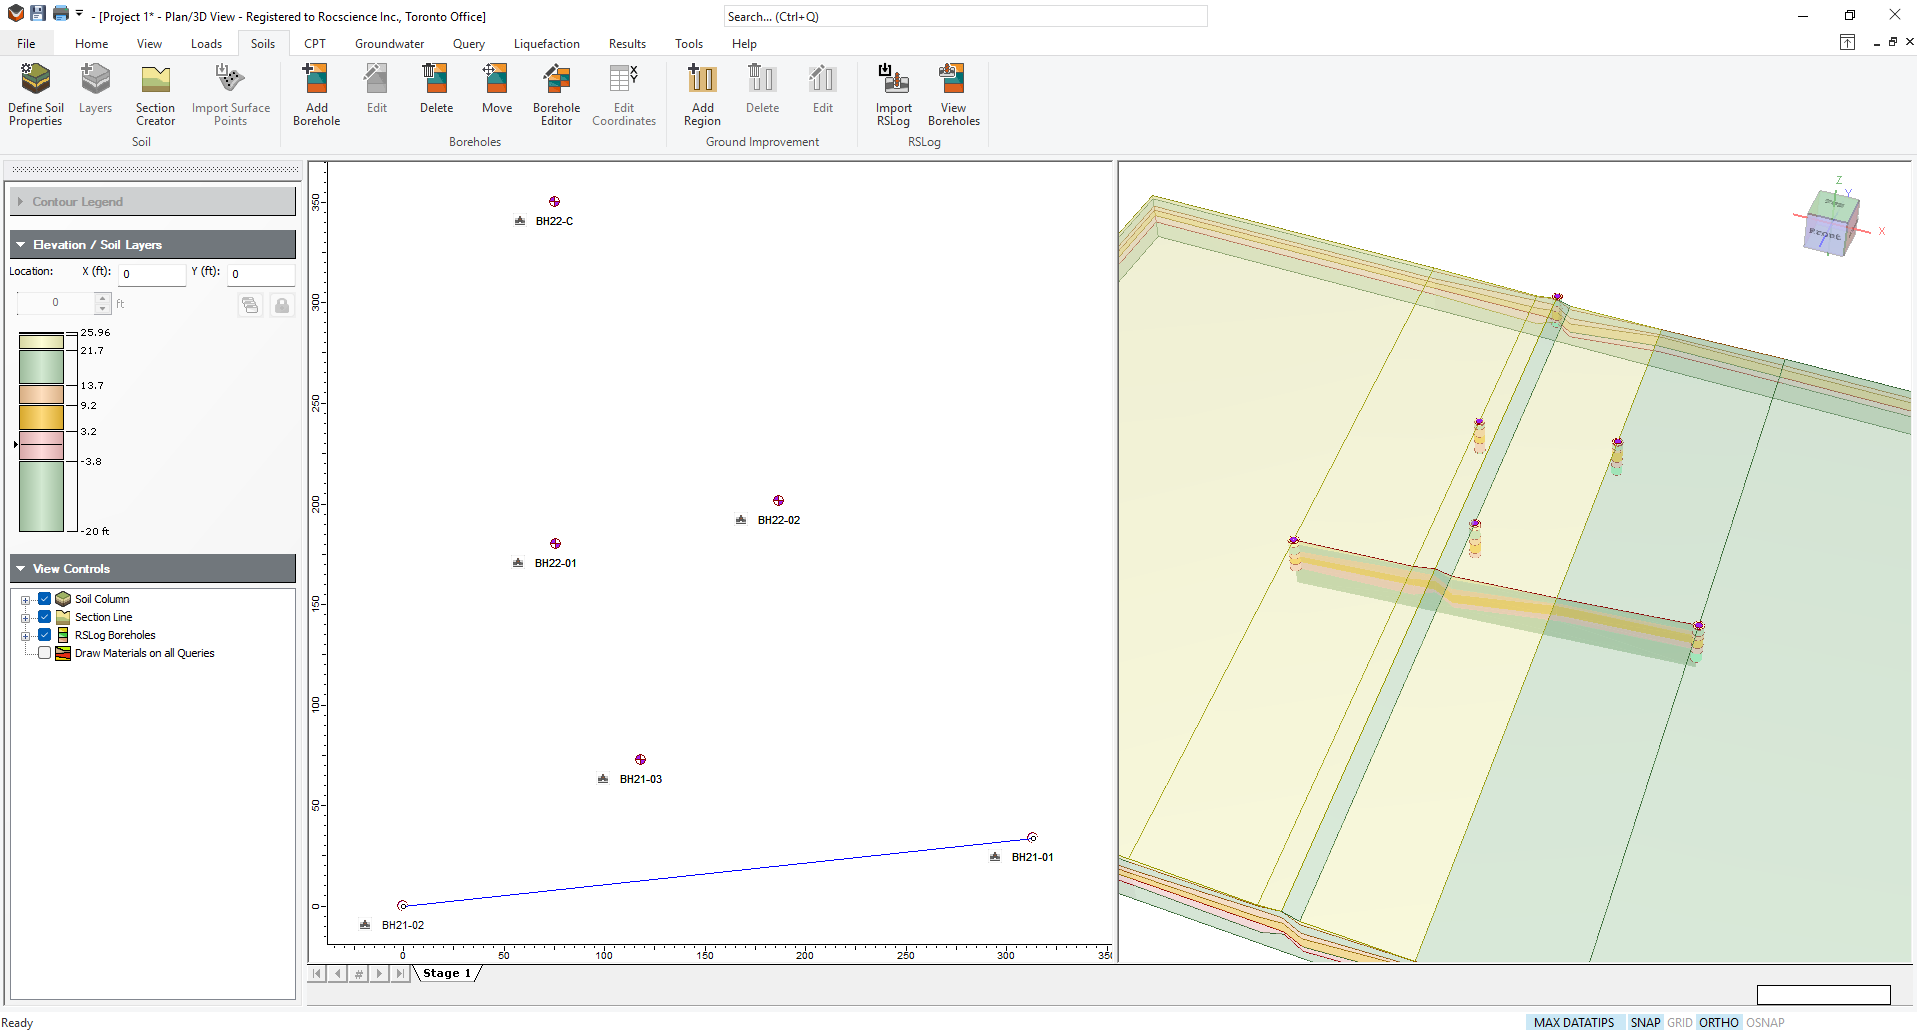
After importing, you’ll see the boreholes imported in the plan view. Since the coordinates are in large values for these boreholes, we'll move the boreholes closer to the origin for better visualization of the soil model in Settle3.
- Select Loads > Edit > Move All.
- All the imported boreholes will be selected. Select the bottom left corner borehole and move BH21-02 to (0, 0).
- Then, select Soils > Section creator
 . We'll be creating a section from BH21-02 to BH21-01 as shown below:
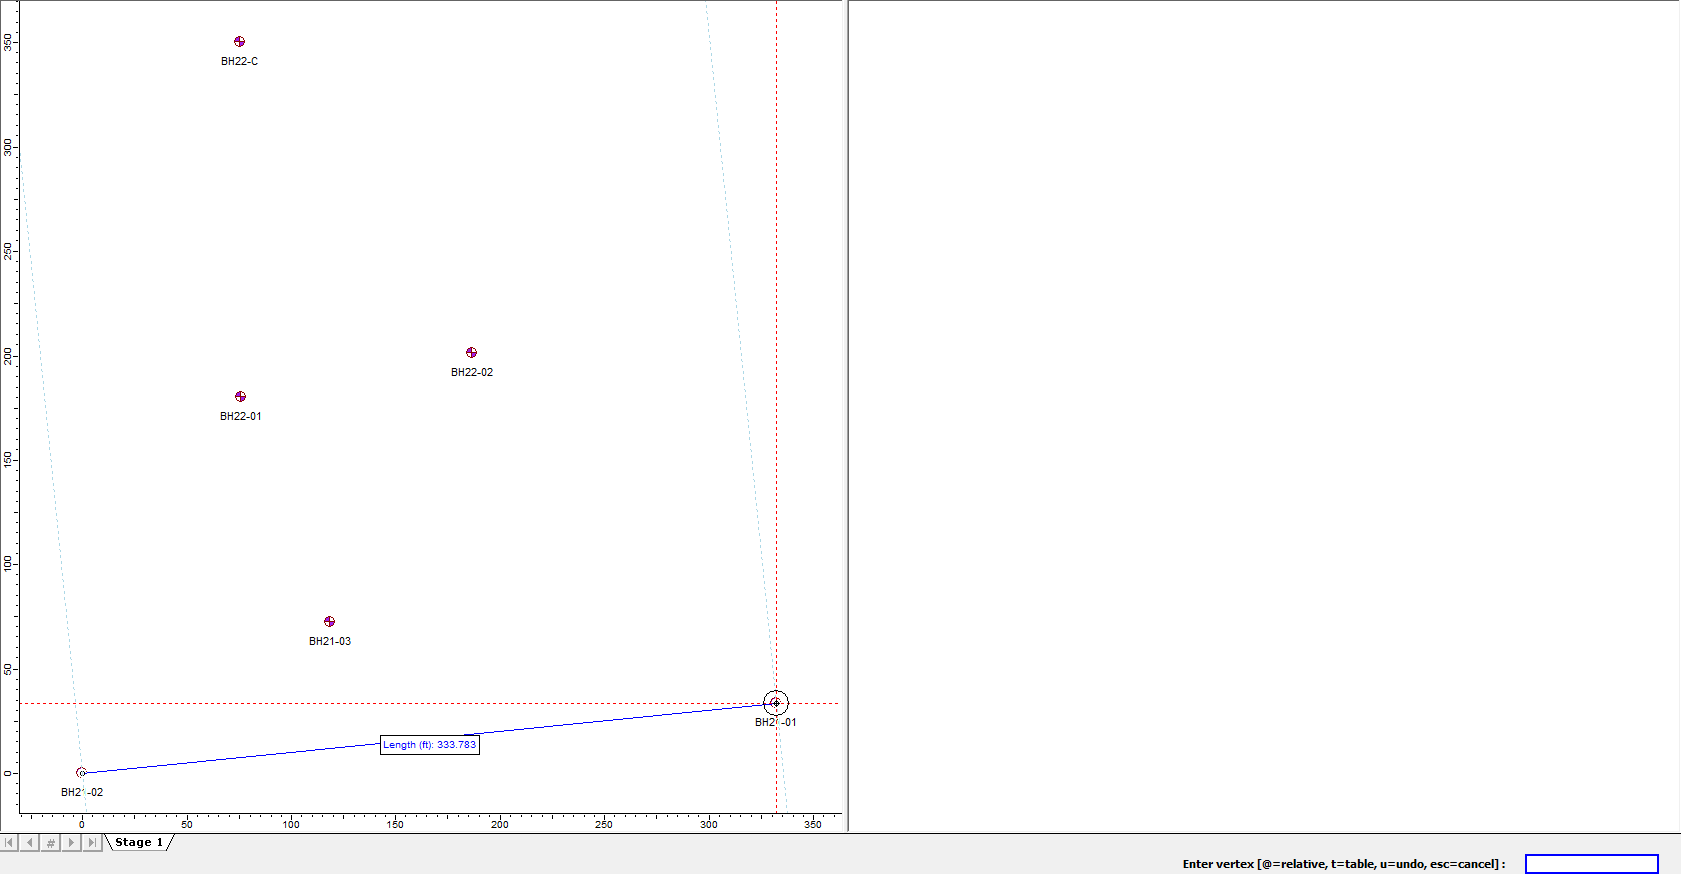
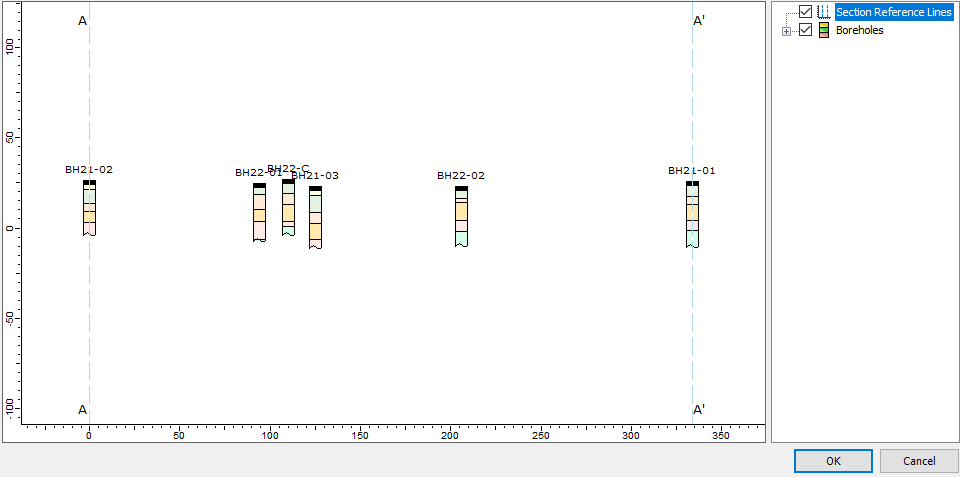
- After selecting two points for cross-section layout, you should be able to see the section creator with cross-section as following:
- Select the Draw ground surface
 icon and connect the top layer of the boreholes.
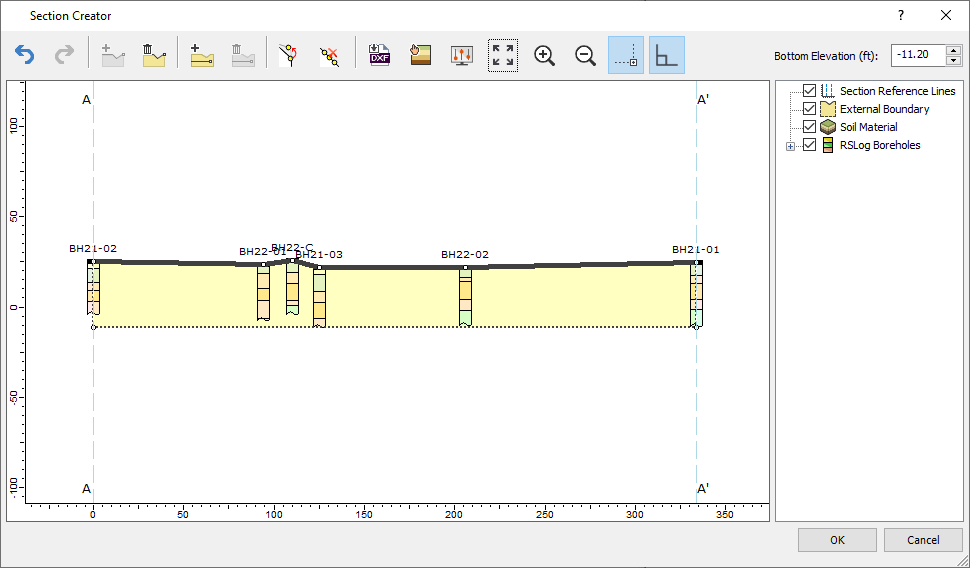
- Enter the Bottom Elevation as -20 ft.
- Then, select Add Internal Boundaries
 and connect each boreholes with soil layer thickness. After the layer boundaries are drawn, you can Assign Materials
  by selecting and assign the boundaries for each internal layers drawn. The finished dialog should look similar to the following:
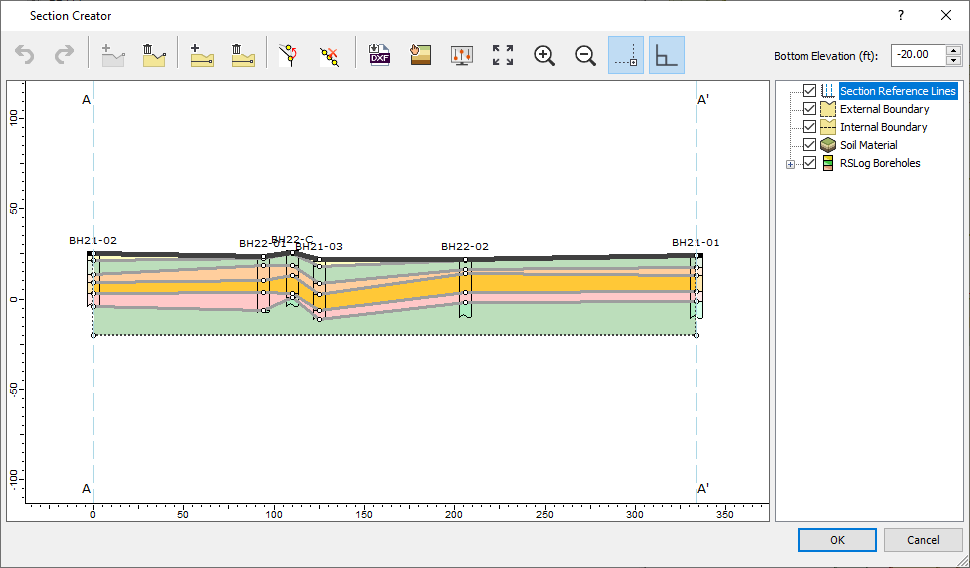
- After assigning the soil profile, click OK and you should see the geometry created with soil profile. Right click on the 3D viewer and select Display options
 . Change the Soil Column Expansion Factor to 3, located at the right bottom of 3D View options as shown below.
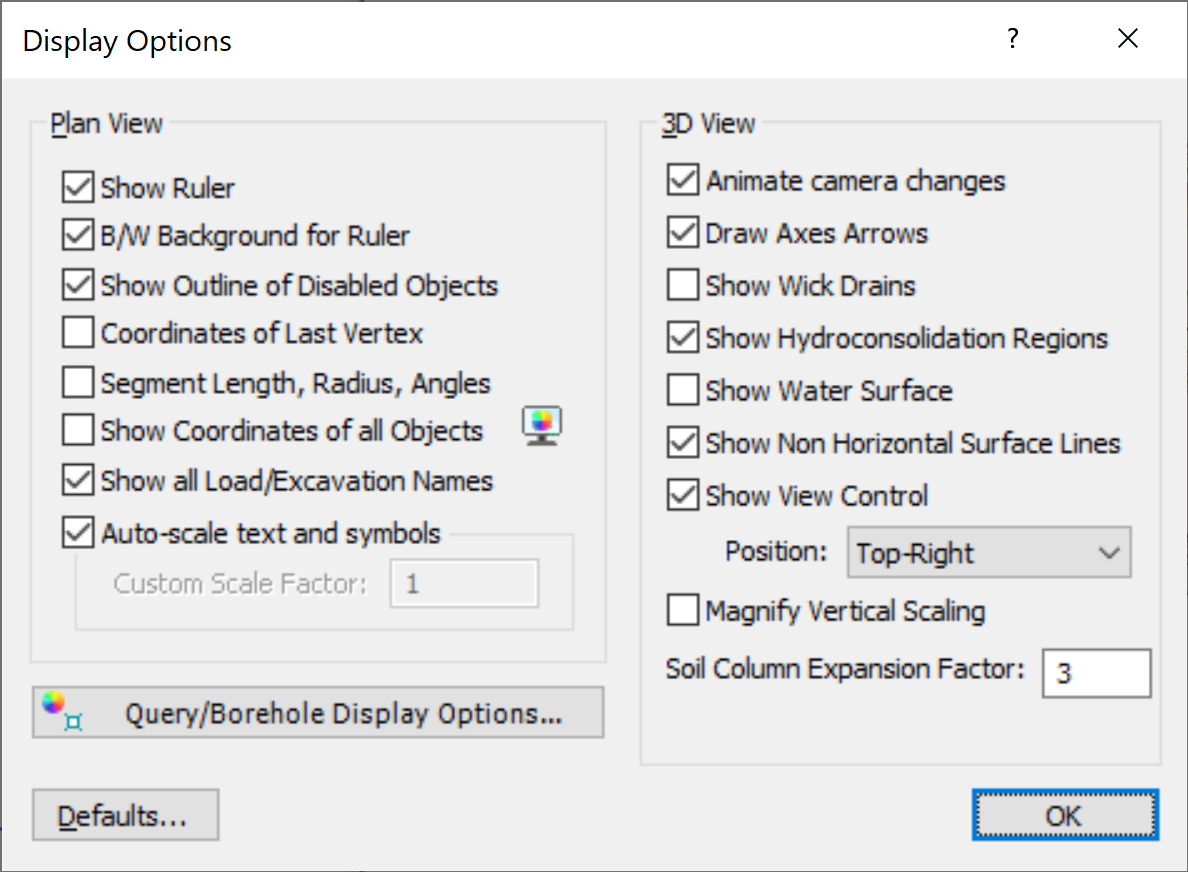
- After clicking OK, you'll see the following model as shown below.
Note that the imported boreholes are provided as a guide for creating section profile in Settle3 for soil model. You can assign soil material properties by selecting Soil > Define Soil Properties and assign material parameters for settlement analysis.
This concludes import RSLog from Settle3. For more information on this feature, please refer to our Import from RSLog help page.