Bolts may be added to a RocPlane model to evaluate the effect of support on wedge stability. In this tutorial, we will add a bolt to a wedge model, and discuss how bolts (and external loads) are implemented in the RocPlane analysis.
Topics covered in this tutorial:
Bolt Properties
Adding Bolts
Probabilistic Analysis
Pressure Option
Finished Product:
The finished product of this tutorial can be found in the Tutorial 4 Support.pln4 file, located in the Examples > Tutorials folder in your RocPlane installation folder.
1.0 Creating a New File
If you have not already done so, run the RocPlane program by double-clicking the RocPlane icon in your installation folder or by selecting Programs > Rocscience > RocPlane > RocPlane in the Windows Start menu.
When the program starts, a default model is automatically created. If you do NOT see a model on your screen:
Select File > New
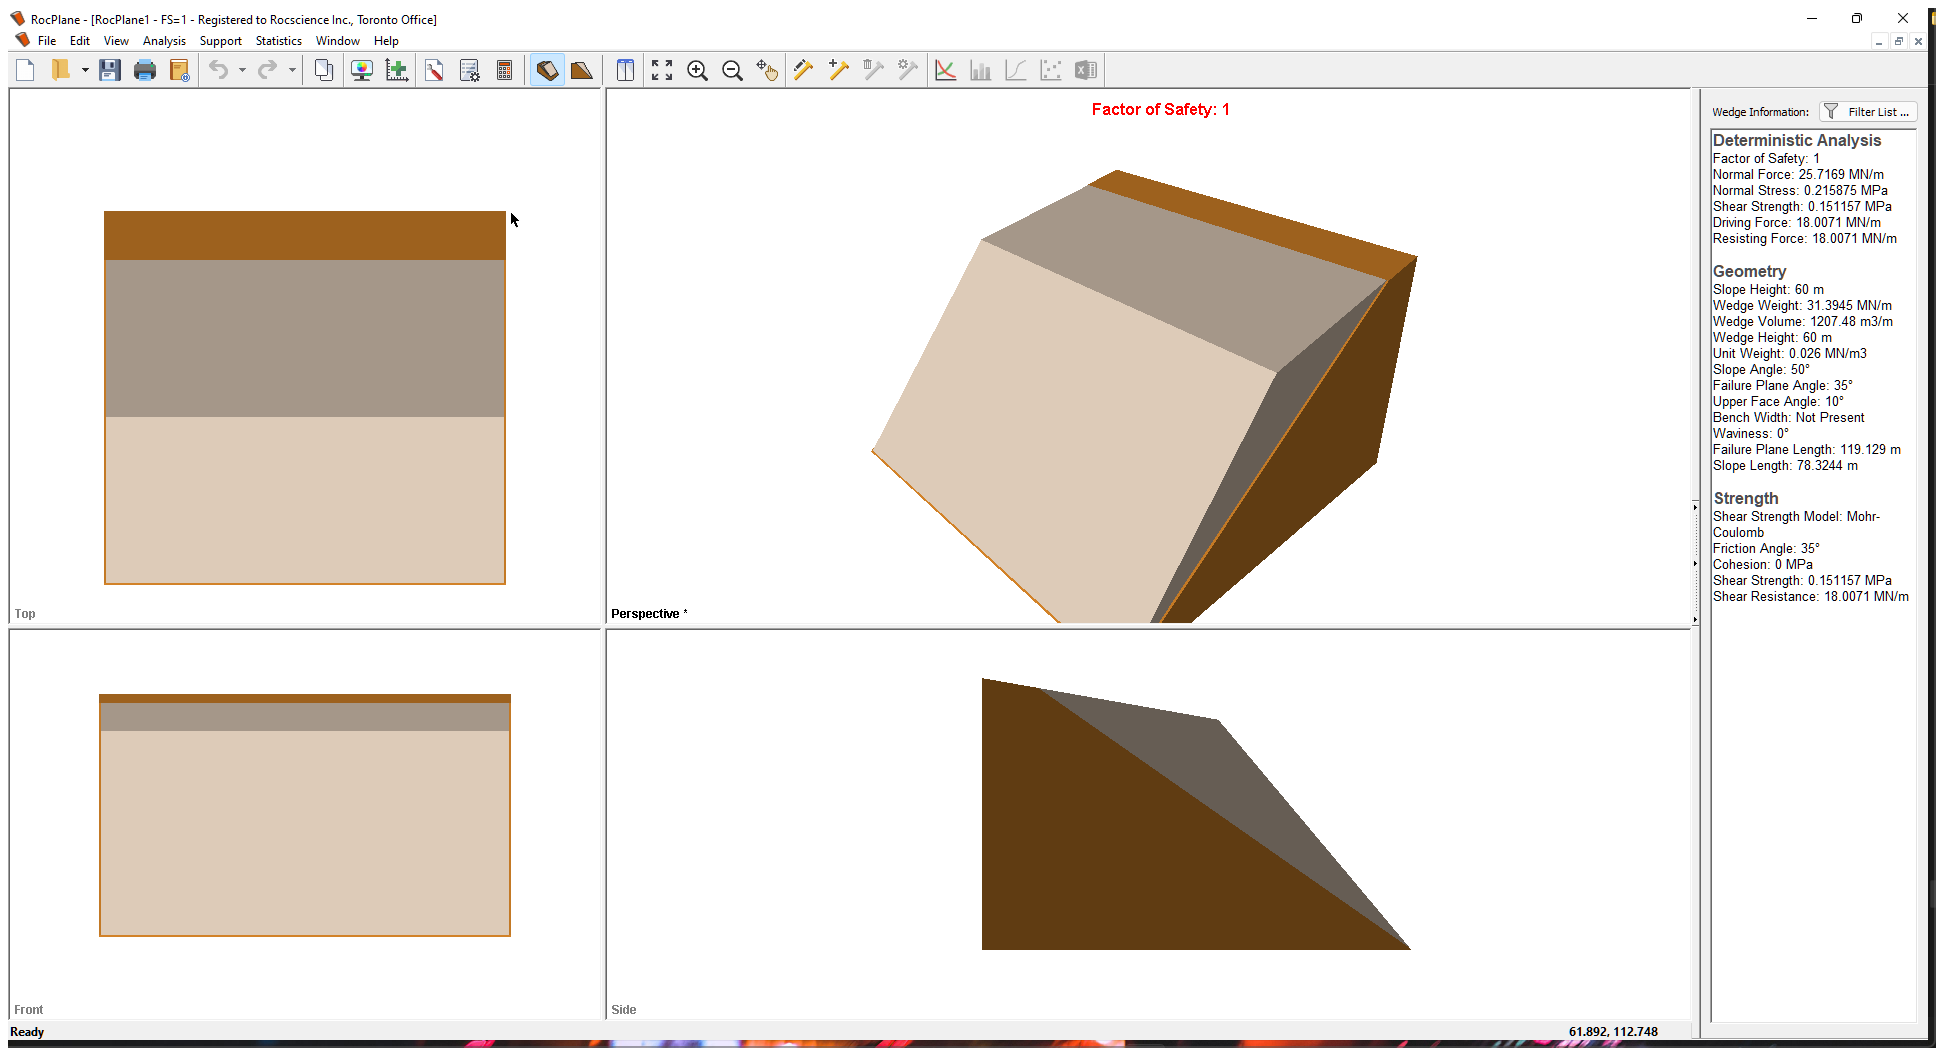
Whenever a new file is created, the default input data forms a valid wedge, as shown in the image below.
If the RocPlane application window is not already maximized, maximize it now so that the full screen is available for viewing the model.
Notice the four-pane, split screen format of the display, which shows Top, Front, Side and Perspective views of the model. This view is referred to as the 3DWedge View. The Top, Front and Side views are orthogonal with respect to each other i.e., viewing angles differ by 90 degrees.
Before we proceed, it is very important to note the following:
Although RocPlane displays the model in a three dimensional format, the RocPlane analysis is strictly a two-dimensional analysis. The 3D display is solely for the purpose of improved visualization of the problem geometry.
All input data assumes that the problem is uniform in the direction perpendicular to the wedge cross-section. The analysis is performed on a “slice” through the cross-section of unit width.
All analysis results (e.g., Wedge Weight, Wedge Volume, Normal Force, Resisting Force, Driving Force, etc.) and input data are therefore stated in terms of force per unit length, volume per unit length, etc.
2.0 Model
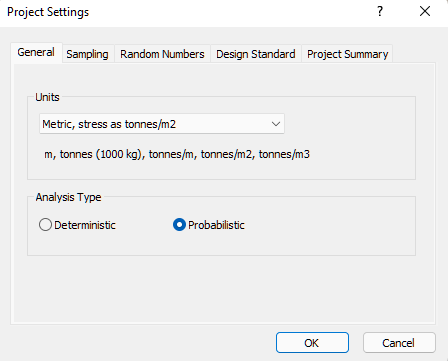
2.1 PROJECT SETTINGS
The Project Settings dialog allows you to configure the main analysis settings for your model. To open the dialog:
Select Analysis > Project Settings
In the General tab, keep Units = Metric, stress as tonnes/m2.
Select the Project Summary tab and enter RocPlane Support Tutorial as the Project Title.
2.2 BOLT PROPERTIES
The Bolt Properties dialog allows you set up one or more Bolt Properties for use in your model. To open the dialog:
Select Support > Bolt Properties in the menu.
Make sure Bolt Property 1 is selected.
Set Type = Simple Bolt Force, Bolt Model = Active, and Force = 20.39.
Click OK.
2.3 ADDING BOLTS
Bolts are added individually to a wedge model using the Add Spot Bolt dialog. To open the dialog:
Select Support > Add Bolt
Position the cursor on the slope face of the wedge on any of the four3D Wedge View panels. The cursor changes from an "arrow/rockbolt" icon to where the "rockbolt" and "arrow" lines up.
Click the left mouse button at a point on the wedge where you want the bolt installed. The Add Spot Bolt dialog appears, allowing you to modify the geometry and select a bolt property for the bolt.
Make sure Bolt Properties =Bolt Property 1.
Keep Orientation = Trend / Plunge.
Set Plunge = 40.
Click OK.
The bolt is automatically “snapped” to the center of the 3D wedge model, regardless of the lateral location at which you clicked the mouse. Remember that the RocPlane analysis is 2D and that the 3D Wedge View is for display purposes only. The lateral location of a bolt on the slope has no effect on the analysis, so all bolts are displayed at the “center” of the 3D wedge model.
TIP: Note that the colour of the bolt on the model matches the colour selected for the Bolt Property in the Bolt Properties dialog.
2.4 BOLT CAPACITY
Since RocPlane is a 2D software, the bolt capacity entered in the Bolt Properties dialog (Force) is considered as a force per unit distance (tonnes per meter in this example). The capacity takes account of the spacing of the bolts in the out-of-plane direction. For example, if the capacity of an individual bolt were 50 tonnes and the out-of-plane bolt spacing were 2 meters, you would enter a Force of 50 / 2 = 25 tonnes / meter. Each bolt in RocPlane therefore actually represents a ROW of equally spaced bolts.
Since the default wedge model in RocPlane is a very large wedge (60-meter-high slope), and the default Force in the Bolt Properties dialog is about 20 tonnes / meter, the effect of the added single bolt on the Factor of Safety is very small (changed from 1.0 to 1.01 after adding the bolt). To see a greater change, let's increase the bolt Force to 200 tonnes / meter.
Re-open the Bolt Properties dialog.
Make sure Bolt Property 1 is selected.
Set Force = 200.
Click OK.
Note that the Factor of Safety has increased to 1.10.
A listing of all bolts and their properties can be found in the Bolt Force section of the Wedge Information Panel in the Sidebar at the right of the screen.
Select Info Viewer on the toolbar or the Analysis menu.
Bolt information is also available in the 2D Wedge View.
To display the 2D Wedge View:
Select the 2D View toolbar button OR
Select 2D View on the Analysis menu.
6.0 Viewing Bolts
It's useful to know that, if you move the wedge out of the slope after adding bolts, the bolts stay "in" the slope and are completely visible. This allows you to examine the bolt installation in more detail.
To move the wedge out of the slope:
Click and drag the wedge with the left mouse button.
6.1 BOLT DISPLAY OPTIONS
You can control the appearance of bolts on your model by using the Display Options dialog. For example, you can turn off display of the ends of the slope drawn on the model (Draw Slope Ends) to make it easier to view the bolts, particularly in the Side View.
The Probabilistic Analysis will be run each time a bolt is added or edited (i.e., when OK is clicked in the Bolt Propertiesdialog).
Selecting Apply in the Bolt Properties dialog will calculate a new Factor of Safety for the Mean Wedge, but will re-run the Probabilistic Analysis.
If you are deleting bolts, the Factor of Safety for the Mean Wedge is re-calculated as each bolt is deleted, but the Probabilistic Analysis is re-run only when you exit the Delete Bolt option.
Bolts should be used with some caution in a Probabilistic analysis. Since the bolts are added while viewing the Mean Wedge, the orientations of bolts added on the Mean Wedge may no longer be optimal in terms of support, to other wedges generated by the Probabilistic analysis.
8.0 Pressure Option
The Pressure option is another method of modeling either support or loading in RocPlane.
Let’s demonstrate this with the following example, which shows the equivalence of Bolt or Pressure support.
Delete any bolts that may still be applied to the wedge model.
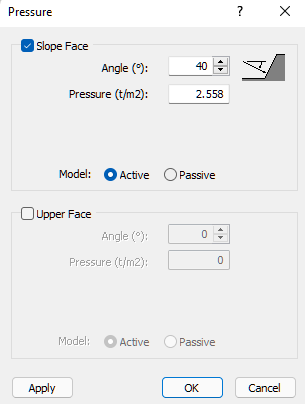
Select Support > Pressure in the menu.
In the Pressure dialog, select the Slope Face check box. This applies the pressure to the slope face only.
Enter Angle = 40 degrees.
Enter a Pressure value of 2.558 t/m2.
We want to enter a pressure that is equivalent to the bolt capacity entered in Section 1.4 above. In the Sidebar Wedge Information Panel, under the Geometry heading, notice the Slope Length value = 78.2 meters. This is the length of the wedge face from toe to crest. We divide the bolt capacity by the slope length to obtain the required pressure on the slope face:
200 (tonnes/m) / 78.2 m = 2.558 tonnes per square meter
Click Apply. We get a Factor of Safety of 1.1071 that's very close to 1.1069 with a single bolt of 200 tonnes/m.
This demonstrates the equivalence of Bolt or Pressure support in RocPlane. You can utilize whichever method is most convenient for modeling support and performing parametric analysis using different bolt capacities, pressures or required safety factors.
For example, you could use the Pressure option to determine a required pressure to achieve a given Factor of Safety, and then use the value of Pressure to determine required bolt capacity and / or bolt spacing.


 in the menu.

 to
to  where the "rockbolt" and "arrow" lines up.
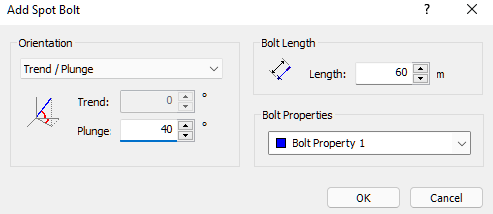
 from the toolbar or Support menu.
 from the toolbar or Support menu.
 on the toolbar or the Analysis menu.
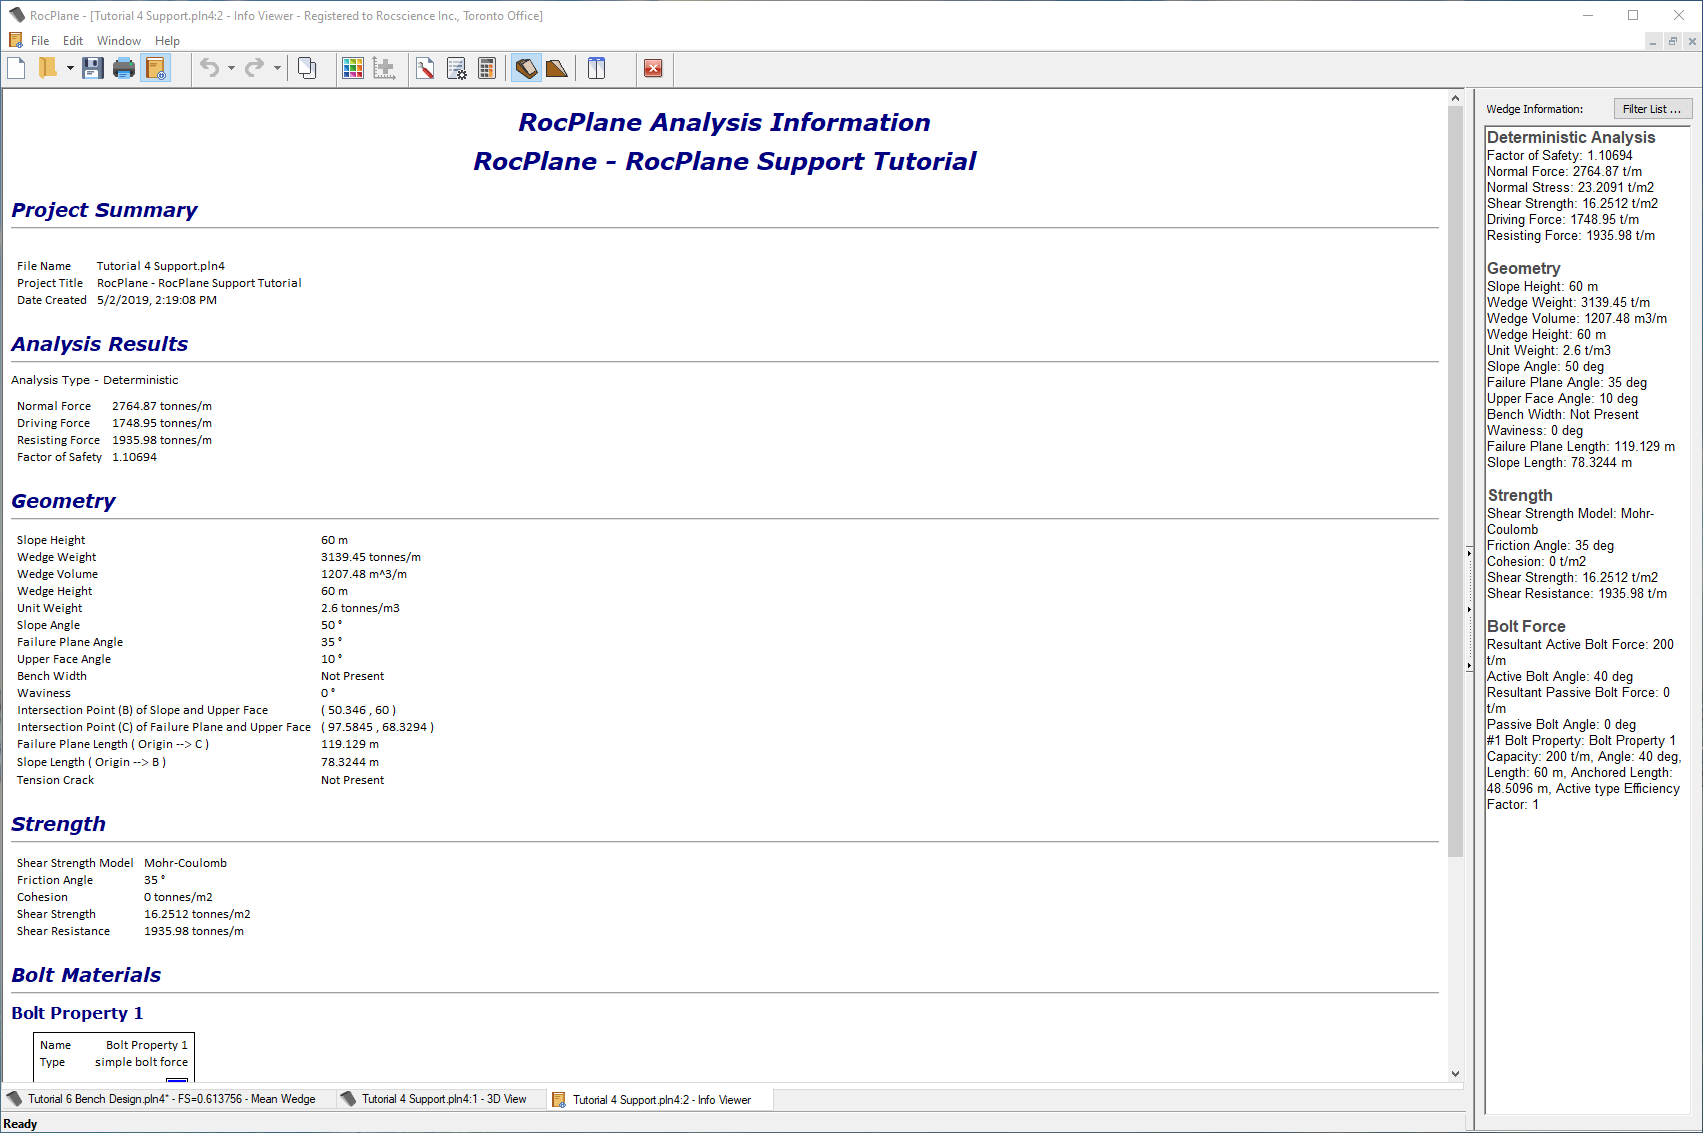
 OR
OR

 in the menu.