In this tutorial, we demonstrate the Forest Damping option in RocFall2 and show the effect of different forest densities on rock fall trajectories. When rockfalls occur on a forested slope, impacts of rocks with trees or vegetation can reduce the speed and energy of rocks traveling down the slope. This tutorial will demonstrate the effects of forest dampening by specifying a design forest with an effective height, drag coefficient, or vegetation density.
Topics Covered in this Tutorial:
Creating/editing forest settings
Changing forest layer display options
Analysis for different forest densities
Finished Product
The finished product of this tutorial can be found in the Tutorial 08 Forest Damping data file. All tutorial files installed with RocFall2 can be accessed by selecting File > Recent Folders > Tutorials Folder from the RocFall2 main menu.
2.0 Model
Let's start by opening the file for the tutorial:
Select:File > Recent Folders > Tutorials Folder and open the Tutorial 08 initial file.
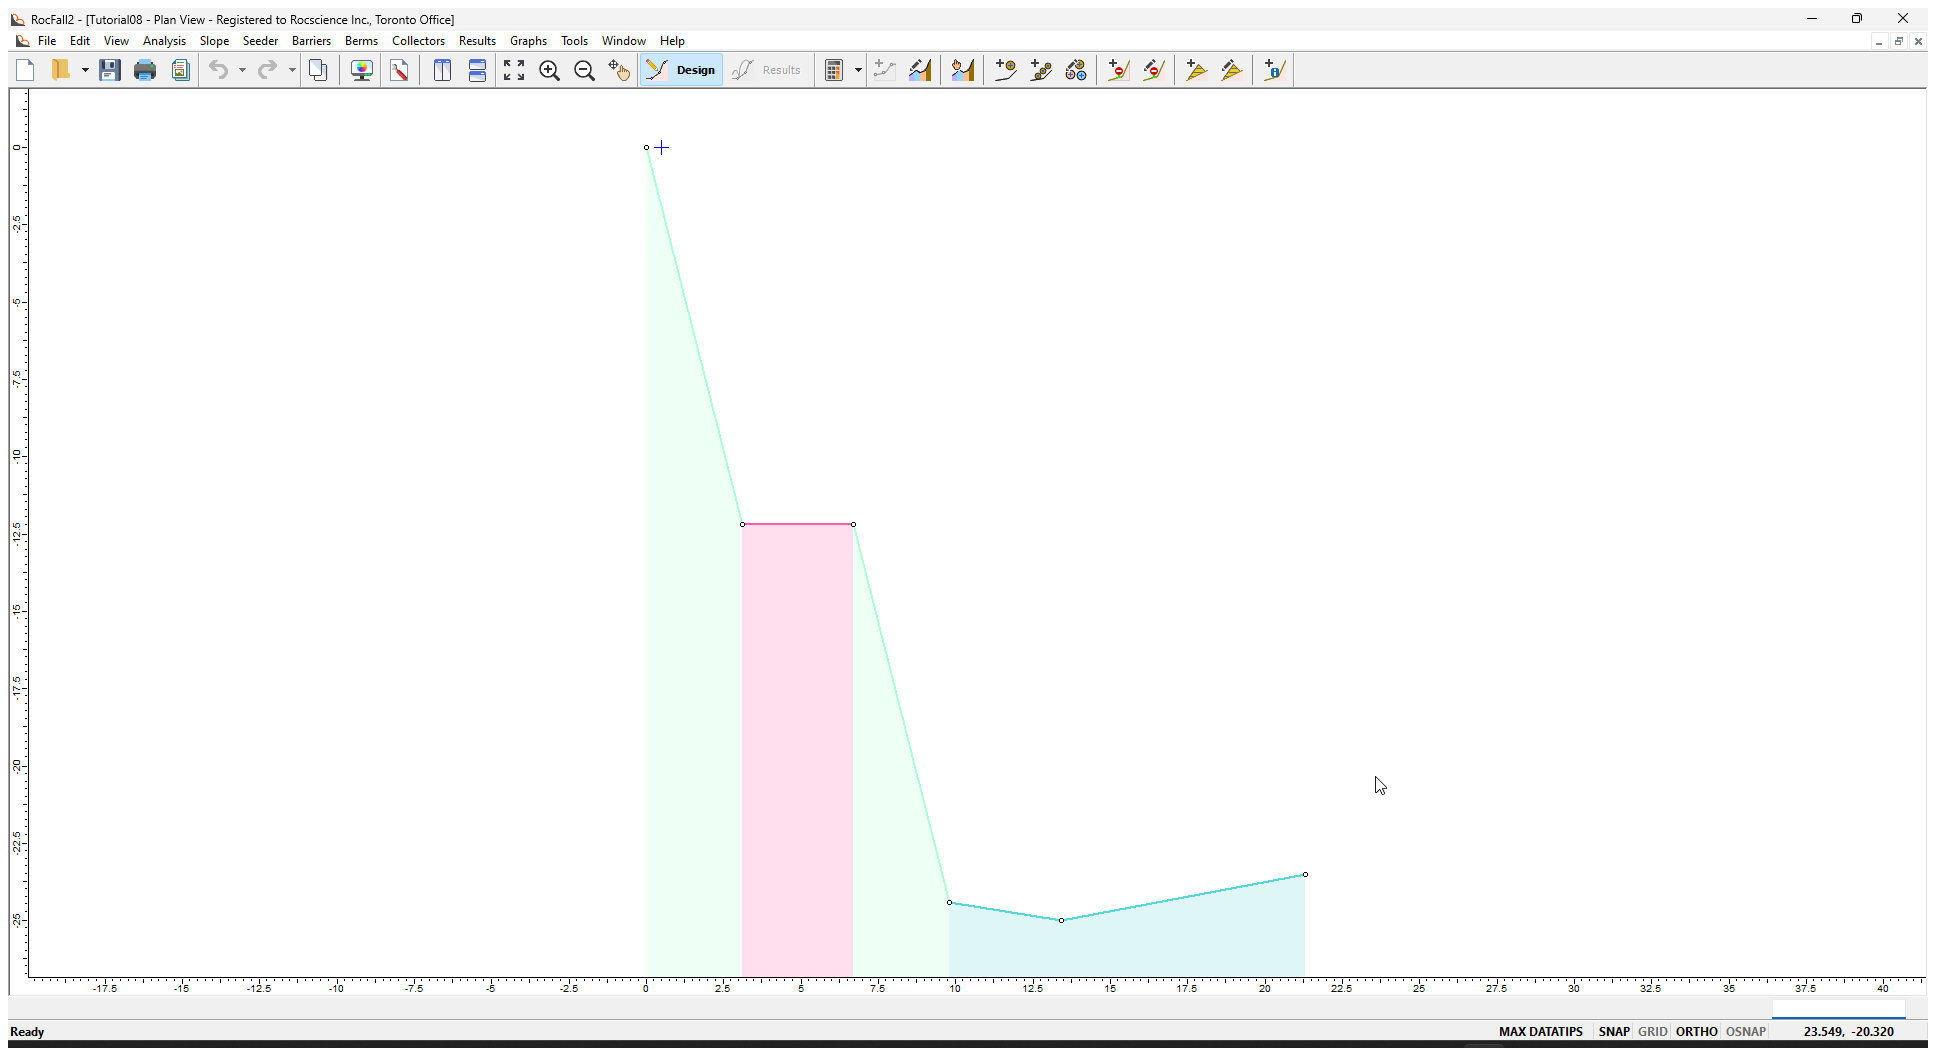
You should see the following model.
We will keep the Slope Coordinates and most of the slope properties the same.
2.1 PROJECT SETTINGS
The Project Settings dialog is used to configure the main analysis parameters of the model. Forest damping is only available for Rigid Body models.
Select Project Settingson the toolbar or the Analysis menu.
In the General tab, make sure Rigid Body is selected as the Analysis Method.
Make sure the Use Tangential CRSP Damping check box is selected.
Click OK.
2.2 DEFINING / EDITING SEEDER
We'll keep the model's seeder Location, Number of Rocks, and Initial Conditions and change just the shape of the rocks using the Rock Type Library.
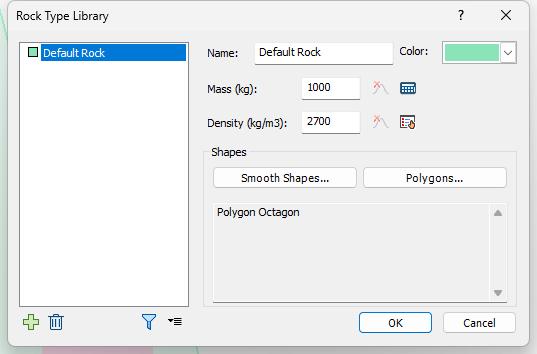
Select Rock Type Libraryon the toolbar or the Seeder menu. Rock Type Library dialog There are two groups of rock types: smooth shapes and polygonal shapes.
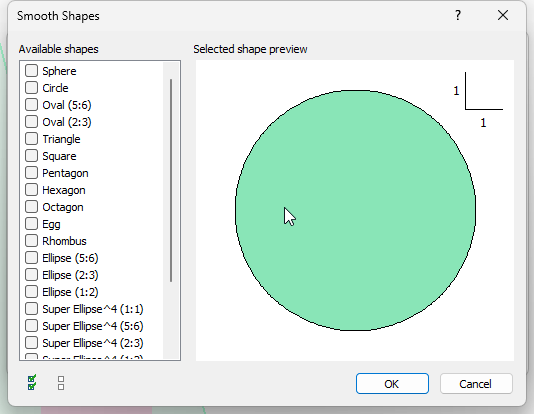
Click the Smooth Shapes button.
In the Available Shapes dialog, deselect Sphere and click OK.
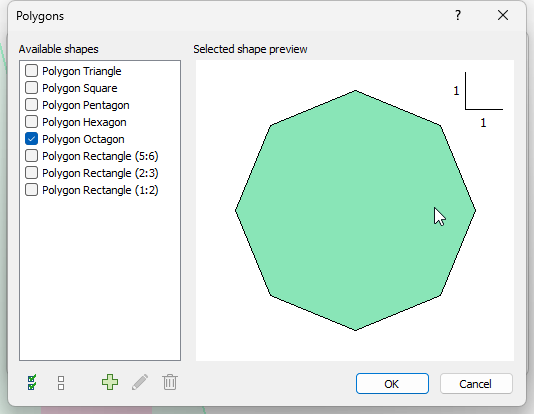
Click the Polygons button.
Select Polygon Octagon and click OK.
2.3 ASSIGNING/EDITING SLOPE MATERIAL
Next we'll edit and assign slope materials using the Slope Material Library. The model already has three materials defined: Type One, Type Two, and Type Three. We will add Forest/Vegetation Damping to Type Two and Type Three.
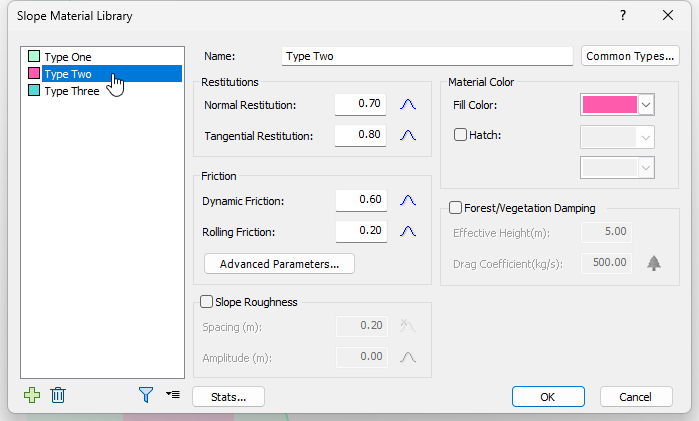
Select Slope Material Libraryon the toolbar or the Slope menu.
Select Type Two in the list.
Select the Forest/Vegetation Damping check box.
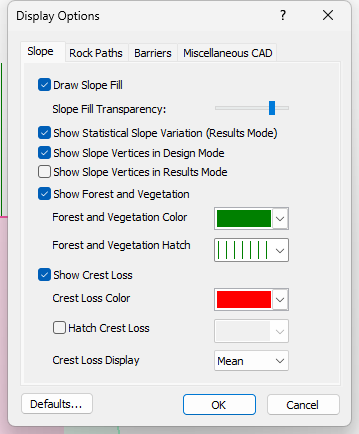
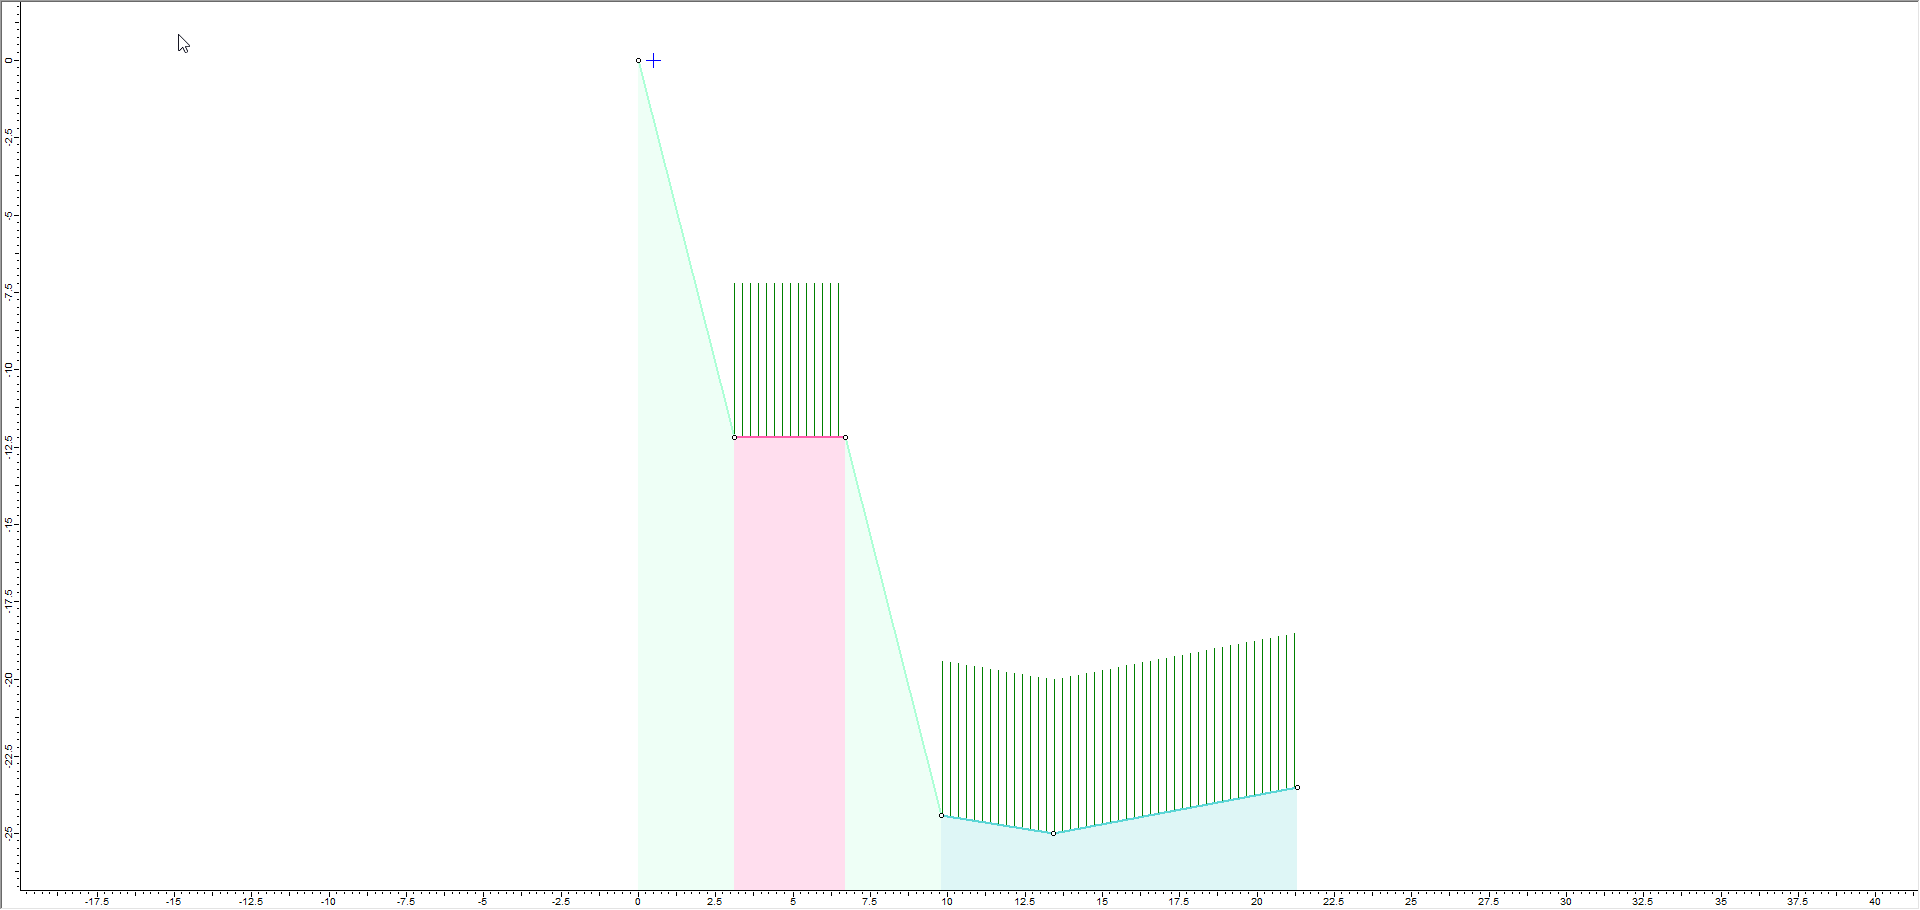
Keep Effective Height (m) = 5.00. Forest drag forces will only be applied when the rock enters the defined forest area. This area is depicted by green vertical hatch by default. The hatch pattern and colour can be modified in Display Options, as shown below. The default Drag Coefficient is 500 kg/s. A value between 100 kg/s to 999 kg/s can be entered.
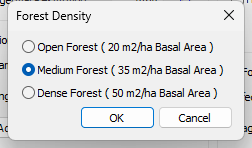
Click the tree icon next to the value. The Forest Density popup appears. The three default Coefficients can be selected based on the effective forest density, which is defined based on the basal area. These are the suggested default values depending on the forest density. Forest density is defined by the “Basal Area”, which is commonly used in forest management and forest ecology. It is defined as the total cross sectional area of tree trunks and stems per hectare in the selected slope segment. m2/ha or ft2/acre are commonly used units. To convert from ft2/acre to m2/ha, multiply by 0.230. (For example, 200 ft2/acre * 0.230 = 46.0 m2/ha).
Click Cancel to keep the default Density.
Enable Forest/Vegetation Damping for the Type Three material as above.
Click OK.
You should see the following. Notice that a hatch pattern is shown to represent the forest areas.
NOTE: Forest drag forces will only be applied to slope segments with angles less than 90 degrees.
3.0 Results
For the purposes of analyzing the effects from different forest densities, repeat the above Slope Materials definitions for four different models and save them as No Forest, Open Forest, Medium Forest, and Dense Forest respectively.
3.1 ANALYSIS TOOLS
Next, we'll switch to Results Mode to display the Analysis Tools on the toolbar and show the rock paths on the slope.
Select the Compute button.
Tile the windows for ease of comparison.
You should see the following four views:
On the general results screens, you can observe the effects of forest damping on the rock trajectories. Let’s graph the Endpoints for a more numerical comparison.
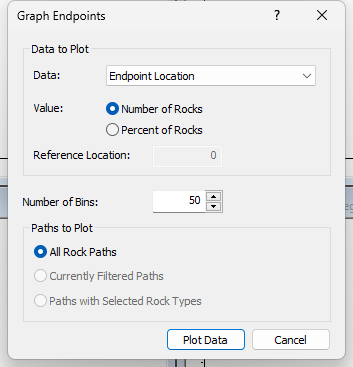
Select: Graphs > Graph Endpoints to open the Graph Endpoints dialog.
Set Data = Endpoint Location.
Set Value = Number of Rocks.
Set Number of Bins = 50.
Set Paths to Plot = All Rock Paths.
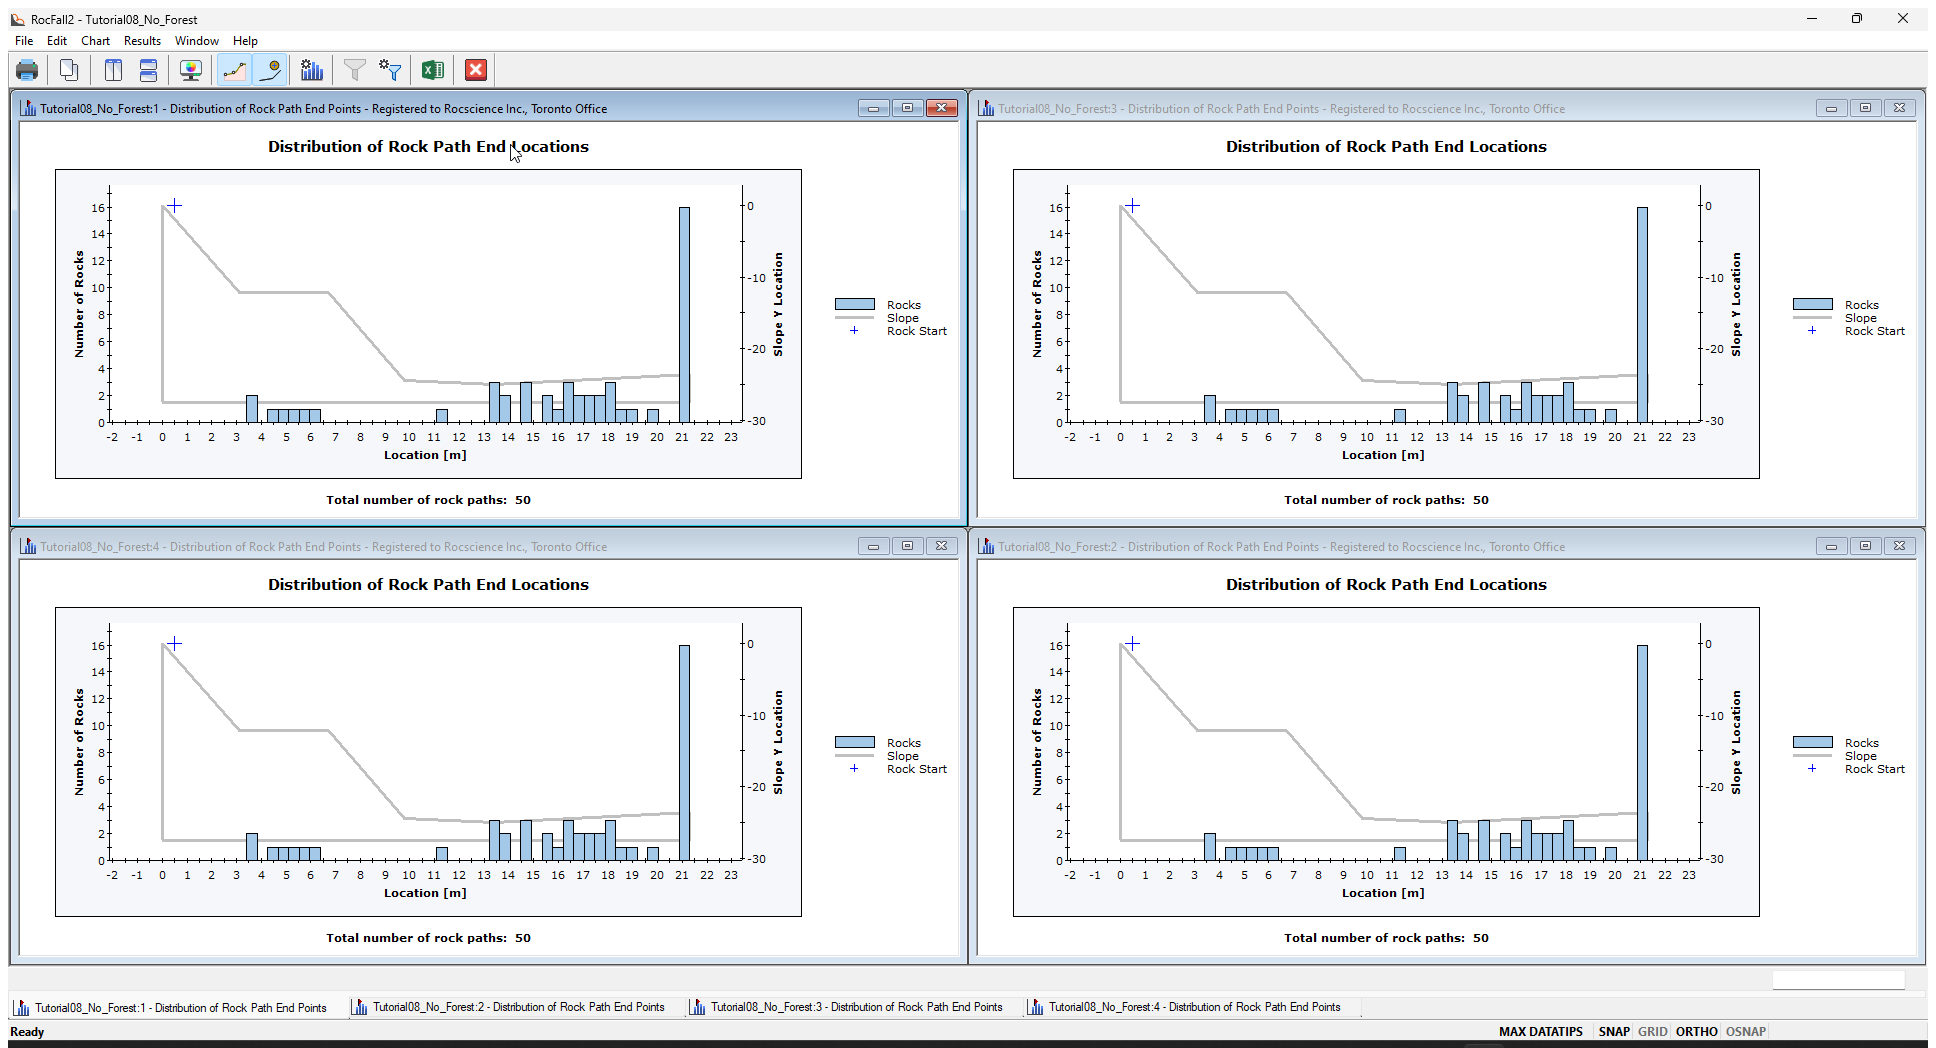
Select Plot Data to generate the Distribution of Rock Path End Locations graph. Repeat for all four analyses.
You should see the following four charts. Note that the rocks travel further as the densities of the forest decrease.
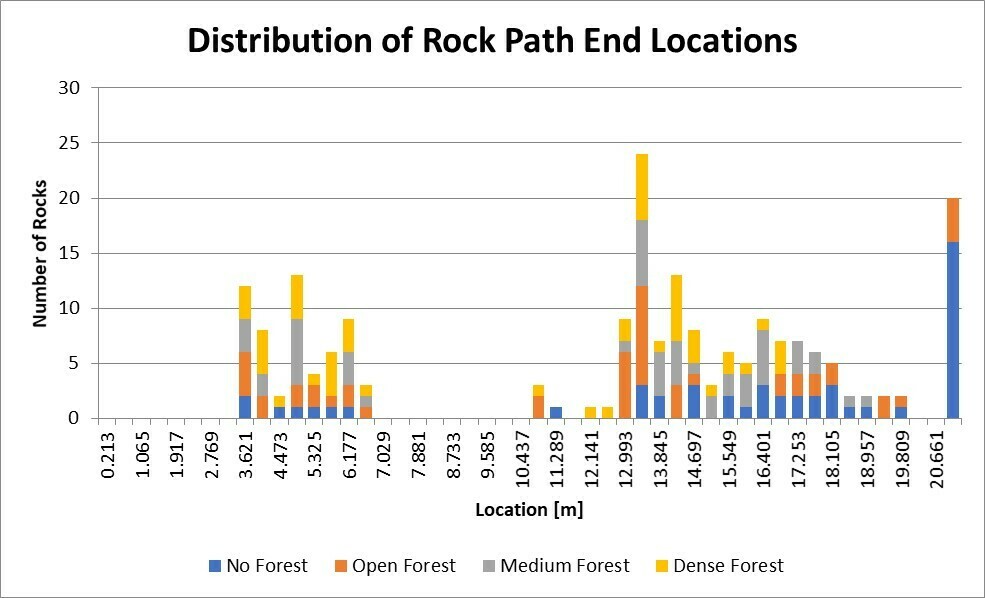
Next, we'll export the charts to Excel to plot the end locations together.
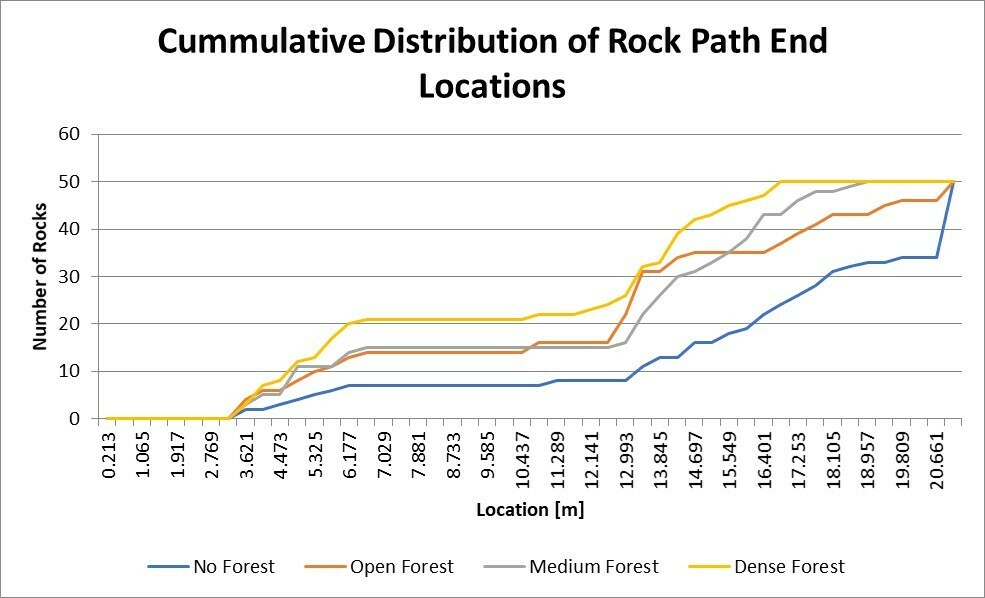
Right-click in a Plot and select Plot in Excel in the popup menu. Repeat for all four analyses. The following graphs contain the combined rock path end location data from the four analyses.
Note that the rocks travel further as the densities of the forest decrease. Denser forests impart larger drag forces (increased drag coefficient and increased dampening effects) on the rocks as they pass through, reducing their speed and energy.
 on the toolbar or the Analysis menu.
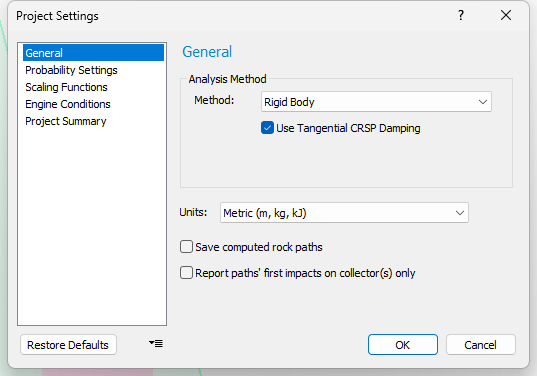


 button.
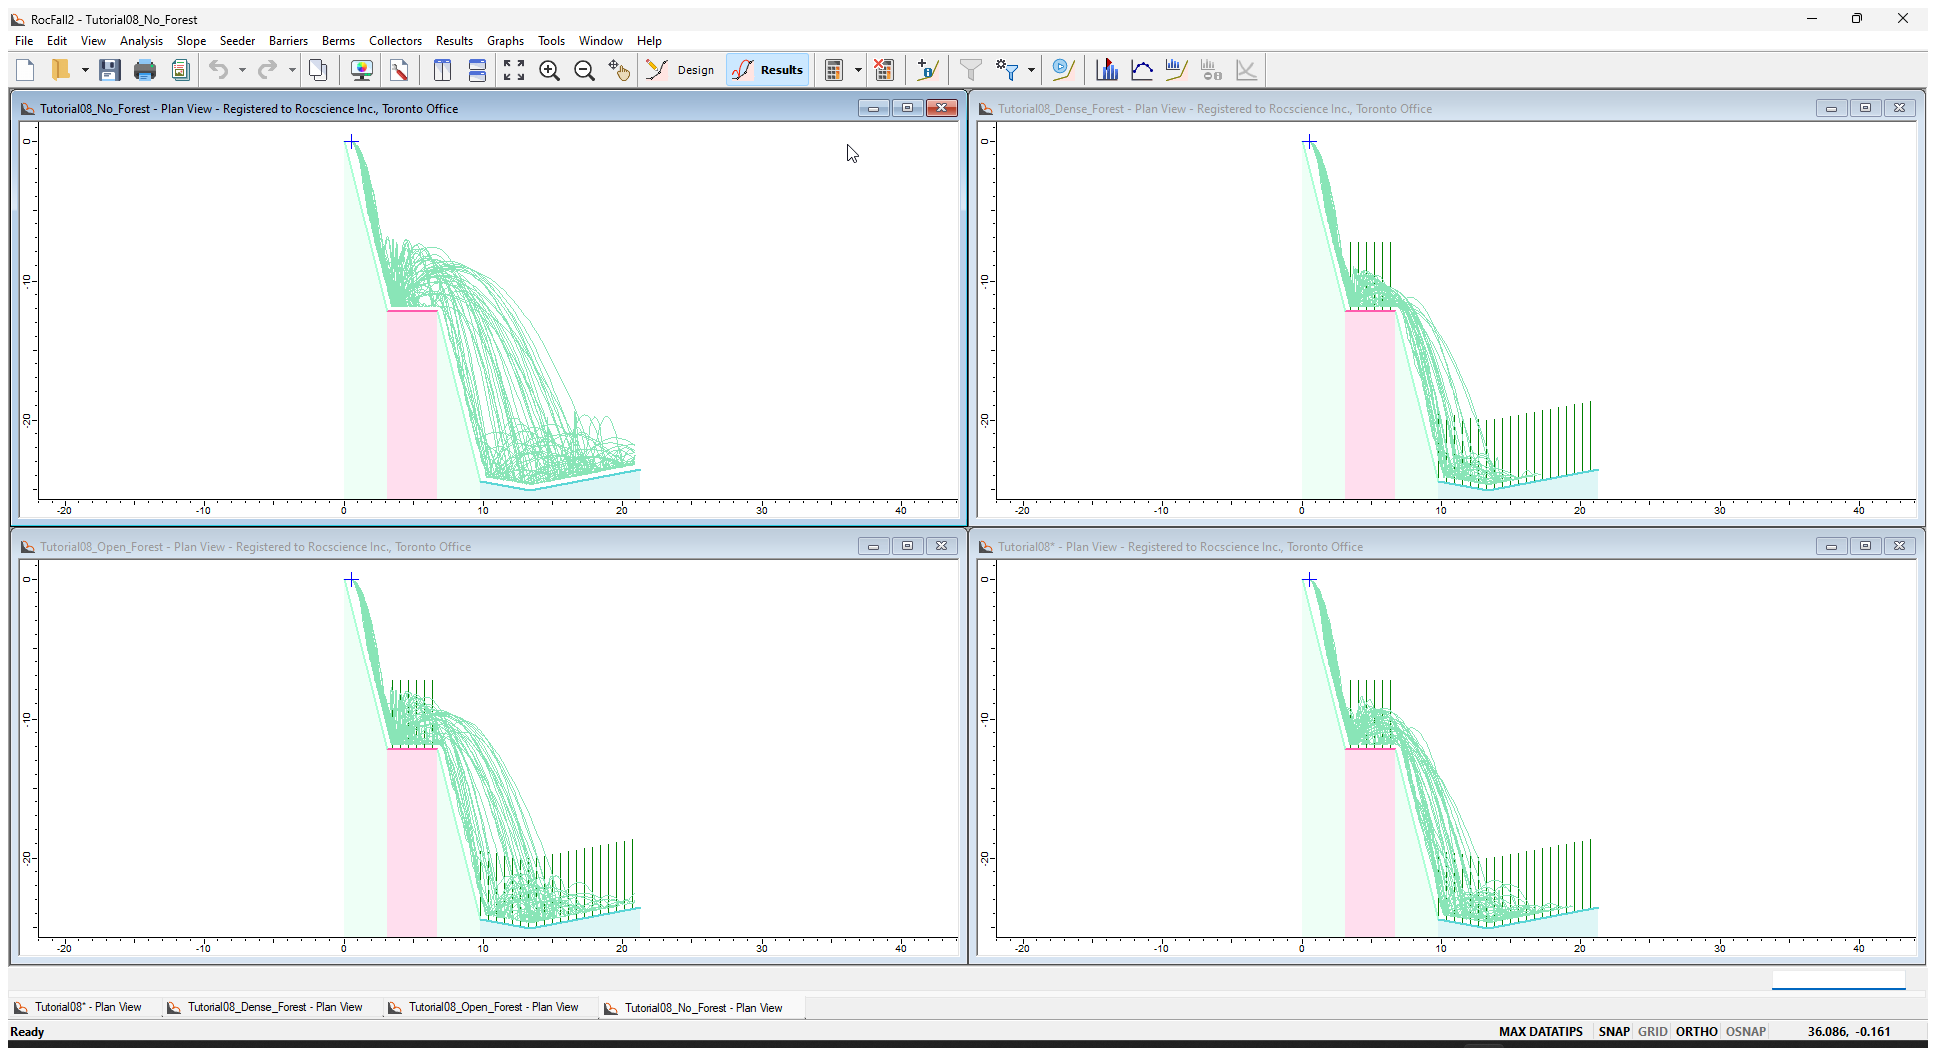
 to open the Graph Endpoints dialog.