10 - Advanced Friction and Viscoplastic Ground Drag
In this tutorial, you will learn about Advanced Friction parameters in RocFall2: Variable Friction (Scarring) and Viscoplastic Damping (Ground Drag).
Topics Covered in this Tutorial:
Creating/Editing advanced friction options
Analysis of different settings: Basic Friction, Variable Friction, Viscoplastic Ground Drag, and both Variable Friction and Viscoplastic Ground Drag
Finished Product
The finished product of this tutorial can be found in the Tutorial 10 Advanced Friction data file. All tutorial files installed with RocFall2 can be accessed by selecting File > Recent Folders > Tutorials Folder from the RocFall2 main menu.
1.0 Introduction
In this tutorial, you will learn about Advanced Friction parameters in RocFall2: Variable Friction (Scarring) and Viscoplastic Damping (Ground Drag). These options allow you to model the phenomenon of increase in friction with sliding distance, which may occur when a rock slides on soft ground and builds up material in front of the rock as it slides. This creates a “scar” in the ground and effectively increases friction with distance, which may result in the rock slowing down, coming to a stop, or flipping the rock back into the air. Viscoplastic Ground Drag is the possible energy dissipation from any viscoplastic deformation that is caused by contact of rock and ground.
2.0 Model
Let's start by opening the file for the tutorial:
Select:File > Recent Folders > Tutorials Folder and open the Tutorial 10 Advanced Friction file.
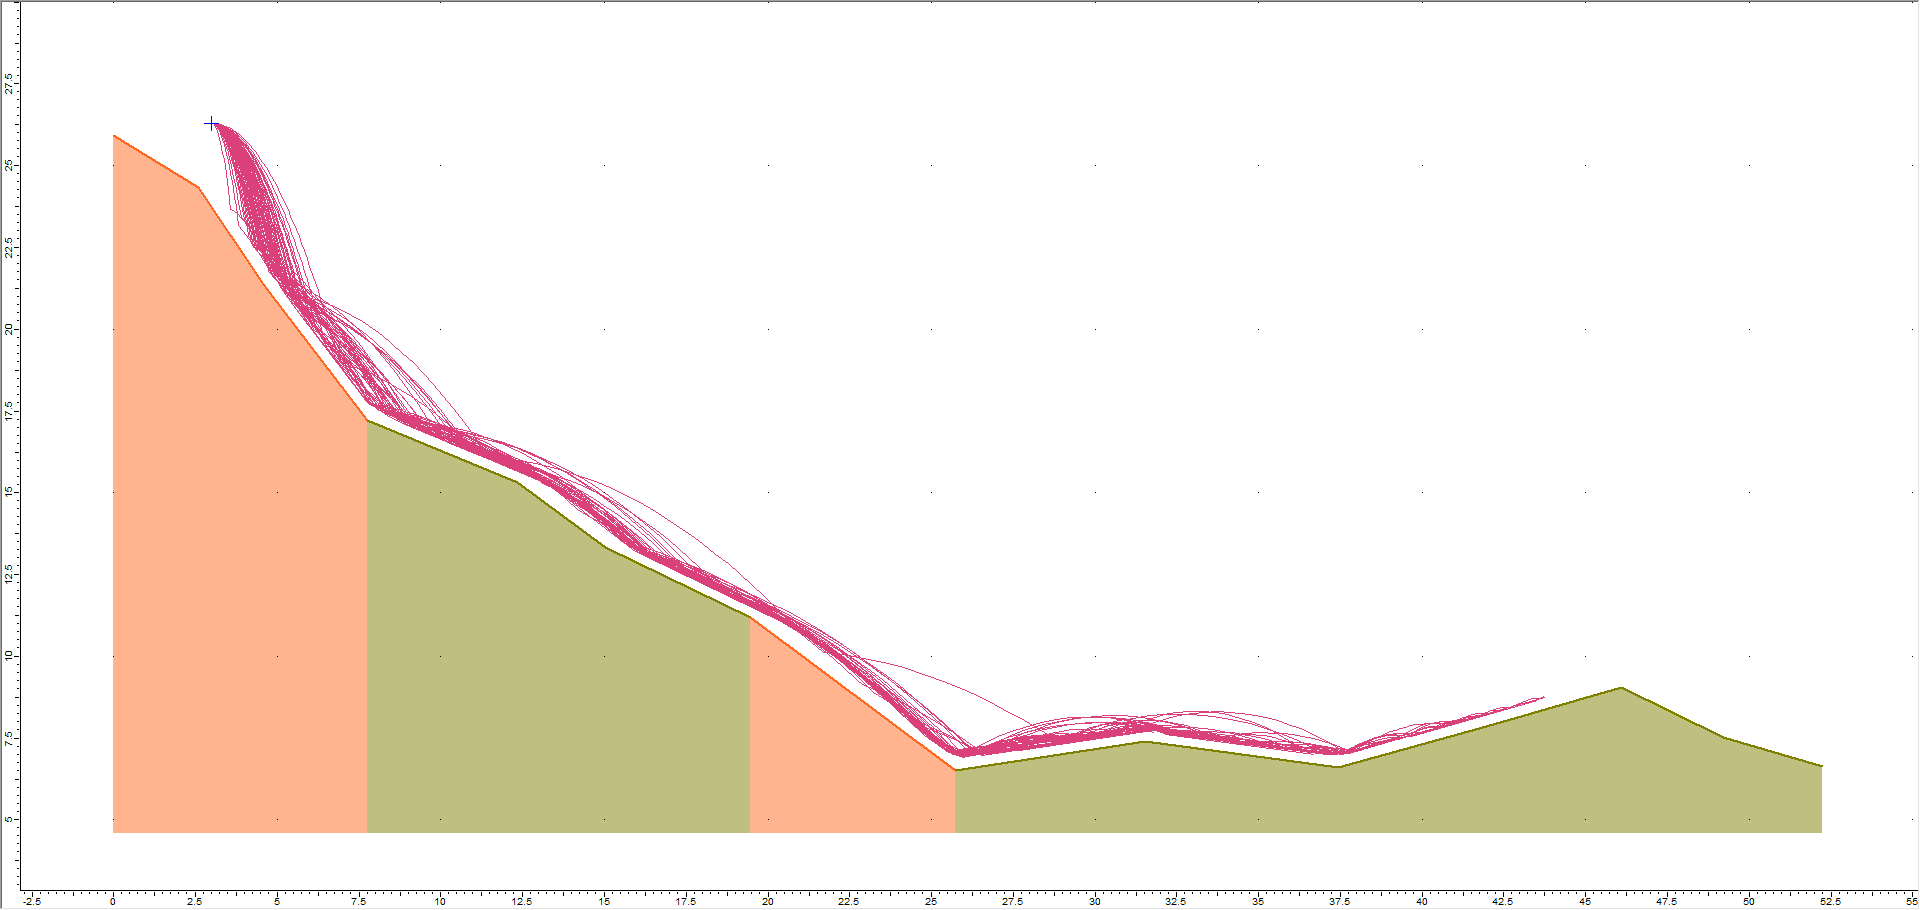
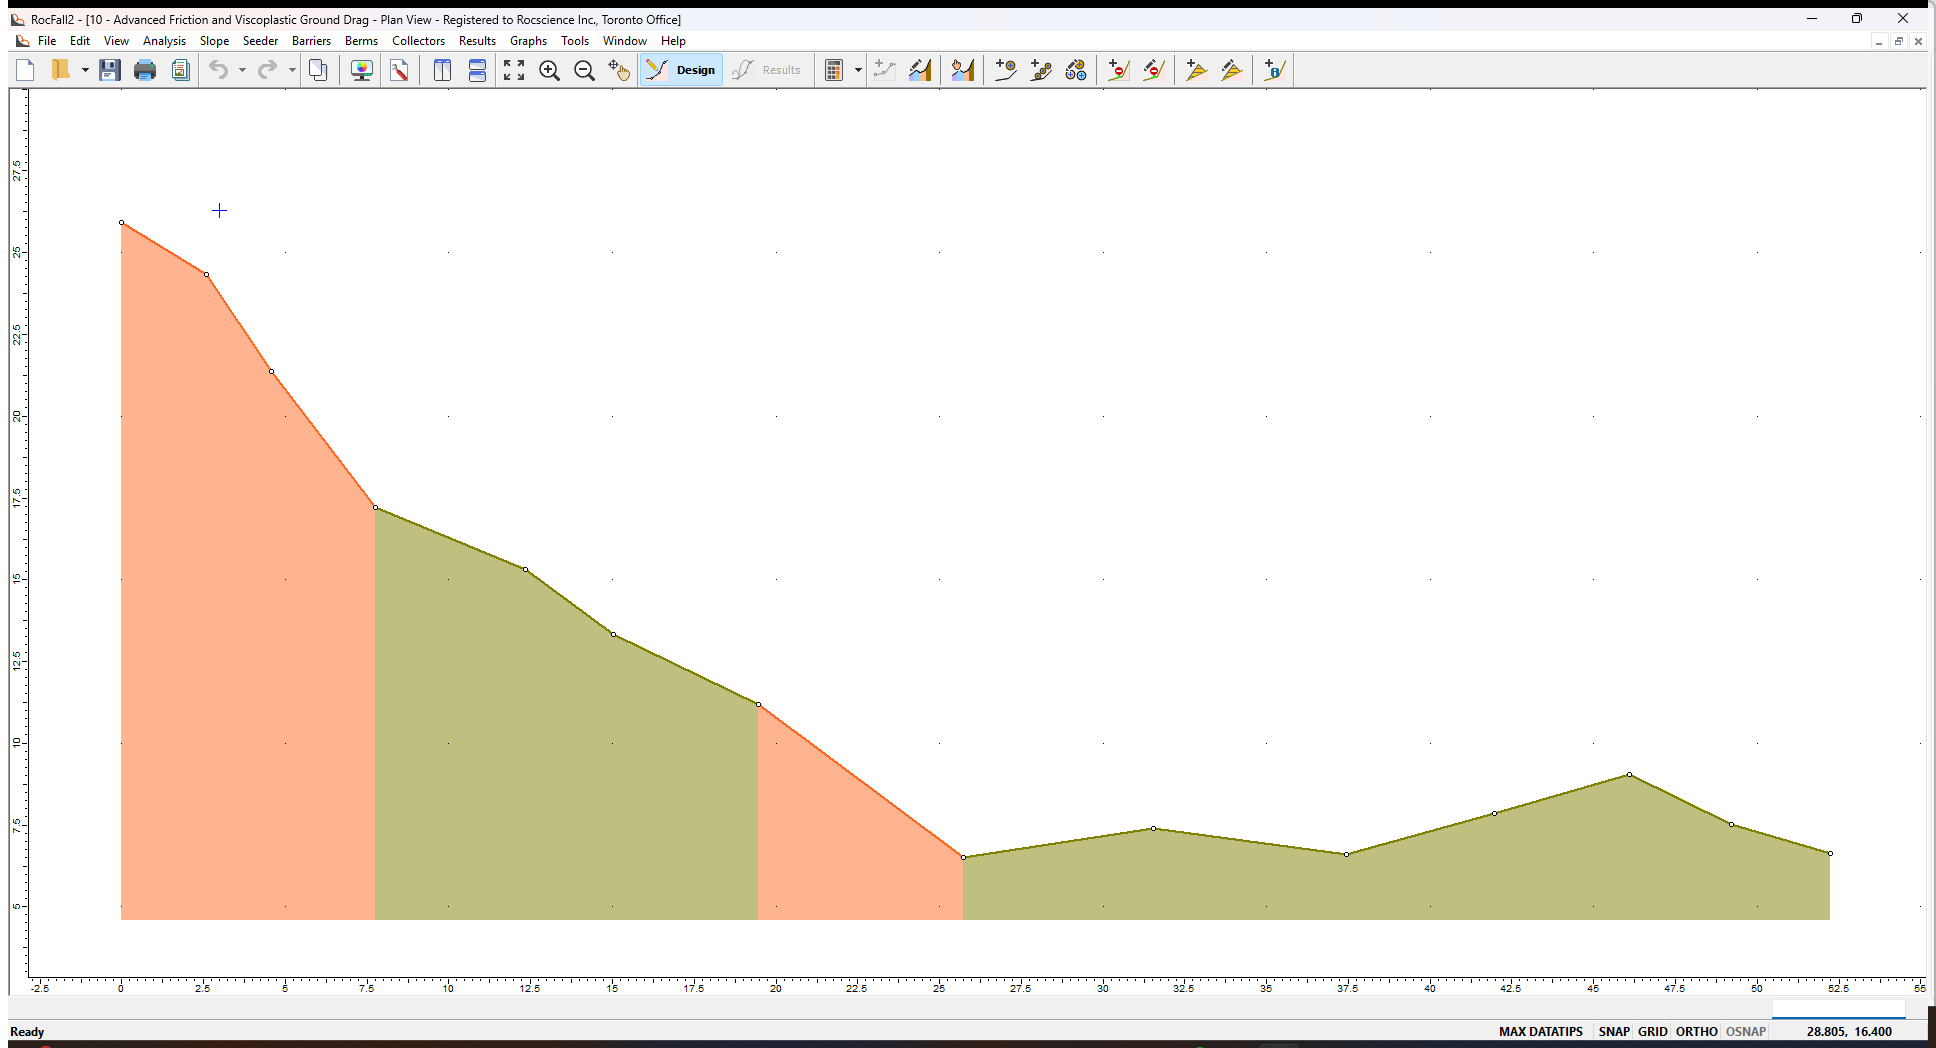
You should see the following model.
2.1 PROJECT SETTINGS
Let's start by looking at the model's Project Settings. Advanced Friction settings are available only in Rigid Body models.
Select Project Settingson the toolbar or the Analysis menu.
In the General tab, make sure Rigid Body is selected and the Use Tangential CRSP Damping check box is DESELECTED.
Make sure Units = Metric (m, kg, kJ).
Click OK.
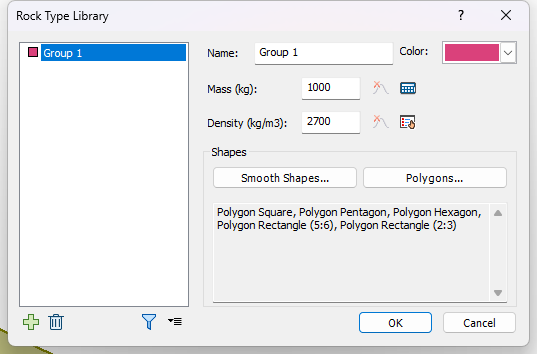
2.2 ROCK TYPES
Let’s view the model's rock properties in the Rock Type Library.
Select Rock Type Libraryon the toolbar or the Seeder menu.
Note that we've defined one rock group, Group 1, and that the following polygon shapes have been selected: Polygon Square, Polygon Pentagon, Polygon Hexagon, Polygon Rectangle (5:6) and Polygon Rectangle (2:3).
Click OK or Cancel.
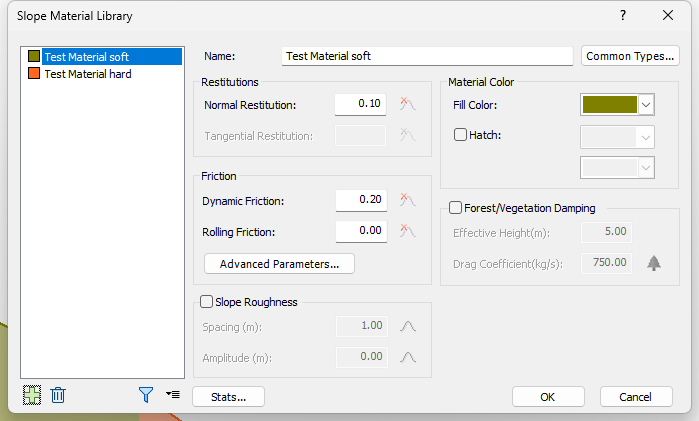
2.3 SLOPE MATERIALS
Let’s have a look at the Slope Materials in the Slope Material Library.
Select Slope Material Libraryin the toolbar or the Slope menu.
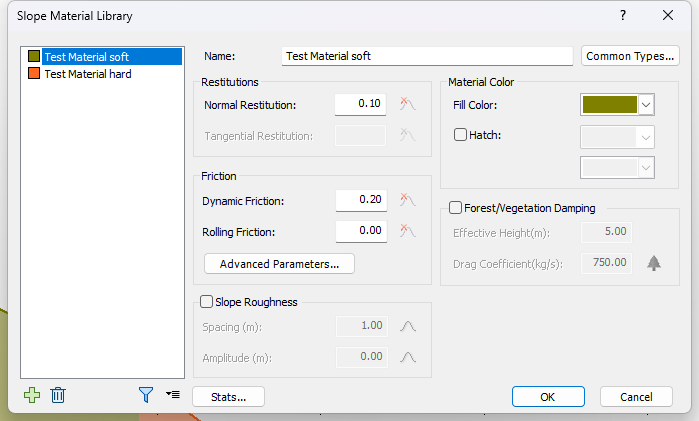
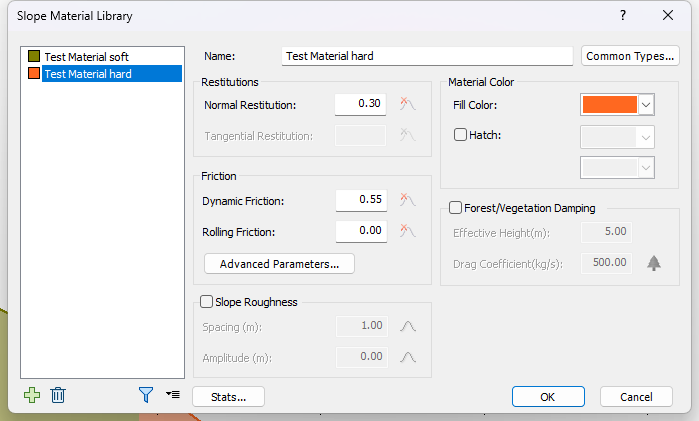
Notice we've defined two slope materials: soft and hard.
Click Cancel.
3.0 Results
Now we'll compute to view results.
Select the Compute option from the toolbar or the Analysis menu.
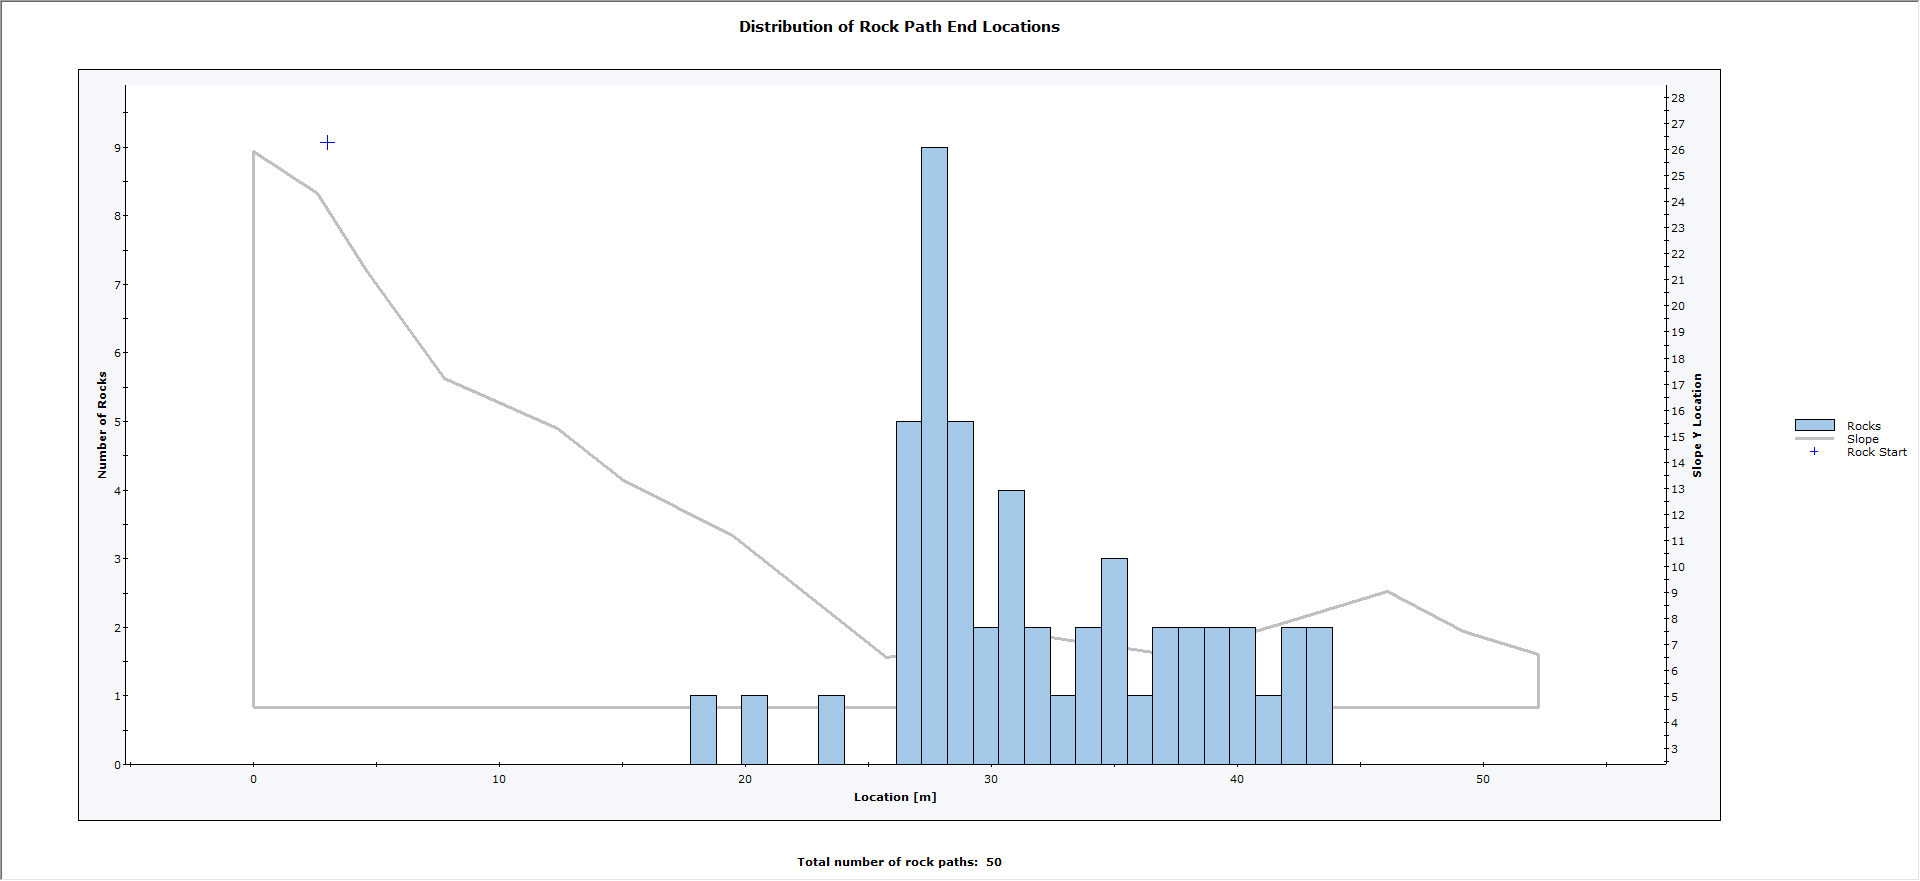
You should see the calculated paths of 50 rocks as follows:
3.1 ANIMATE ROCK PATHS
You can animate the path of any of the rocks by right-clicking the path in the model and selecting Animate Path. For more help, see Animating Path Results in RocFall2.
3.2 GRAPH ENDPOINTS
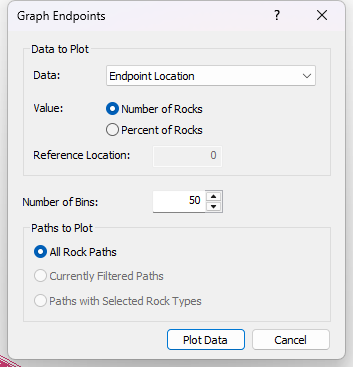
For this tutorial, we will look at the Endpoints plot:
Select Graph Endpointson the toolbar or the Graphs menu. The Graph Endpoints dialog should appear.
Set Data = Endpoint Location.
Set Value = Number of Rocks.
Set Number of Bins = 50.
Set Paths to Plot = All Rock Paths.
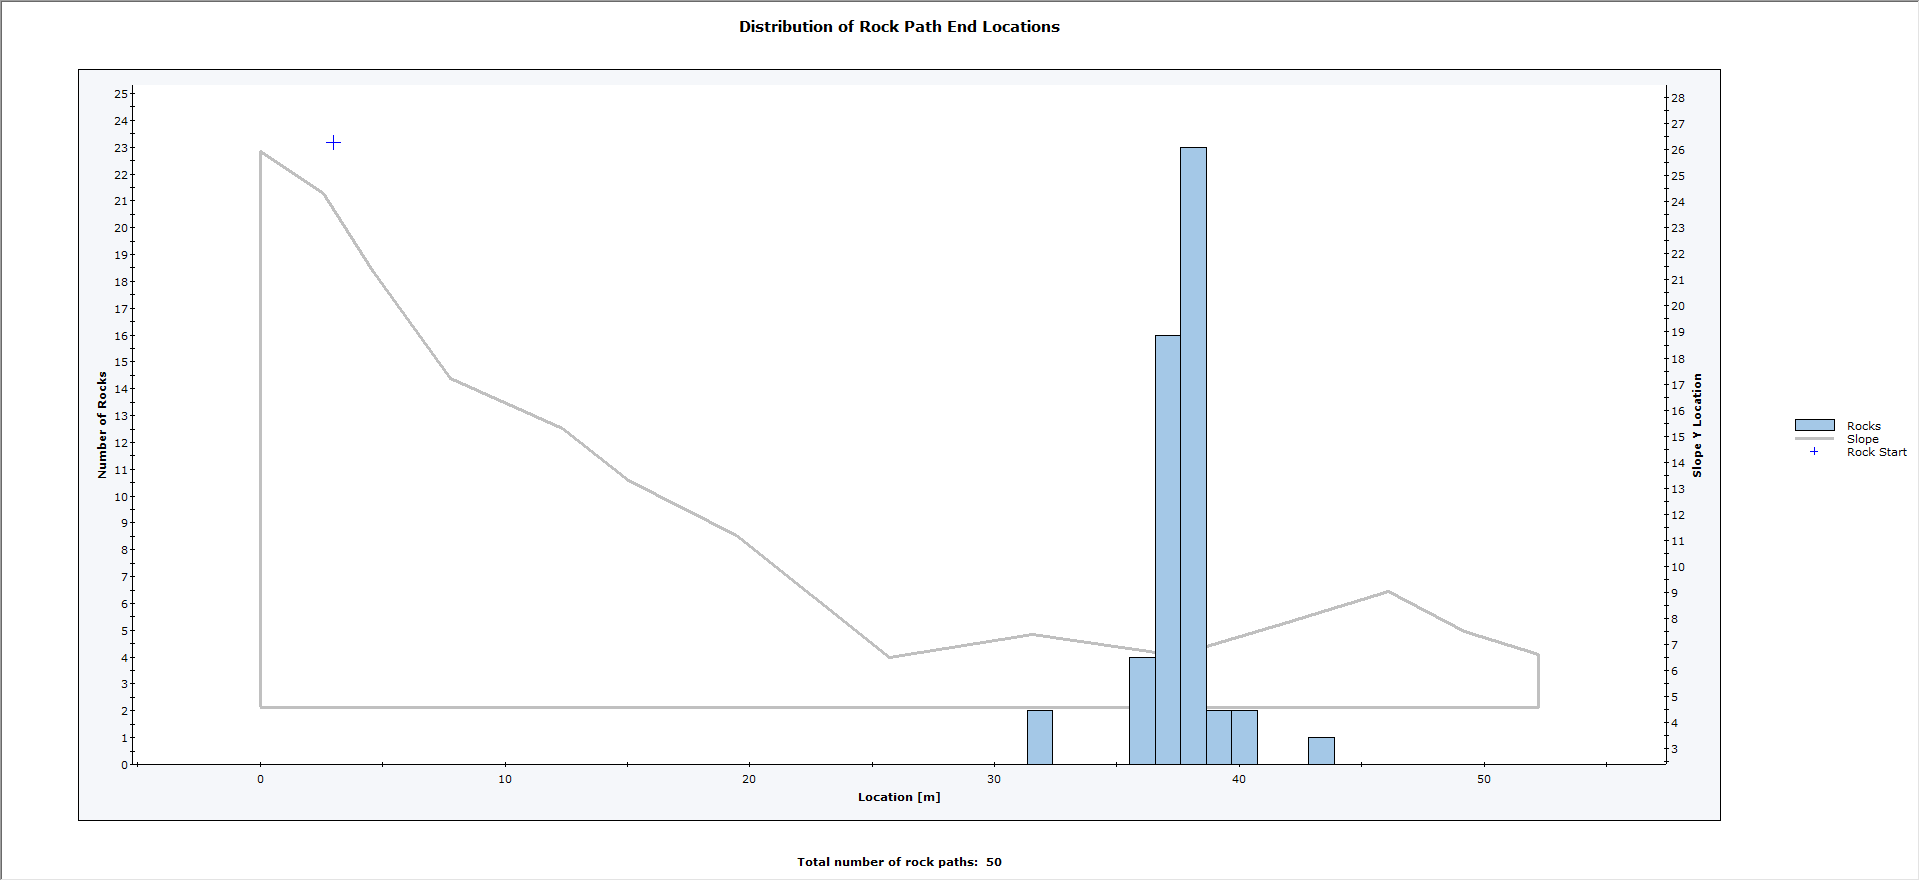
Select Plot Data to generate the Distribution of Rock Path End Locations graph.
This plot shows the horizontal endpoint locations of each rock.
4.0 Analysis with Advanced Friction
We'll now repeat the above steps but creating three models. The only difference will be the Advanced Friction parameters added to them in the Slope Material Library. We'll add the following:
Variable Friction (Scarring)
Viscoplastic Damping
Variable Friction AND Viscoplastic Damping
4.1 WITH VARIABLE FRICTION
Select Slope Material Libraryin the toolbar or the Slope menu.
Select Test Material soft in the materials list and click the Advanced Parameters button.
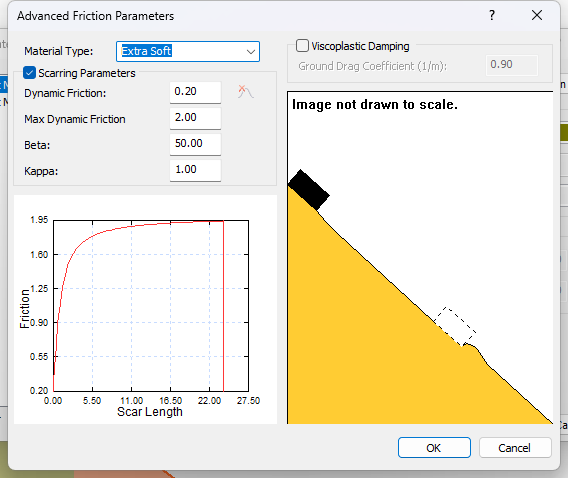
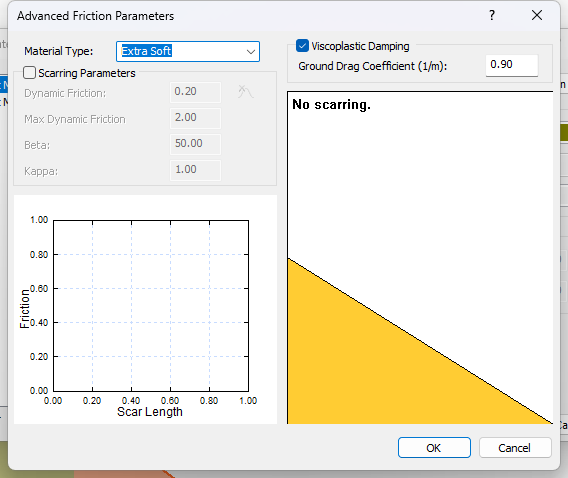
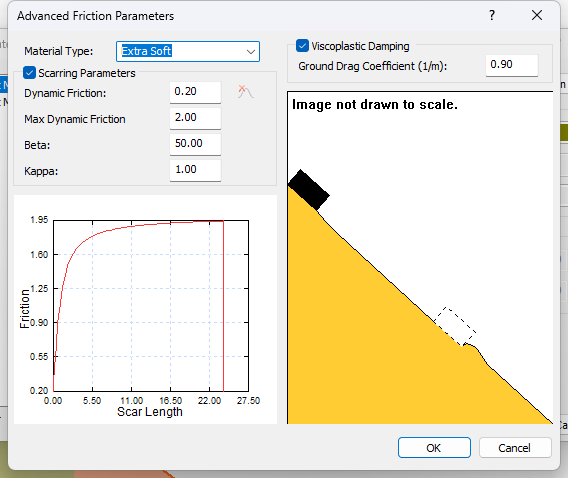
In the Advanced Friction Parameters dialog, select the Scarring Parameters check box and set Material Type = Extra Soft.
Back in the Slope Material Library, select Test Material hard in the list and click the Advanced Parameters button.
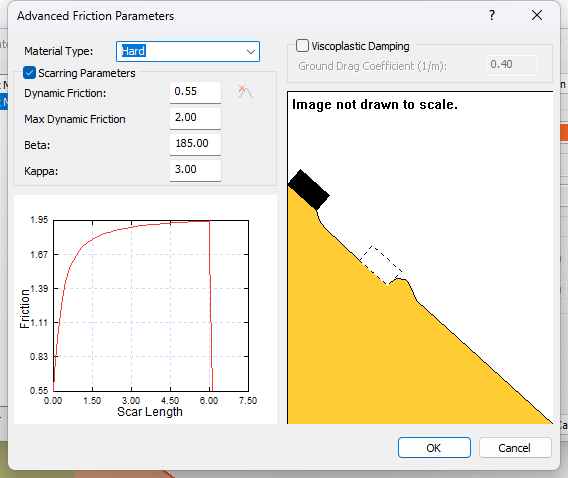
In the Advanced Friction Parameters dialog, select the Scarring Parameters check box and set Material Type = Hard.
Click OK. Notice that the Advanced Parameters button now shows a green check mark to indicate that Advanced Parameters have been applied to a material.
Click OK.
Save the model as Tutorial 10 Advanced Friction - Scarring.
Select Results on the toolbar.
Select Graphs > Graph Endpoints . The Graph Endpoints dialog should appear.
Set Data = Endpoint Location.
Set Value = Number of Rocks.
Set Number of Bins = 50.
Set Paths to Plot = All Rock Paths.
Select Plot Data to generate the Distribution of Rock Path End Locations graph.
If you compare the endpoint graphs (Basic Friction versus Variable Friction), you can see that the variable friction results in some rocks coming to rest on the slope. With only basic friction, all rocks reached the bottom of the slope.
4.2 WITH VISCOPLASTIC GROUND DRAG
Now repeat the above steps except do the following:
For both the hard and soft materials, turn OFF Scarring Parameters and turn ON Viscoplastic Damping in the Advanced Friction Parameters dialog. We will use the default values corresponding to the extra soft and hard material types.
Save the model as Tutorial 10 Advanced Friction – Viscoplastic Damping.
4.3 WITH VARIABLE FRICTION AND VISCOPLASTIC GROUND DRAG
Repeat the above steps again with the following settings:
For both the hard and soft materials, turn ON Scarring Parameters and turn ON Viscoplastic Damping, again with the default values.
Save the model as Tutorial 10 Advanced Friction – Scarring and Viscoplastic Damping.
4.4 ENDPOINT COMPARISON
Now let's compare the results of the four models.
select the Compute option from the toolbar or the Analysis menu for each model.
Select Graphs > Graph Endpoints for each model. In the Graph Endpoints dialog:
Set Data = Endpoint Location.
Set Value = Number of Rocks.
Set Number of Bins = 50.
Set Paths to Plot = All Rock Paths.
Select Plot Data to generate the Distribution of Rock Path End Locations graph.
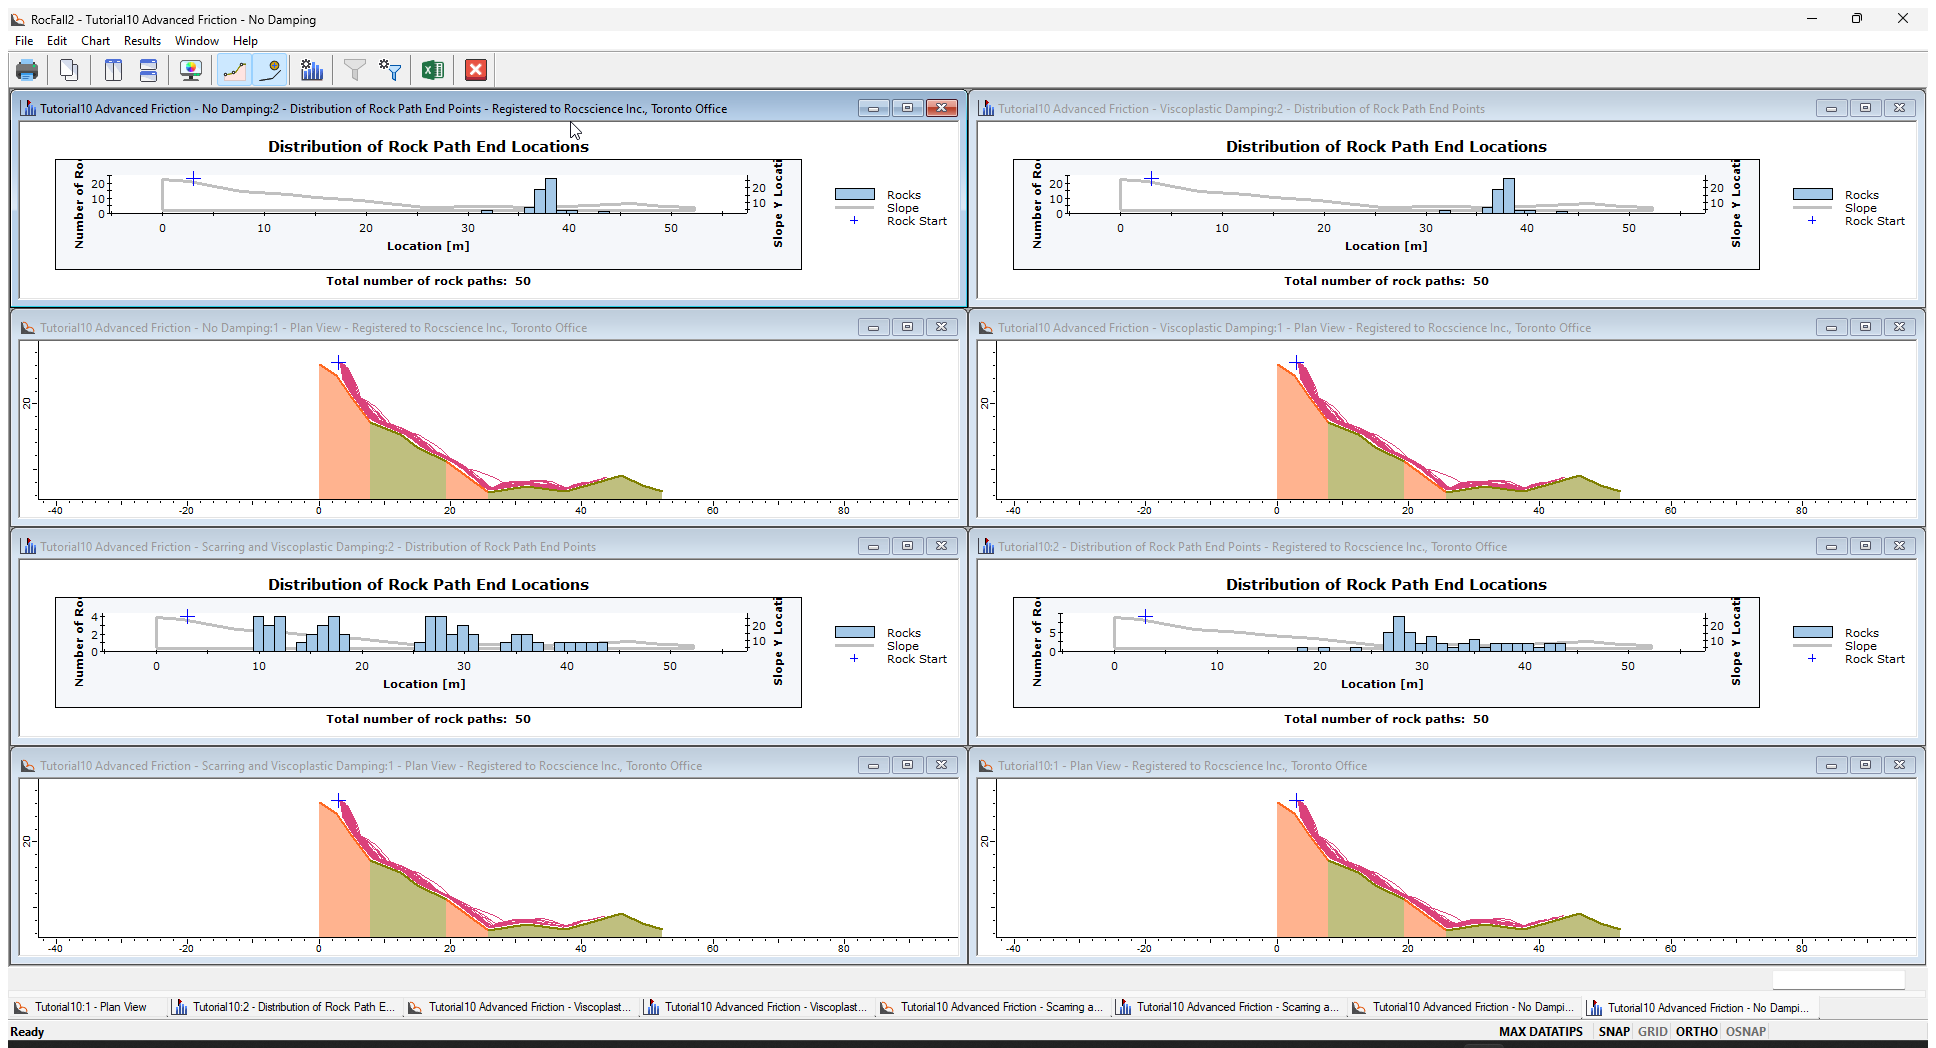
Minimize and tile the views.
Your screen should look similar to the following.
Compare the graphs and observe the effects of variable friction and viscoplastic ground drag on the rock endpoints.
5.0 Possible Analysis Outcomes
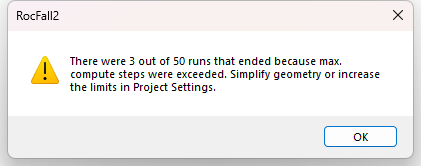
When you select Results to compute the rock fall analysis for each file, you may see a warning dialog indicating various possible analysis outcomes encountered during the compute. For example:
This is normal and may occur due to the combination of slope properties and rock properties. You may filter analysis results based on various criteria, including the stopping condition of the rocks. This may help you to better understand analysis results and to adjust input parameters to improve the rockfall simulation results. This is left as an optional exercise.
 on the toolbar or the Analysis menu.
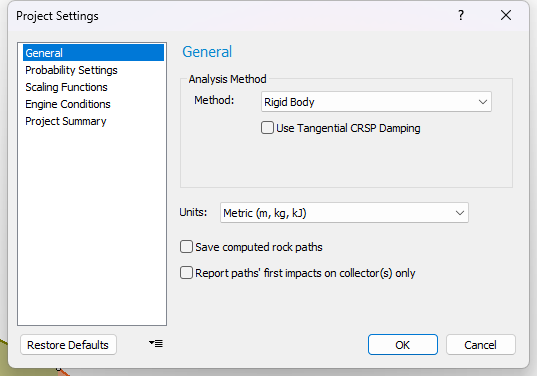


 option from the toolbar or the Analysis menu.