12 - Combined Block Analysis
1.0 Introduction
In this tutorial, a Combined Block Analysis is performed to assess the stabilization requirements in a rock slope with block cluster failure. In RocSlope3, a block cluster is referred to as a “Combined Block”, which consists of multiple “Unit Blocks”. For stabilizing a block cluster, we need to assess the total force distribution in the Combined Block rather than in the individual Unit Blocks. We would be interested in determining the Combined Blocks that give the largest failure volume, the lowest safety factor, or the largest required resistance, etc. Note that these design attributes may not coincide in a single Combined Block, and a conservative analysis may require assessing a number of different Combined Blocks within a single block cluster. This tutorial will demonstrate how you can use the Combined Block Analysis to find these important Combined Blocks for stabilization assessment.
Topics Covered in this Tutorial:
- Combined Block Analysis
- Combined Block Search Filters
Finished Product
The finished product of this tutorial can be found in the Tutorial 12 Combined Block Analysis folder. All tutorial files installed with RocSlope3 can be accessed by selecting File > Recent Folders > Tutorials Folder from the RocSlope3 main menu.
2.0 Starting File
Open RocSlope3. You will see a blank workspace. To access the starting file to this tutorial:
- Select File > Recent > Tutorials Folder
 . In the Tutorial 12 Combined Block Analysis folder, select the file Tutorial 12 Combined Block Analysis.rocslope3 and click Open.
 - The starting model should already have all geometry and joints. Select Analysis > Compute Blocks
 to compute all valid blocks.
 - Select Analysis > Compute Kinematics
 to compute the block forces and factors of safety.
 - View results in the Results
 workflow tab.
 - Select the Results node in the Visibility Tree.
- In the Properties Pane, set the Results Set to Failed Unit Blocks (FS < Design FS). Note that the Design FS = 1 for this model, which you can confirm via Analysis > Project Settings in the Analysis tab.
- In the Properties pane, note that the Block Colors are set to Random Colors so all blocks can be viewed in different colors.

You can see there are two (2) large failed block clusters, located on the east and south sections of the model. Each block cluster consists of multiple Unit Blocks. For stabilization assessment, let’s determine the Combined Blocks in the south cluster that would result in the largest removable volume and smallest factor of safety.
3.0 Combined Block Analysis
3.1 Search Limits
A Combined Block forms from a combination of Unit Blocks. Given that many Unit Blocks could be found in a large model, the total number of Combined Blocks could far exceed the number of Unit Blocks. To reduce the total computation time, it is recommended that a Combined Block analysis be strategically conducted within Search Limits in the following locations:
- Where block clusters are observed to fail
- Where joint traces show valid daylighting block faces and there are valid block clusters behind the slope surface
Having Search Limits in the second scenario helps to identify Combined Blocks that could be important for stabilization where individual daylighting Unit Blocks may be unremovable:
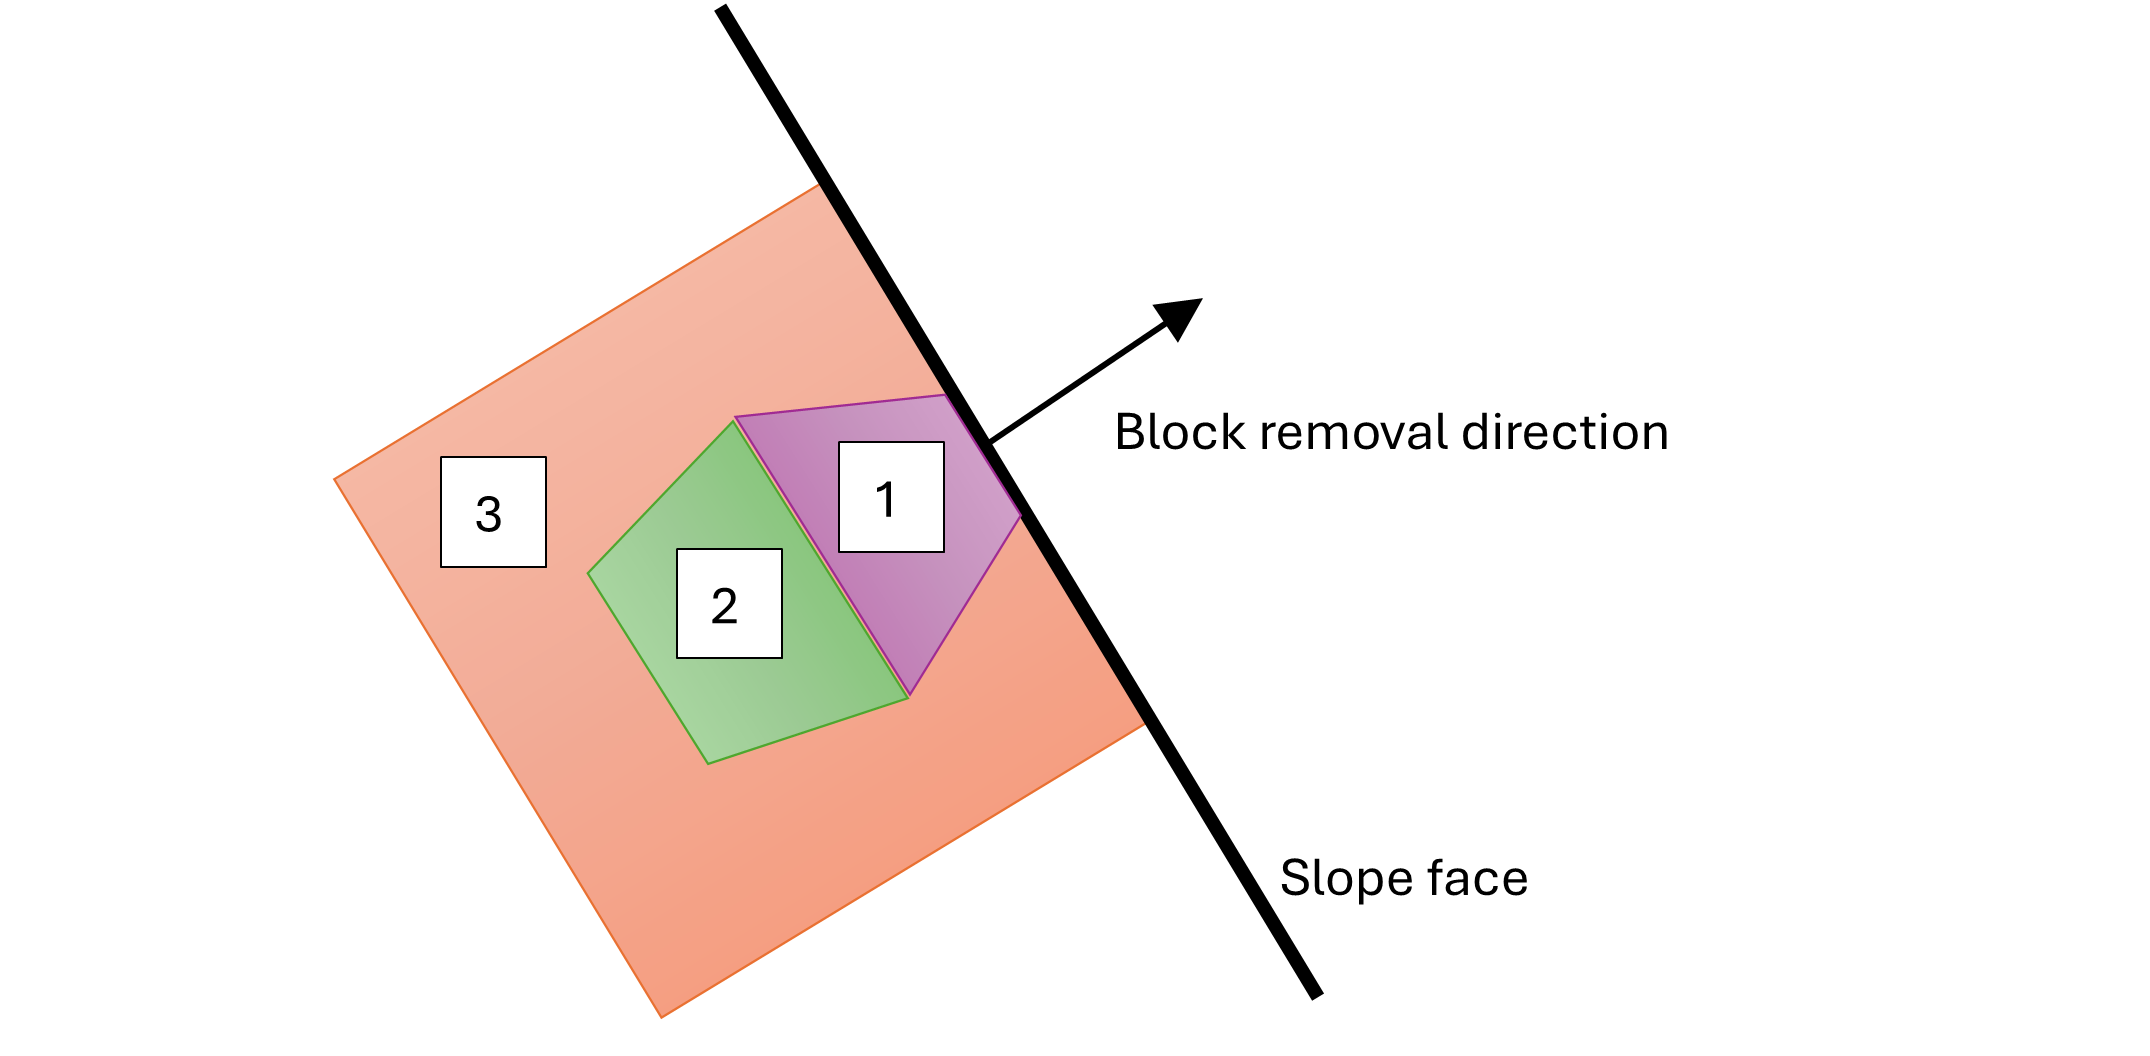
In this tutorial, let’s look for Combined Blocks within the south cluster by placing a Search Limit around it.
- Select Analysis > Search Limit > Add Search Limit by Box

Enter the following coordinates for the First Corner and Second Corner:
X Y Z First Corner -465 -680 860 Second Corner -281 -536 1105 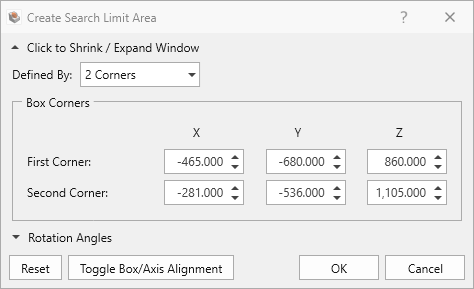
Create search limit area dialog with the search limit coordinates. - Click OK.
- Ensure the Search Limit Type = Completely Inside
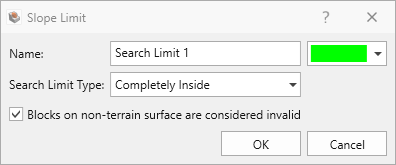
Search limit type set to “Completely Inside”. - Click OK.
3.2 Project Settings
The Combined Block analysis is configured in Project Settings.
- Select Analysis > Project Settings or click on the Project Settings
 icon in the toolbar.
 - Select the Analysis tab.
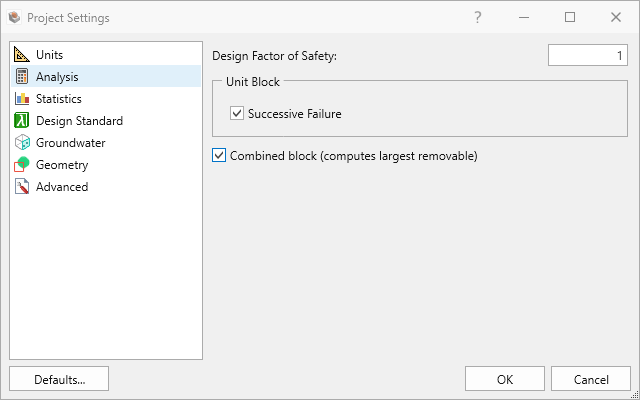
Analysis tab in Project Settings dialog with “Combined block” selected. - Enable “Compute block (computes largest removable)”.
- Click OK to save the Project Settings and to close the dialog.
The project is now configured to run a deterministic block stability analysis considering both successive failure in Unit Blocks and largest removable Combined Blocks.
3.3 Compute
- Select the Compute
 workflow tab
 - In the toolbar, click Compute Blocks (or select Analysis > Compute Blocks in the menu).
- Click Compute Kinematics (or select Analysis > Compute Kinematics in the menu).
3.4 Results
- Select the Results workflow tab .
- Select Interpret > Zoom to All Blocks
 to better view the search limit area.
 - Select the Results node in the Visibility Tree, then in the Properties Pane, change the Block Type to Unit Blocks and Combined Blocks. You should now see an overview of all Unit Blocks (colored) and Combined Blocks (outlined) in the 3D view.
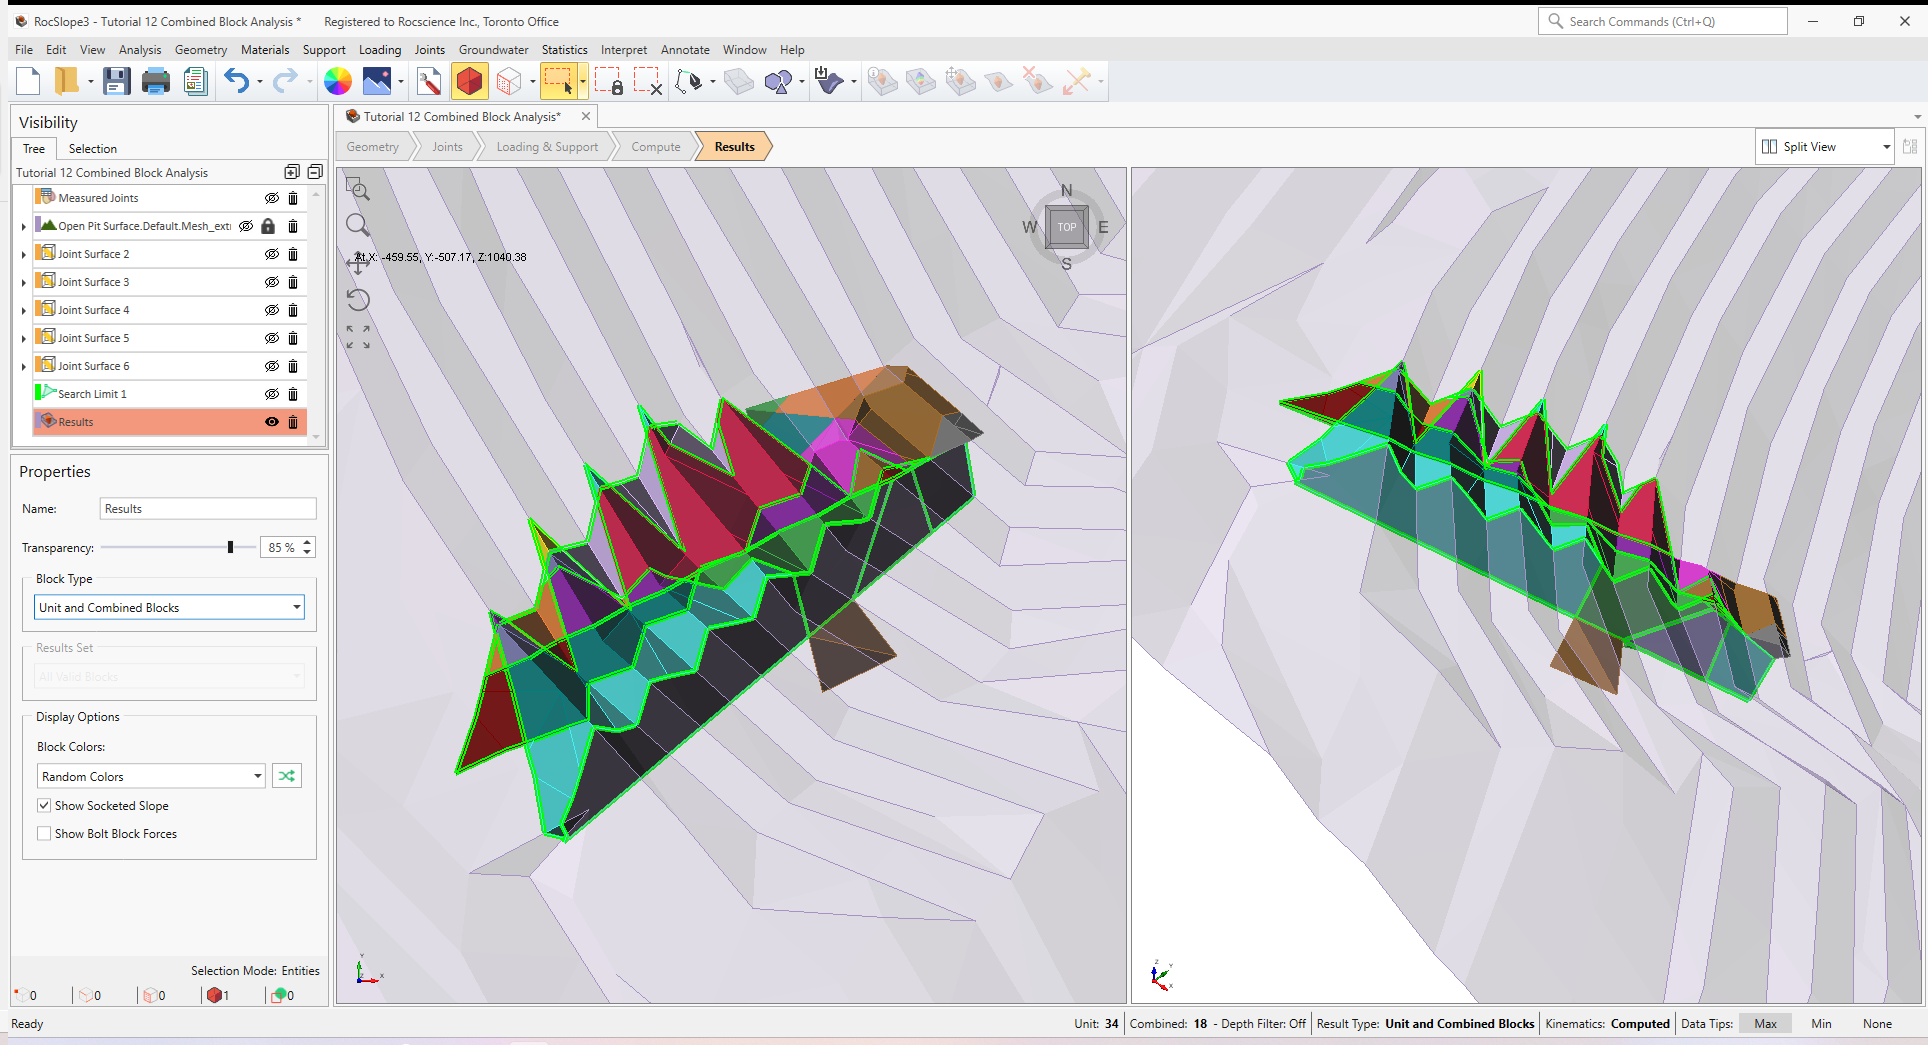
- Change the Block Type to Combined Blocks, and the Results Set to Removable Combined Blocks.
- Display the Block Information Table by selecting Interpret > Block Information
 . The Block Information Table should now be updated to reflect the selected Block Type and Results Set, hence showing entries for Combined Blocks
that are removable. Each entry represents the largest removable Combined Block for a potential sliding direction.
. The Block Information Table should now be updated to reflect the selected Block Type and Results Set, hence showing entries for Combined Blocks
that are removable. Each entry represents the largest removable Combined Block for a potential sliding direction. - Take note of Combined Block ID = 51. This block has both a large failure volume and a low factor of safety. Take note that its Failure Depth = 19.28.
- In the Block Information Table, select Combined Block ID = 51, and then select Interpret > Detailed Block Information
 (or click See Block Details in the top right of the Block Information Pane). All values shown pertain to the selected Combined Block. Users interested in stabilization assessment may be especially interested in the Failure Depth, Failure Volume, and Required Support Pressure.
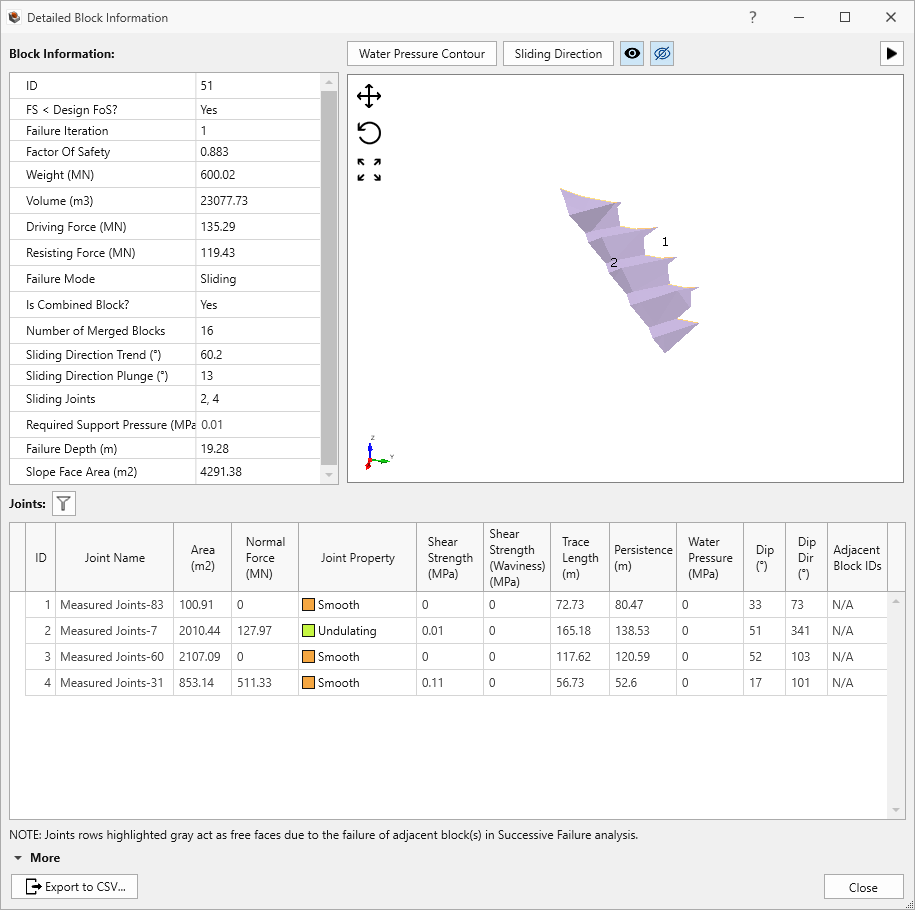
Detailed block information for Combined Block ID = 51. - Users may view the composite Unit Blocks of the Combined Block by clicking More (in the bottom left of the Detailed Block Information dialog) and examining the Merged Blocks table.
- Click Close to exit the Detailed Block Information.
- To view contours of Required Support Pressure for the removable combined blocks, toggle the Legend to Required Support Pressure. Note that the Combined Block with the largest Required Support Pressure is displayed on the top layer. This is because Combined Blocks may share Unit Blocks (overlap) and thus are coloured by priority depending on the selected Legend entry.
4.0 Combined Block Search Filters
The Combined Blocks computed in Section 3.0 are the largest removable combined blocks in any given sliding direction, but they may not necessarily have the smallest factor of safety or the largest required support pressure. However, we may refine our search within these Combined Blocks because any other critical Combined Block would have to be a subset of the largest removable Combined Block. Applying Combined Block Search Filters allows users to perform this refined search without needing to re-compute all existing Unit Blocks and Combined Blocks.
4.1 Compute with Combined Block Search Filters
- Analysis > Combined Block Search Filters

- Tick the checkbox for Max failure depth (m) and enter a filter criterion for the Failure Depth = 19 m. This means that a refined search for Combined Blocks would be performed within a Failure Depth of 19 m. This value was selected based on the Failure Depth observed for Combined Block ID = 51 found in Section 3.4. We want to look for Combined Blocks that are smaller in volume compared to Combined Block ID = 51 but with potentially lower factors of safety.
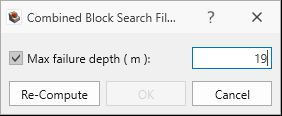
Combined Block Search Filters dialog. - Click Re-Compute.
4.2 Results
- Select the Results workflow tab.
- Select the Results node in the Visibility Tree, the in the Properties Pane, toggle the Block Type to Combined Blocks, and toggle the Results Set to Removable Combined Blocks.
- Display the Block Information Table by selecting Interpret > Block Information . Note now a different list of Combined Blocks is shown. Each Combined Block entry has a Failure Depth smaller than that entered in the Combined Block Search Filter.
- Take note of Combined Block ID = 41. This block has a lower factor of safety compared to Combined Block ID = 51 computed in Section 3.4 without the Combined Block Search Filter.
This concludes Tutorial 12.