Axial Pushover Analysis: Bringing More Versatility to RSPile
- Ahmed Mufty, Senior Geomechanics Specialist
One of our primary goals is developing new features that will give you more value out of your software. This latest feature has been highly requested by RSPile users, who have asked to add the axial option to pushover analysis.
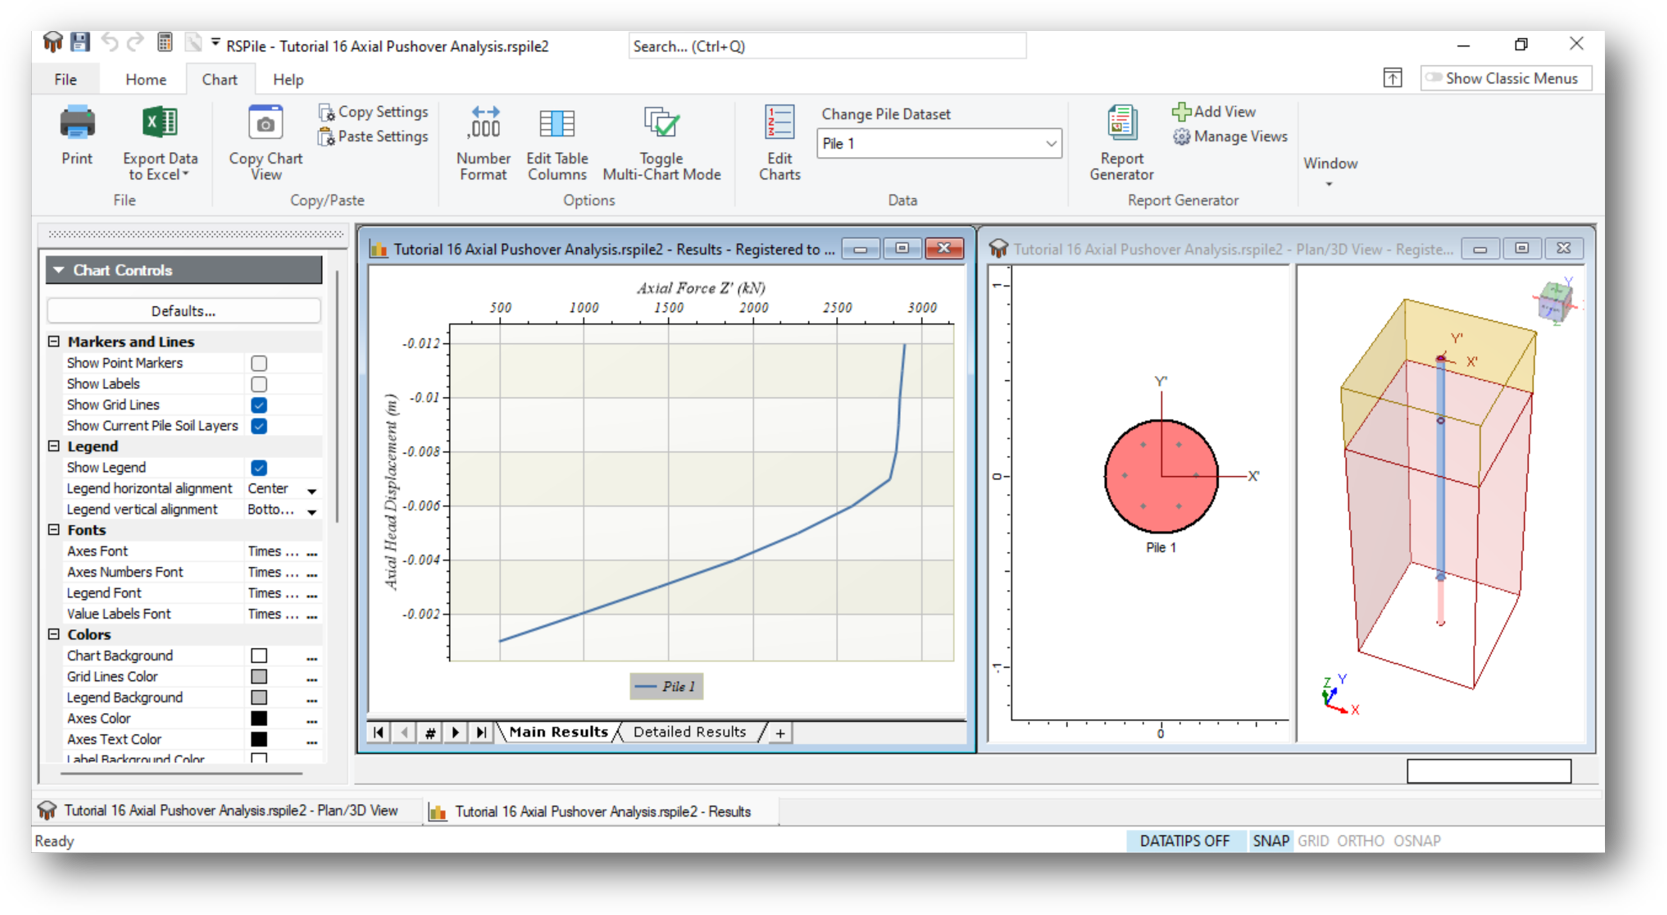
The latest RSPile release can now use the new feature of pushover analysis for axial load. With this feature, you can obtain axial load response to applied axial head displacement. This behavior is similar to the available lateral pushover analysis available already in the program, but this time to assess the axial behavior. It is now easy to construct a predicted load – settlement curve for axial load testing, which is an important quality control and verification testing method in piling projects.
Where will you find the feature?
After establishing all soil (axial) properties using soil editor “Define Soil Properties” and ground layers using the boreholes editor, pile section(s) is(are) decided and designed using “Pile Sections” definer. If the section is a reinforced concrete one, it is needed to proportion the section with section designer assigning concrete and reinforcement properties. The pile is built up using pile type editor then the pile is added by the “add/edit pile” tab.
In the same “edit pile” dialogue box, there is the “advanced” tab. Clicking on this tab will open the input box for different additional analyses where the new axial pushover analysis is added. You may give the maximum displacement for the pushover and divide the expected load settlement curve into number of divisions. The default is 10 divisions.
After establishing all soil (axial) properties using soil editor “Define Soil Properties” and ground layers using the boreholes editor, pile section(s) is(are) decided and designed using “Pile Sections” definer. If the section is a reinforced concrete one, it is needed to proportion the section with section designer assigning concrete and reinforcement properties. The pile is built up using pile type editor then the pile is added by the “add/edit pile” tab.
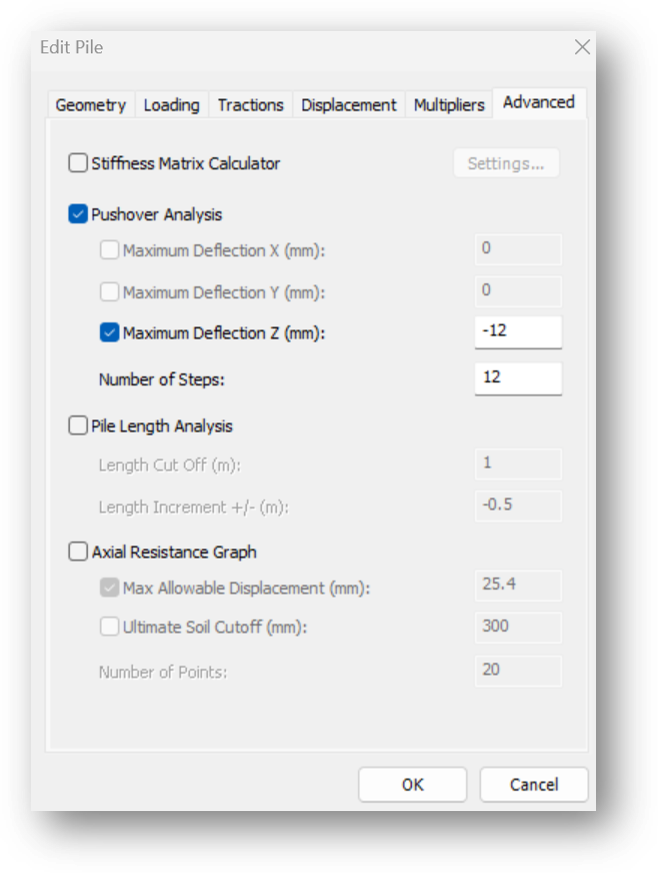
In the same “edit pile” dialogue box, there is the “advanced” tab. Clicking on this tab will open the input box for different additional analyses where the new axial pushover analysis is added. You may give the maximum displacement for the pushover and divide the expected load settlement curve into number of divisions. The default is 10 divisions.
The divisions may not be equal because the program will automatically adjust them to the best choice to follow the curvature of the load – settlement curve.
You can learn more about this feature in this tutorial.
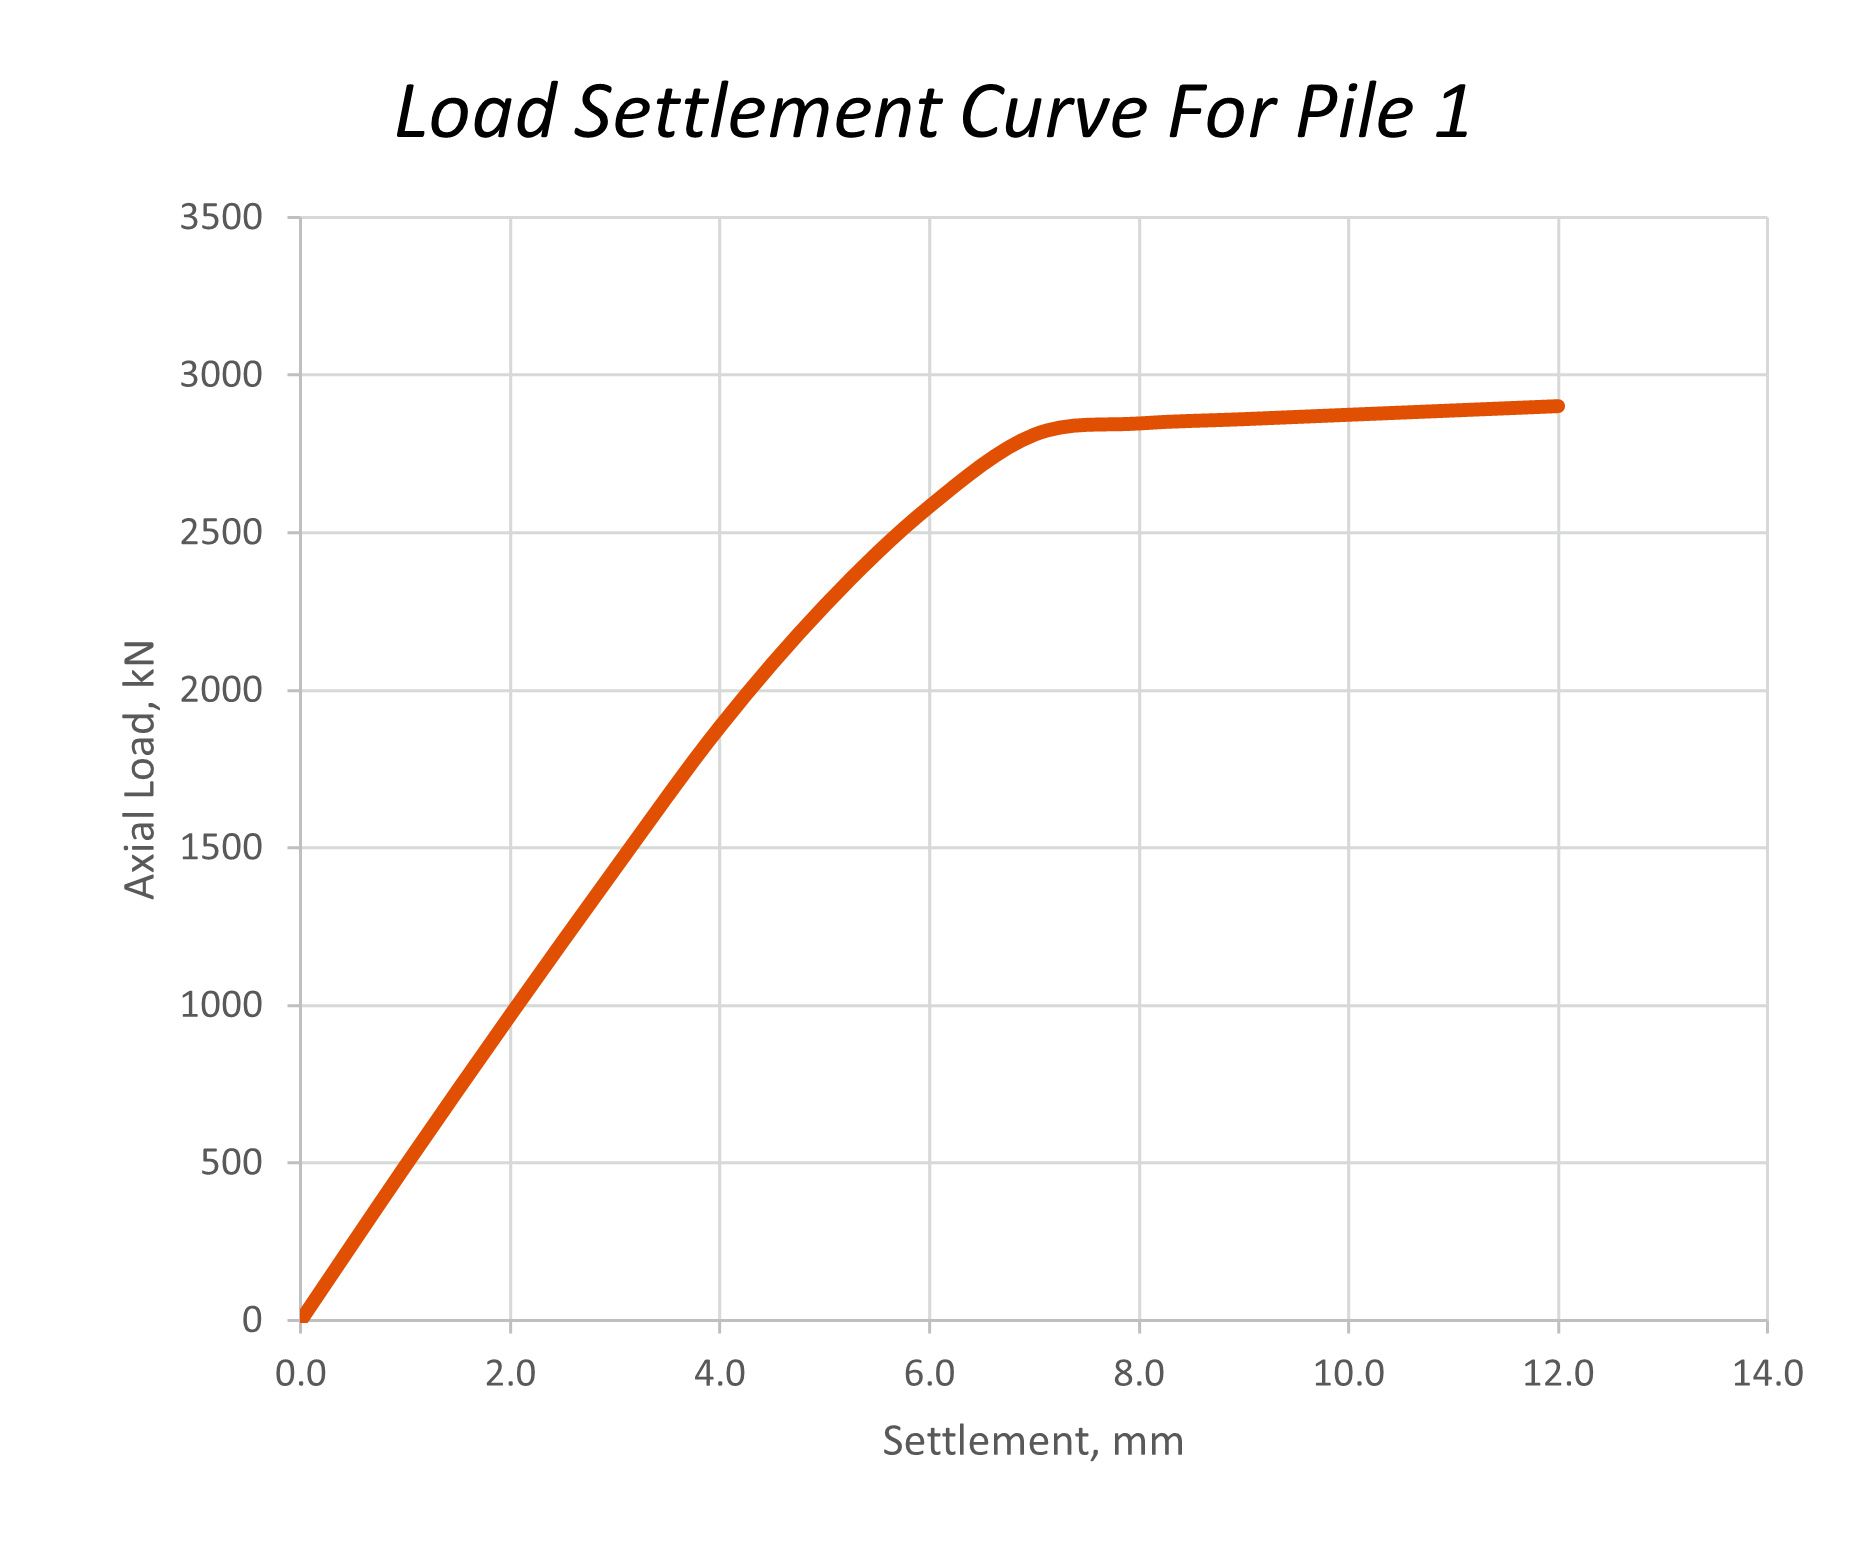
Construction of Load Settlement Curve
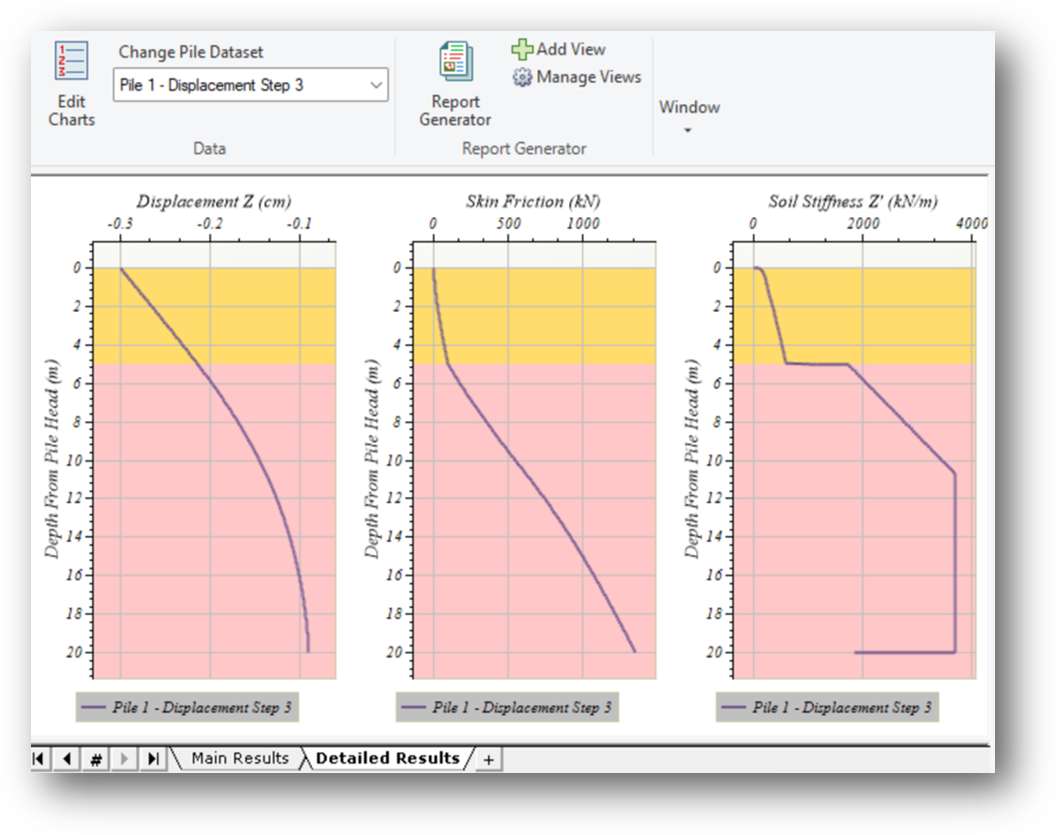
One of the most important results expected from a pile analysis program is to be able to predict the load settlement curve of a pile static load test. This is generally done by multiple runs for the program for different load levels, see for example, Circular Pile Group Analysis | Heavy Alumina Storage Silo, but now, with the new axial pushover analysis, a load settlement curve is a ready product with the required number of points defining the relation. If the results are copied into an excel sheet, the graph may be shaped in a beautiful format the client would like to see. Else, the graphic output on screen may be sent to the report generator in the program.
Additional results you may get from “Axial Pushover Analysis”
Several byproducts of the axial pushover analysis are:
- The axial force distribution throughout the length of the pile
- The skin friction along the pile
- The end bearing at the pile tip
- Parallel reaction and stiffness provided by the soil springs.
The above results may be obtained for each load step (each pushed over settlement). To get these results graphically or tabulated, you need to press on the “Detailed Results” tab at the bottom of the results layout.