RS3: Modeling Complex 3D Geometry Without the Frustration
Here at Rocscience, we’re always looking for ways to make 3D modeling as easy and streamlined as possible. As engineers ourselves, we understand the time-consuming and often frustrating task of creating complex 3D models and how this work can make it difficult to stay focused on what’s important—a sound and realistic model you can count on.
That’s why we’ve decided to focus the design of the new RS3 on modeling without the frustration. That includes improved built-in geometry tools to make importing of external geometry easier and more reliable. It also includes a 3D Tunnel Designer that provides a single integrated interface for creating your model from start to finish. Other additions to RS3 are the RS2 Section Creator for integrated 2D analysis of 3D model sections, and integration of slope deformation monitoring radar data for comparison and calibration of 3D slope stability results.
Improved Built-in Geometry Tools
Built-in geometry tools in RS3 mean you can fix problems with imported geometry with just a few clicks of the mouse. The tools include geometry cleanup of defects as well as surface remeshing and merging of intersecting surfaces.
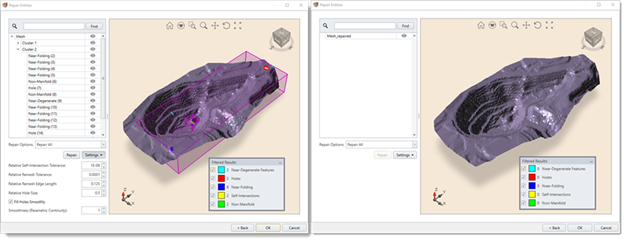
Geometry Cleanup
Geometry cleanup can be performed as part of Geometry Import or explicitly by selecting Repair in the Geometry menu. In either case, users can choose to repair all entities in the geometry or only selected entities. Running a cleanup repairs defects in imported geometry such as holes, degenerate features, near-folding triangles, and self-intersections.
Surface Remeshing and Merging of Intersecting Surfaces
The geometry tools also include the ability to re-mesh geometry surfaces as well as merge intersecting surfaces. Both are performed by selecting the surfaces in the model, then selecting Surface Utility in the Geometry menu, and then selecting the appropriate tool: Remesh Surface or Merge Surfaces. Each command has its own dialog with relevant settings
Project-Wide Geometry Settings
In the new RS3, Geometry settings are part of a project’s overall settings in the Project Settings dialog. This brings all Geometry settings together in one place and enables them to be defined project-wide while allowing for individual overrides. To display the settings, select the Geometry page in the Project Settings dialog.
Additional Geometry Functions
In this release of RS3 are also automatic translation of large, or “mining,” coordinates and support for removal of selected construction geometry above the surface.
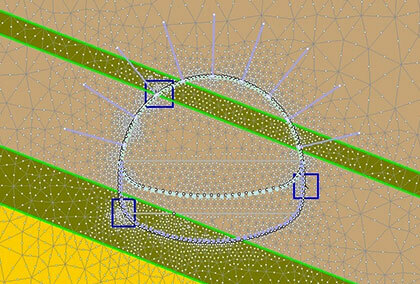
3D Tunnel Designer
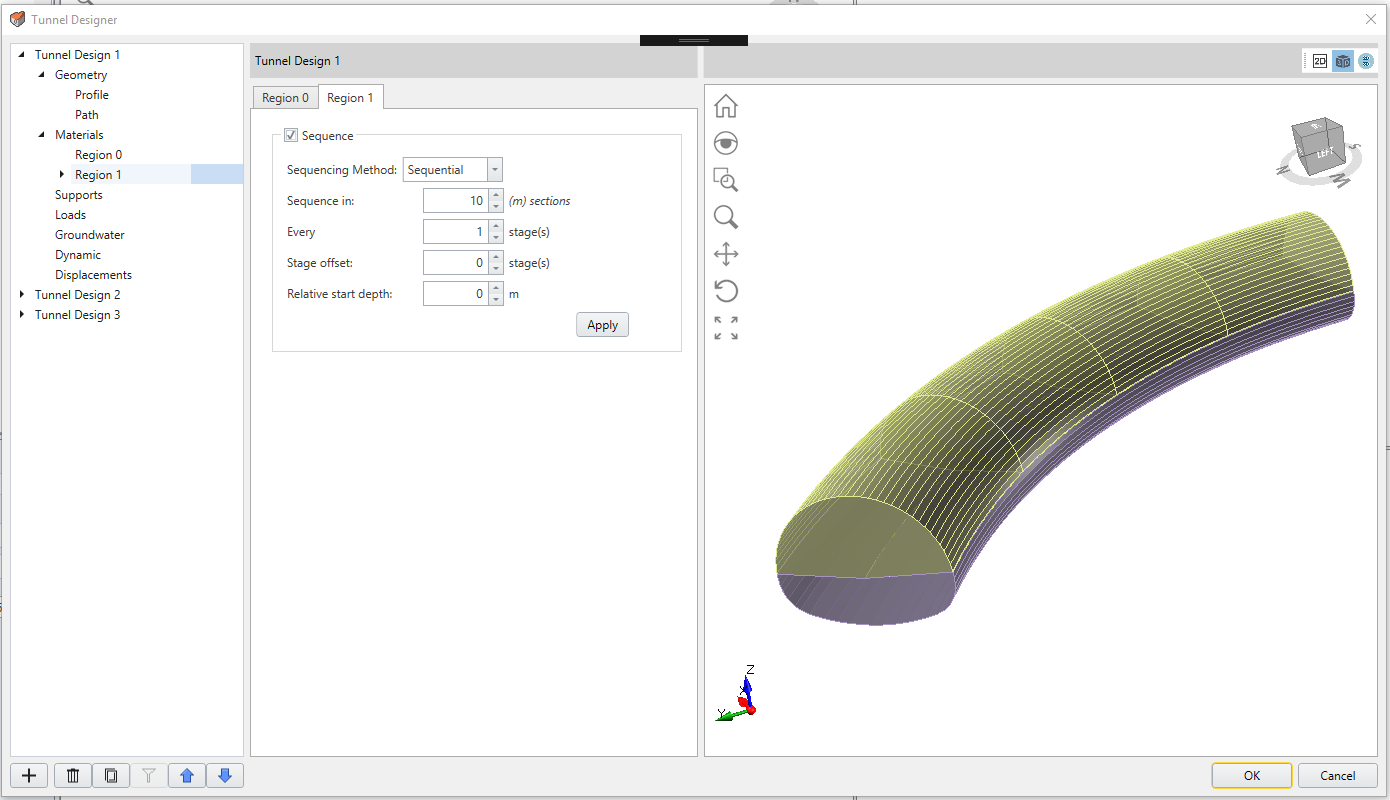
An outstanding new feature of RS3 is the 3D Tunnel Designer, which incorporates and expands on the current Tunnel Profiler.
The Tunnel Designer works like a guided tool or wizard for creating a library of tunnel designs that can be selected for addition to your models. The designer provides a step-by-step walk through the entire model sequencing process, including geometry creation, definition, and staging of materials, and staging of supports, groundwater options, loads, and dynamic modeling. Engineers can now see and work with every aspect of their tunnel or excavation in a single interface and are even able to go back and edit or remove anything in the sequence without having to start the process all over again.
By streamlining the modeling process, the new Tunnel Designer allows engineers to focus on what’s important—the model itself—instead of the often time-consuming sequencing tasks involved. In addition, the Tunnel Designer fosters teamwork and collaboration by allowing users to save tunnel profiles for re-use by other engineers in other RS3 projects.
New RS2 Section Creator
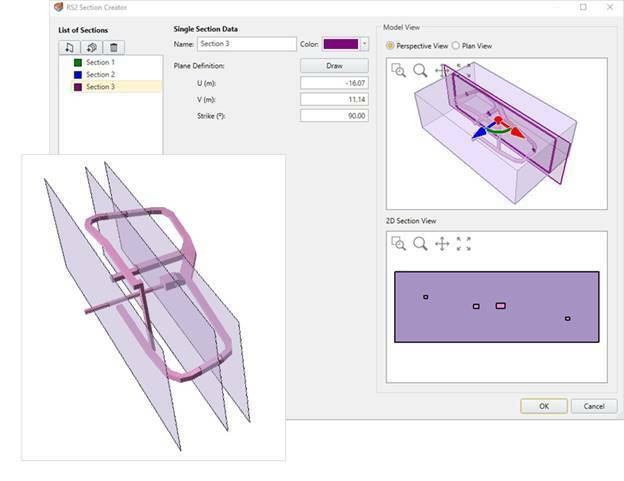
RS3 can create 2D sections of a 3D model for analysis and viewing in RS2. Once a section is created in the Section Creator dialog, you can select it in the Visibility Pane and then click the RS2 icon on the toolbar to open it as a saved file in RS2.
Once the section is open, you can then mesh it and compute to perform a 2D finite element analysis on it. Once computing is complete, you can view the results of your 2D analysis in RS2 Interpret. Once you’ve computed an RS3 3D model’s section in RS2, you can open the section in RS2 Interpreter any time directly from the RS2 icon in RS3 whenever you’re working on the model.
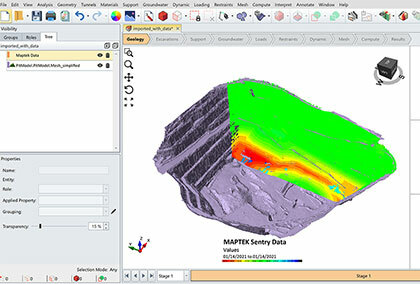
Integration of Slope Deformation Monitoring Radar Data
One of the most innovative new features in RS3 is the integration of slope deformation monitoring radar data from two manufacturers of radar data systems: IDS GeoRadar and GroundProbe. Users of RS3 can import slope deformation output as radar data overlaid onto the model.
This collaboration signifies a step-change in slope stability modeling in that it allows engineers to calibrate and refine input parameters in comparison with radar data right in RS3, resulting in more efficient analysis and higher reliability from results. And with further advancements in radar data integration, this innovation could in the future lead to so-called “intelligent slope design” in which models are “intelligently” updated in real-time as ground conditions and behavior change and are further interpreted.