Slide3’s Latest Update Adds Block Model Projection, 2D Section Creation in Slide2, and More
Block models are an integral part of mine design and planning. They are huge point clouds of data that provide insight into the mine’s geological properties. Every “block” that gets mapped represents a region with specific material properties.
Slide3 first launched block modeling capabilities in v3.011, released in April 2021. This gave users the ability to import block models generated in Leapfrog, Deswik, Vulcan, Datamine as well as other programs. Once the block model is imported, you can analyze the model to compute the factor of safety in the same way as any other model.
The upcoming v3.024 release will be the second major release of block model features since its launch. Our team of developers worked with industry partners to create this new version of block model.
Block Model Visualization on External
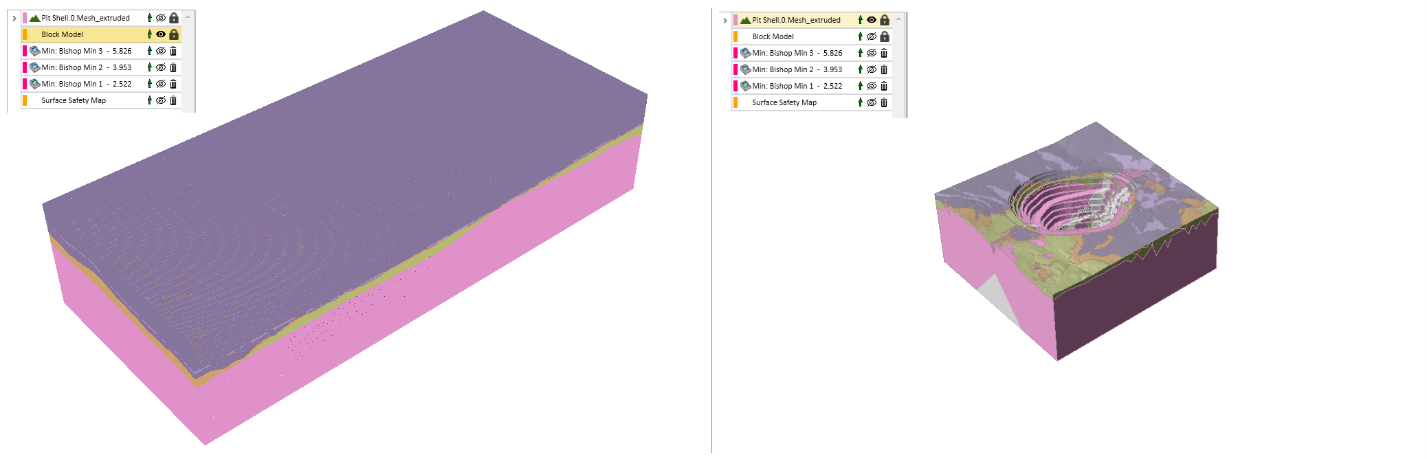
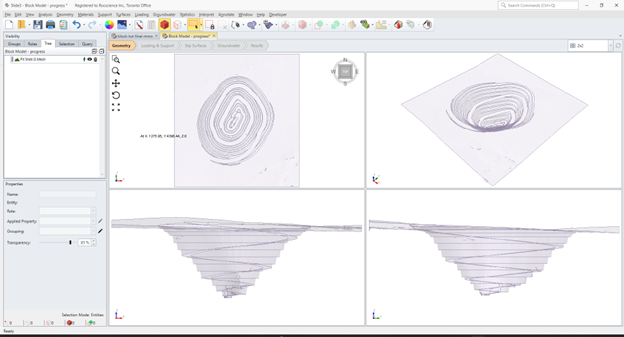
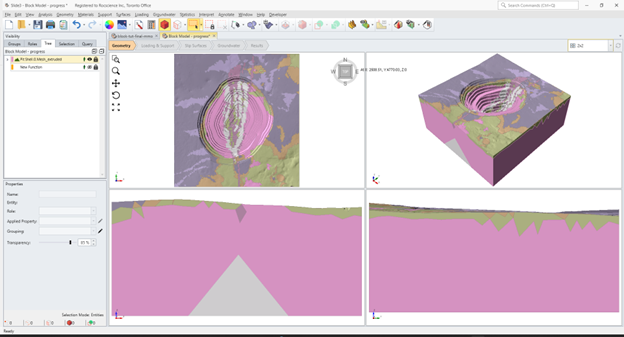
One feature highly requested by users is the ability to see the blocks on the external itself. In the previous release of the block model, the imported model function was shown as a separate node on the tree, and the external pieces did not have the blocks projected on them.
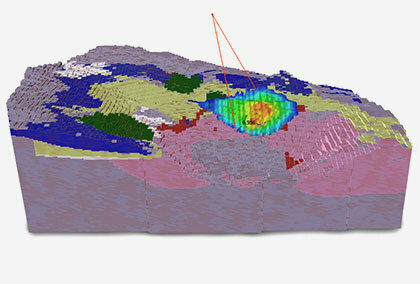
Now, all external pieces will automatically have the block model projected on them. In the image below, the block model function is shown on the left, whereas the block model projected on the external is shown on the right.
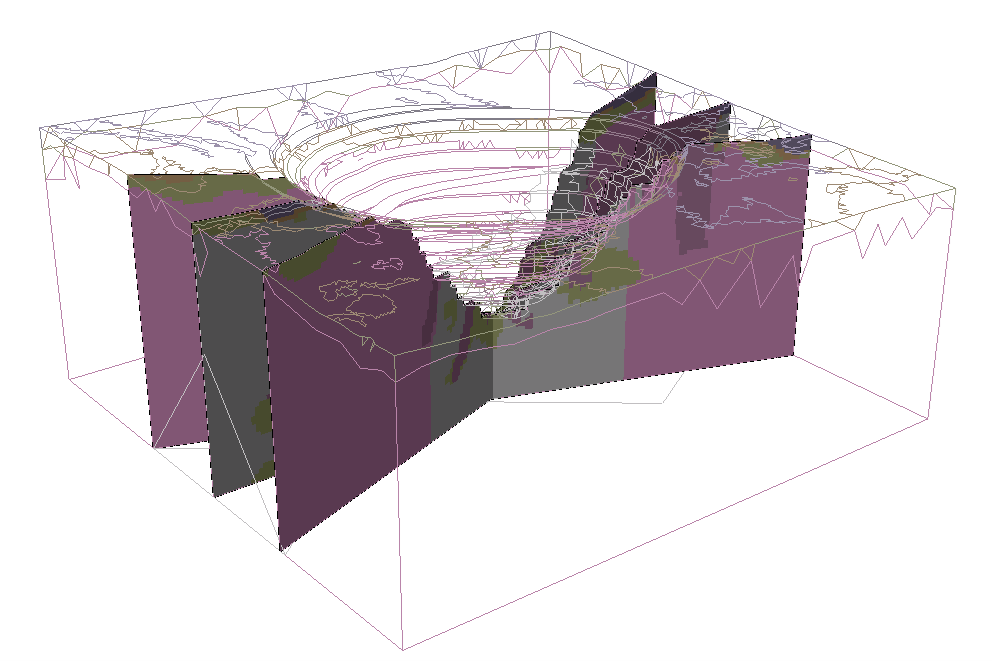
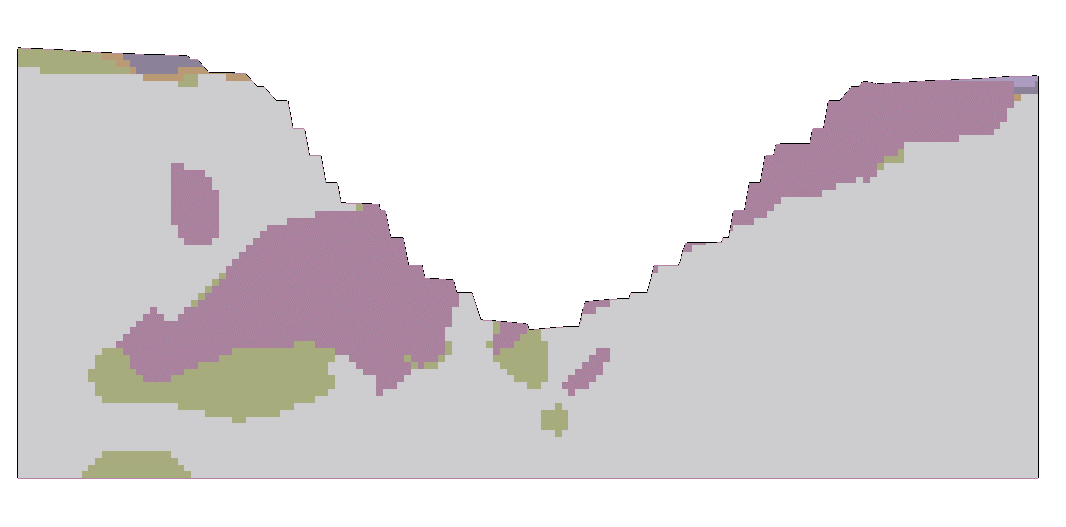
Block Model Visualization on 2D Sections
Also in this version, the Section Creator can be used to make 2D sections of the block model, allowing the user to see the blocks inside.
Block-level Data
This version will also contain the ability to add block-level data. This means that within the same material, the user can select a parameter that changes at the block level.
In the example below, the “Mineralisation” material is reading the GSI parameter from the imported block file, such that a different value of GSI can be assigned to each block:
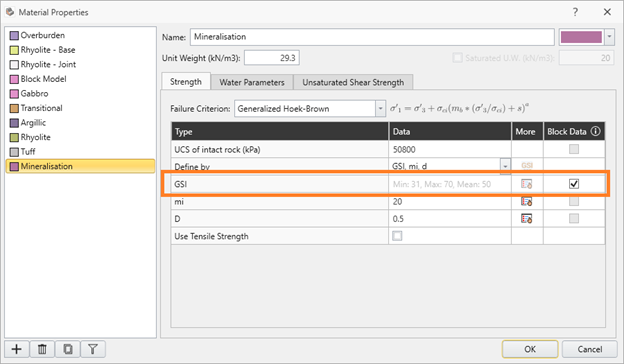
This is done by checking the “Block Data” box in the last column, which is only enabled for parameters that were defined at the block level while importing the data. The input field for GSI then becomes replaced with summary data about the GSI values defined at the block level.
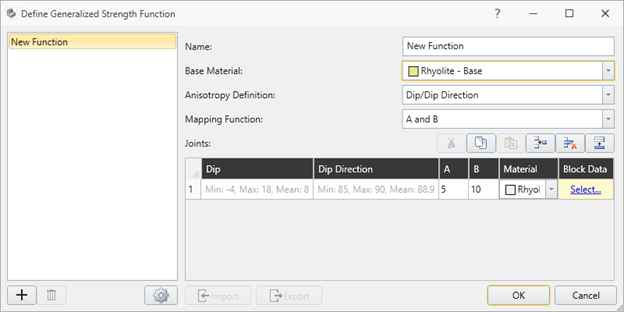
In the example below, Dip and Dip Direction for the Generalized Anisotropic function are being read from the block model:
New Block Model Import Wizard
Finally, the block model import wizard has been entirely revamped in this release.
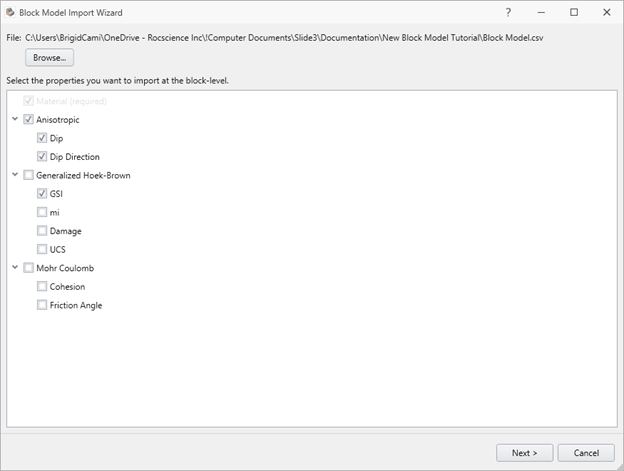
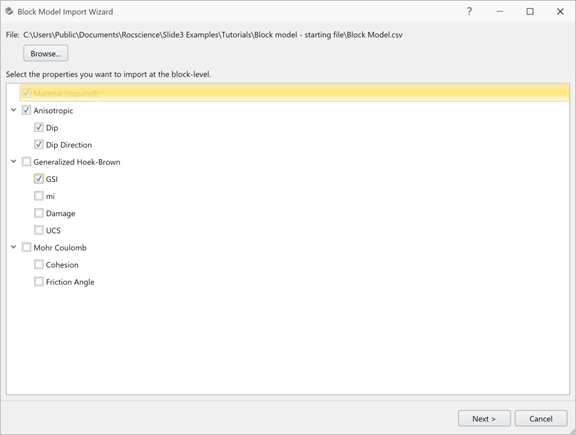
The first page of the import wizard asks you to indicate which parameters you need to vary at the block level:
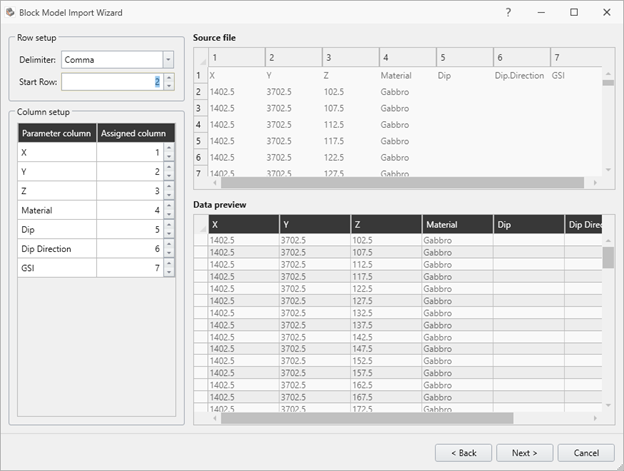
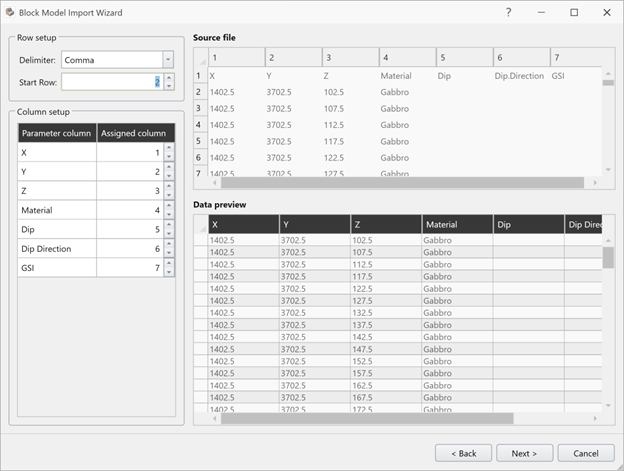
In the next page, you can then use the source file at the top to assign a column to each parameter:
New Block Model Tutorial
With the new features, comes a new block model tutorial. The block model in the tutorial is set up as follows:
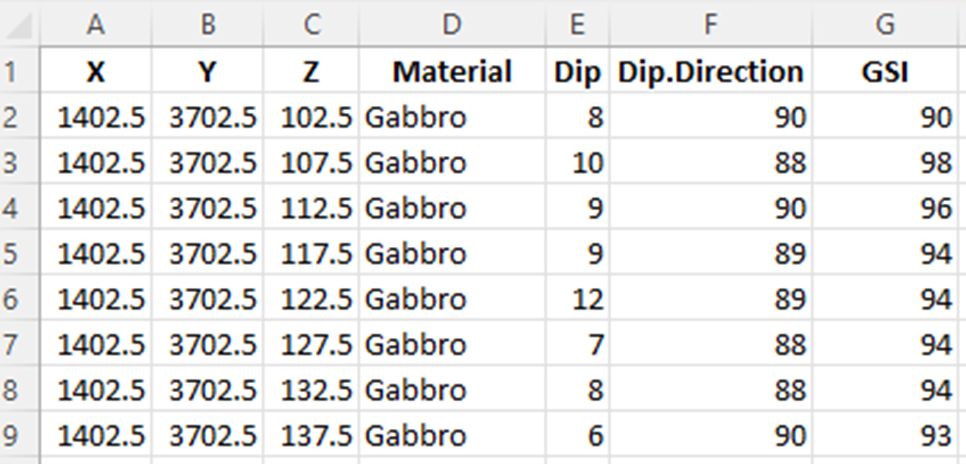
The block data file is a csv file that looks like this:
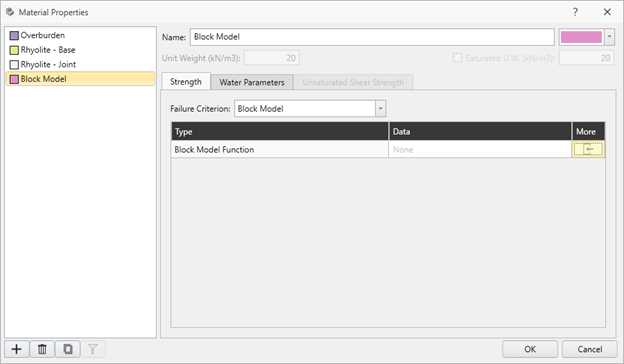
It is imported in the Material Properties dialog, after setting Failure Criterion to Block Model:
Upon entering the import wizard, you first select which properties will vary at the block-level:
This is followed by the matching up of the columns with the parameters:
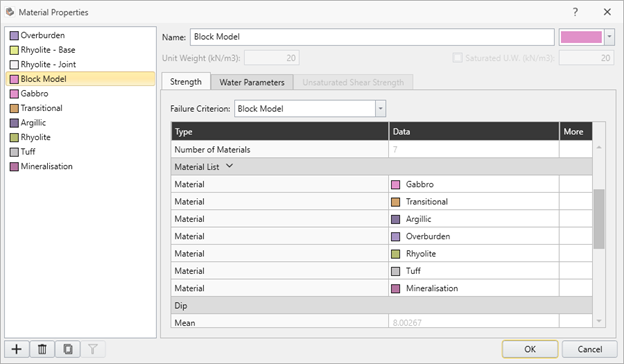
Once done, the material names in the block model will be created in Slide3 with default parameters, and you can fill in or import the material properties:
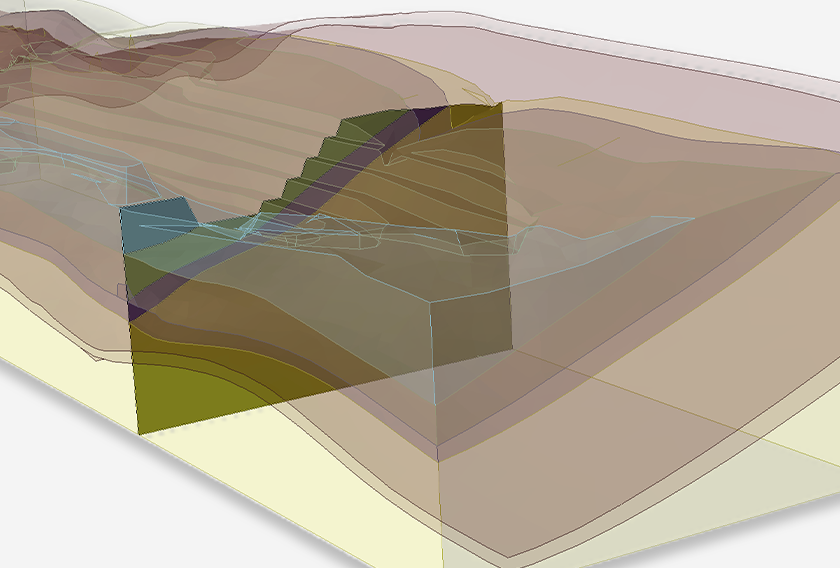
Once done, you can import a pit shell:
And then create the external from it using Geometry > Create External from Surface. This will project the block model on the external:
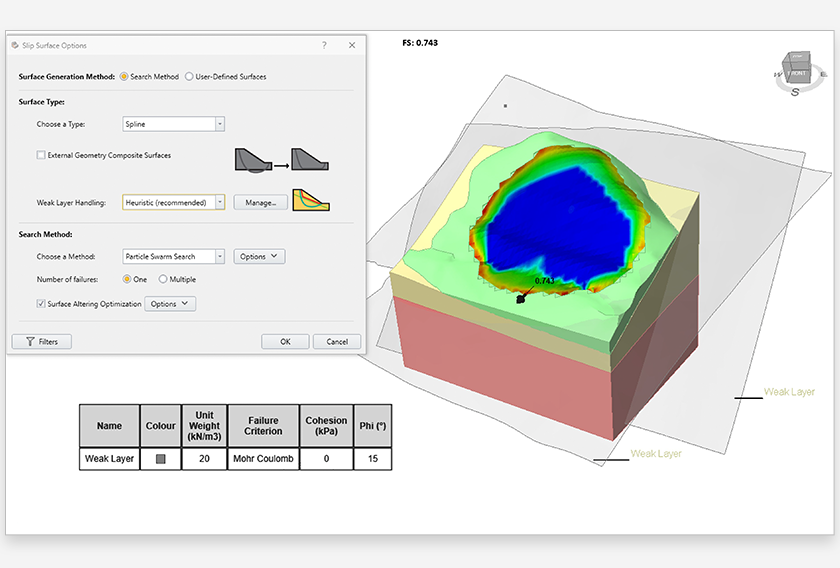
Once done, you can simply hit compute:
These new features and the addition of this full tutorial in the upcoming version of Slide3.