Tunnel Shapes
The Tunnel Shapes option allows you to quickly create an outline of tunnel cross section based on common pre-defined shapes with user-defined parameters. To define a tunnel shape:
- Select the Tunnel Shapes
 option from the Tunnels menu.
This option can also be found in the Tunnel Designer dialog, listed under the Tunnel section of the Toolbar.
The Tunnel Shapes dialog will display: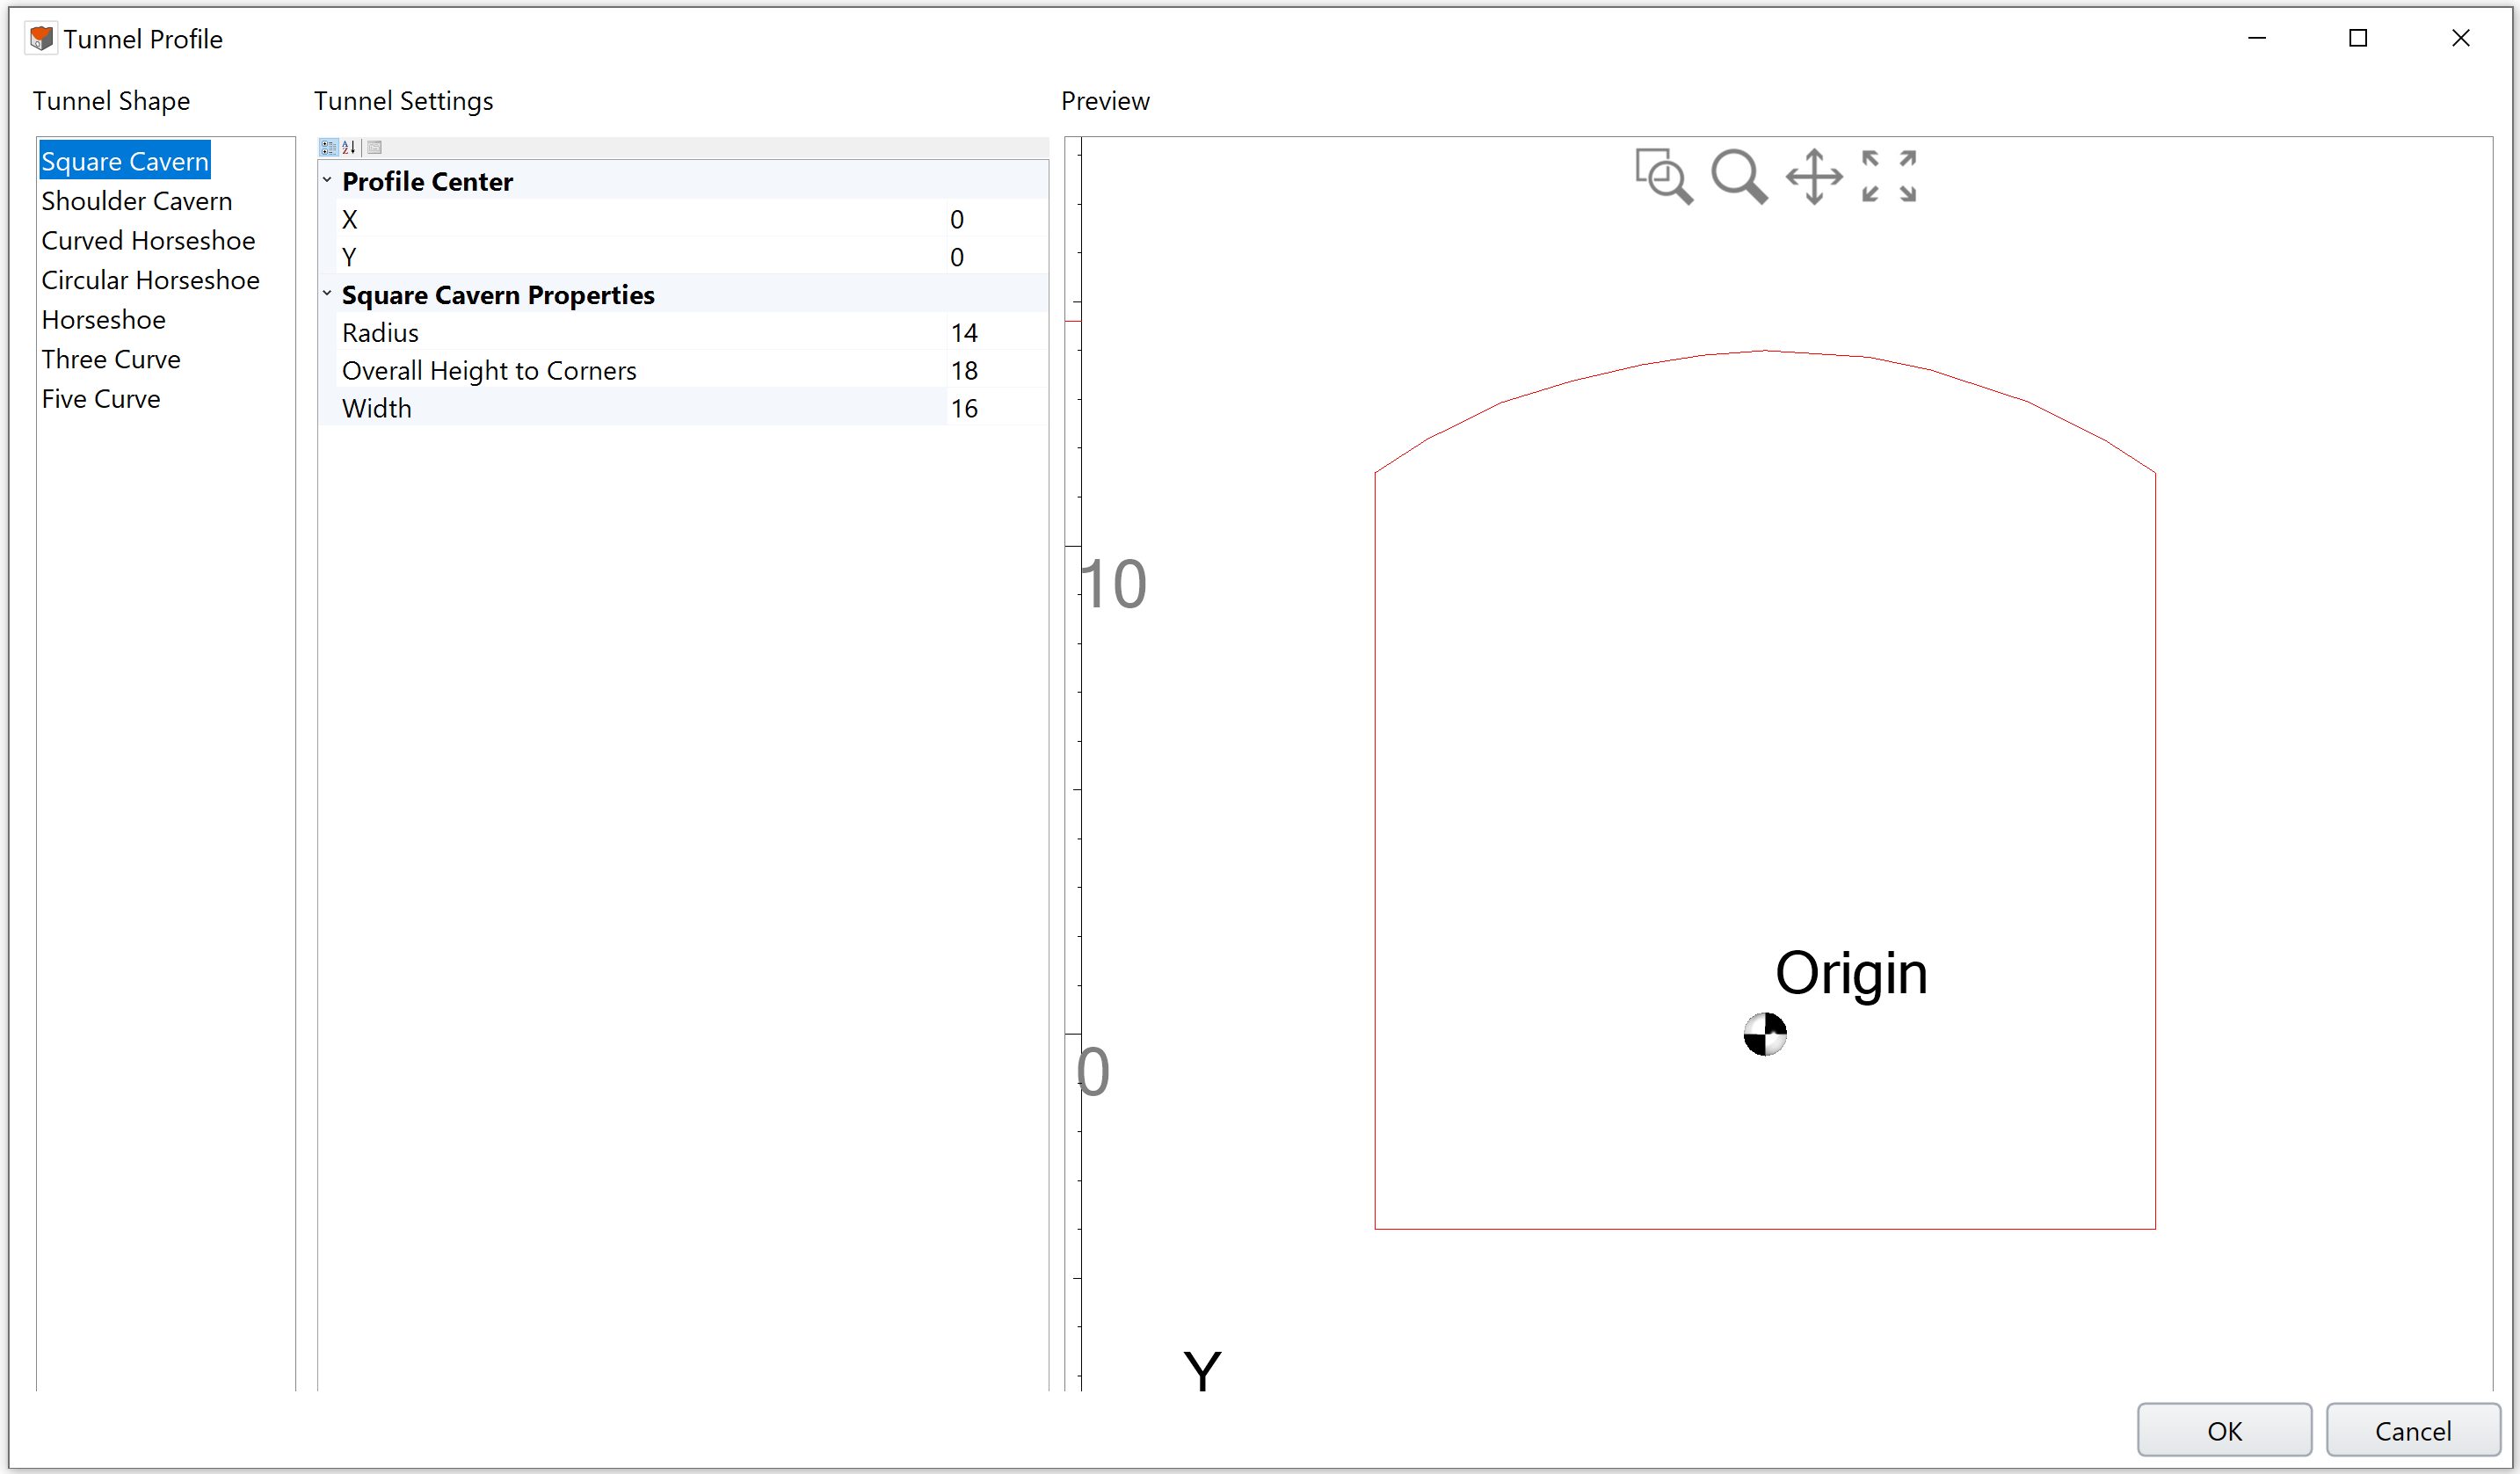
- In the Tunnel Shapes dialog. You may choose from the provided shapes:
- Square Cavern
- Shoulder Cavern
- Curved Horseshoe
- Circular Horseshoe
- Horseshoe
- Three Curve
- Five Curve
- The Top Heading section is available for Curved Horseshoe, Circular Horseshoe, Horseshoe, Three Curve, and Five Curve shapes.
For users who are using the Tunnel Shapes option inside the Tunnel Designer dialog -
- The tunnel profile will be added and shown in the viewport. See more information on the Tunnel Profile help page.
- Stop following proceeding instructions on this page. Continue your tunnel design to Tunnel Path, in the Tunnel Designer dialog.
- For users who are using the Tunnel Shape option directly from the Tunnels menu, please proceed on this page.
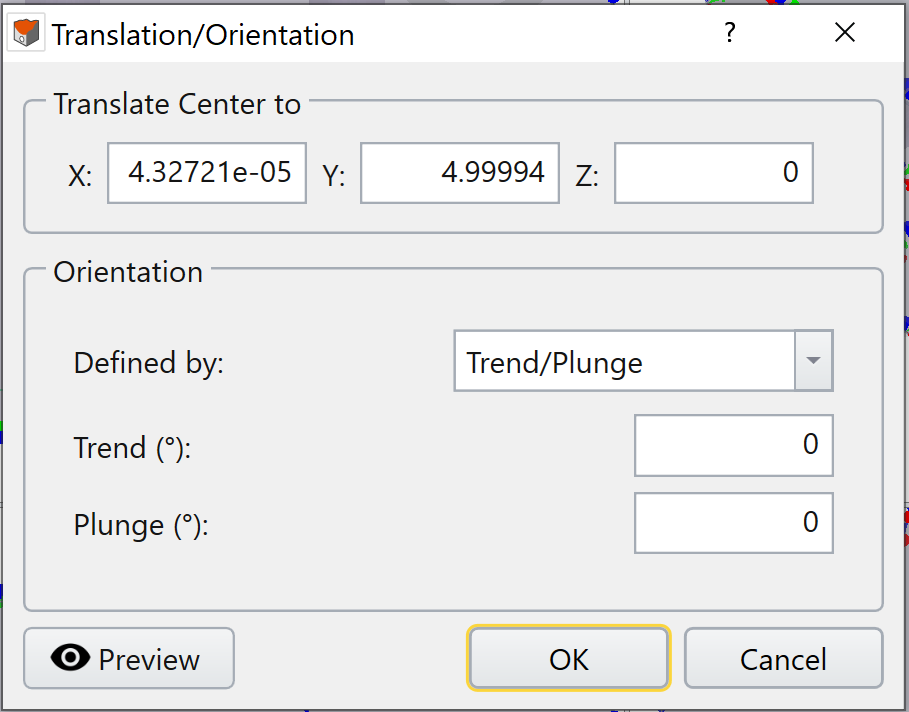
Choose Defined by = Trend/Plunge – specify a trend angle and a plunge angle. See the help page Sign Convention - Trend/Plunge for trend/plunge sign convention in RS3.
Choose Defined by = Vectors
– specify a vector with XYZ components. The normalized vector will be shown below in blue text.
Extrude Tunnel Face
After the tunnel cross section outline is created with Tunnel Shapes option, and it is added to the model, the next step is to extrude the tunnel face.
Use the Extrude option under Geometry menu to extrude the tunnel face. A 3D tunnel will then be made.