How Do I Design a Reinforced Concrete Pile?
Unlike other general pile programs, RSPile is an incredibly flexible tool that lets you design piles for all types of geotechnical projects, including both driven piles and axially and/or laterally loaded. Within these options, RSPile includes a variety of tools to let you customize your piles, including a Concrete Designer for axially/laterally loaded reinforced and prestressed concrete piles.
The Concrete Designer lets you easily define the properties of the concrete cross-section. For reinforced concrete piles, this includes reinforcement patterns, casings, cores, and I-Beams. The workflow of the Concrete Designer is designed for speed and convenience, so you can design the concrete section as efficiently as possible.
To access the Concrete Designer, open the Pile Properties dialog by selecting:
Piles > Pile Properties
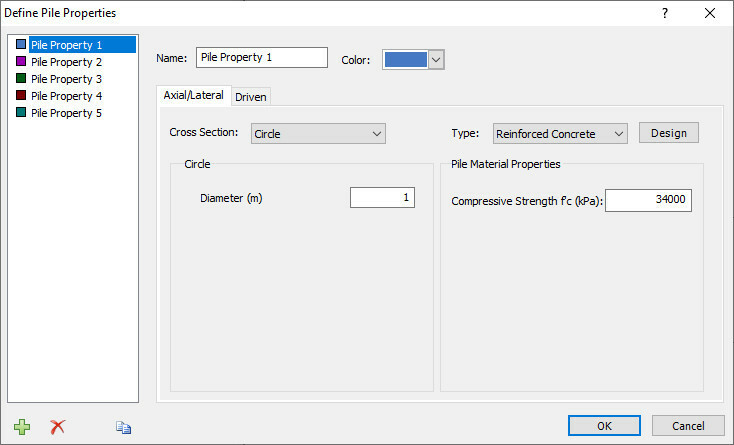
Under the Axial/Lateral tab, select the pile type as “Reinforced Concrete.” A design button will appear which will allow you to open the Concrete Designer.
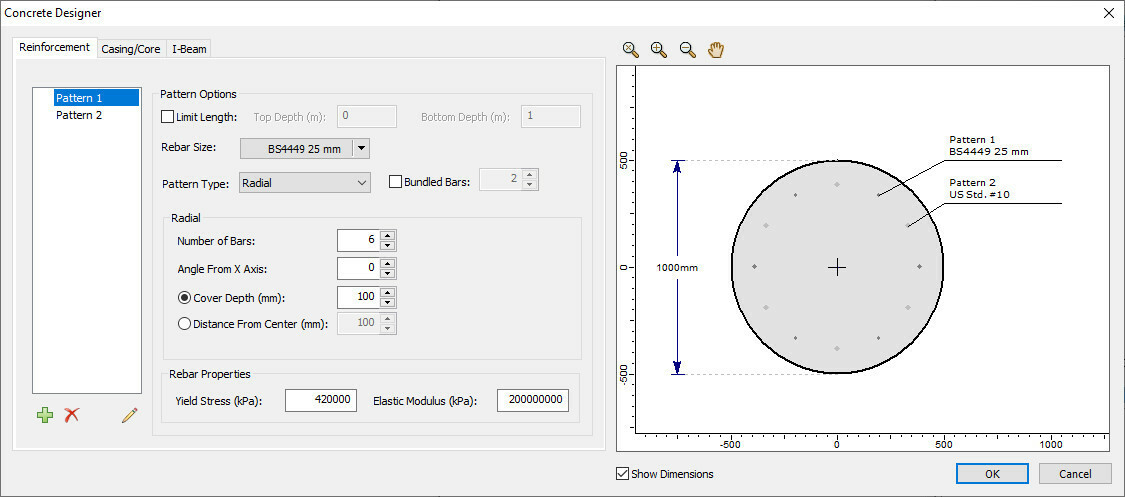
When designing reinforced concrete sections, the Concrete Designer will display three tabs: Reinforcement, Casing/Core, and I-Beam. These tabs allow you to add and define these reinforcements for the concrete section.
The Reinforcement tab lets you add and define multiple reinforcement patterns. With this feature, you can define your pattern type as either radial, rectangle or design a custom pattern of your own. Once your pattern type is selected, you can choose from a drop-down menu of standard rebar sizes, select your number of bars, and define other aspects like spacing and laying distance of bars from the edge of concrete or from the center of the pile.
If the reinforcement pattern you’ve added has a specific depth and length within the pile, you can check the “Limit Length” box and specify the depth and length of the reinforcement.
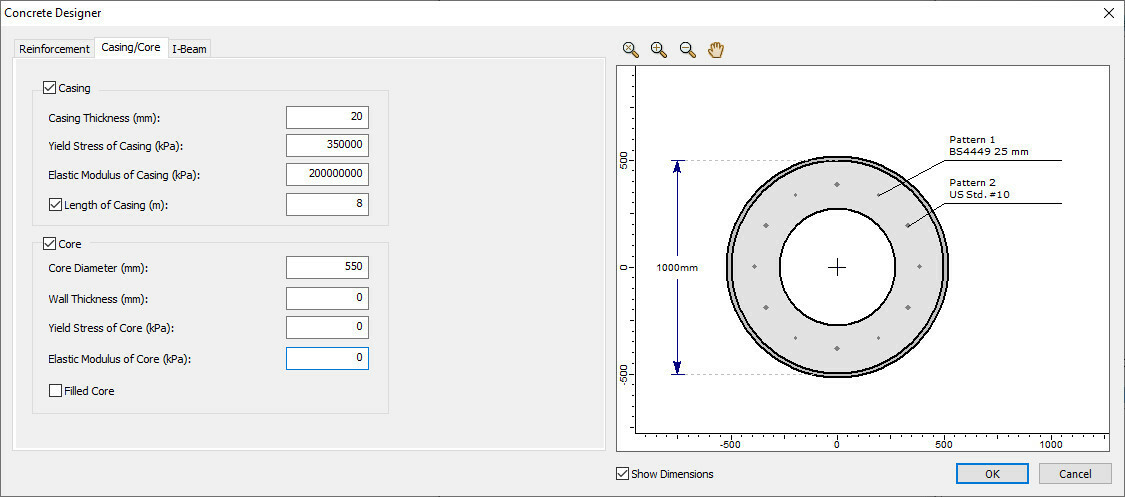
If you wish to add a casing or core to your concrete section, you can use the Casing/Core tab. This tab lets you add and define the casing thickness and core diameter of the section. Just check the checkboxes to add a casing or core and define the properties of each. If you add a core, you also easily specify if the core is hollow or filled with concrete by checking the checkbox. If the core you’ve added intersects with the defined reinforcement, an error message will appear, and the affected reinforcement will be highlighted on screen for you. If you’ve added a casing but you don’t want the pile to be fully cased, you can check the checkbox to specify the length of the casing.
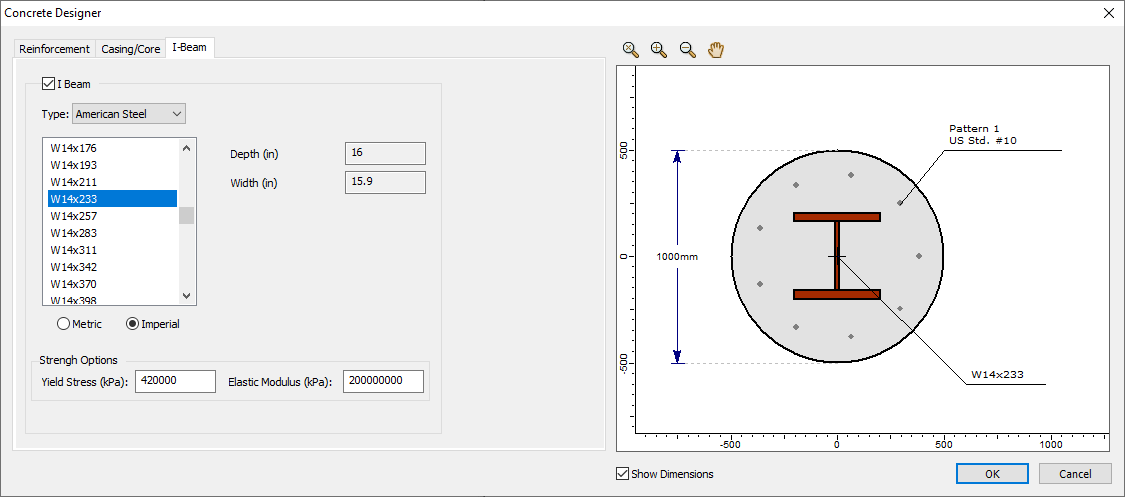
If the pile is going to be reinforced with an internal structural steel section, you can go to the I-Beam tab instead which lets you add an I-beam section to your reinforced concrete section. Two types of I-Beams are available: Canadian Steel and American Steel, which both come with a convenient list of standard sizes for each option.
Once you’re happy with the design of your reinforced concrete section, just click OK to close the dialog.
Learn more
For more information on RSPile and the Concrete Designer tool, you can check out the RSPile Online Help section. Here you will find more details on RSPile and a new tutorial to guide you through all the steps for designing your reinforced concrete pile.