Wedge Surfaces
1. Introduction
In this tutorial, we learn about wedge surfaces. We start this tutorial with defining a single wedge as user-defined slip surface. Then we will proceed with defining wedge settings to be used by automatic search methods.
2. User-defined Wedge
- From the Slide3 main menu, select File > Recent > Tutorials and open the file Wedge Surfaces - starting file.
- Select Surfaces > Slip Surface Options
- In the dialog select Surface Generation Mode = User-Defined Surfaces.
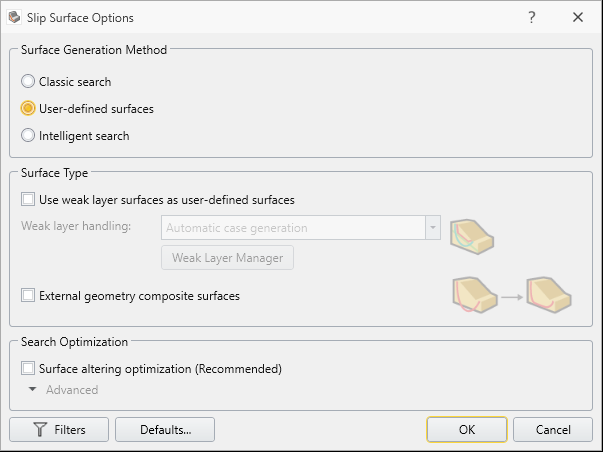
- Select OK.
3.0 Defining User-Defined Wedge
To add a user-defined wedge:
- Select Surfaces > Add User-Defined Slip Surface > Wedge or go to the Slip Surfaces workflow tab, click on the Sphere/Ellipsoid and select Add User-Defined Slip Surface from the drop-down.
- In the Add User Defined Slip Surface dialog, select Wedge Surface = Two Joints and Defined By = Dip/Dip Direction.
- For Joint 1 select Material = Material 3 . Enter 55 for Dip and 80 for Dip Direction
- For Joint 2 select Material = Material 4 . Enter 45 for Dip and 210 for Dip Direction
- For Crest Point enter (60, 190) for the (X, Y) coordinates
- Now select OK to finalize the defined wedge surface.
Note that you are modifying the content of the dialog, there is a preview of wedge shape and location in the view port.

Once that wedge surface is defined, you can always edit its properties afterwards by selecting the Wedge Surface under Visibility pane and then checking Applied Property under Properties pane.
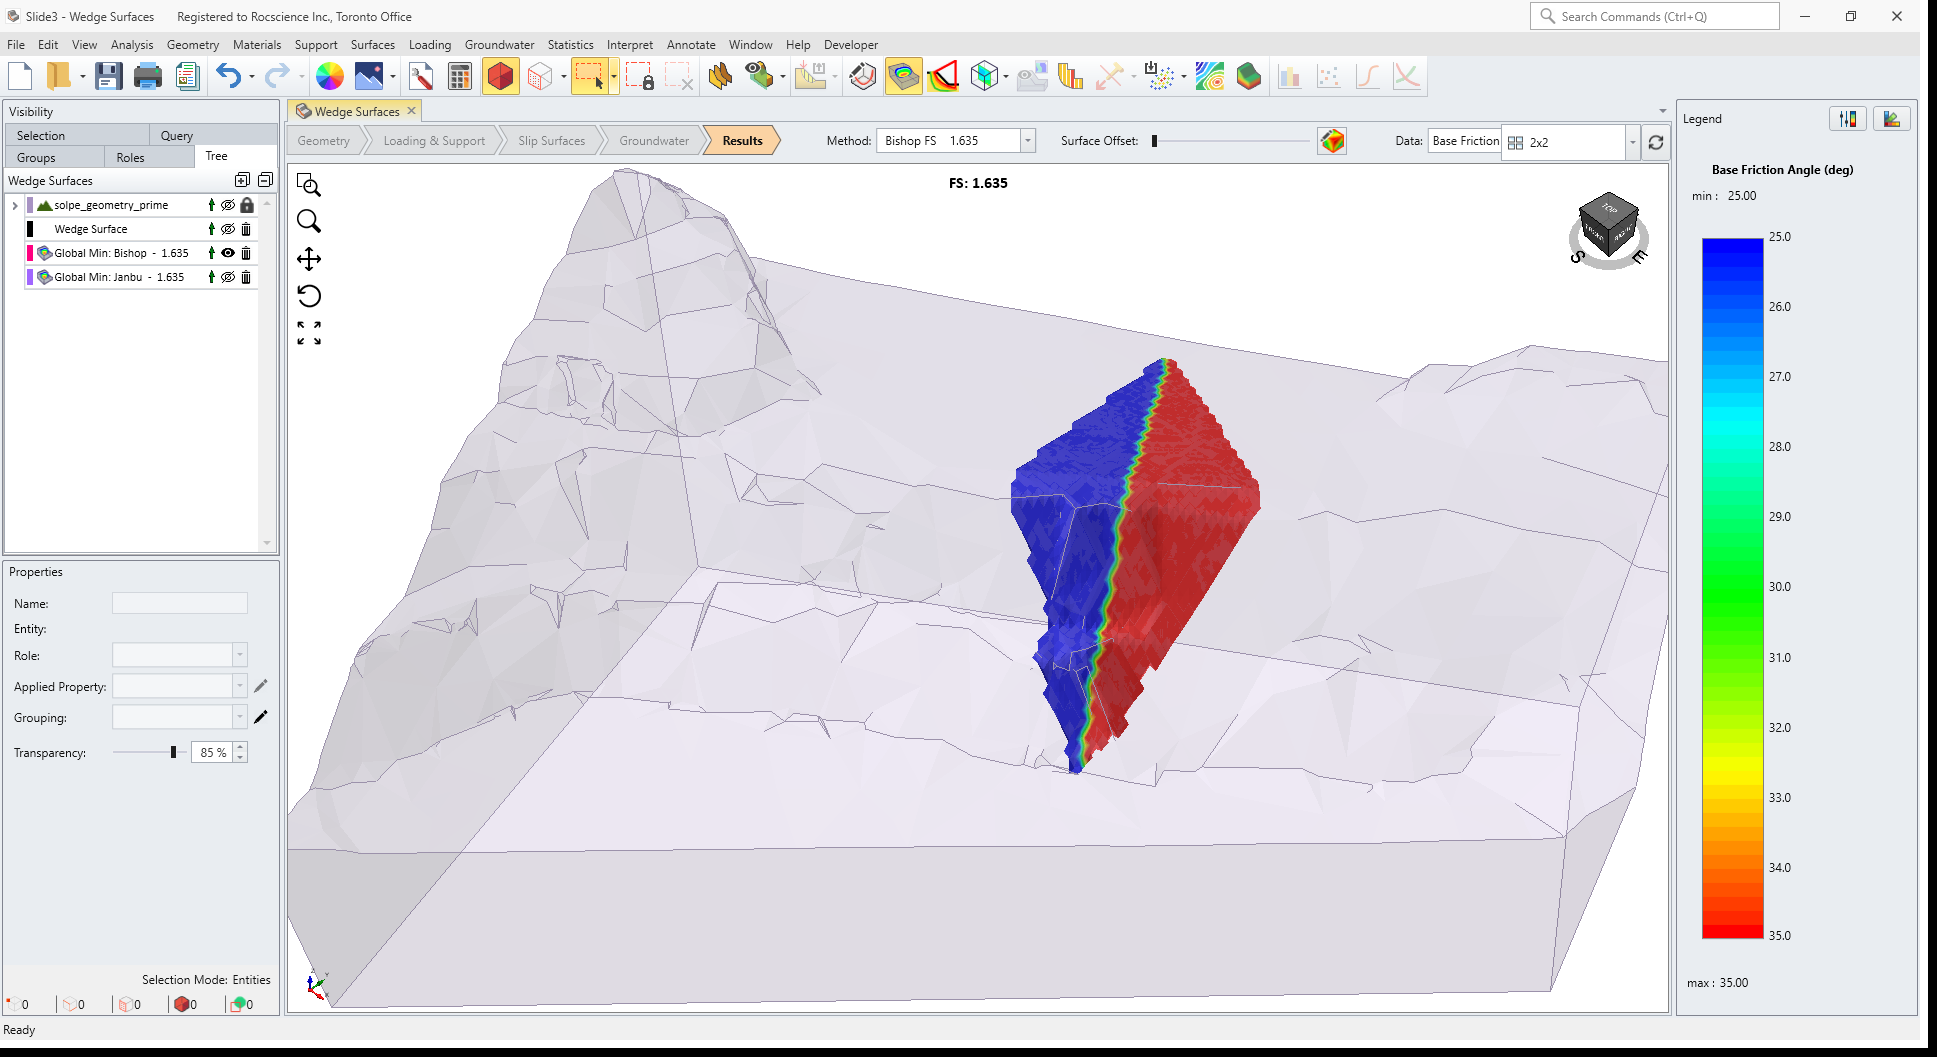
You should be able to see the following model.
4.0 Results
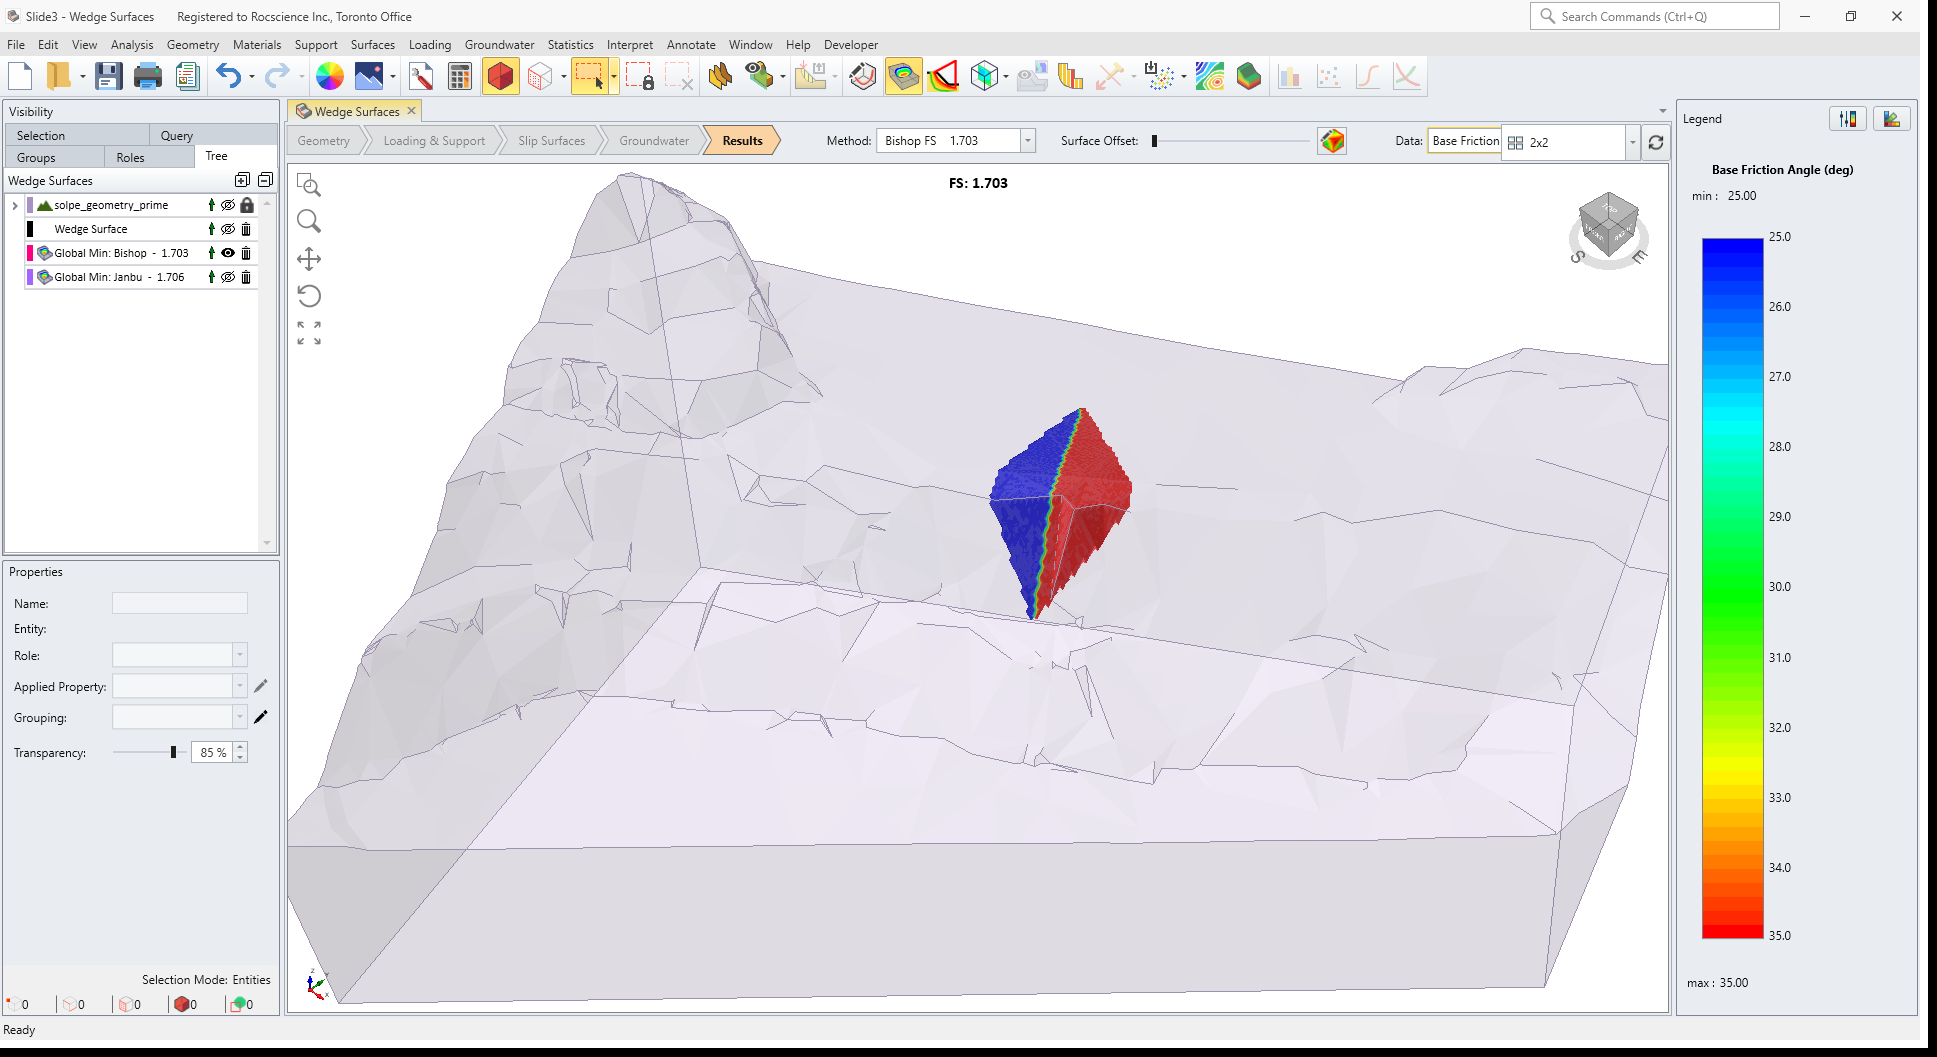
- Save the file and select Analysis > Compute

- Select Interpret > Show Contours or select Show Contours
 in the toolbar.
 - Using the Data dropdown menu, plot contours for Base Friction Angle to see the difference of material properties between two joints. The Bishop safety factor is about 1.7.
5.0 Adding Basal Joint
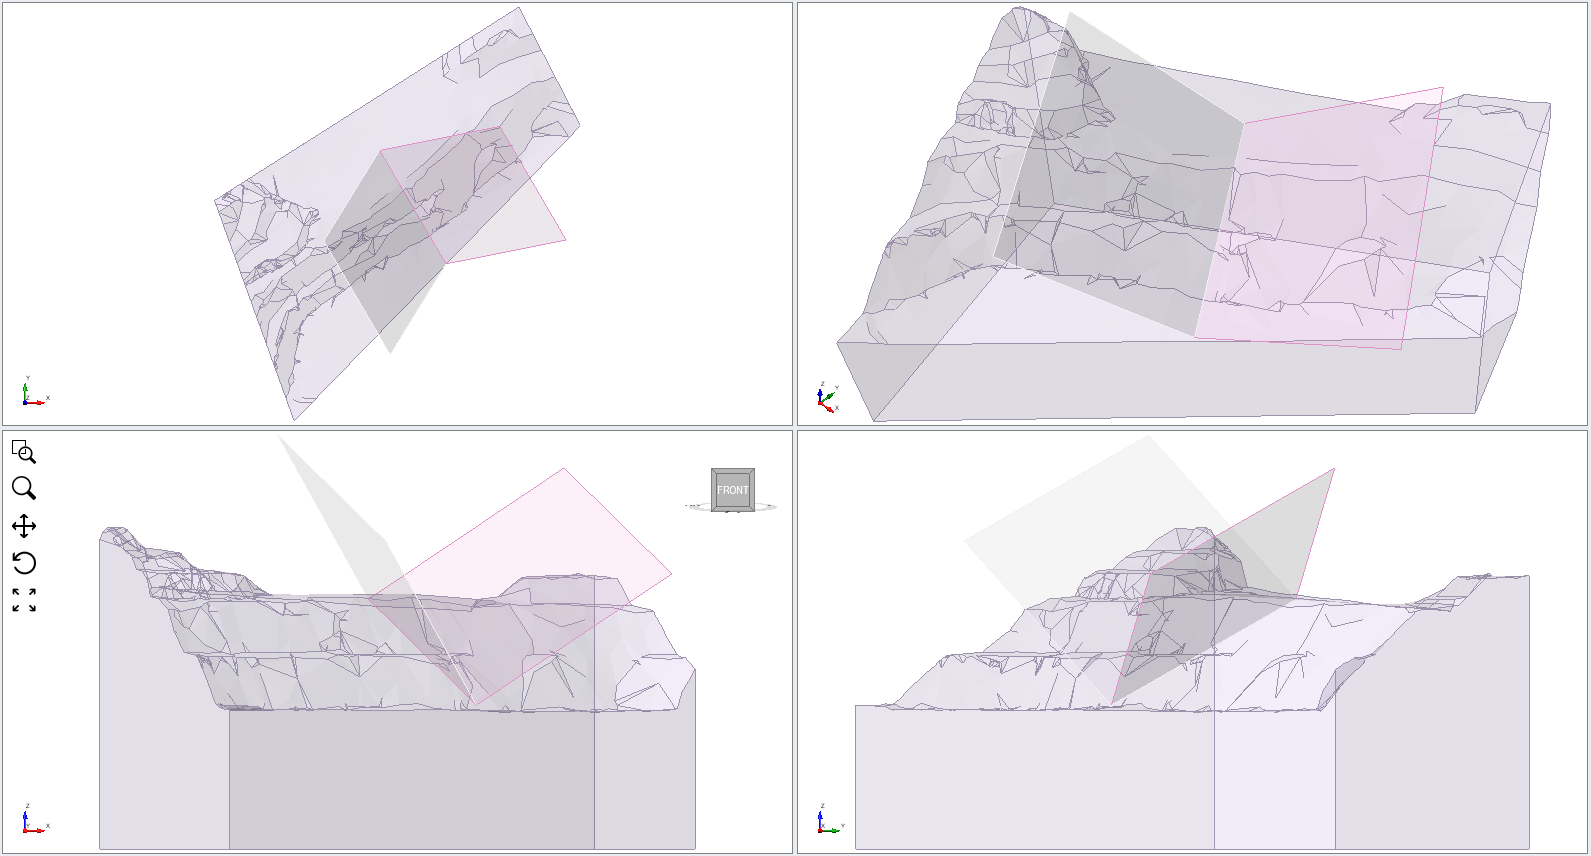
Consider a case where the combination of crest point location and orientation of line of intersection between the two joints does not form a closed polygon with slope surface. See the left image below.

In this case no valid wedge is formed unless we add a basal joint such that slope surface is crossed more than once, see the right image above. A basal joint may help to form wedges where without it, wedge geometry would not be valid. Note that if a geometrically valid wedge is formed using two joints, generally adding a basal joint would increase its factor of safety.
To add basal joint:
- Select Wedge Surface under Visibility pane. Select edit beside Applied Property under Properties pane.
- Change Y coordinate of the Crest Point to 220 and select OK.
If you compute, it gives an error code stating no valid slip surface was generated.
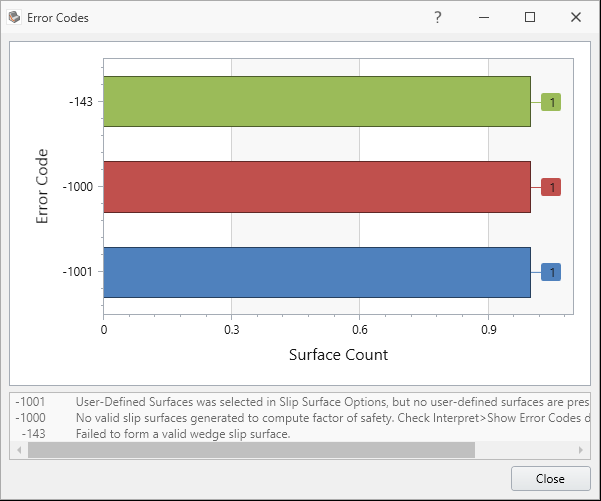
This is because the line of intersection between two joints does not intersect with slope surface more than once.
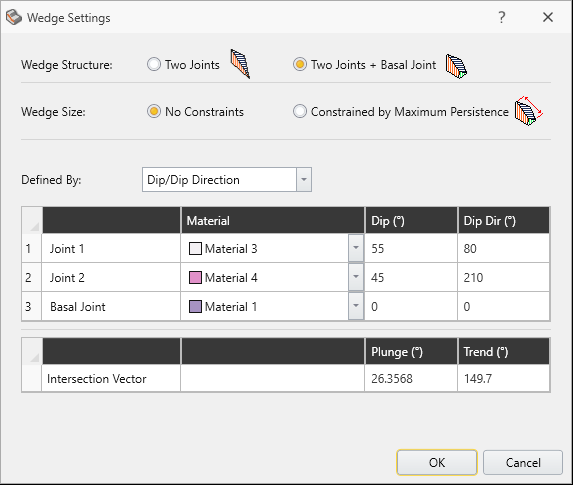
To fix this, go to edit the defined Wedge Surface again. This time:
- Select Wedge Structure = Two Joints + Basal Joint , and fill in the dialog as below:

- For Basal Joint select Material = Material 1. Enter 0 for Dip and 0 for Dip Direction
- For Basal Elevation enter 60
6.0 Results
- Save the file and compute.
- Select Show Contours and plot contours for Base Friction Angle.
The Bishop safety factor is about 1.63.
7.0 Search Methods with Wedge Slip Surface
There are four different search methods in the current version of Slide3 which all support wedge slip surface.
- Go to Surfaces > Slip Surface Options and select Surface Generation Mode = Search Method.

- Under Surface Type, Wedge is already selected. Click on Settings. You can then see the Wedge Settings dialog (you can also access to this dialog from the main menu by selecting Surfaces > Wedge Settings).
- Select OK for both dialogs.
8.0 Results
- Save the file and Compute.
- Click Show Contours and plot contours for Base Friction Angle.
The Bishop safety factor is about 0.97. As you can see, you will get a very small slip surfaces as the critical slip surface.
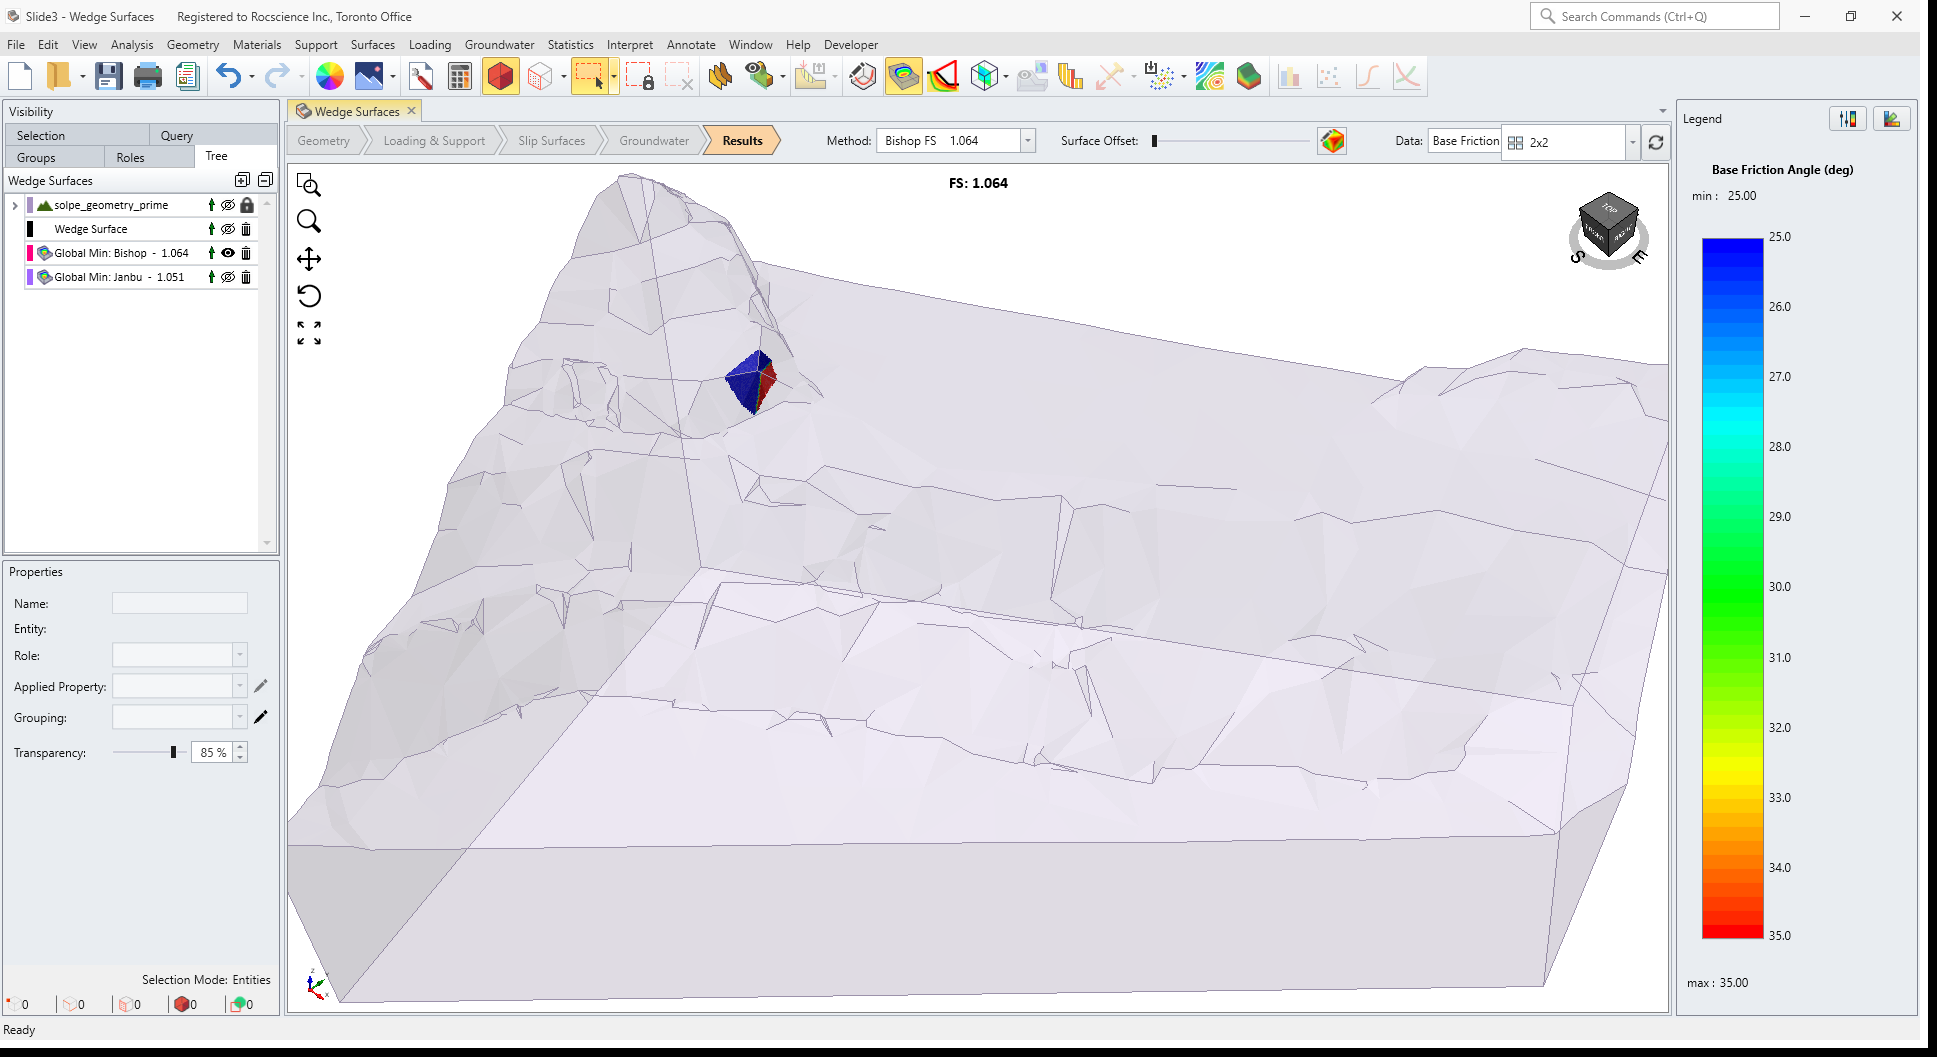
To filter out such undesired results, you can use the Filters option in Slip Surface Options dialog.
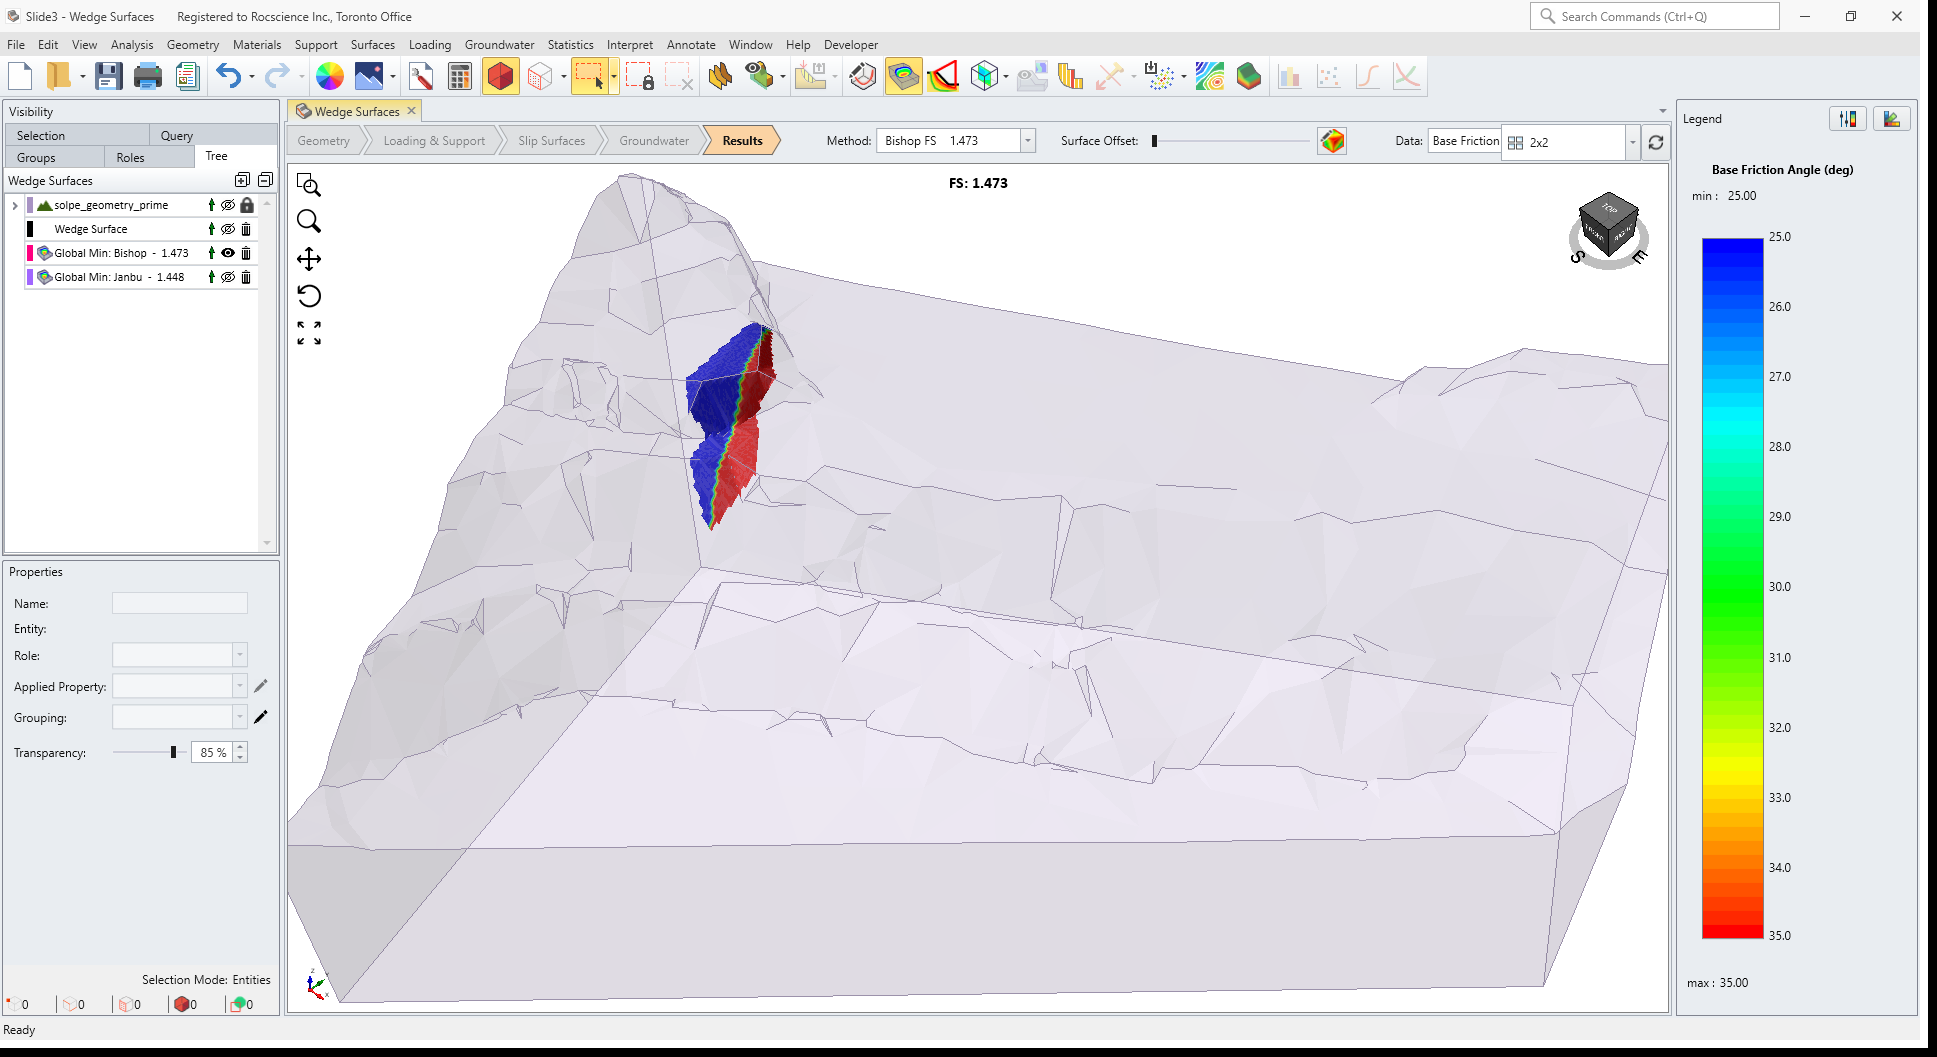
- Select Surfaces > Slip Surface Options and click Filters.
- Set Minimum Depth value to 10. This means that search algorithm will discard any slip surface that after discretization, does not have at least one column with a height of 10 meters or more.

- Select Apply and the click OK.
- Save the file and Compute.
- Select Show Contours and plot contours for Base Friction Angle.
The Bishop safety factor is about 1.5. As you can see, the factor of safety has improved significantly.
As an extra exploration, you may try different search methods.
This concludes the Wedge Surfaces tutorial.