15 - Horizontal Loading
1.0 Introduction
This tutorial provides an introduction to the Horizontal Loading option in Settle3. Horizontal loading can be used to model footings for wind turbines, etc.
Before proceeding with the tutorial, make sure you’ve gone through Tutorial 01 – Settle3 Quick Start so you’re familiar with the product’s basic functions and features.
Topics Covered in this Tutorial:
- Combined horizontal and vertical loading
- Horizontal stresses
Finished Product:
The finished product of this tutorial can be found in the Tutorial 15 Horizontal Loading.s3z file. All tutorial files installed with Settle3 can be accessed by selecting File > Recent Folders > Tutorials Folder from the Settle3 main menu.
2.0 Model
2.1 Project Settings
-
Select Home > Project Settings
 (CTRL + J) to open the Project Settings dialog.
- In the General tab, make sure the Stress Units are set as Metric, stress as kPa and the Settlement Units are set to Millimeters.
- Select the Soil Profile tab. Select the 'Depth below Ground Surface' option.
- Leave all other options as the default options.
- Click OK to close the dialog.
2.2 Adding the Load
In this tutorial, we will model an octagonal wind turbine base. The octagon side lengths will be 5m. The turbine applies the following approximate loads to the footing:
- Moment = 65000 kNm
- Horizontal Force = 800 kN
- Vertical Force = 3500 kN
These forces will be approximated in Settle3 using a variable vertical load and horizontal load.
To add the load:
-
Select Loads > Polygon
 icon in the toolbar.
- In the bottom right of the screen, enter t in the Command Prompt to bring up the Enter Coordinates dialog.
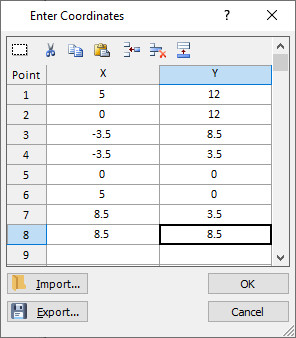
- Enter the following coordinates:
| X | Y |
| 5 | 12 |
| 0 | 12 |
| -3.5 | 8.5 |
| -3.5 | 3.5 |
| 0 | 0 |
| 5 | 0 |
| 8.5 | 3.5 |
| 8.5 | 8.5 |
- Click OK.
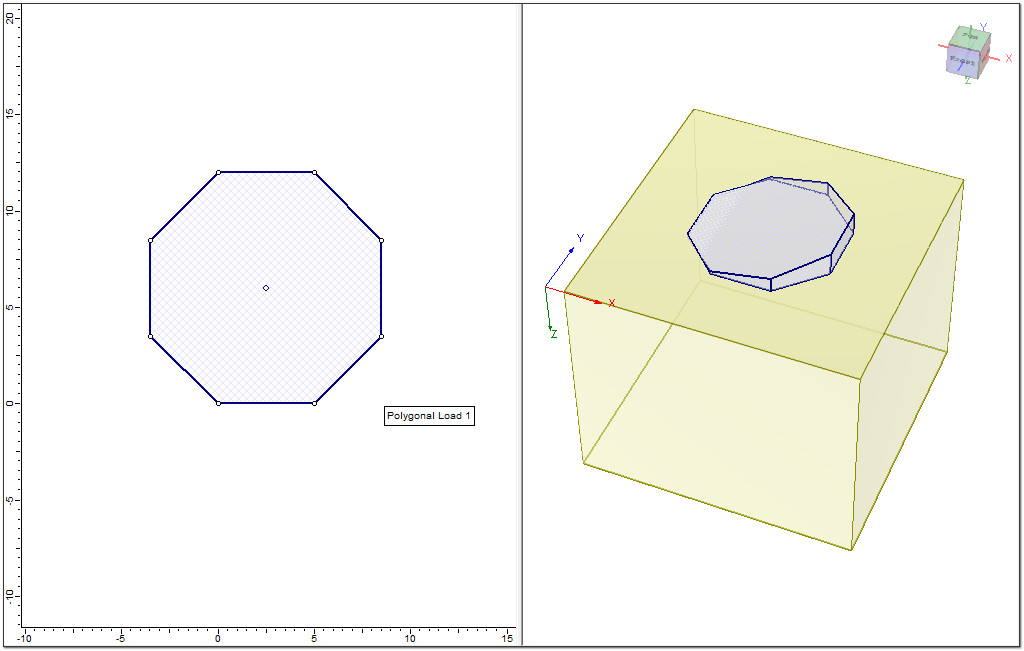
- Use your mouse to close the octagon or type c in the prompt line to close the polygon and press Enter. The Define Load dialog will appear.
- Use the drop-down to set your Load Direction as Vertical and Horizontal.
- Check the box for Variable Vertical load, then click on the Define button.
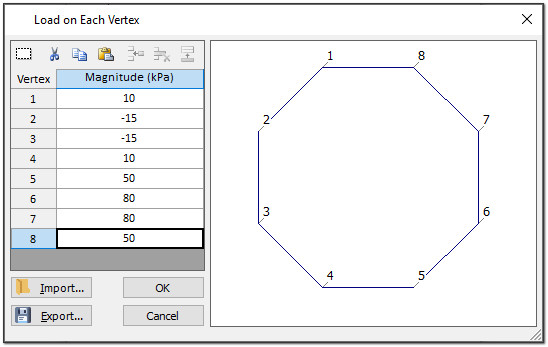
- Enter the following vertical loading stress magnitudes and click OK:
| Vertex | Magnitude (kPa) |
| 1 | 10 |
| 2 | -15 |
| 3 | -15 |
| 4 | 10 |
| 5 | 50 |
| 6 | 80 |
| 7 | 80 |
| 8 | 50 |
- Enter a Horizontal Pressure of 7 kPa.
- Click OK to close the dialog.
3.0 Field Point Grid
-
Select Query > Auto Field Point Grid (CTRL + A)
 icon in the toolbar.
- The Grid Properties dialog will appear. Enter the following properties:
- Number of grid points: 1000
- Autogrid expansion factor: 2
- Click OK to close the dialog.

4.0 Results Interpretation
After computing, go to the Results tab and select the Data Type - Loading Stress ZZ from the drop-down menu. The Loading Stress ZZ contours should appear as shown below:
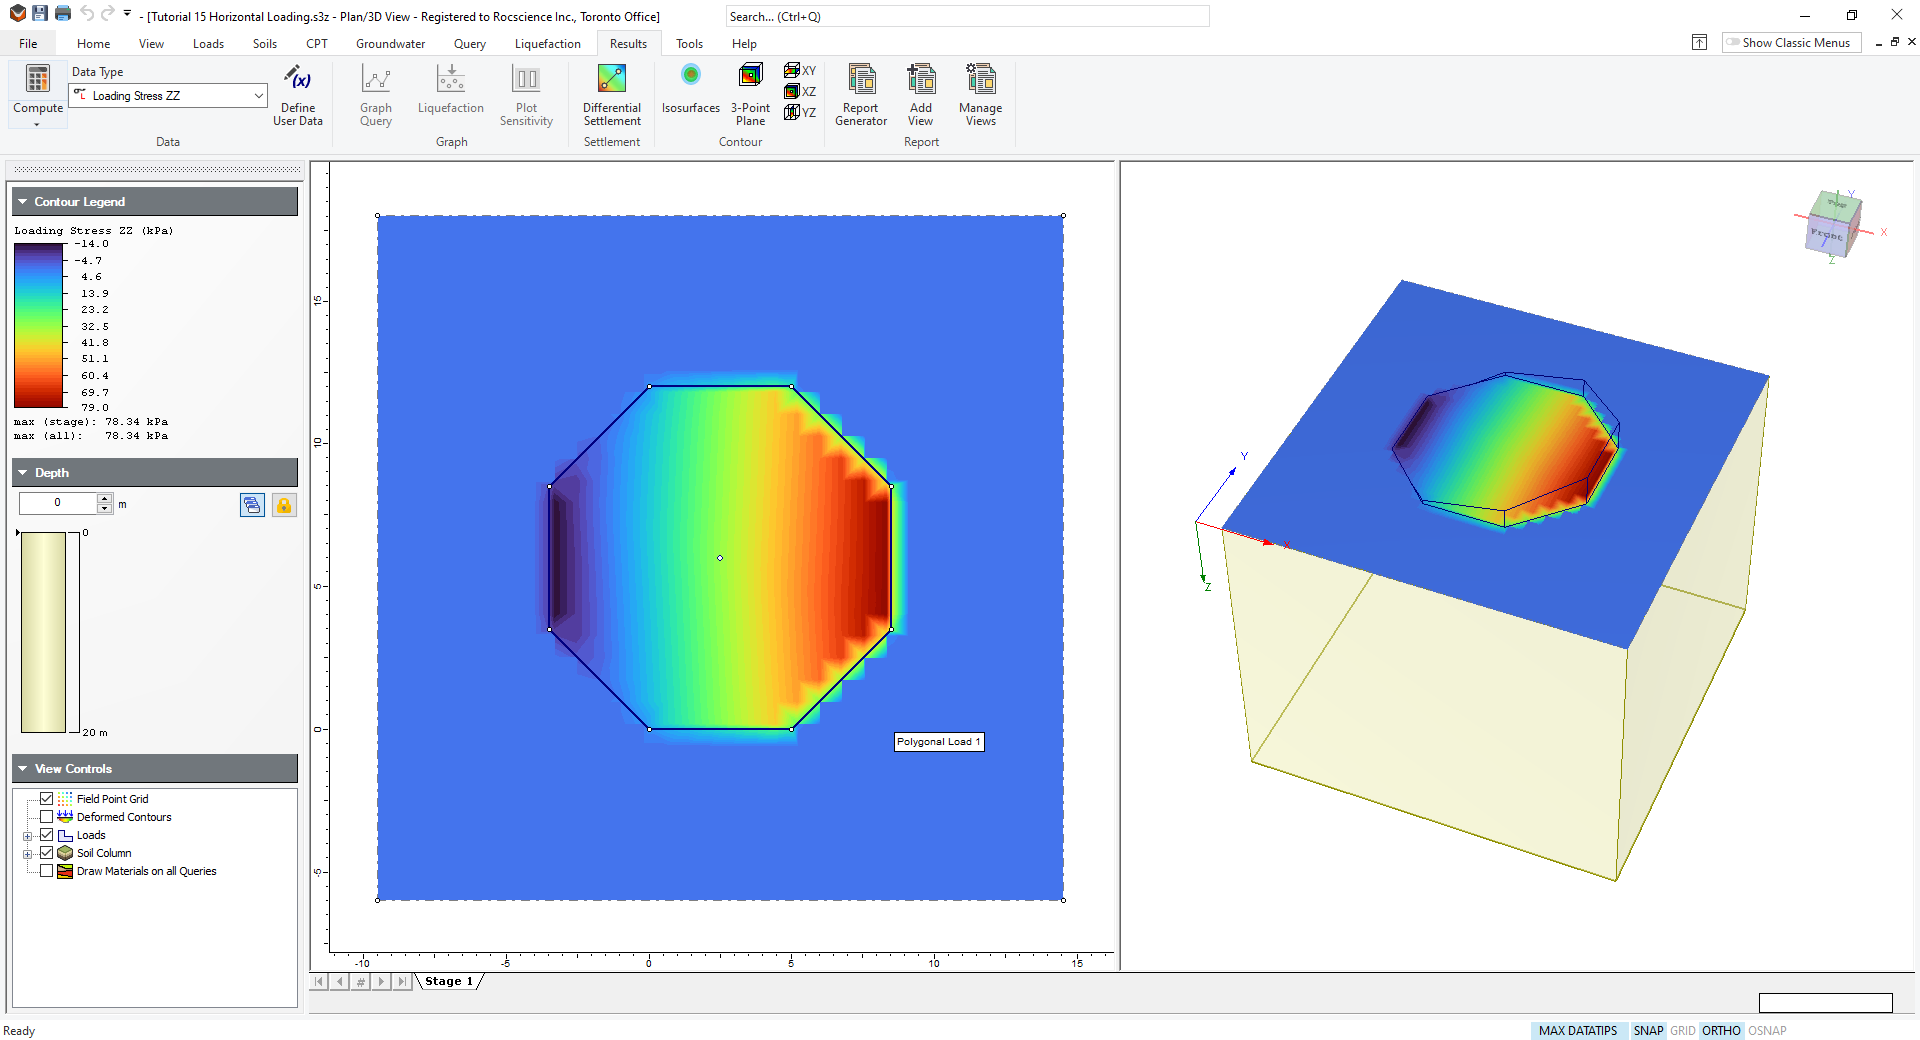
This concludes the Horizontal Loading tutorial; you may now exit the Settle3 program.