7 - Pile Patterns Feature
1.0 Introduction
Here we'll explore the Add Pile Pattern feature. This feature is useful primarily when you want to break apart the pattern, or when you have different soil profiles that you want to examine the same pile in. More information on this feature can be found in the Add Pile Pattern topic.
Topics Covered in this Tutorial:
- Pile Patterns
- Pile Display Options
- Pile Properties
Finished Product:
The finished product of this tutorial can be found in the Tutorial 7 - Pile Pattern Feature.rspile2 data file. All tutorial files installed with RSPile can be accessed by selecting File > Recent Folders > Tutorials Folder from the RSPile main menu.
2.0 Project Settings
- Select Home > Project Settings
 .
. - In the General tab ensure the Units are set to SI (Metric) and Program Mode Selection is set to Pile Analysis.
- In the Pile Analysis Type tab, select Individual Pile Analysis = Axially / Laterally Loaded.
- Click OK to close the dialog.
3.0 Pile Patterns
Begin by adding your Pile Pattern:
- Select Piles > Pattern

3.1 PLACING THE PILE PATTERN
The Geometry tab of the dialog is used to define the length and orientation of the piles. We won't examine this in detail here.
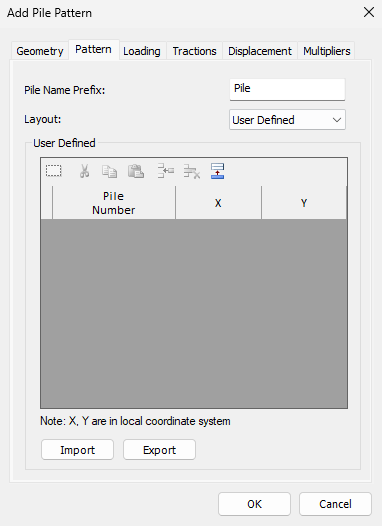
In the Pattern tab of the Add Pile Pattern dialog, pile locations can be specified using the Layout of Radial, Rectangular, Triangular or User-defined options as shown below:
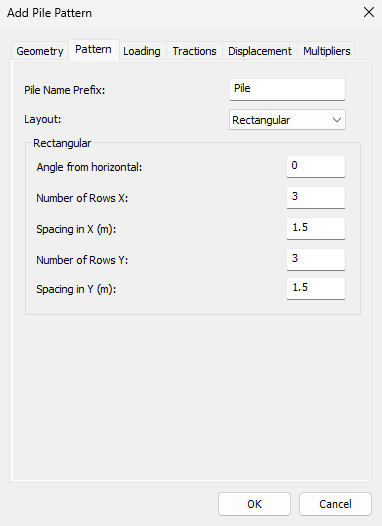
In this example we'll use the Rectangular option and keep the default values illustrated in the screen shot above of rectangular pattern. For our purposes this is sufficient to define the pile pattern.
- From the Layout dropdown, select Rectangular.
- Click OK to close the dialog.
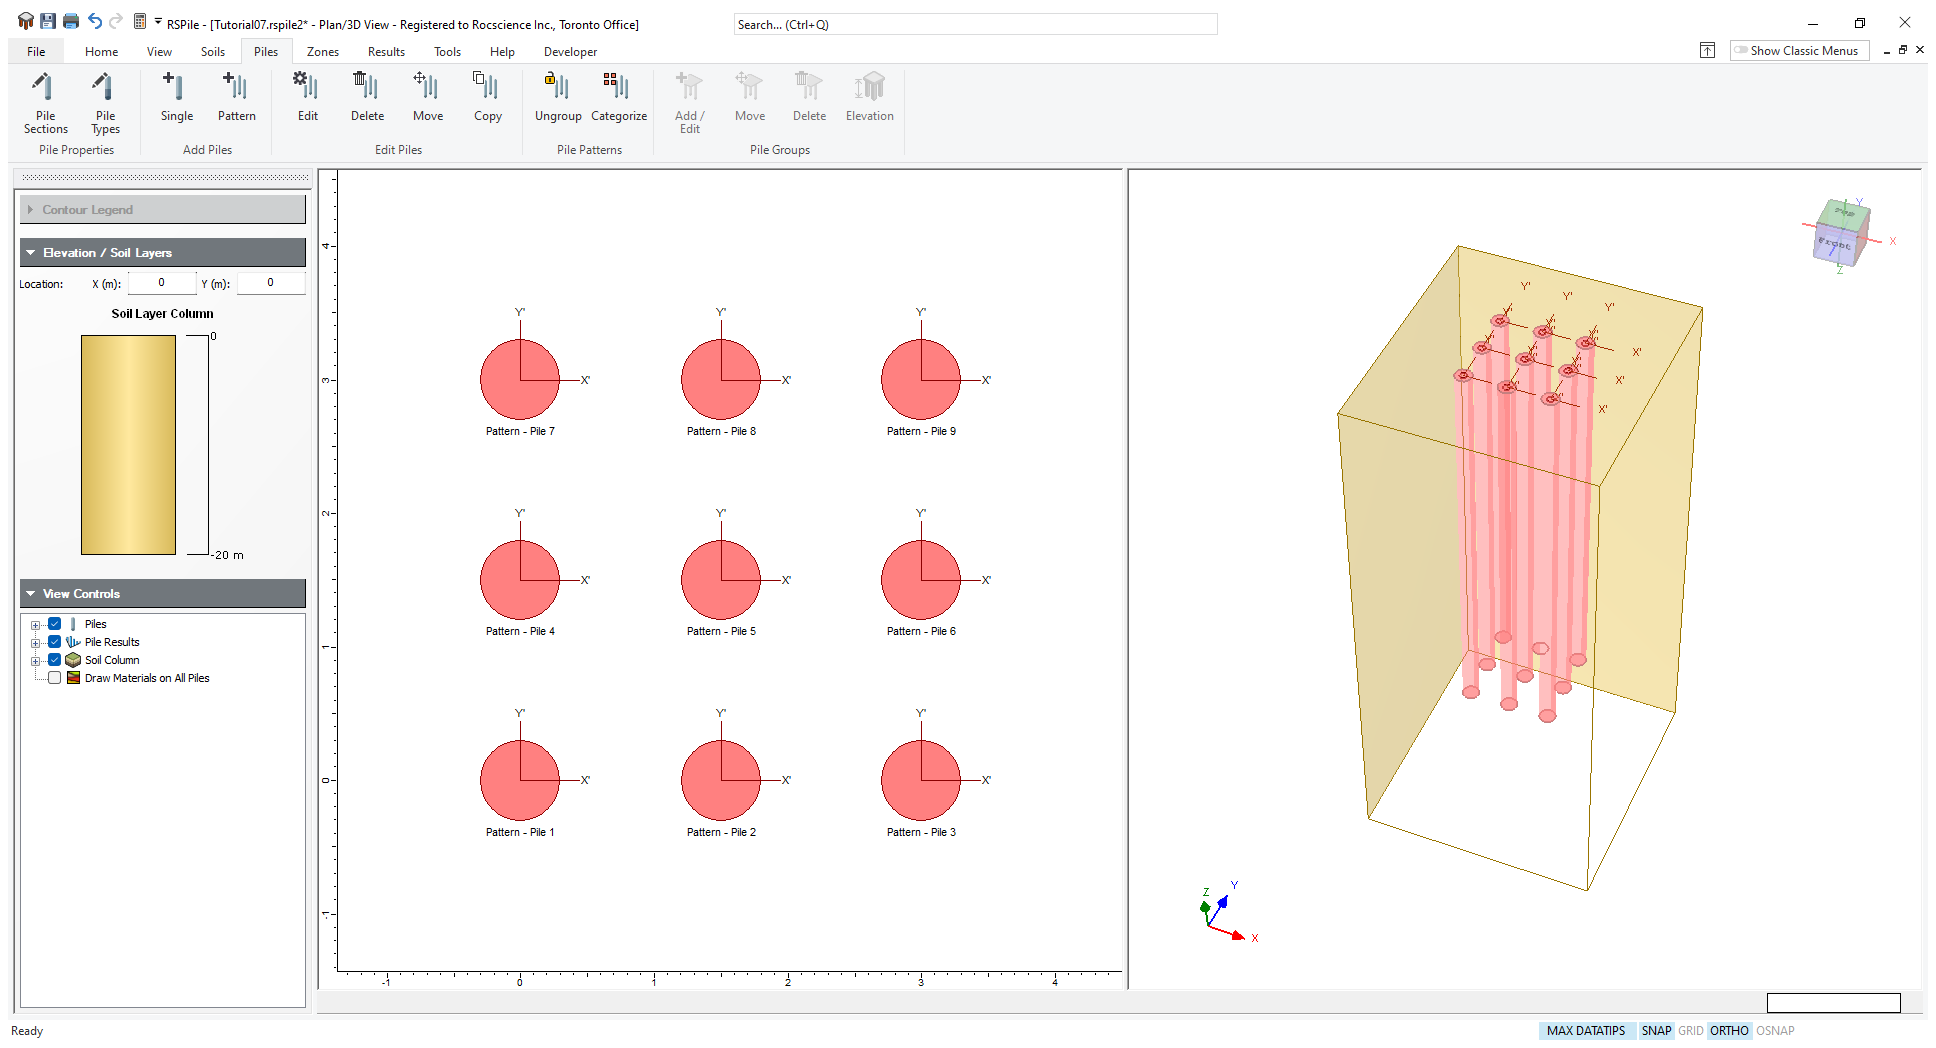
- Type (0,0) into the command prompt at the bottom right of the screen and press Enter to add the pile group.
You will be prompted to place the pile pattern - note that you are placing the center of the bottom left pile in the pattern.
You can also achieve the same result using the user-defined option:
- Select the Pattern tab.
- Then for Layout select User defined. You will see the Add Pile Pattern dialog.
- Select Append rows
 as shown below and enter 9 rows.
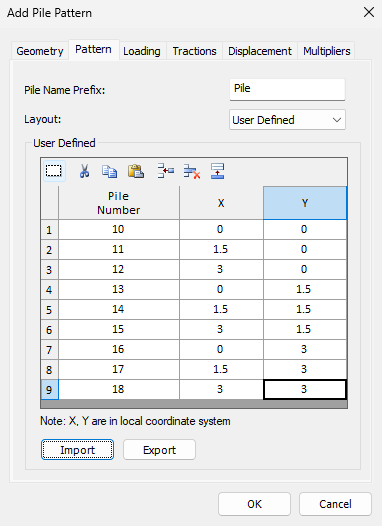
Add Pile Pattern - User Defined - Enter the following coordinates which represent each pile location.
| X | Y |
| 0 | 0 |
| 1.5 | 0 |
| 3 | 0 |
| 0 | 1.5 |
| 1.5 | 1.5 |
| 3 | 1.5 |
| 0 | 3 |
| 1.5 | 3 |
| 3 | 3 |
If we apply this pattern at (0,0), it will overlap the rectangular pattern. If we apply this patter at (5,0), then it will apply the pattern at (5,0). Try this and you can see that equal pattern of piles have been added using the user-defined feature.
3.1.1 Display Options
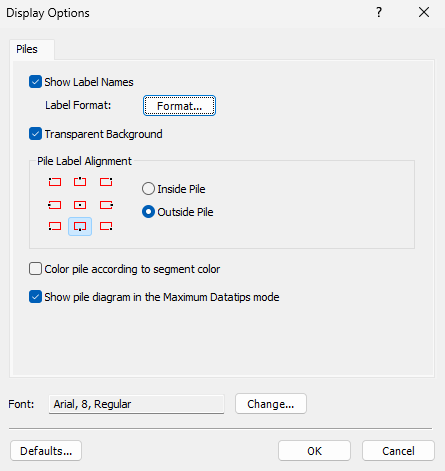
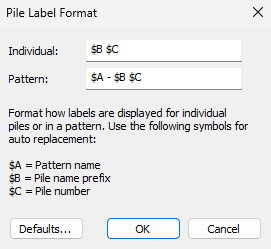
You can also change the pattern name by right clicking on the pile group and selecting Pile Display Options. Right beside the ‘Show Label Names’ checkbox you can select the format and change the format of the pattern name as shown below. (i.e. If pattern: $A : $B $C, you will see the pile labels change to ‘Pattern : Pile1’.
 |  |
3.2 UNGROUP PILE PATTERN
- Right-click on any pile in the pattern and select Ungroup Pile Pattern

Now you can go into each pile and define the desired loading. Everything else will have been defined when you defined the pattern including pile properties, length and orientation. If applicable, displacement profiles and p-y multipliers may also have been defined.
If in case you have deleted one of the ungrouped piles (i.e. pile 9) and you add a new pattern, the new pattern numbering starts from the deleted pile number (pile 9) and will add the rest of the piles sequentially.
3.3 CATEGORIZE PATTERN - REGROUPING PILES OR CREATING NEW PILE PATTERNS
To re-group or create a new pile pattern from existing individual piles:
- Select Piles > Categorize

- Use your mouse to select the piles for the new pile pattern.
- Hit Enter.
- A dialog will appear prompting you to select the pile whose properties will be used as the template for all the piles in the new pile pattern.
- Once you have selected the pile, click OK to close the dialog.
4.0 Looking at the same pile in multiple soil profiles
The other main way in which the pile pattern is useful is if you want to examine the exact same pile, under the same loading conditions, in different soil profiles.
For this case you can easily define a model in which you can line up borehole locations and pile locations.